Healthy and Easy Peanut Butter Oatmeal Cookies

I love blogs with beautiful photos of ridiculous things I might not ever make.  But truth be told, sometimes I want to see recipes I’ll actually make.

So recently, while I was brainstorming ideas for Peanut Butter & Co.’s Peanut Butter/Oat extravaganza, I decided to share a recipe I make all the time.

pboatmealcookies3


I have an enormous sweet tooth.  I want to eat cake every single day.

No really.  Every. Single. Day.

But I also want to be healthy.  So sometimes I make compromises and find ways to tone down my sweet tooth and still be satisfied.

Peanut Butter + Oats + Banana is the perfect way to do it.  They’re not terribly sweet, but they do the job when I want a big fat cookie without all the extra fat and sugar.

Peanut Butter and Co. teamed up with Bob’s Red Mill to do what they are calling #Oatober.  I love both oats and peanut butter, so I couldn’t help but participate.

unnamed

I seriously made these cookies every other week in some variation or another.  Today I’m sharing an oatmeal, raisin, date inspired cookie, but I’m thinking I’ll try a pumpkin version later this month.

pboatmealcookies1

Healthy and Easy Peanut Butter Oatmeal Cookies

2 ripe bananas, mashed
1/2 cup Cinnamon Raisin Swirl Peanut Butter
2 cups of oats, blended in a food processor
1/2 tsp baking soda
1/2 cup chocolate chips
5 dates, chopped

Pre-heat oven to 350F.  Combine all ingredients in a bowl.  You’ll get a thick dough.  Form dough into balls and flatten slightly to form a cookie shape.

Lay cookies on a parchment paper lined baking sheet.  Bake 15 minutes or until golden on the bottoms.  Allow to cool and serve!

pboatmealcookies2

That’s it.  They’re super easy and perfect with a cup of tea.  I really do make them all the time.  Sometimes I omit the chocolate chips.  Sometimes I do raisins.  I also tried making this with Peanut Butter and Co’s new Pumpkin Spice Peanut Butter and they were all sorts of awesome!

What’s your favorite Peanut Butter/Oat Combo?


Advertisement

Prosciutto Wrapped Dates Stuffed with Smokey Cheese

There are two people in the world who I think appreciate wine and cheese as much as I do: my sister and my friend Sara.

This past week, I was visiting my sister before I start a new job tomorrow (wish me luck!).  We did wedding things and of course there was wine and cheese.  One night, while enjoying some wine with cheese and prosciutto, we had a great idea.

Let’s put it all together with dates, because dates are always a good idea (and Jesse’s mom loves to give us boxes of dates and we love it).

prosciutto wrapped dates2

Smoked cheddar. Dates. Prosciutto. 

Awesome flavor combos.

Normally, I’m all for bacon wrapped dates, but I think I actually prefer prosciutto for a few reason:

  1. It’s thinner.  Someones I feel like the bacon can be so thick that you have to bake it forever and your risk the date getting charred.  Sometimes the bacon also overpowers the dates and filling.  This is the perfect balance.
  2. Less baking time.  Prosciutto doesn’t need to be cooked.  So you put it in the oven long enough for the cheese to melt and the prosciutto to get a little bit crispy (about 10 minutes).

This is really a non-recipe.  I can’t tell you exactly how much cheese I put in each date, because each date is different but here’s roughly what you’ll need.

Trust me, you’ll want to make these for your next wine and cheese party.

Prosciutto Wrapped Dates Stuffed with Smokey Cheese

Medjool dates, washed and pitted
Smoked Cheese (such as smoked cheddar, smoked gouda, this time I used smoked cheddar with caramelized onion from Trader Joe’s)
Prosciutto or Jamon Serrano (I tried with both and both were great)

Pre-heat oven to 400F.  Pit your dates by cutting a small slit down the side, then pulling out the pit.  Where the pit was, slide in little chunks of cheese then pinch the date back together.  Next take some prosciutto and wrap it around each date.  I used about half a slice for each date.

Lay on a parchment lined baking sheet and bake 10-15 minutes or until cheese is melted and prosciutto is crispy.

prosciutto wrapped dates1

Serve with wine and enjoy!

Cheesecake with Strawberry Balsamic Sauce

Nowadays, other people’s birthdays are far more exciting than my own.  Does that happen to you too? I think that’s what happens when you pass the age of 21.

I love other people’s birthdays, because I love getting other people gifts and I love making them birthday cakes.  Ok really, that last reason is the most important one.

Yesterday  was Jesse’s birthday.  In the past I’ve written an embarrassing post in his honor, but this year I’ll mostly spare him.  I made him an epic cheesecake, because while I love layer cakes, I know he’s a fan of cheesecake.

jessecake1

On someone’s birthday, you should probably make what they like, not what you like.  Remember, it’s the time to be giving.

cheesecake2

Cheesecake with Strawberry Balsamic Sauce

cake adapted from All Recipes (strawberry sauce my own)

9 graham crackers, crushed
1/4 cup butter, melted
4 (8oz) packages of cream cheese, room temperature
1 1/2 cup sugar
3/4 cup milk
4 eggs
1 cup sour cream
1 tbsp vanilla extract
1/4 cup flour

For Topping:

1 cup sour cream
1/4 cup powdered sugar
1 tsp vanilla extract
1/2 cup whipped cream (sweetened with a few tbsp sugar), optional

For Sauce:

1lb fresh strawberries
1/2-3/4 cup sugar
3 tbsp balsamic vinegar

Preheat oven to 325F.  Grease 9inch springform pan and wrap in aluminum foil (this is to keep water from getting in when you bake in a water bath). In a bowl, mix together graham cracker crumbs and melted butter.  Press into bottom of springform pan.  Refrigerate until ready to use.

Using a mixer, beat together cream cheese and sugar until smooth. Beat in milk and eggs, one at a time until just combined.  Add in sour cream, vanilla and flour and beat until just combined.  Pour batter into prepared pan.

Place pan in a larger baking dish, a roasting pan if you have one (I used a jelly roll pan because that’s all I had), and fill baking dish with hot water.  Bake for 1 hour and 15 minutes.  After that time, turn the oven off and leave the cheesecake in the oven for another hour, then crack the oven door and let it sit for another hour or two.  The goal is to make sure the temperature doesn’t drop too quickly.  That way you’ll get a smooth cheesecake with no cracks.

While you’re waiting for the cake to cool, is the perfect time to make the topping.  Dice strawberries and place in a sauce pan with sugar and balsamic vinegar.  With regards to the amount of sugar, start with half a cup, after it’s been cooking for a while, taste the sauce and add more if you’d like.  I didn’t, but I could see where some would want it sweeter.  Cook on medium heat about 10 minutes.  Allow to cool.  At this point, you can leave it with chunks of fruit or you can blend to get a smooth sauce.  I blended it, but whole chunks of fruit could also be delicious and beautiful.

strawberry balsamic sauce2

The topping can be made in advance and refrigerated.  Feel free to serve it warm or cold.

cheesecake

Now back to the cake… Once the cake has cooled, refrigerate a few hours or overnight.  A few hours before you’re ready to serve, prepare topping.  Mix together sour cream, sugar and vanilla.  Spread over top of cake.  Pipe whipped cream around edges (this is optional, just for decoration).  Refrigerate until ready to serve.

strawberry balsamic sauce1

Serve with strawberry balsamic sauce and enjoy!

I hope Jesse enjoyed it!  His birthday was pretty low key.  We had sushi, ate cheesecake and then proceeded to spend the rest of the night in a food coma.

cheesecakeslice

That might be one of the most awesome ways to spend a birthday.

Happy Birthday, Jesse!

I know I said my other people’s birthdays are more exciting than my own, but next week is my birthday and let’s be honest, making a birthday cake for yourself is always exciting.

I have many ideas in mind and it involves lots of fresh fruit.

What’s more exciting: your birthday or someone else’s?

BBQ Chicken Cauliflower Pizza

Jesse and I have been together for nearly 4 years.  In that time, I’ve come to terms with the fact that I eat more than he does.  When you can admit this is when you know you’re comfortable with someone.

Some ladies are dainty eaters.  I’m not judging them.  If you can eat a piece of salmon and some zucchini and be done for the night, then more power to you.  I wish I wasn’t a hangry beast.  I’d probably save a ton of money.  I know the expectation that the woman in the relationship eats about half as much as the man, but that certainly isn’t the case for us.

I think early on in our dating, I probably ate less (at least in front of him), so he wouldn’t think I was the Cookie Monster (I am).  I distinctly remember having a conversation about this with my sister.  I’m 100% positive that at one point she said, “yeah, he doesn’t eat very much. Like pio pio” (FYI, pio pio is the sound little chicks make in Spanish).  This isn’t meant to criticize Jesse’s eating habit; him and his habits are perfectly fine.  I admire his ability to say no to certain foods, yet be able to eat half a wheel of brie.

Now that the new-ness ship has sailed, I can eat three tacos and be a happy camper (while lusting over gelato after dinner); he can eat sunflower seeds with beer and call it a night.  After all, it’s just food.  How much I eat in relation to him doesn’t define our relationship.  It’s just a funny quirk about us.

But some days, we’re equals on the eating front.  Last night, we both ate half a pizza.  Not a regular pizza.  This cauliflower pizza.

BBQ Chicken Cauliflower Pizza2

It was delightful.  I bring this all up, because I was thinking about serving size for this recipe.

How many does this serve?  2 hungry people who went to crossfit earlier that day? 4 not so hungry folks? 4 normal people if complemented with a side salad? 6 children?  It’s not clear.

Make it and let me know how much you eat in one sitting.  Like I said, I ate half the pizza in one sitting.  It sounds obscene, but I promise you’ll want to eat at least half too.

BBQ Chicken Cauliflower Pizza1

BBQ Chicken Cauliflower Pizza

10-12oz cauliflower (about 1/2 a large head), grated
1/2 cup pecorino romano cheese, grated
2 eggs
1/2 tsp salt
1 tsp italian seasoning
1/2 tbsp butter
1/4 onion, sliced
1 chicken breast
1/4 tsp chili powder
1/4 tsp paprika
few pinches of salt
1/2 cup BBQ Sauce
2-3 oz sharp cheddar, shredded (or more if you’d like)

There are three main components of this pizza.

1. Make the crust. 2. Cook the chicken and onions. 3. Assemble the pizza and bake.

I suggest doing it in that order but if you want to do 2 before 1, that’s cool too.  Let’s be flexible.

To make the crust:

Pre-heat oven to 425F. Grate your cauliflower.  I did this in the vitamix by cutting the cauliflower into pieces then pulsing it in batches until it looked somewhat like cauliflower rice.  Once it’s all grated, combine cauliflower, eggs, pecorino romano cheese, salt and italian seasoning.   Mix it all together.  Then press the mixture into a parchment paper lined baking sheet.  Try to get it as thin as you can so it will be crispy and not soggy.

Once you’ve got it as thin as you can, bake for 15 minutes, take out of oven until ready to assemble.

While the crust is baking cook your onions and chicken.  First, add butter to a skillet, then add the onions. Let those cook until soft (about 10 minutes or longer, let them hang out, they’ll get tastier), put onions into a small bowl or plate.  Cut the chicken into small pieces, then add chicken to the same pan where you cooked the onions.  Season with salt, pepper, paprika and chili powder.  Toss occasionally until cooked through, set aside.

Now that your crust is cooked, assemble the pizza.  Spread 1/2 cup BBQ sauce on pizza, top with onions and chicken, then put cheese on top.  I like to put the cheese on top of the toppings to keep the chicken and onions from burning.  Feel free to add a little extra pecorino on top if you’d like.

Bake 10-12 more minutes, until the crust is browned and crispy and the cheese is melty.  Allow to cool a few minutes, then slice and serve.

BBQ Chicken Cauliflower Pizza3

Like I said, serving size? I’m not sure.  This pizza probably feeds 2-4.  If you’re like me and you eat a lot, you might want to double this and make two pizzas.  I did.

If you want to make two pizzas just so you have leftovers, that’s also a great idea.

Who eats more, you or your partner? or what’s your favorite pizza topping?


Flourless Peanut Butter Brownies

I’ve generally been of the opinion that if you want dessert, just eat dessert.  But recently, I’ve been interested in trying out healthier dessert options, because it sounds sort of fun.  So to get started on that track I turned to Pinterest.

I can’t really take credit for this recipe.  I made a few changes to the original but for the most part, I need to give credit where credit is due (aka thanks Skinny Taste).  I’m still learning the ropes of healthy baking (which I used to do all the time, but apparently have completely forgotten), so I’m relying on some awesome recipes out there.

Now that I’ve tried a few successful ones, I can start experimenting with my own concoctions.

FlourlessPBBrownies2

Sometimes when I look at healthy recipes, I worry the finished product is going to be gross.  Don’t lie. I know you worry about this too.

The reality is we need to adjust our expectations.  Most of the time, a recipe that includes no butter and sugar and calls itself dessert will NOT be the same as a traditional dessert recipe.  So if you’re looking to make these brownies and expecting the gooey, chewy deliciousness of Ghiradelli Box Mix, you will be disappointed.

(Side note: These Caramel Pretzel Brownies will not disappoint)

These Flourless Peanut Butter Brownies are tasty, but let’s be real.  They’re not like those awesome and chewy box mix brownies.  The texture is more spongey. That said, they’re pretty great considering they are completely flourless and low in sugar.   If you’re wondering about the nutrition for 1 piece (and I cut this into 12 pieces), each serving is under 100 calories and has 5g of protein and 9g of sugar.

FullSizeRender

I found this idea of using powdered peanut butter instead of flour and thought it was perfect since Peanut Butter & Co. sent me some of their new Mighty Nut Powdered Peanut Butter to try.   Why hadn’t I thought of that before?  I’ll definitely be giving this a try again and making new recipes with powdered peanut butter.

FlourlessPBBrownies3

Flourless Peanut Butter Brownies

adapted from Skinny Taste

1 egg
1 egg white
1 cup chocolate powdered peanut butter (I used Chocolate Mighty Nut)
1/2 cup cocoa powder
1 tsp baking soda
1/2 cup + 1 tbsp coffee (or water)
1/4 cup maple syrup
1 tsp vanilla extract
1/2 cup chocolate chips

Pre-heat oven to 325F.  Grease and line a 9×9 inch square pan with parchment paper. Set aside.

In a medium bowl, beat together egg and egg white.  Add powdered peanut butter, cocoa powder, baking and start to mix in.  Add water, maple syrup and vanilla extract and mix until combined.  Fold in chocolate chips.  Spread batter into prepared pan.  The batter will be thick, mine didn’t actually fill the whole 9×9 inch pan, but it worked.

Bake 25 minutes.  Allow to cool completely and cut into 12 squares.  Serve and enjoy!

FlourlessPBBrownies1I was pretty surprised at how tasty these were.  I’m not sure if it’s because it was the first dessert I had in about a week or if they really were good.  I’m going to give some to some friends later to see if they think they’re awesome too.  Remember, it’s all about expectations right?

FlourlessPBBrownies4

The other expectation is that you enjoy these while binge-watching House of Cards on Netflix.  I finally got around to season 3 and destroyed it this weekend while Jesse was away backpacking.

How was your weekend? Do you love healthy desserts or prefer to stick to regular ones in moderation?


Dulce de Leche Swiss Meringue Buttercream

I know my last post was all about how I didn’t love Swiss Meringue Buttercream, but I’ve had a change of heart.  Actually, I just tried again, and this time it was great.

SMBC

After my last post, Sara from Matchbox Kitchen, left me an awesome comment with some tips for trying again.  It wasn’t an issue of recipe, more of technique. When Matchbox Kitchen tells you SMBC is awesome, you try it again.  So I did and this time, I used her tips.

I’m happy to say, it turned out awesome.

I sort of think dulce de leche had a lot to do with it, but either way, it turned out great.

dulcedeleche

So new confession: Swiss Meringue Buttercream is pretty tasty (especially when dulce de leche is mixed into it).

dulcedelecheSMBC1

It’s still very buttery but this time, I think the dulce de leche masked some of the butter taste and it was great.   Here’s the recipe, that incorporated some of Sara’s comments regarding technique…

Dulce de Leche Swiss Meringue Buttercream

3 egg whites
1 cup sugar
1 tsp vanilla extract
3 sticks of butter, softened
1/4 cup dulce de leche*

Whisk together egg whites and sugar in your stand mixer bowl.  Place over a pot of boiling water (make sure water isn’t touching the bowl), stir it every so often until the egg whites become hot and you can no longer feel the sugar granules.

Transfer to the mixer and whip until they’ve formed stiff peaks.

Remove the whisk attachment and change to the paddle attachment for your mixer.  Add vanilla. Then start to beat in butter.  Once the butter is nearly incorporated, add in the dulce de leche.  Beat until it’s smooth.  Then it’s ready to frost.

dulcedelecheSMBC4

I put mine in the fridge for about 5-10 minutes to firm up a bit before frosting, but the texture and flavor was a million times better this time.  This will make enough frosting to frost and fill a 6 inch cake or just frost the outside of a 9 inch cake.

*To make dulce de leche, boil a can of sweetened condensed milk for about 3 hours.  Make sure the can is completely submerged in water (if not, it might explode).  You can also probably find it in most latin grocery stores as different names (dulce de leche, cajeta, arequipe, etc).

I used this Dulce de Leche Swiss Meringue Buttercream to frost a banana cake with chocolate and dulce de leche filling.  It was a hit.

dulcedelecheSMBC3

I took this dessert to the desert

This cake traveled with me from Oakland to the Palm Springs area.  It barely survived the long drive and the heat, but it made it.   It didn’t look as pretty as this when I served it, but it got eaten up.

dulcedelecheSMBC2


This cake is definitely on my list of cakes to make again.  It was delicious, and the buttercream is way easier to make than excepted (probably because you don’t have to sift powdered sugar, which is always a pain).

I guess I’m a fan of swiss meringue buttercream after all.

What’s your favorite way to frost a cake?

Macaron Making: I Promise It’s Not Scary

I’ve started wedding planning and if there’s one thing I’ve learned, it’s that if the word wedding is attached, it’s automatically expensive.

Cakes. Flowers. Dessert tables. Photographers. Dresses. Shoes. Invitations.

All of it = $$$$

So with dollar signs looming over my head, I’m going through a phase where anything I buy seems outrageously expensive, and I want to make everything myself.  While I don’t plan on having french macarons at my wedding, they’ve always been something I thought was ridiculously expensive.macarons1

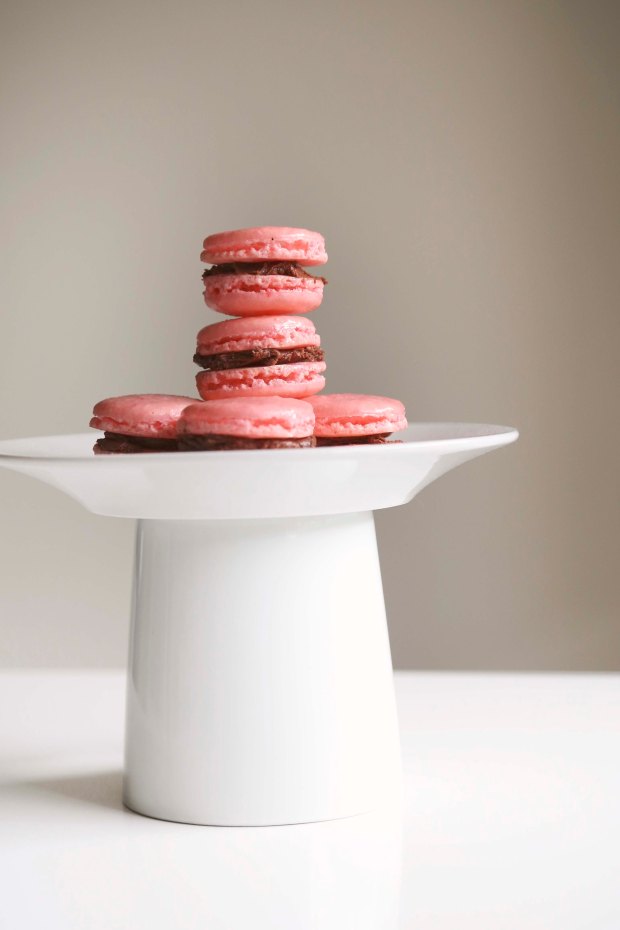
$2+ a pop is too much for el cheap-o over here.

I was determined to make them myself but never got around to it.  I had tried a few times before and failed.  One time they turned out like meringues (with a little peak).  Another time, they just crumbled and fell flat.  After some research and reading, they turned out great.

These cookies are delicate and delicious.  I can see why they’re so pricey, but honestly, you can make them at home on your own.  They take some time, because they require a lot of sitting, but the active amount of work is actually minimal.

macarons6

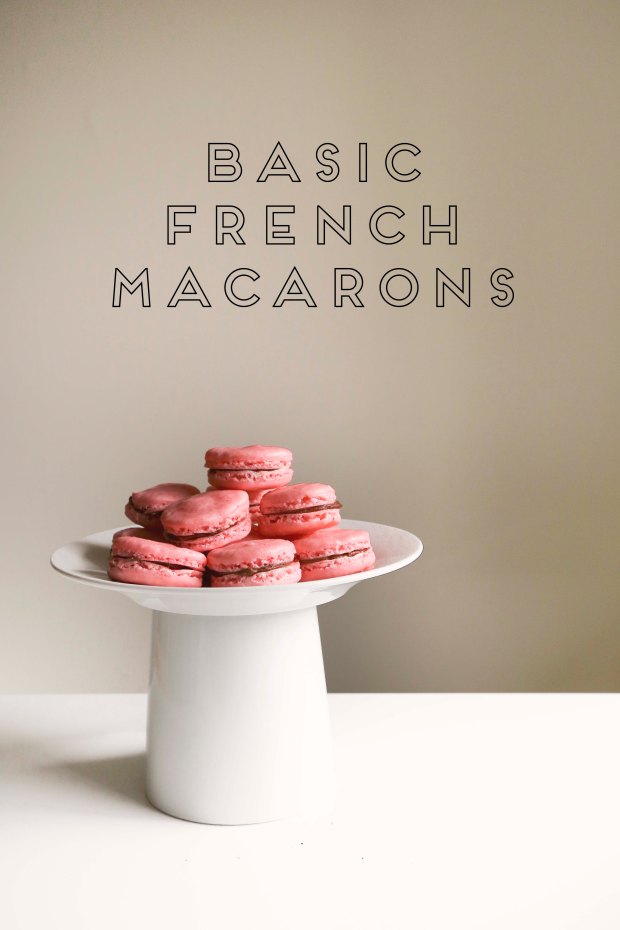
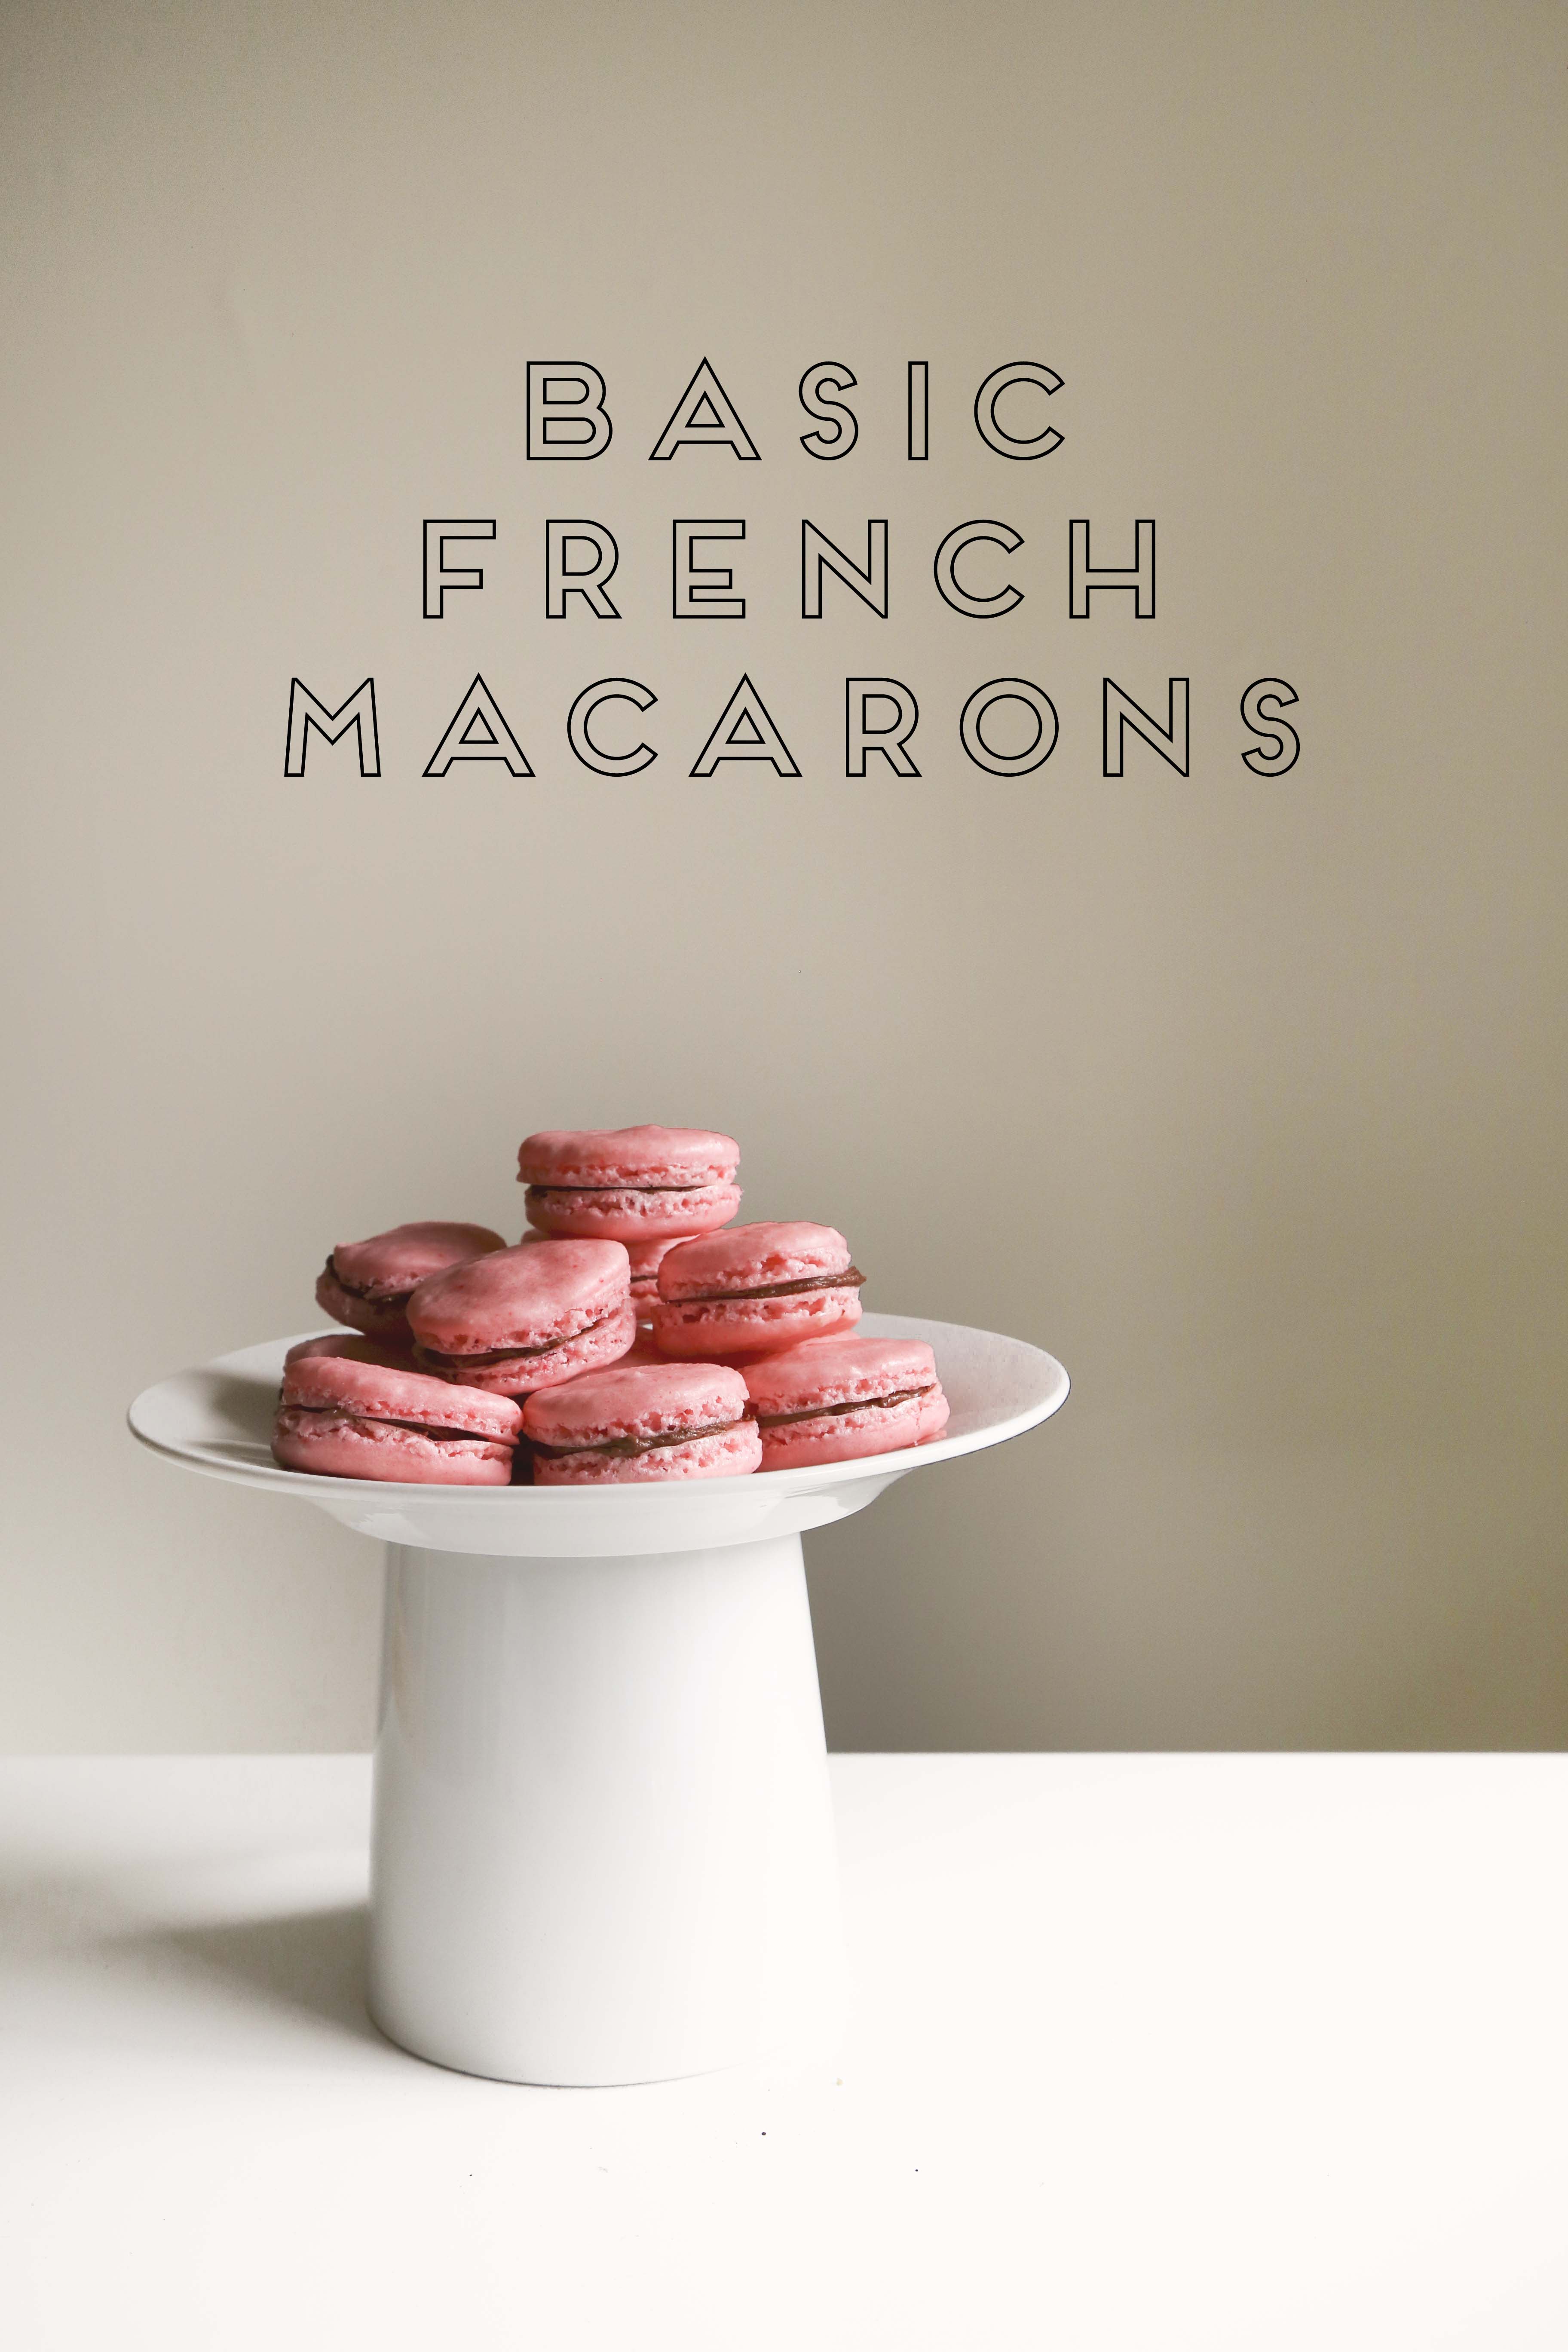
Basic French Macarons

from All Recipes

100g egg whites
50g white granulated sugar
100g powdered sugar
110g almond flour, finely ground
Food coloring of choice (optional)
Filling of choice*

Weigh out your egg whites and allow your eggs to get to room temperature.  100g of eggs was a tiny bit less than 3 egg whites.  Yes, I was neurotic and weighed out exactly 100g.  I think this was part of my success.

While your egg whites get to room temperature, weigh out your remaining ingredients and set aside.  Sift together the powdered sugar and almond flour, set aside.

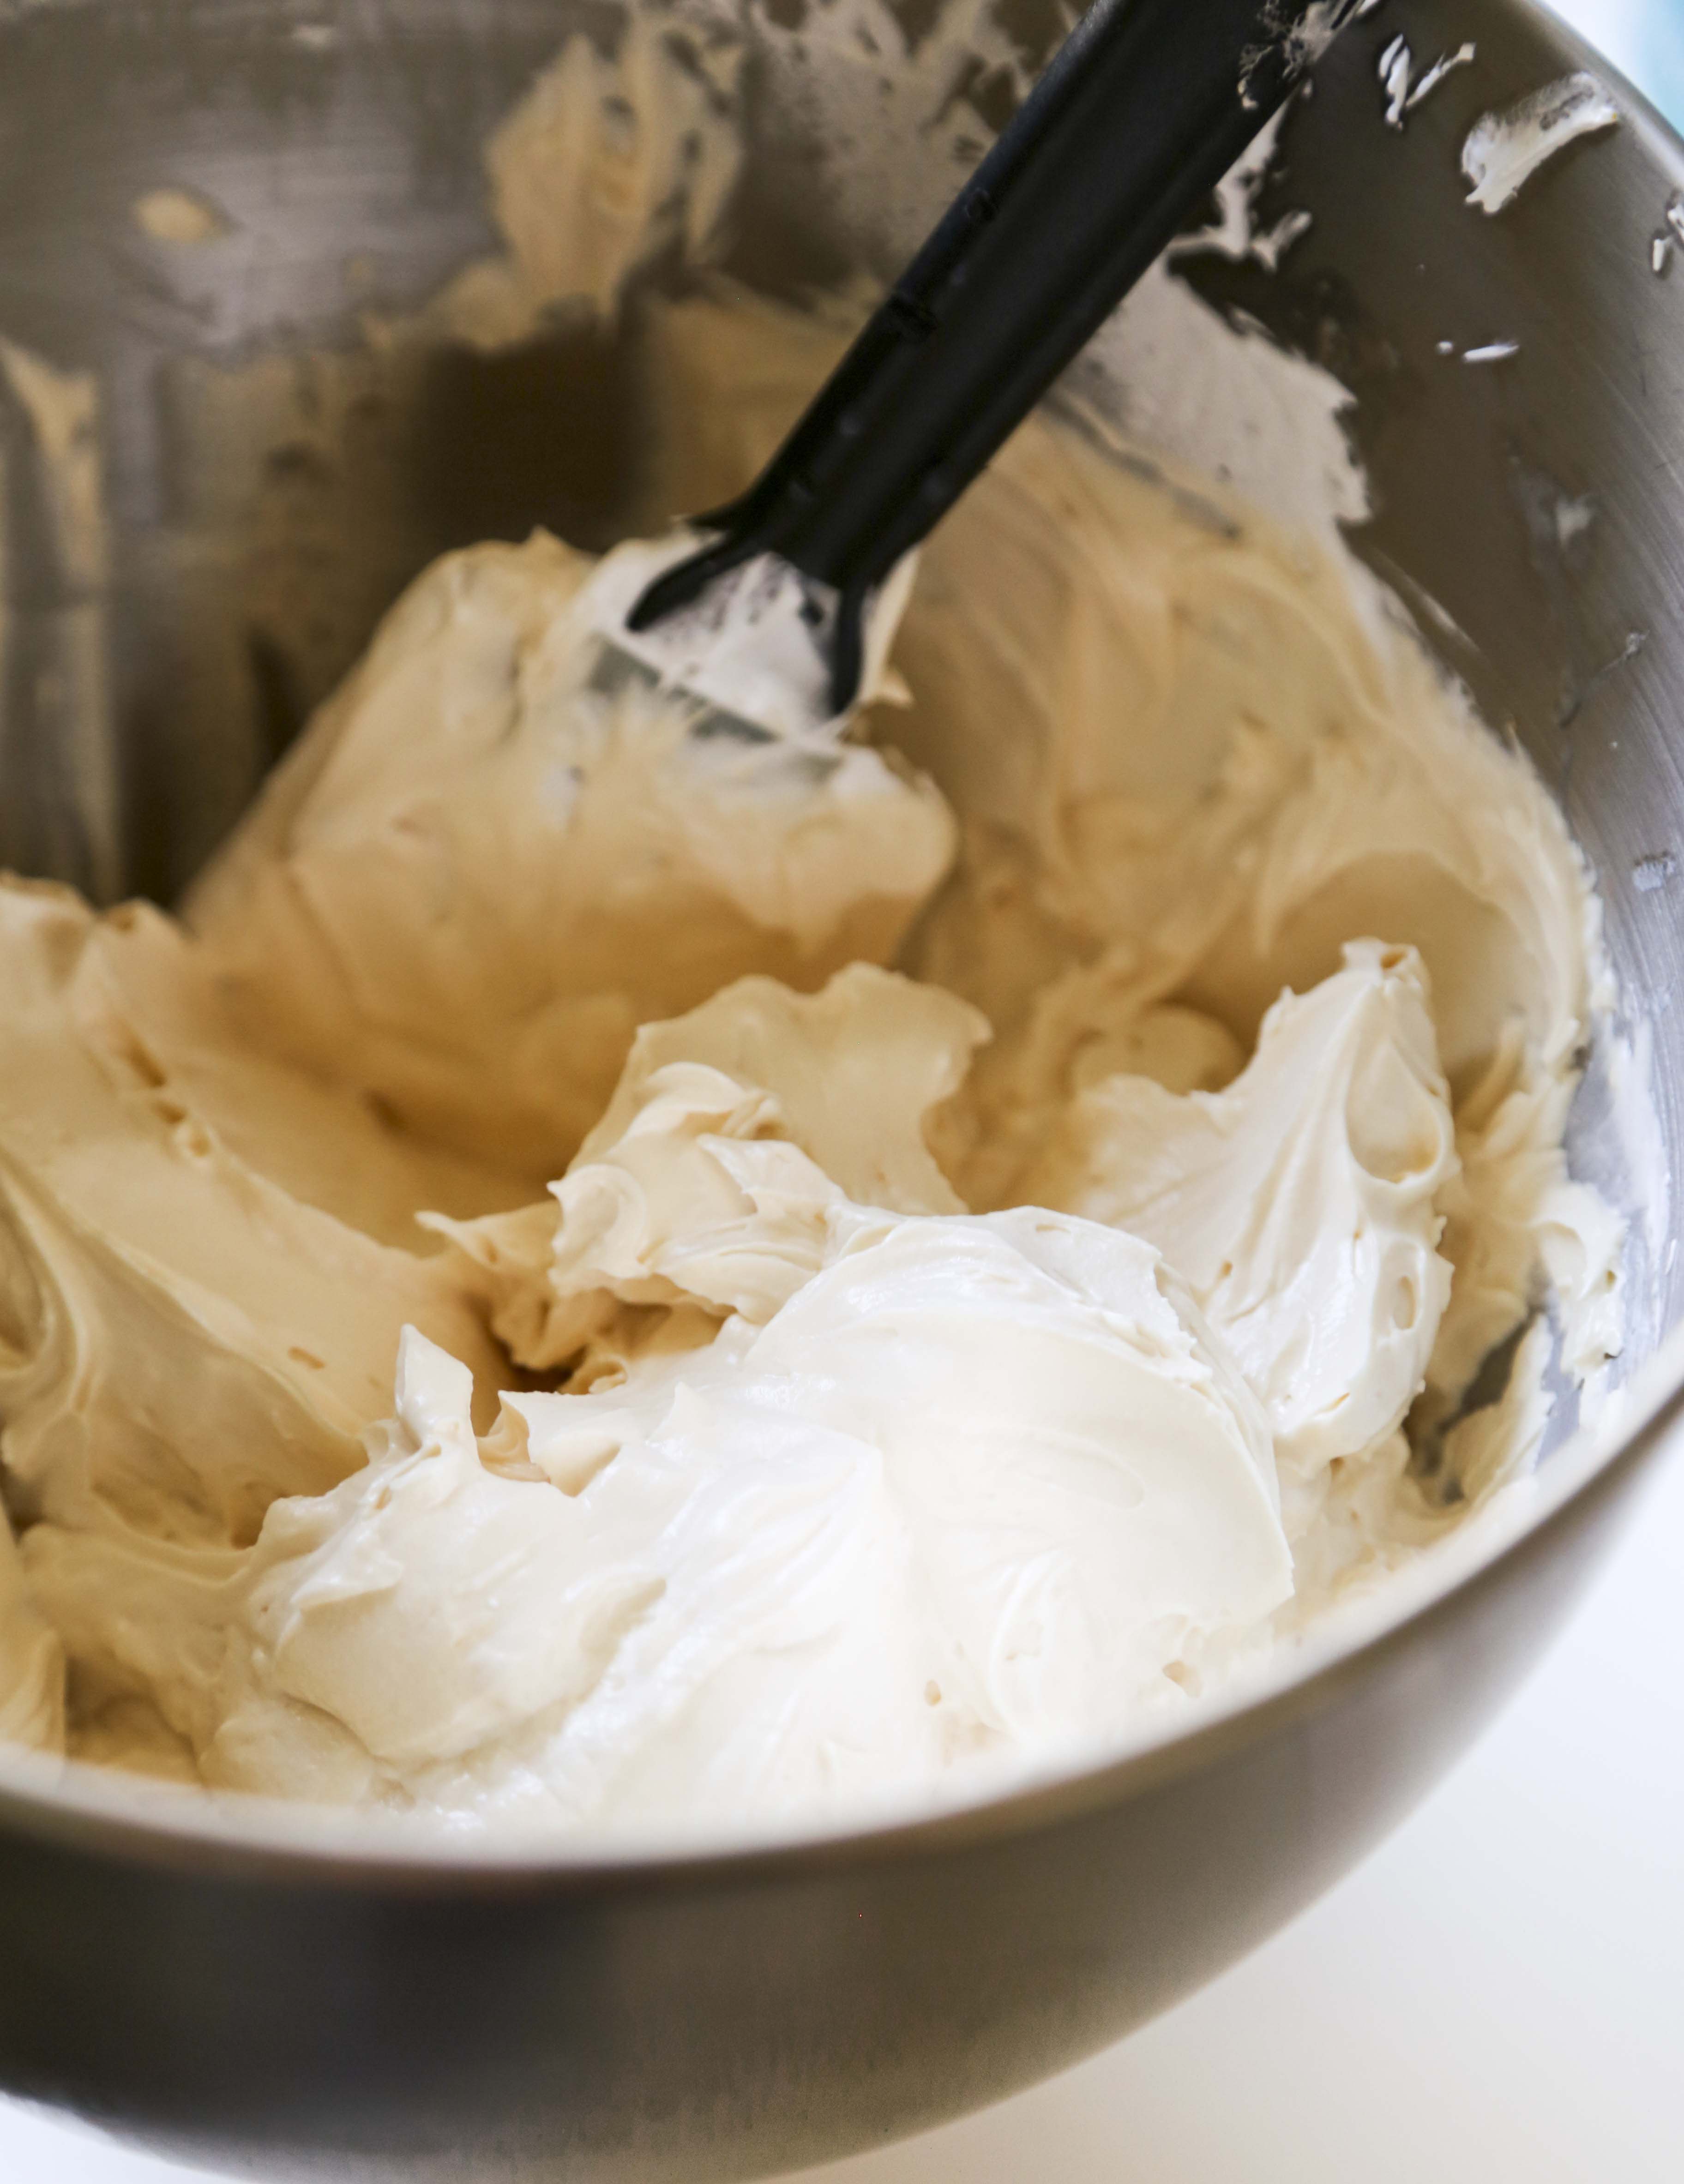
Using a stand mixer, beat the egg whites.  Once they start to foam, slowly stream in the granulated.  Continue to beat until they reach soft peaks.  Try not to over mix and get firm peaks.  Soft peaks are good! They tip of the peak will fall over to the side a bit.

Fold the almond flour and powdered sugar into the egg whites, along with a few drops of any food coloring you’d like (I used a few drops of red to get a bright pink).  Keep turning/folding until it’s all incorporated, but you don’t want to overmix it.  Transfer the batter to a piping bag fitted with a round tip, then get your baking sheets ready.

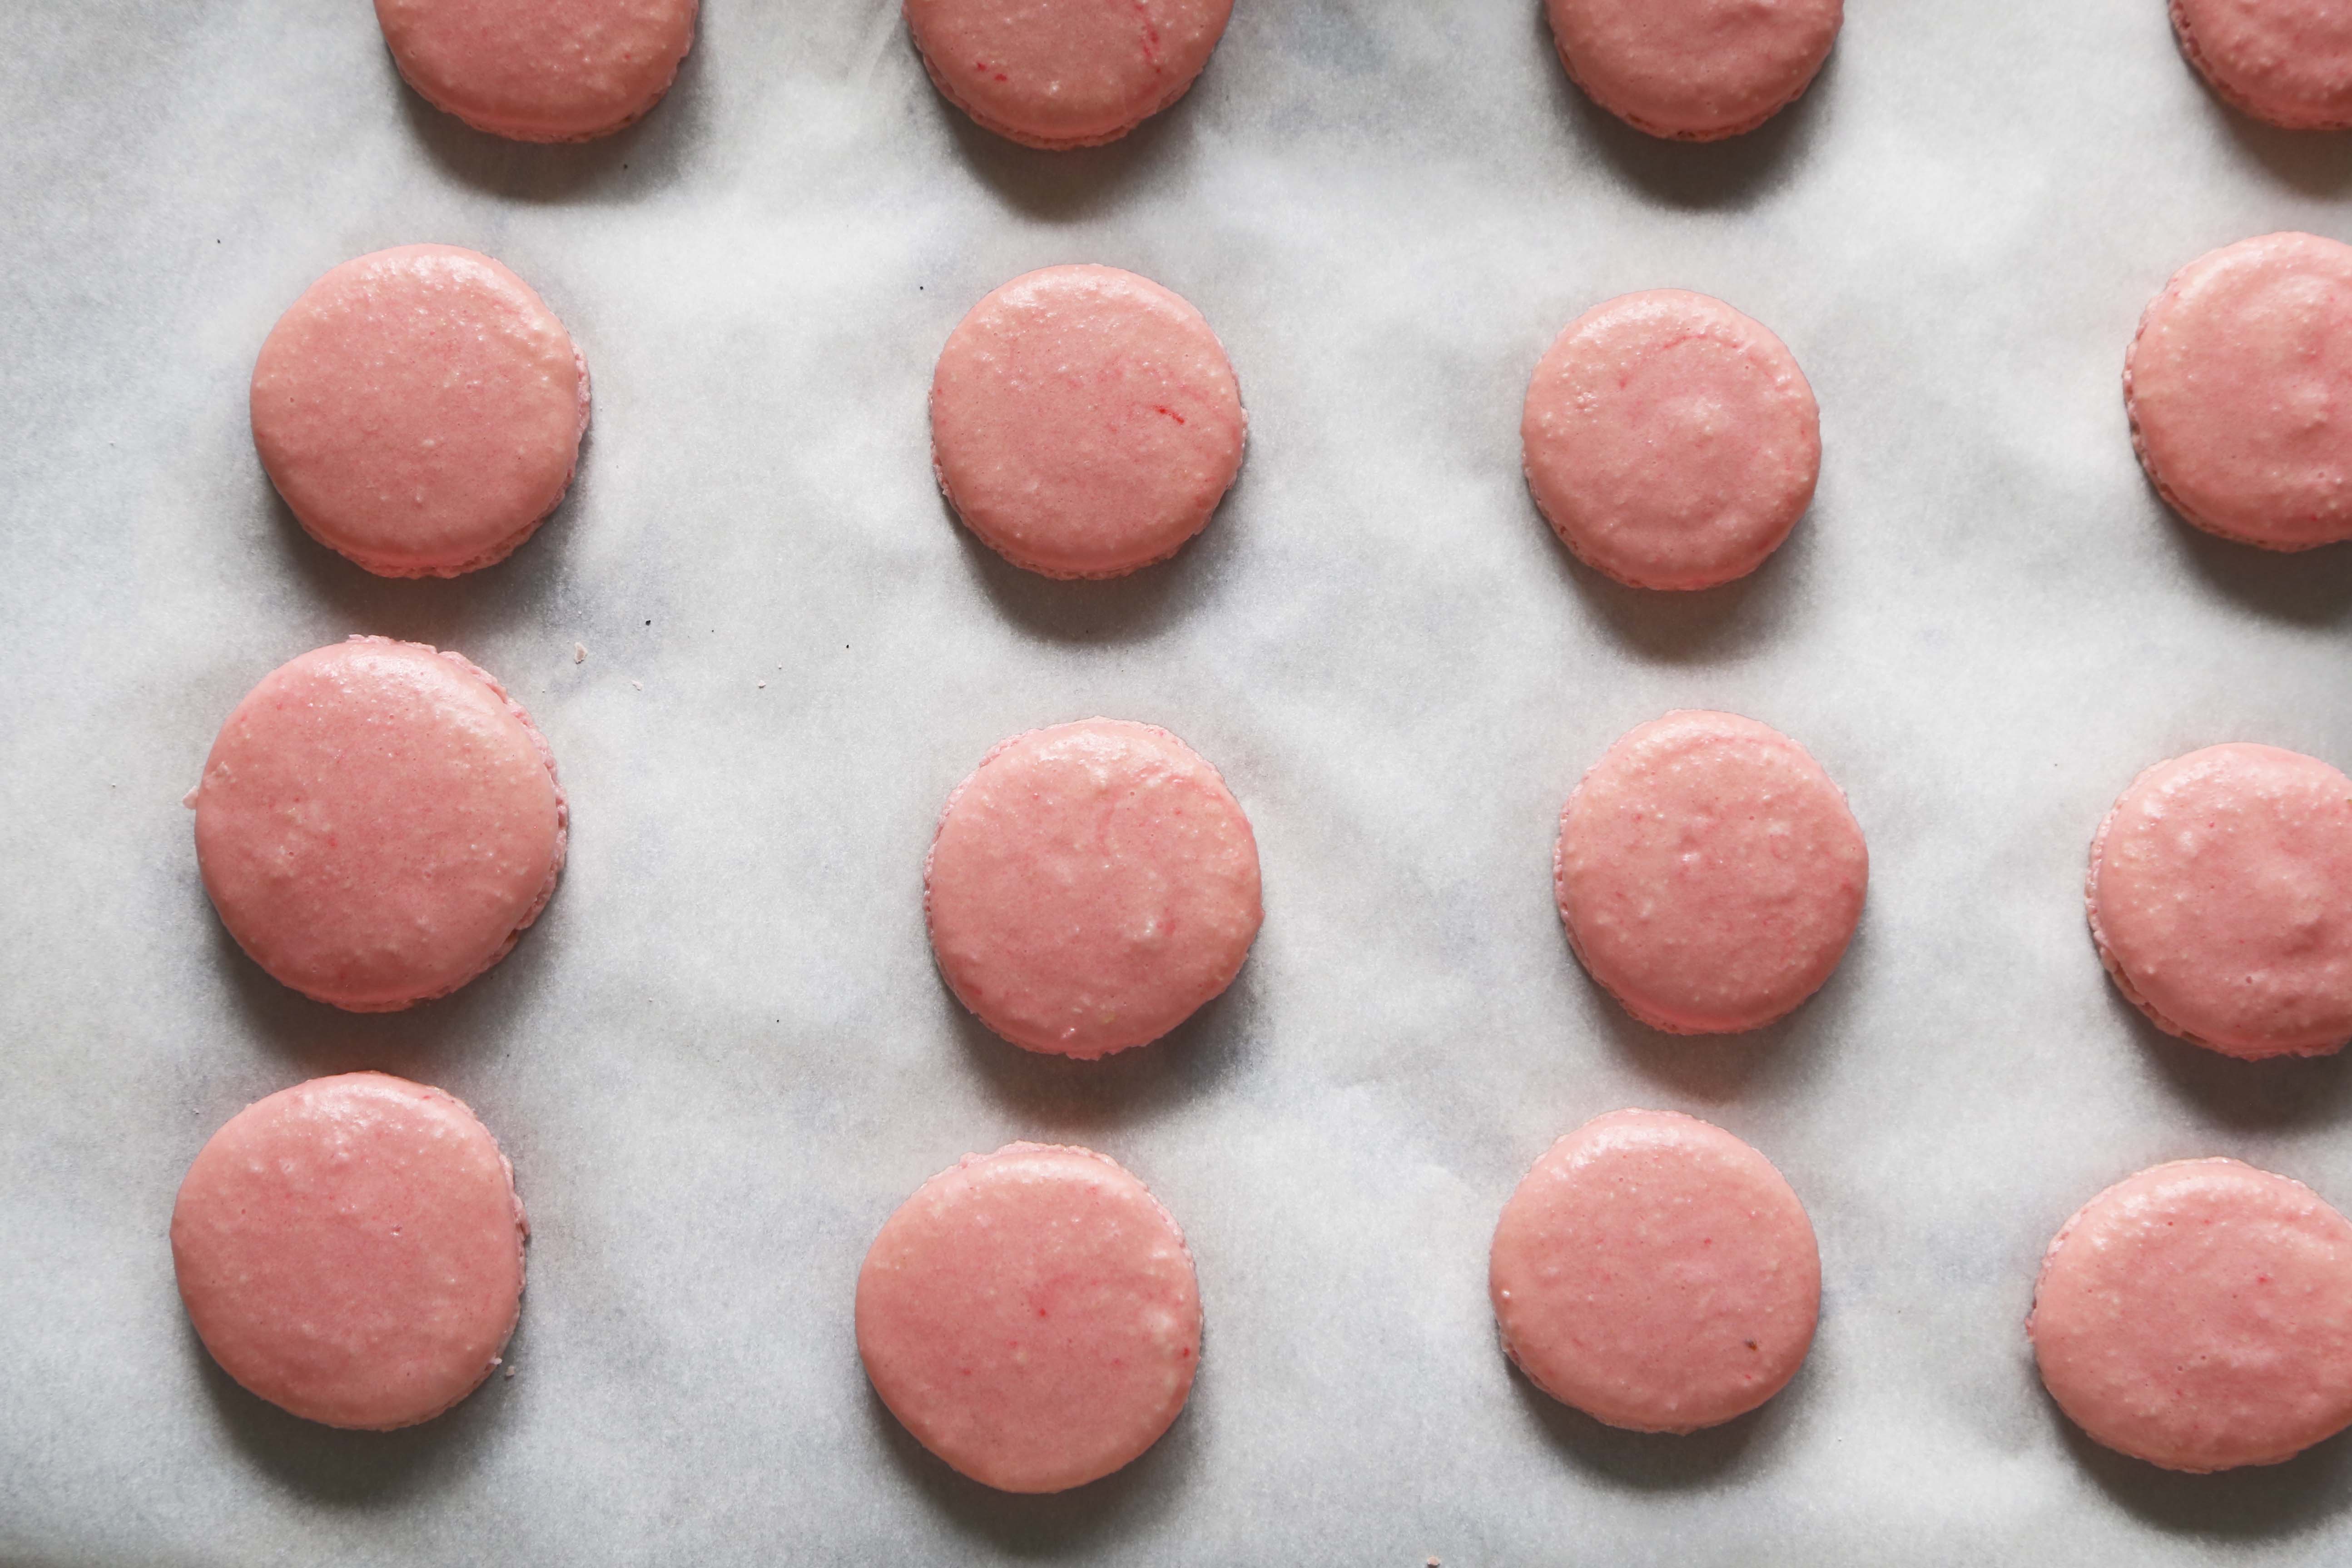
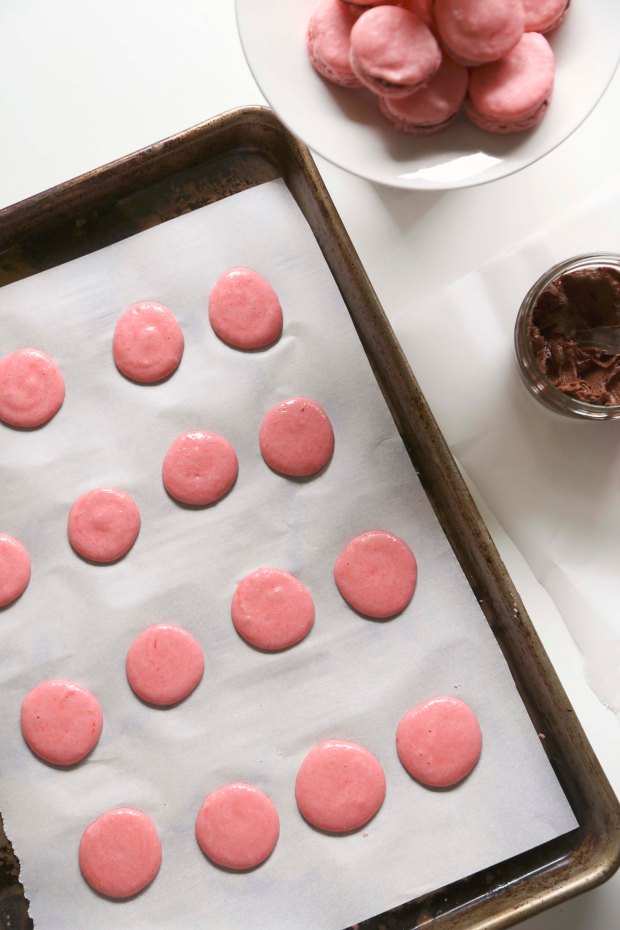
Line your baking sheets with parchment paper.  If you want you can draw circles using a bottle cap so that your cookies are all the same size, I did that at first, then I just eyeballed it and it turned out fine.   You want the parchment paper to be fitted exactly to the baking sheet so it can be completely flat.

Then start piping.  Pipe some frosting onto the baking sheet.  They’ll spread a bit so leave an inch or two between each one.  Once you’ve piped enough to fill your sheet, lift the baking sheet and lightly slam it on the counter a few times to get rid of any air bubbles.  Then continue piping onto another baking sheet until you run out of batter (this recipe makes about 24 macarons, so for me that was 3 baking sheets full of cookies).  Let the unbaked cookies sit out on the counter for an hour.

macarons2

Then preheat the oven to 275F.  Bake 10-14 minutes.  This is where it might get tricky.  My first batch was underbaked and completely stuck to the parchment paper.  The second batch, I baked a few minutes longer (13 minutes) and they turned out great.

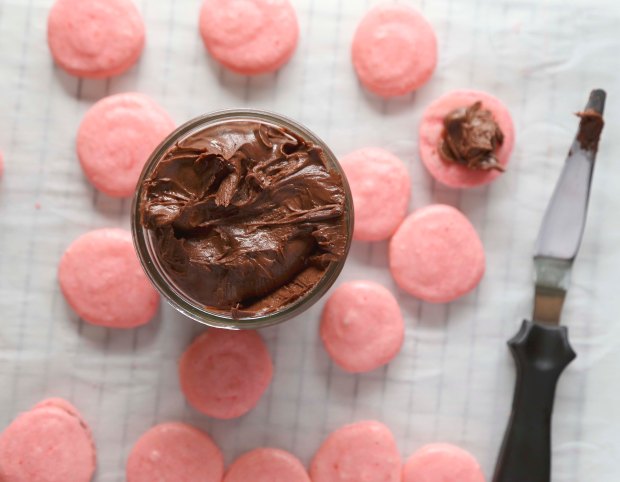
Once you take the macarons out of the oven, transfer the parchment paper with all the macarons on to a cooling rack so they can cool completely (you can put them in the freezer for a few minutes to speed up the process).  After the cookies have cooled completely you can assemble them!

macarons3

*For my filling, I used a simple chocolate frosting recipe, because I wanted to get the basics and I happened to have all the ingredients on hand.  Later I’ll try experimenting with different fillings, but I wanted something quick and easy.  And so, I used the Hershey’s Chocolate Frosting Recipe.

frosting

Chocolate Buttercream Filling

adapted from Hershey’s Chocolate Frosting

1/4 cup butter, melted
1/3 cup cocoa powder
1 1/2 cup powdered sugar, sifted
1/6 cup coffee (or milk)
Melt butter and mix with cocoa powder.  Using a mixer, beat in powdered sugar, a bit at a time, alternating with coffee until all ingredients are incorporated.  Beat a few more minutes until fluffy, then set aside.

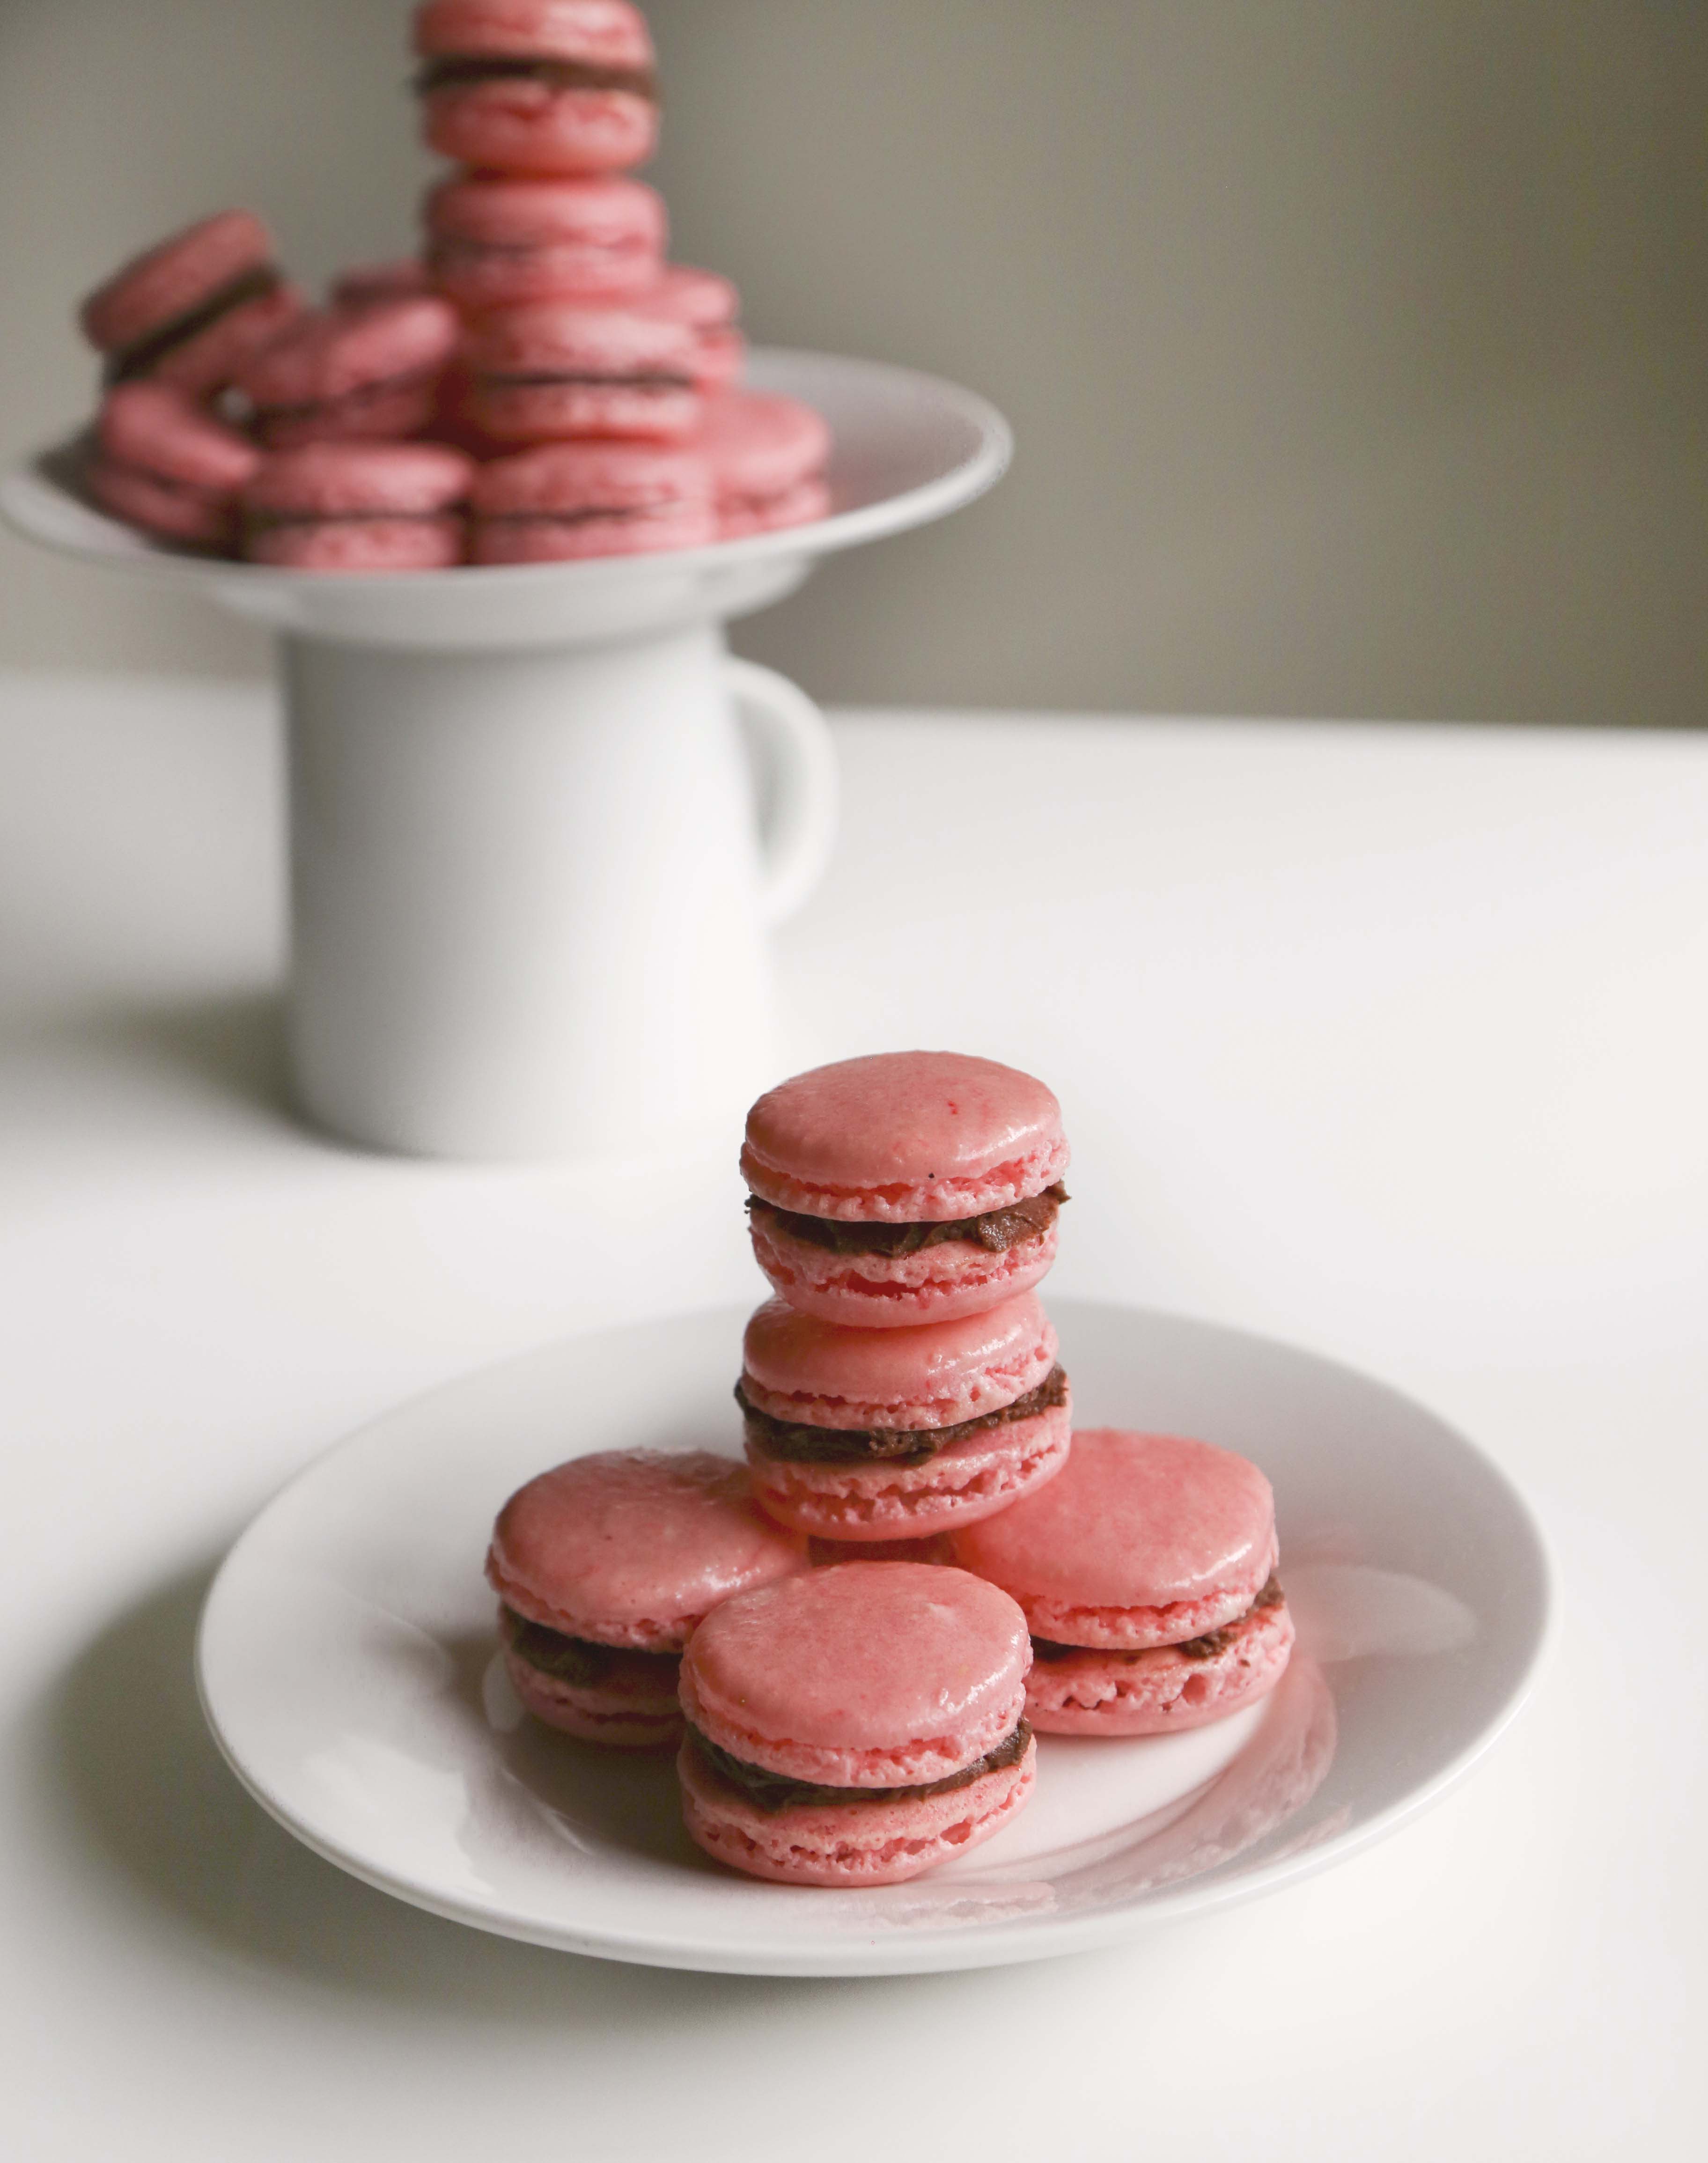
Now assemble the macarons by spreading some frosting (or other filling of choice) on one cookie then putting together like a sandwich.

macarons5

Then ta-da! You have 24 beautiful macarons!  That wasn’t too scary, right?

Overall, in the macaron-making process, I learned a few key things…

Tips for Making Macarons:
  1. Sift the ingredients (and make sure you buy extra fine almond flour).  I hate sifting ingredients but these cookies are so light that it’s a must.  If you buy the almond flour at Sprouts in the bulk food section, it’s not fine enough.  I’ve tried.  Get the Bob’s Red Mill one.
  2.  Let the batter sit a bit before piping it.  I found that my last batch turned out the best, so I’m chalking that up to the fact that it sat the longest in the piping bag (a few hours really) and sat for about an hour and a half on the counter before baking (because I was working and forgot about them).
  3. You need to let them rest for 1 hour after you pipe them onto the baking sheet.  When they sit, they smooth out and develop that nice coat.  Let them chill.
  4. If you underbake your macarons, they’ll stick to the parchment paper.   It depends on your oven and the size of your cookies. Figuring out when the macarons were ready to come out of the over took some guess work.  They have to look set, but not browned.  If this is your first time, I recommending each baking sheet separately in case one gets messed up, there are still two others for you to try with.  I ended up baking mine for 13 minutes, and that was the magic number.  But remember, every oven is different and your macarons might be bigger than mine.

I’m excited to try to make different flavors now.  I’m a big believer in mastering the basics before moving on to more extravagant things or tweaking recipes.  I had a lemon macaron from Lette Macarons that basically changed my view of macarons.  I must try to recreate it!

Have you tried making macarons? or are you just an eater? What’s your favorite macaron flavor?

Let’s Do Lunch

Lunch has always been the most boring meal of the day for me.  In school, it was something I quickly grabbed between classes while trying to catch up on last minute reading for a discussion section later that day.

Then work started and lunch was a little more fun.  I almost always packed my lunch and ate it with a few others who did the same for about 20 minutes, then back to work.

Now that I work at home, I’m trying to make sure lunch is more fun (hey, a lady needs something spice up her day).  Have you noticed that lately, we’ve all been so preoccupied with brunch that we’ve forgotten about lunch?

Let’s do lunch.

The Meal

Let’s keep the meal healthy and balanced.  Last week, I had some fish with sauteed squash.  It was all sorts of tasty.

lunch

Today, I had tuna.

tunasalad

Tuna sounds not exciting, and I have no idea how to make it look good. But when you throw it on a salad with some barley, it’s a winner.

Tuna is seriously underrated.

Now that food is set, let’s chat…

The Discussion Topics

In the World:

Aziz Ansari is hilarious and wrote a book.  Here’s a bit about it in Time.

FIFA is still being nuts, but the Women’s World Cup just started! Why can’t we be as excited about this World Cup as the regular one?

Vegetables!


Let’s talk about GMO foods for a minute… Fear or fact?  “The anti-G.M.O. movement, I’m afraid, risks throwing the baby out with the bathwater. What is needed is a dispassionate look at what G.M.O.s mean and their actual and potential good, not just a fear of harmful possibilities.”  <– Agreed!

In MY World:

I walked past Tartine Bakery twice this weekend and didn’t eat a croissant. Who am I?

Instead, I ate pupusas at Balompie Cafe in San Francisco, and they were all sorts of tasty.

IMG_4841

I hiked at Tennessee Valley in Marin yesterday and forgot to bring sunscreen.  Fail. I’m sunburnt.   But that aside, I hung out with my friend Emily for the first time in years.  She’s awesome. We talked about how much we love having girl friends.  I’m a girl girl, and I’m cool with that.


Do you tend to have friends of the same or opposite sex?  And more importantly… What did you have for lunch?


Peanut Butter Goji Soda Bread

I missed the boat on St. Patrick’s Day.  There was no green beer or corned beef and cabbage, but I did get a little inspiration from the Irish yesterday… Soda Bread.

I’ve never actually had soda bread, but a lot of people seem to like it.  So given the Irish inspiration and some jars of peanut butter and a bag of goji berries sitting around, a great idea came.  Let’s put the two together.

soda bread1 copy

The good news is my experiment was a success!  Again, I’ve never had soda bread so I’m not entirely sure what’s it’s supposed to taste like but this one was good.  Faintly sweet and with a hint of peanut butter.

soda bread2

I kind of think you could make an amazing PB&J with this soda bread, but it would be all sorts of dense and intense.

Feel free to give that a try.

Peanut Butter Goji Soda Bread

3 cups all purpose flour
1 cup whole wheat flour
1 1/2 tsp baking soda
1 tsp salt
3 tbsp sugar
6 tbsp butter, cold
1/2 cup The Bee’s Knees Peanut Butter
1/2 cup dried goji berries, rehydrated, liquid reserved
1/4 cup plain yogurt mixed with
3/4 cup water (1 cup total) or 1 cup buttermilk if you have it
1 tbsp melted butter

Take some hot water and pour it on the goji berries to rehydrate, set aside until ready to use.

Preheat oven to 375F.

Mix dry ingredients in a large bowl. Add butter and use your fingers to work it into small pieces.  Add peanut butter and do the same.  It’s ok if there are chunks of PB, you’ll work it in more later.
Strain goji berries and reserve the steeping water.  You’ll need about 1-2 tbsp of it.  Add yogurt mixture and goji berries to the flour mixture.  Work into a ball.  Add goji berry liquid as needed (I used about 2 tbsp).

Once you’ve got it into a ball.  Transfer it onto a parchment paper lined baking sheet and form into a round thick disc shape.  Score the top in an X shape with a knife.   Brush with melted butter and sprinkle with additional sugar.

Bake 45-50 minutes or until it passes the toothpick test.  Allow to cool completely, serve and enjoy!

soda bread3

This recipe makes one pretty big loaf.  It’s a lot of soda bread, but worth it.

Anyone ever tried making bread pudding with soda bread?  I think that could be amazing!

GIVEAWAY! Don’t forget to enter the Peanut Butter & Co Giveaway.  It ends this Friday!  To enter, go back to the Chocolate Peanut Butter Goji Berry Pie Post and leave a comment!  Entering is easy, winning is awesome.  Tell your friends!

Chocolate Peanut Butter Goji Berry Pie

Before I went to Thailand, I got an email from Peanut Butter & Co. about a Mystery Ingredient Challenge they were doing this month.  The deal was: they send me peanut butter and a mystery ingredient, then I make something tasty with it.

Of course, I was excited about it because…

1. I love peanut butter.

2. I love making things with peanut butter.

After a few weeks my mystery ingredient arrived: Goji Berries.

YumSquad-Banner-MysteryIngredient-Goji-Square

I have to tell you.  I had never tried goji berries.  I imagined sweet little dried fruits, but actually they’re pretty tart!  I was excited to see what I could pair with goji berries other than peanut butter.  Then conveniently, pie day happened…

So of course, I had to make a pie.  Then the idea came: rich chocolate ganache with peanut butter and goji berries.

Chocolate PB Goji Pie

It really was as awesome as it sounds (and looks?).

Chocolate Peanut Butter Goji Berry Pie

1 Graham Cracker Crust (store bought or homemade)
1 cup heavy cream
9 ounces dark chocolate chips
1/2 cup Smooth Operator Peanut Butter
1/4 dried goji berries (plus extra for garnish)
1/4 tsp coarse seal salt (optional)

Heat heavy cream in a saucepan with goji berries.  This way they’ll soften and plump up.  Meanwhile, in a separate bowl, combine chocolate chips and peanut butter.

Pass cream through a strainer and pour hot cream on chocolate and peanut butter.  Let it sit a few minutes and stir to combine.

Take the rehydrated goji berries and place in the bottom of the graham cracker crust.

Goji Pie

Pour chocolate mixture on top.  Garnish with goji berries and coarse sea salt (optional).  Chill for 4 hours and serve with whipped cream.

This turned out great! It was dense, not too sweet and a great balance of flavors.  It’s got sweet, sour (from the goji berries), bitter from the dark chocolate and a touch of sea salt on top really balances it all out.

Also, can we talk about how easy it is?

I didn’t have time to get photos of the slices, because I took it to a Pi(e) Day party, because I wanted to be sure to get this up in time for a giveaway!

Peanut Butter & Co. is giving one Foodologie reader a free Peanut Butter & Co. Prize Pack!

To Enter: Leave a comment on this blog post telling me your favorite way to enjoy Goji Berries OR if you’ve never tried them… what would you like to eat them with?

The giveaway ends Monday March 23rd! So be sure to enter and tell your friends about it too!

WINNER: Mary W! Winner has been emailed 😀  Thanks for entering!

P.S. I have a few more Peanut Butter/Goji recipes up my sleeve.  Stay tuned!