I love mustard. No really. Like a lot. For as long as I can remember, mustard has been one of my favorite condiments. Even the cheap yellow mustard you get on Subway sandwiches (no mayo, extra mustard please). I love it. It adds such a nice flavor profile to most foods.
But fancy mustard, that’s a whole different ball game.
Recently, I got in touch with the guys at Green Mountain Mustard. They make fancy pants mustard, but in the least pretentious way possible.
But anyway, these guys know mustard. They sent me two jars of their mustard so I could make an EPIC grilled cheese sandwich. While the grilled cheese sandwich is still in the works, I had this idea and had to make it asap. It involved one of the mustard flavors they sent me: Deli Dirt. Their Deli Dirt tastes like all the goodness of a deli put into one little jar, and this mustard is THICK. It’s basically the consistency of hummus, which is awesome.
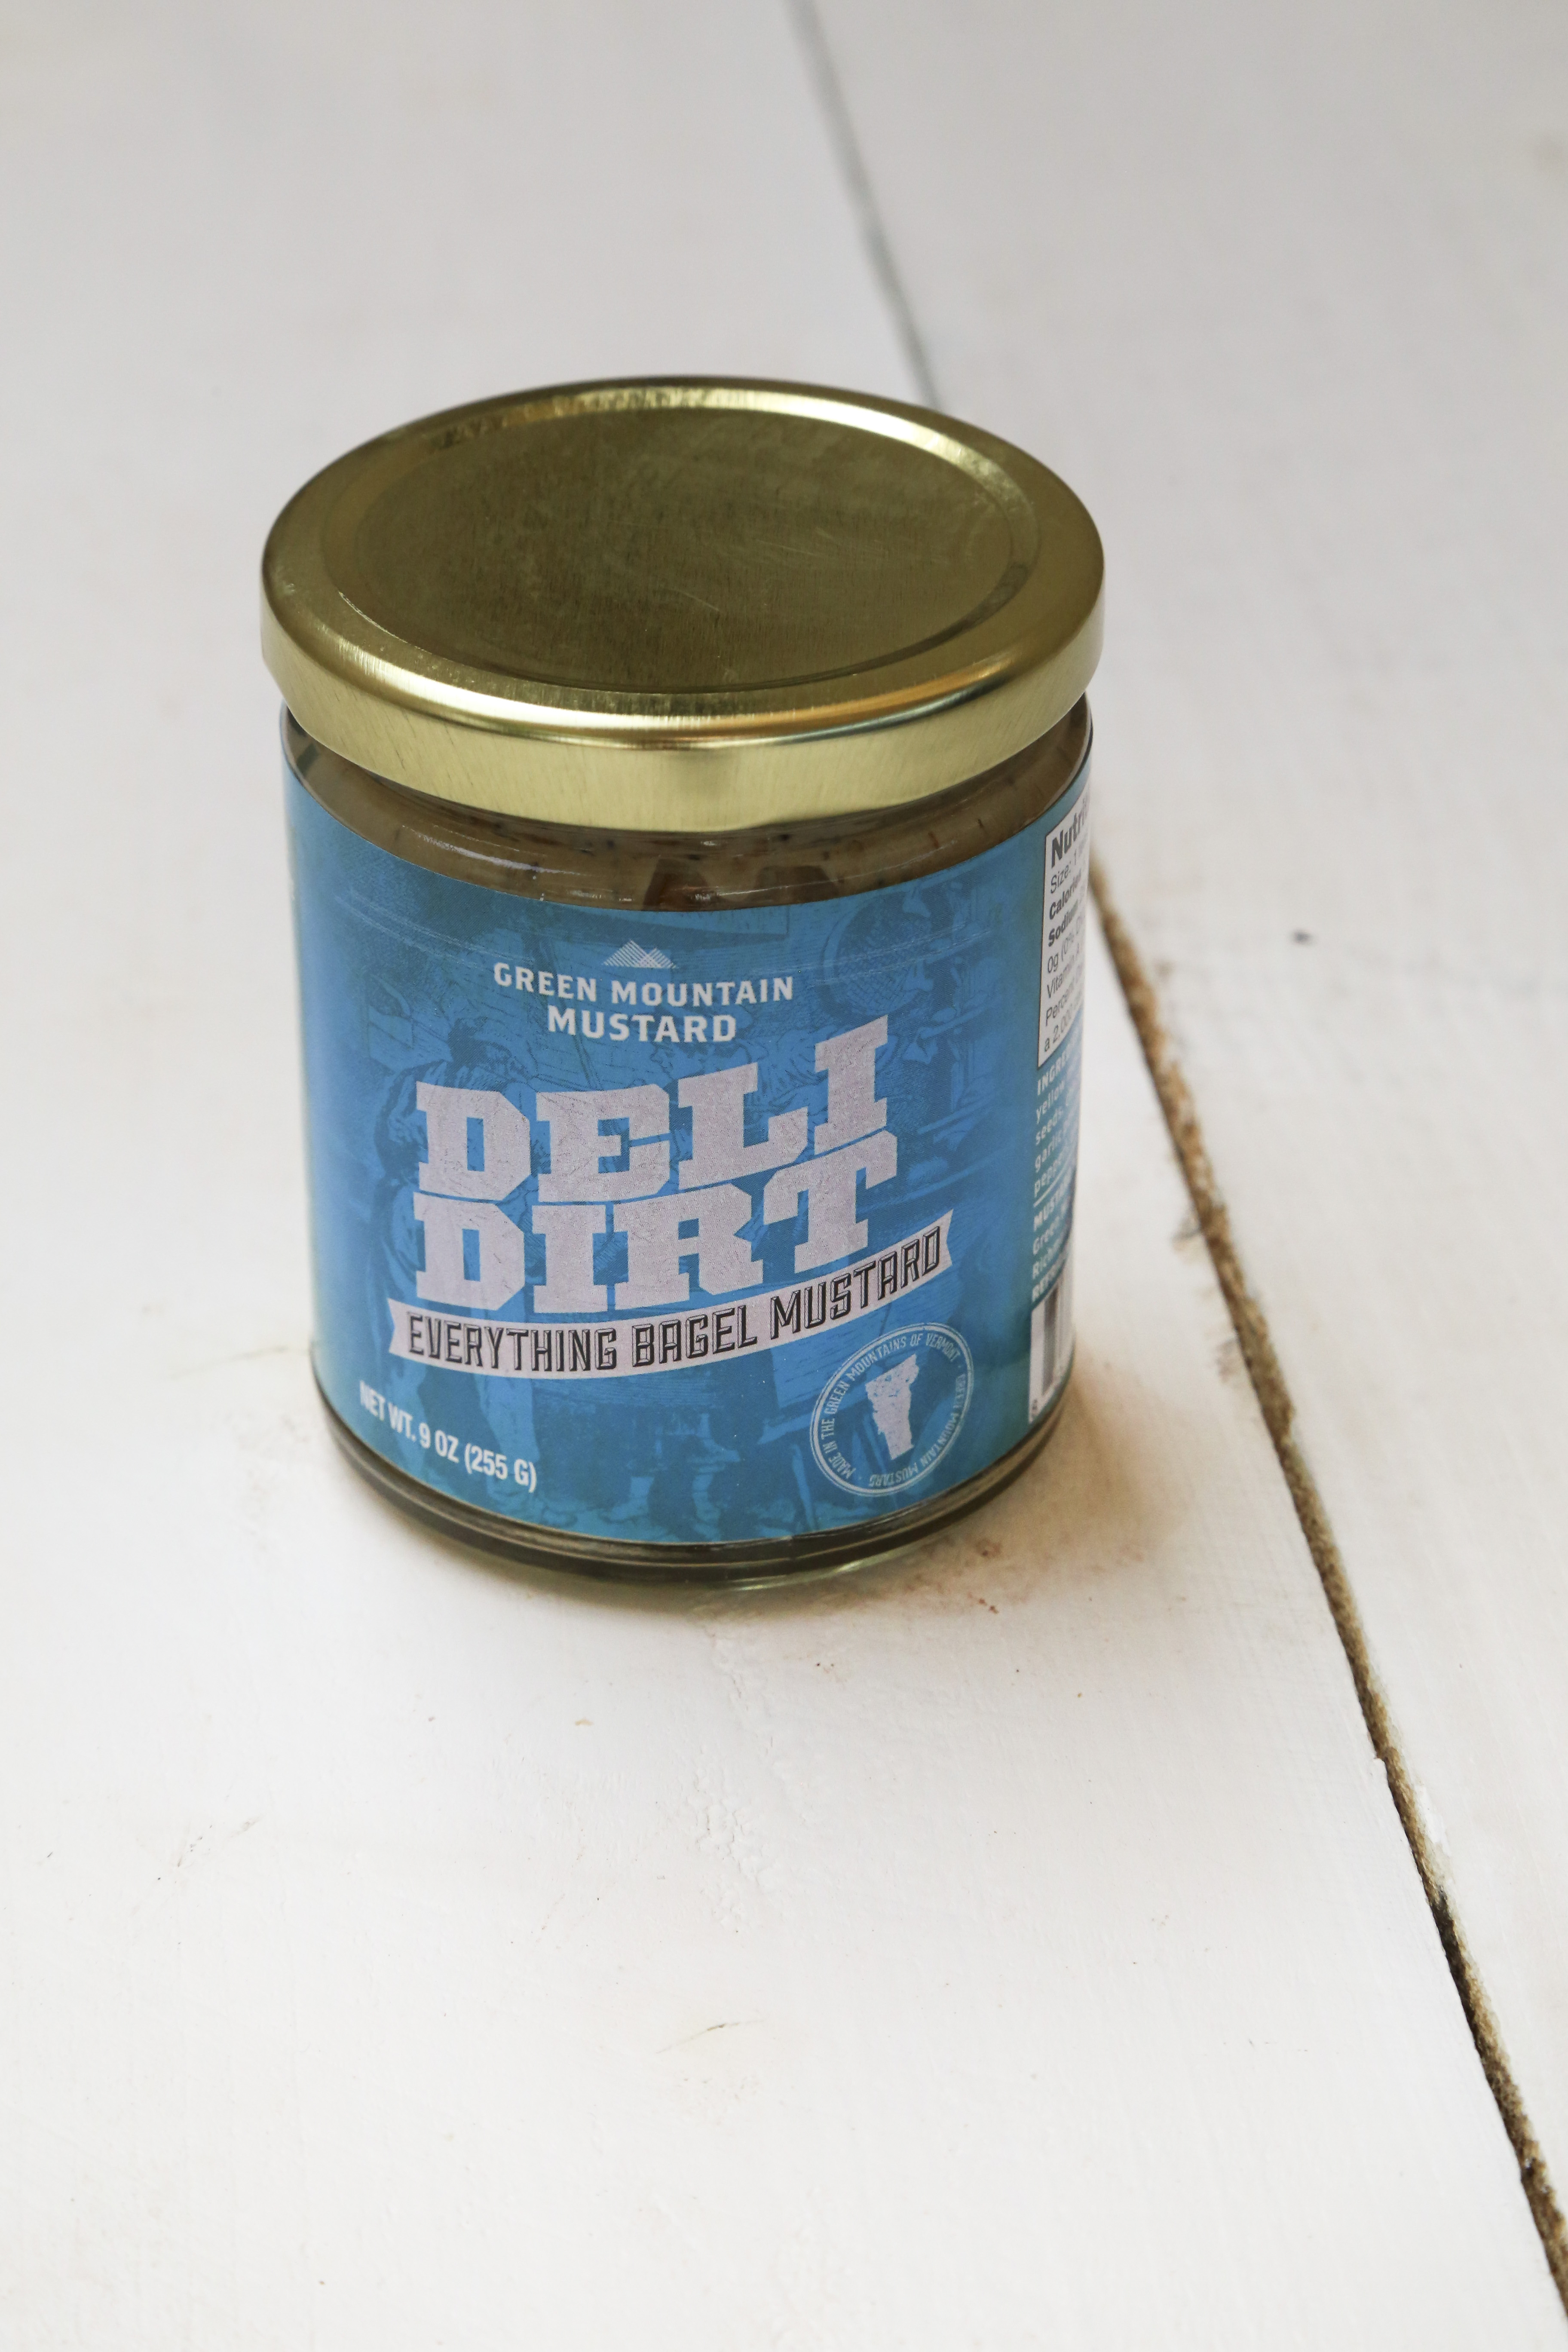
I’m in love. And thus, this creation was born:
%3A%20Baked%20Fries%20with%20Sauerkraut%2C%20Sausage%20and%20Muenster%20Cheese%20Sauce%20%5BRecipe%5D)
One of the things that I love about mustard is that it adds a ton of flavor to food without a ton of fat (or calories). You know I like to make things as light as I can. So while this looks fatty and decadent, it’s a little bit lighter than you would think (please note, I’m not actually saying this is healthy, but it’s better than eating something deep fried). 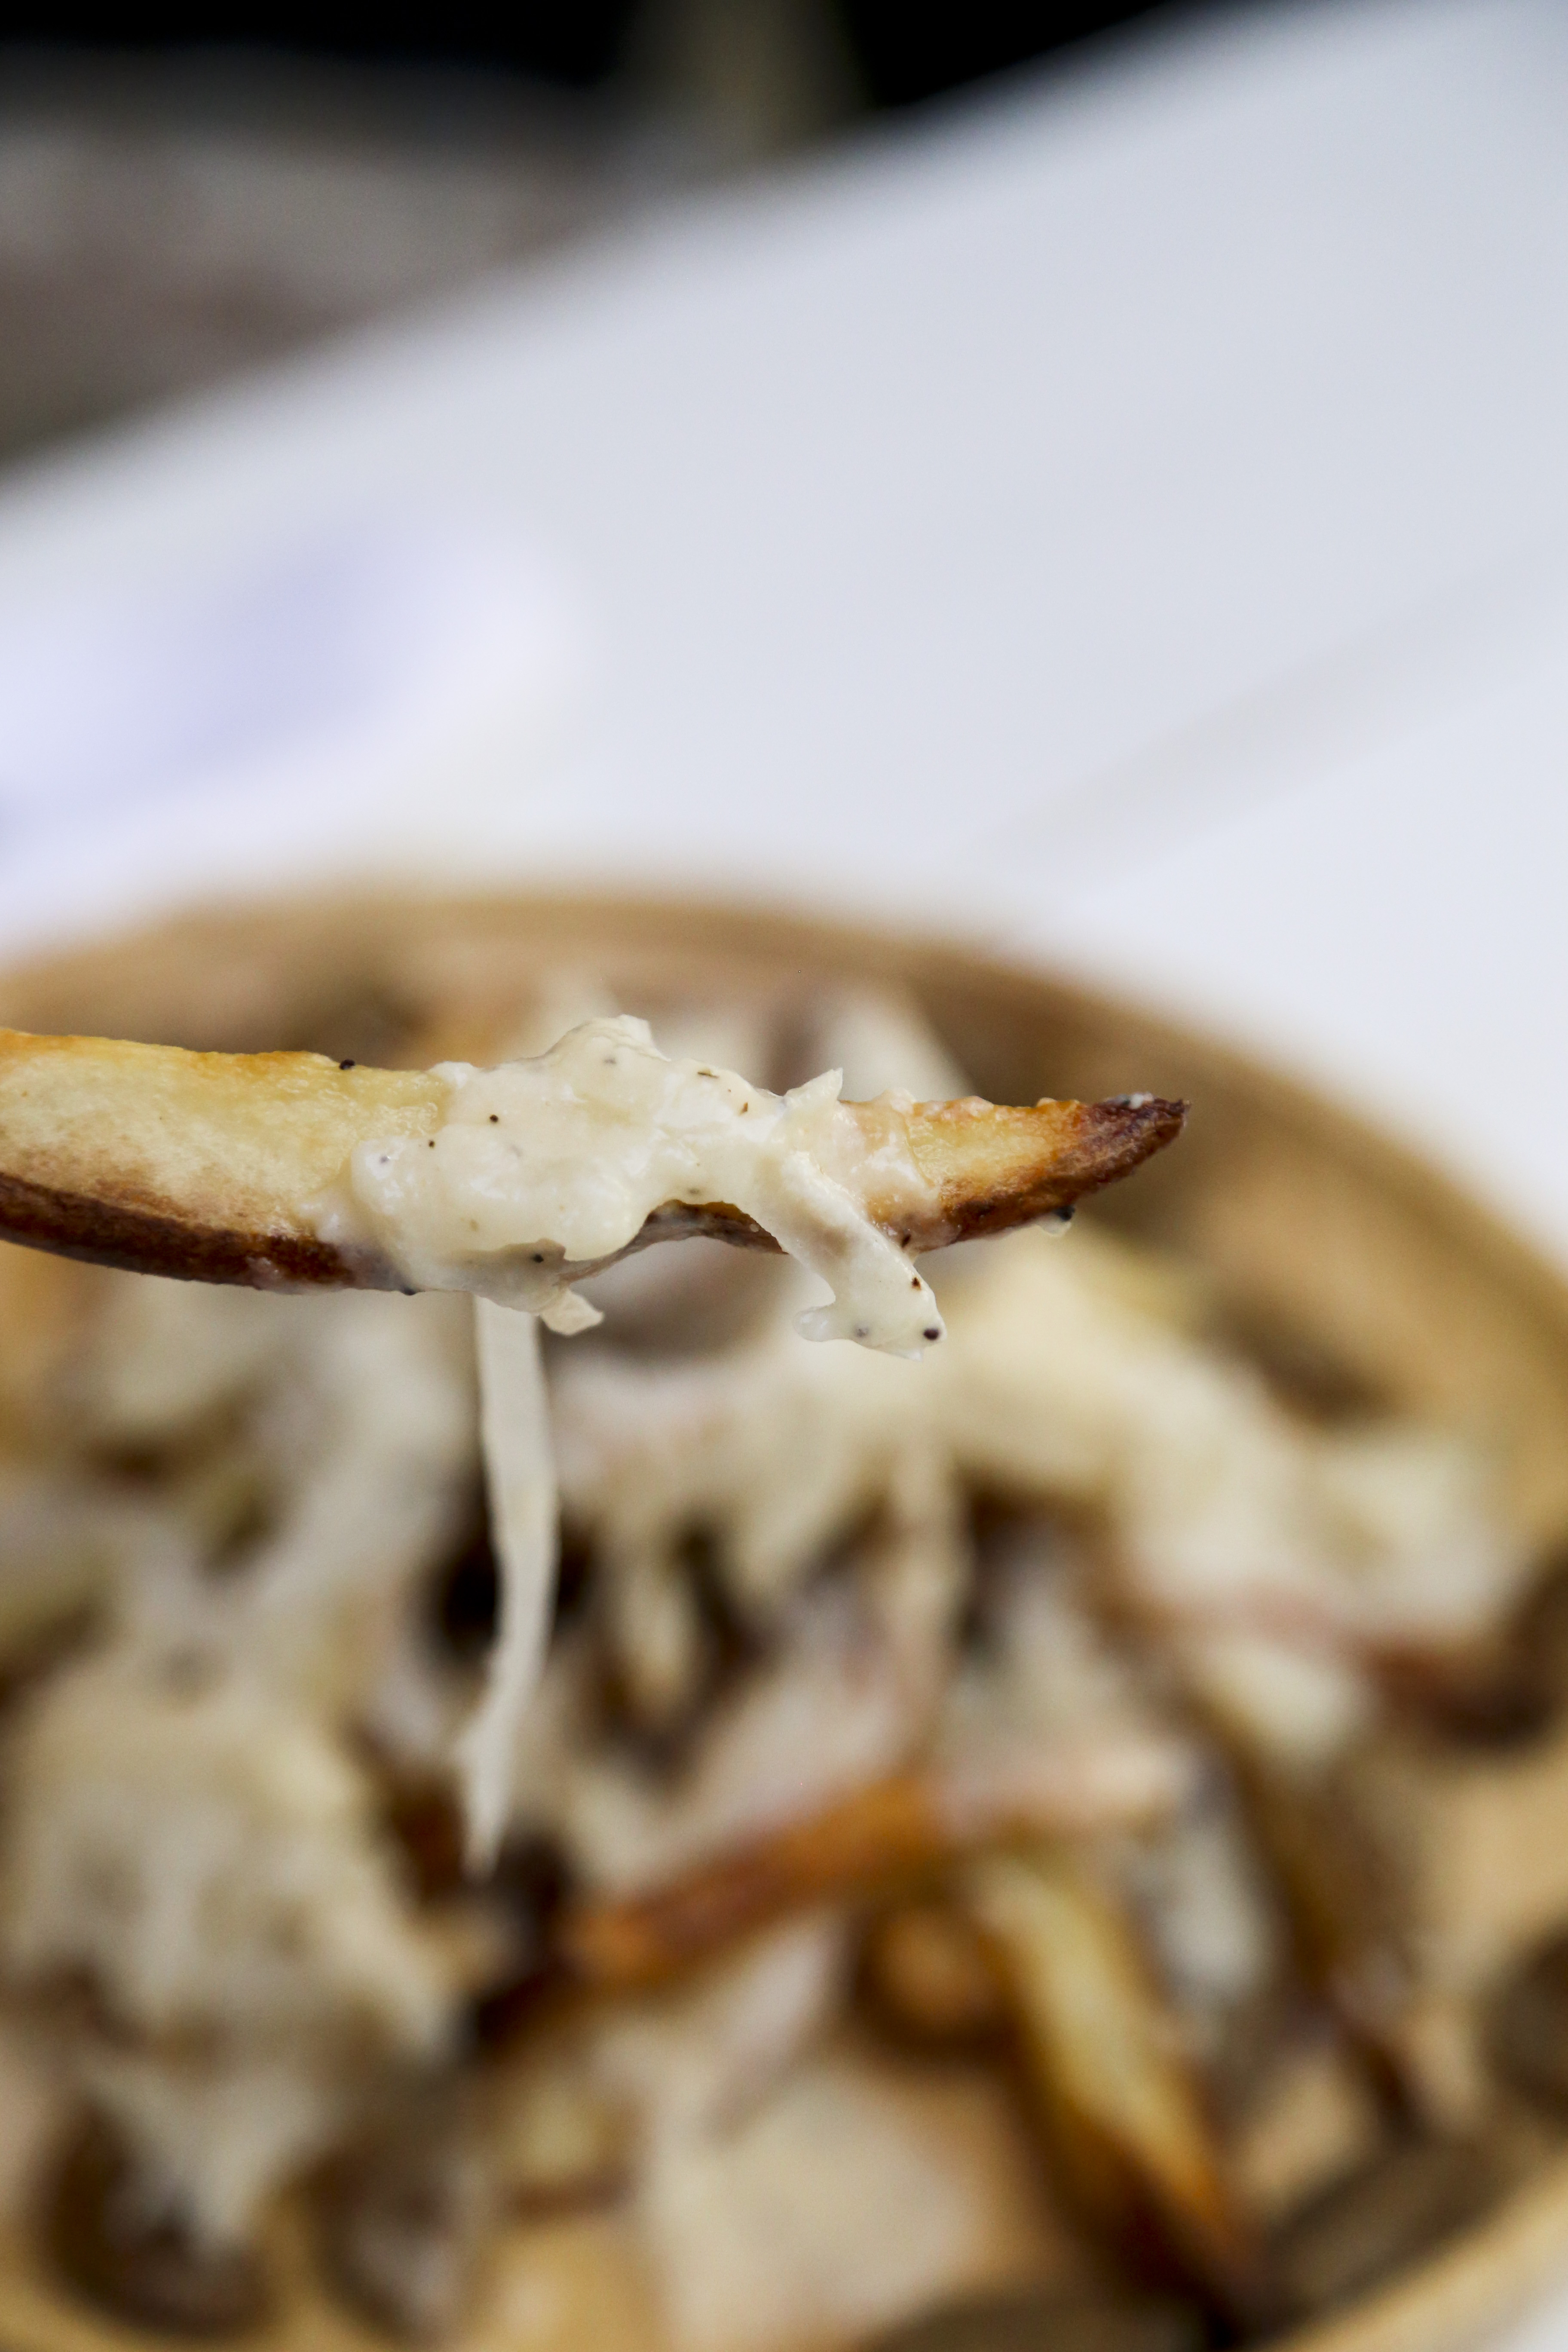
%3A%20Baked%20Fries%20with%20Sauerkraut%2C%20Sausage%20and%20Muenster%20Cheese%20Sauce%20%5BRecipe%5D)
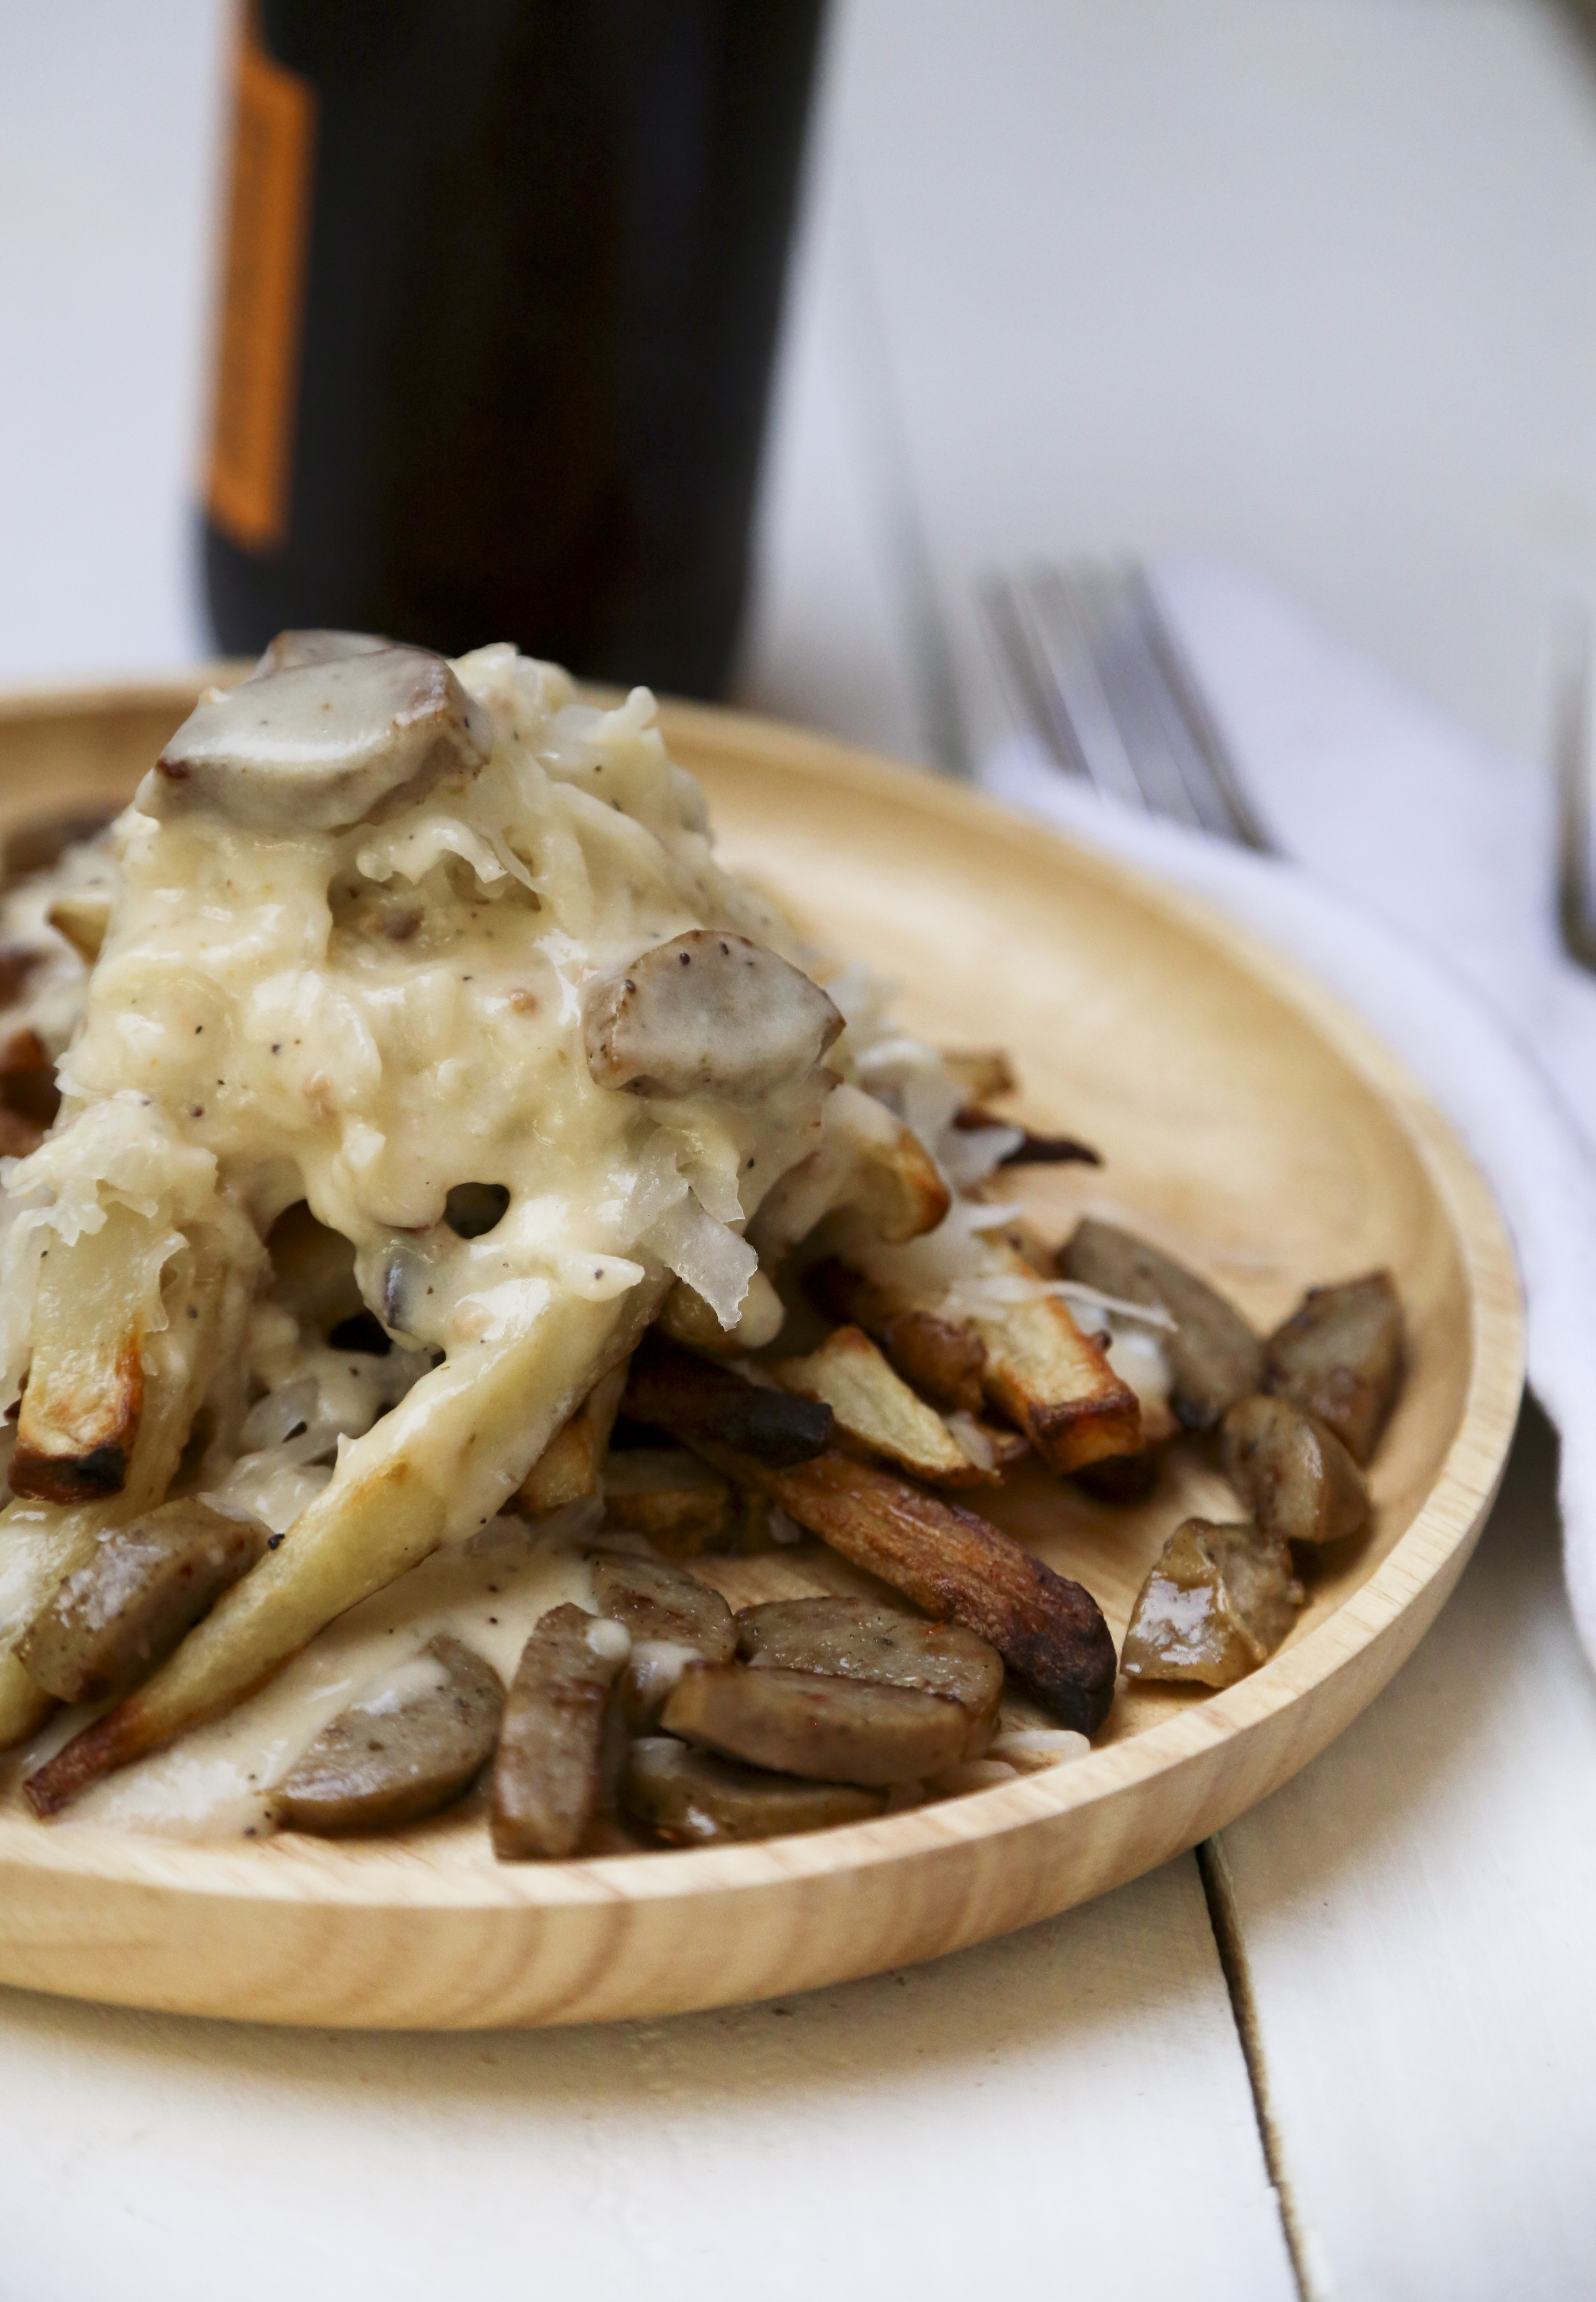
Oh and I should probably mention that I had no idea what to call this. I couldn’t really call it a “Pile of Deliciousness,” which is what it is. So instead I thought of a more Pinterest-friendly name: German Nachos (ish). Ish is a really important qualifier here. Enjoy.
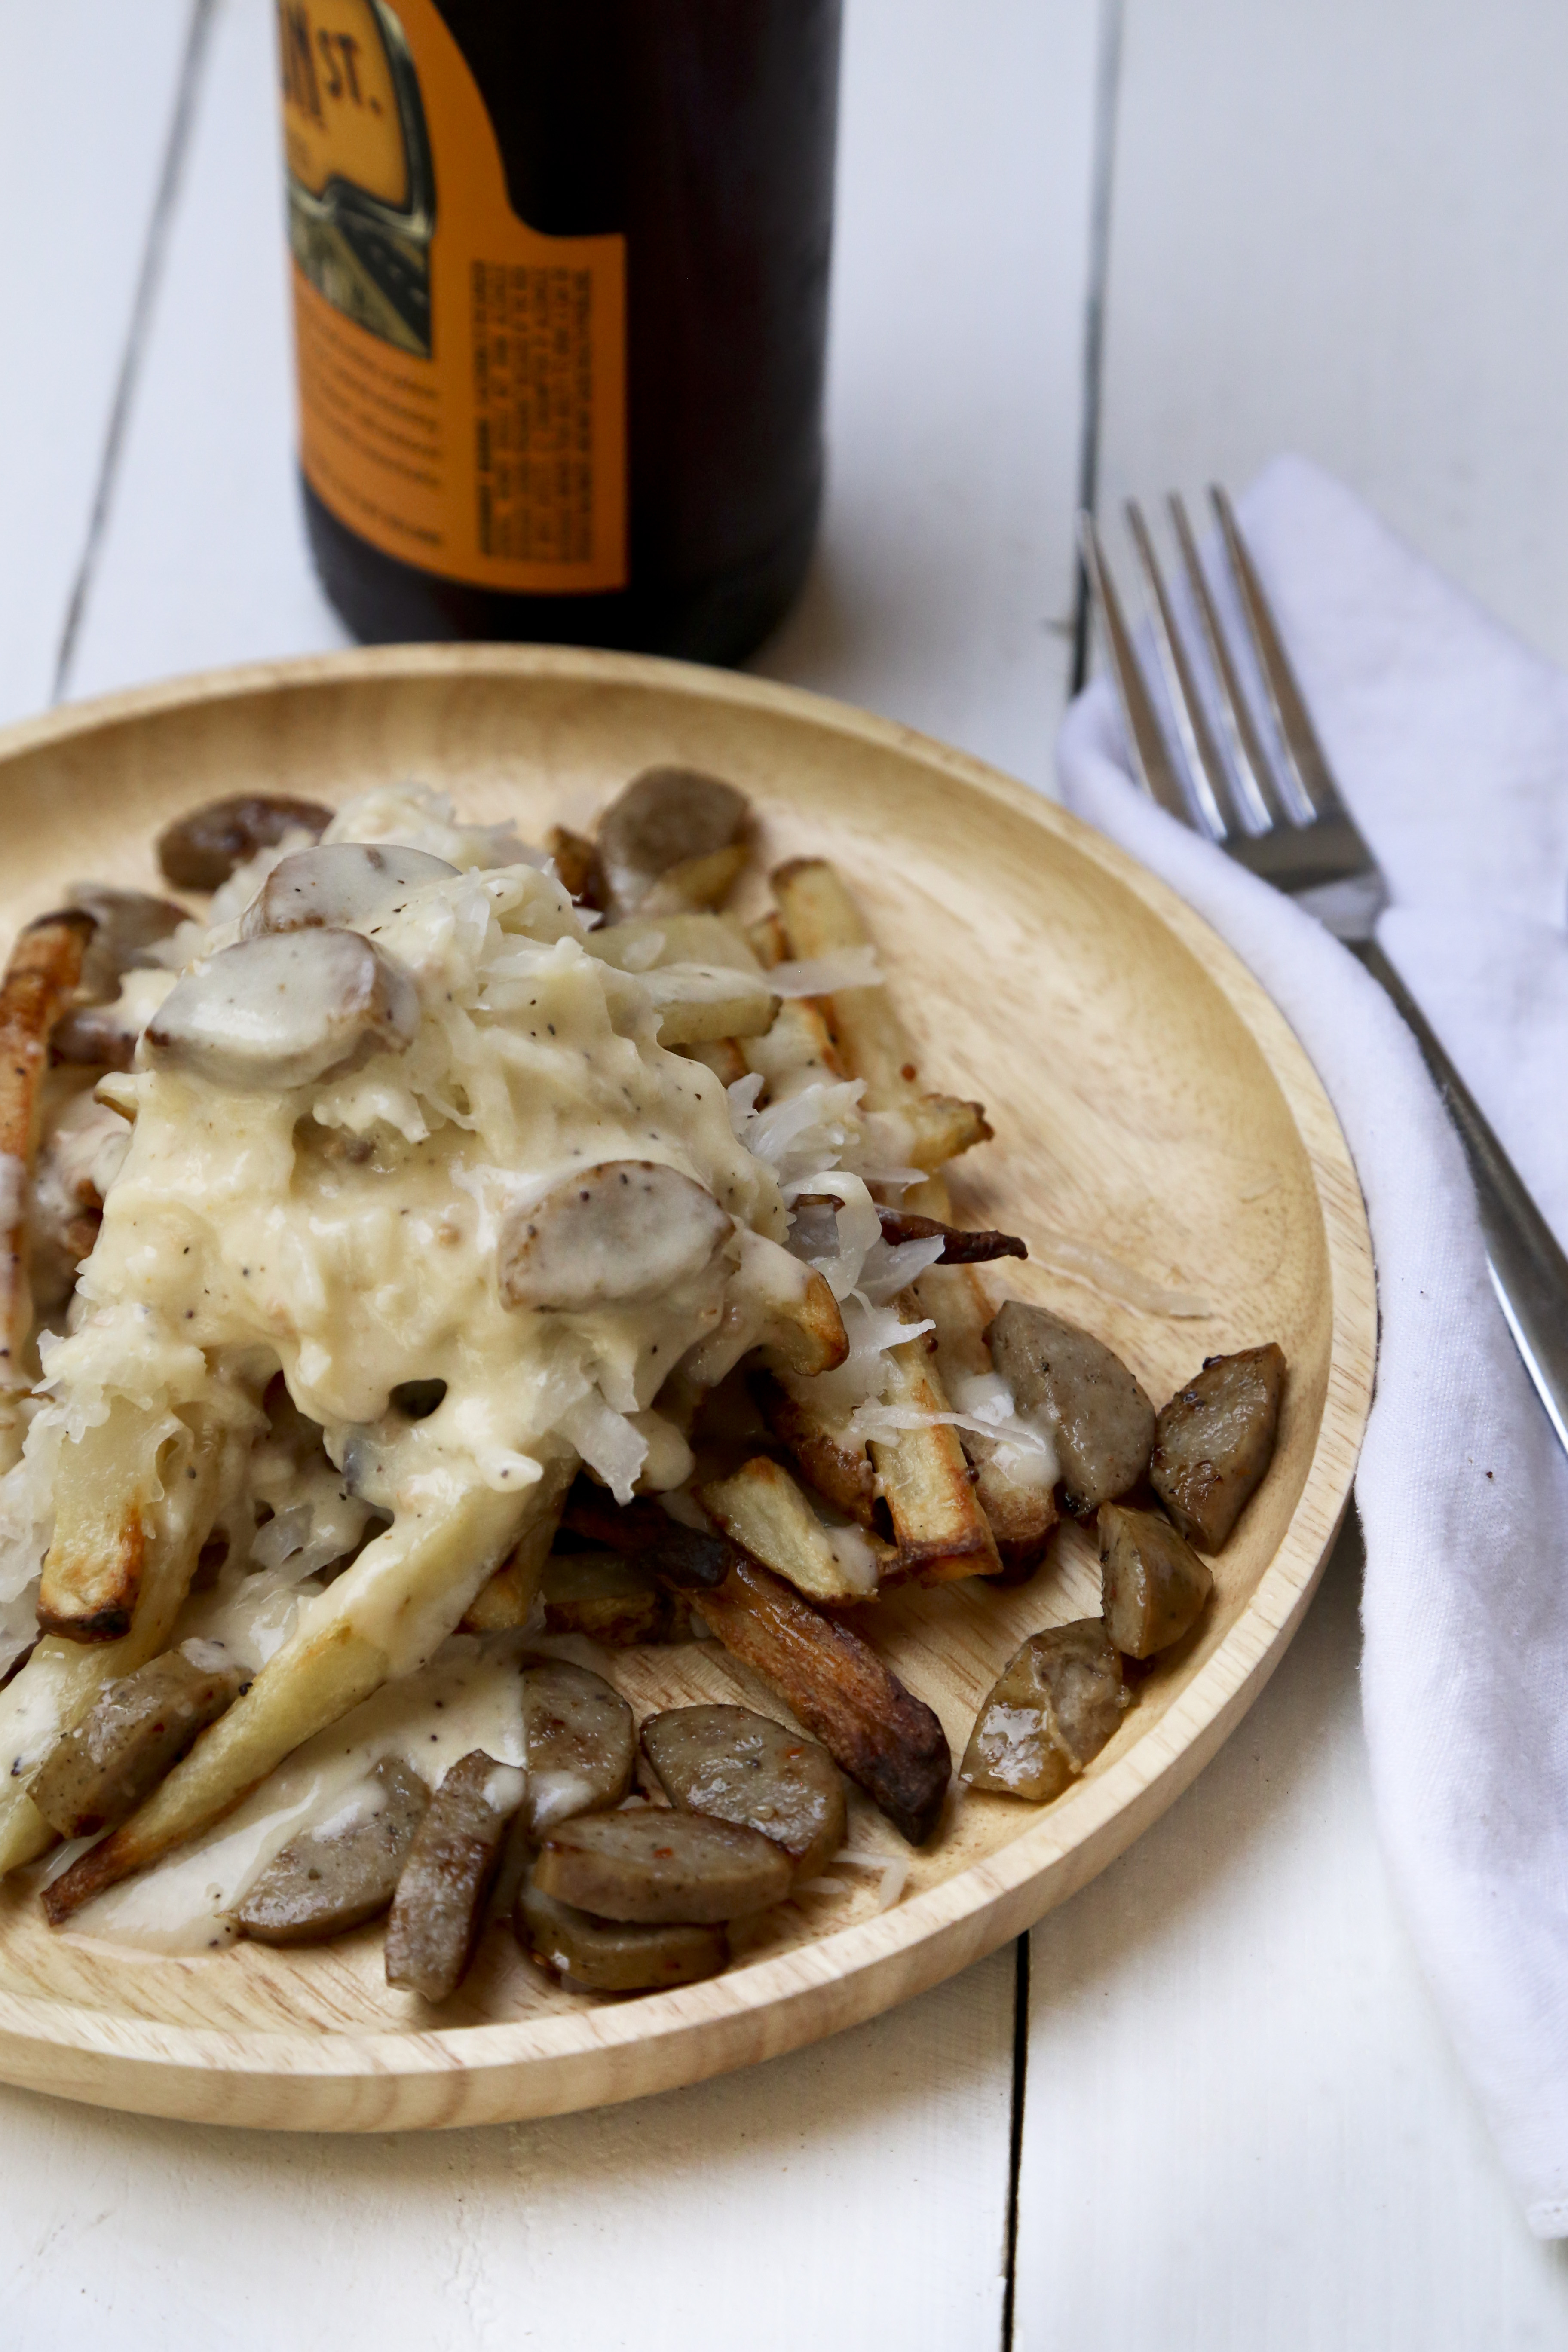
German Nachos (ish): Baked Fries with Sauerkraut, Sausage and Muenster Cheese Sauce
3 large potatoes
2 tbsp olive oil
1 tbsp Deli Dirt mustard
1 sausage (bratwurst are tasty. true story.), sliced
1/2-1 cup sauerkraut
1 tbsp butter
1 tbsp flour
1 tbsp Deli Dirt Mustard
1 cup milk (I used non-fat)
3 oz Muenster cheese
salt and pepper to taste
Pre-heat oven to 425F. Slice potatoes into fry shape.
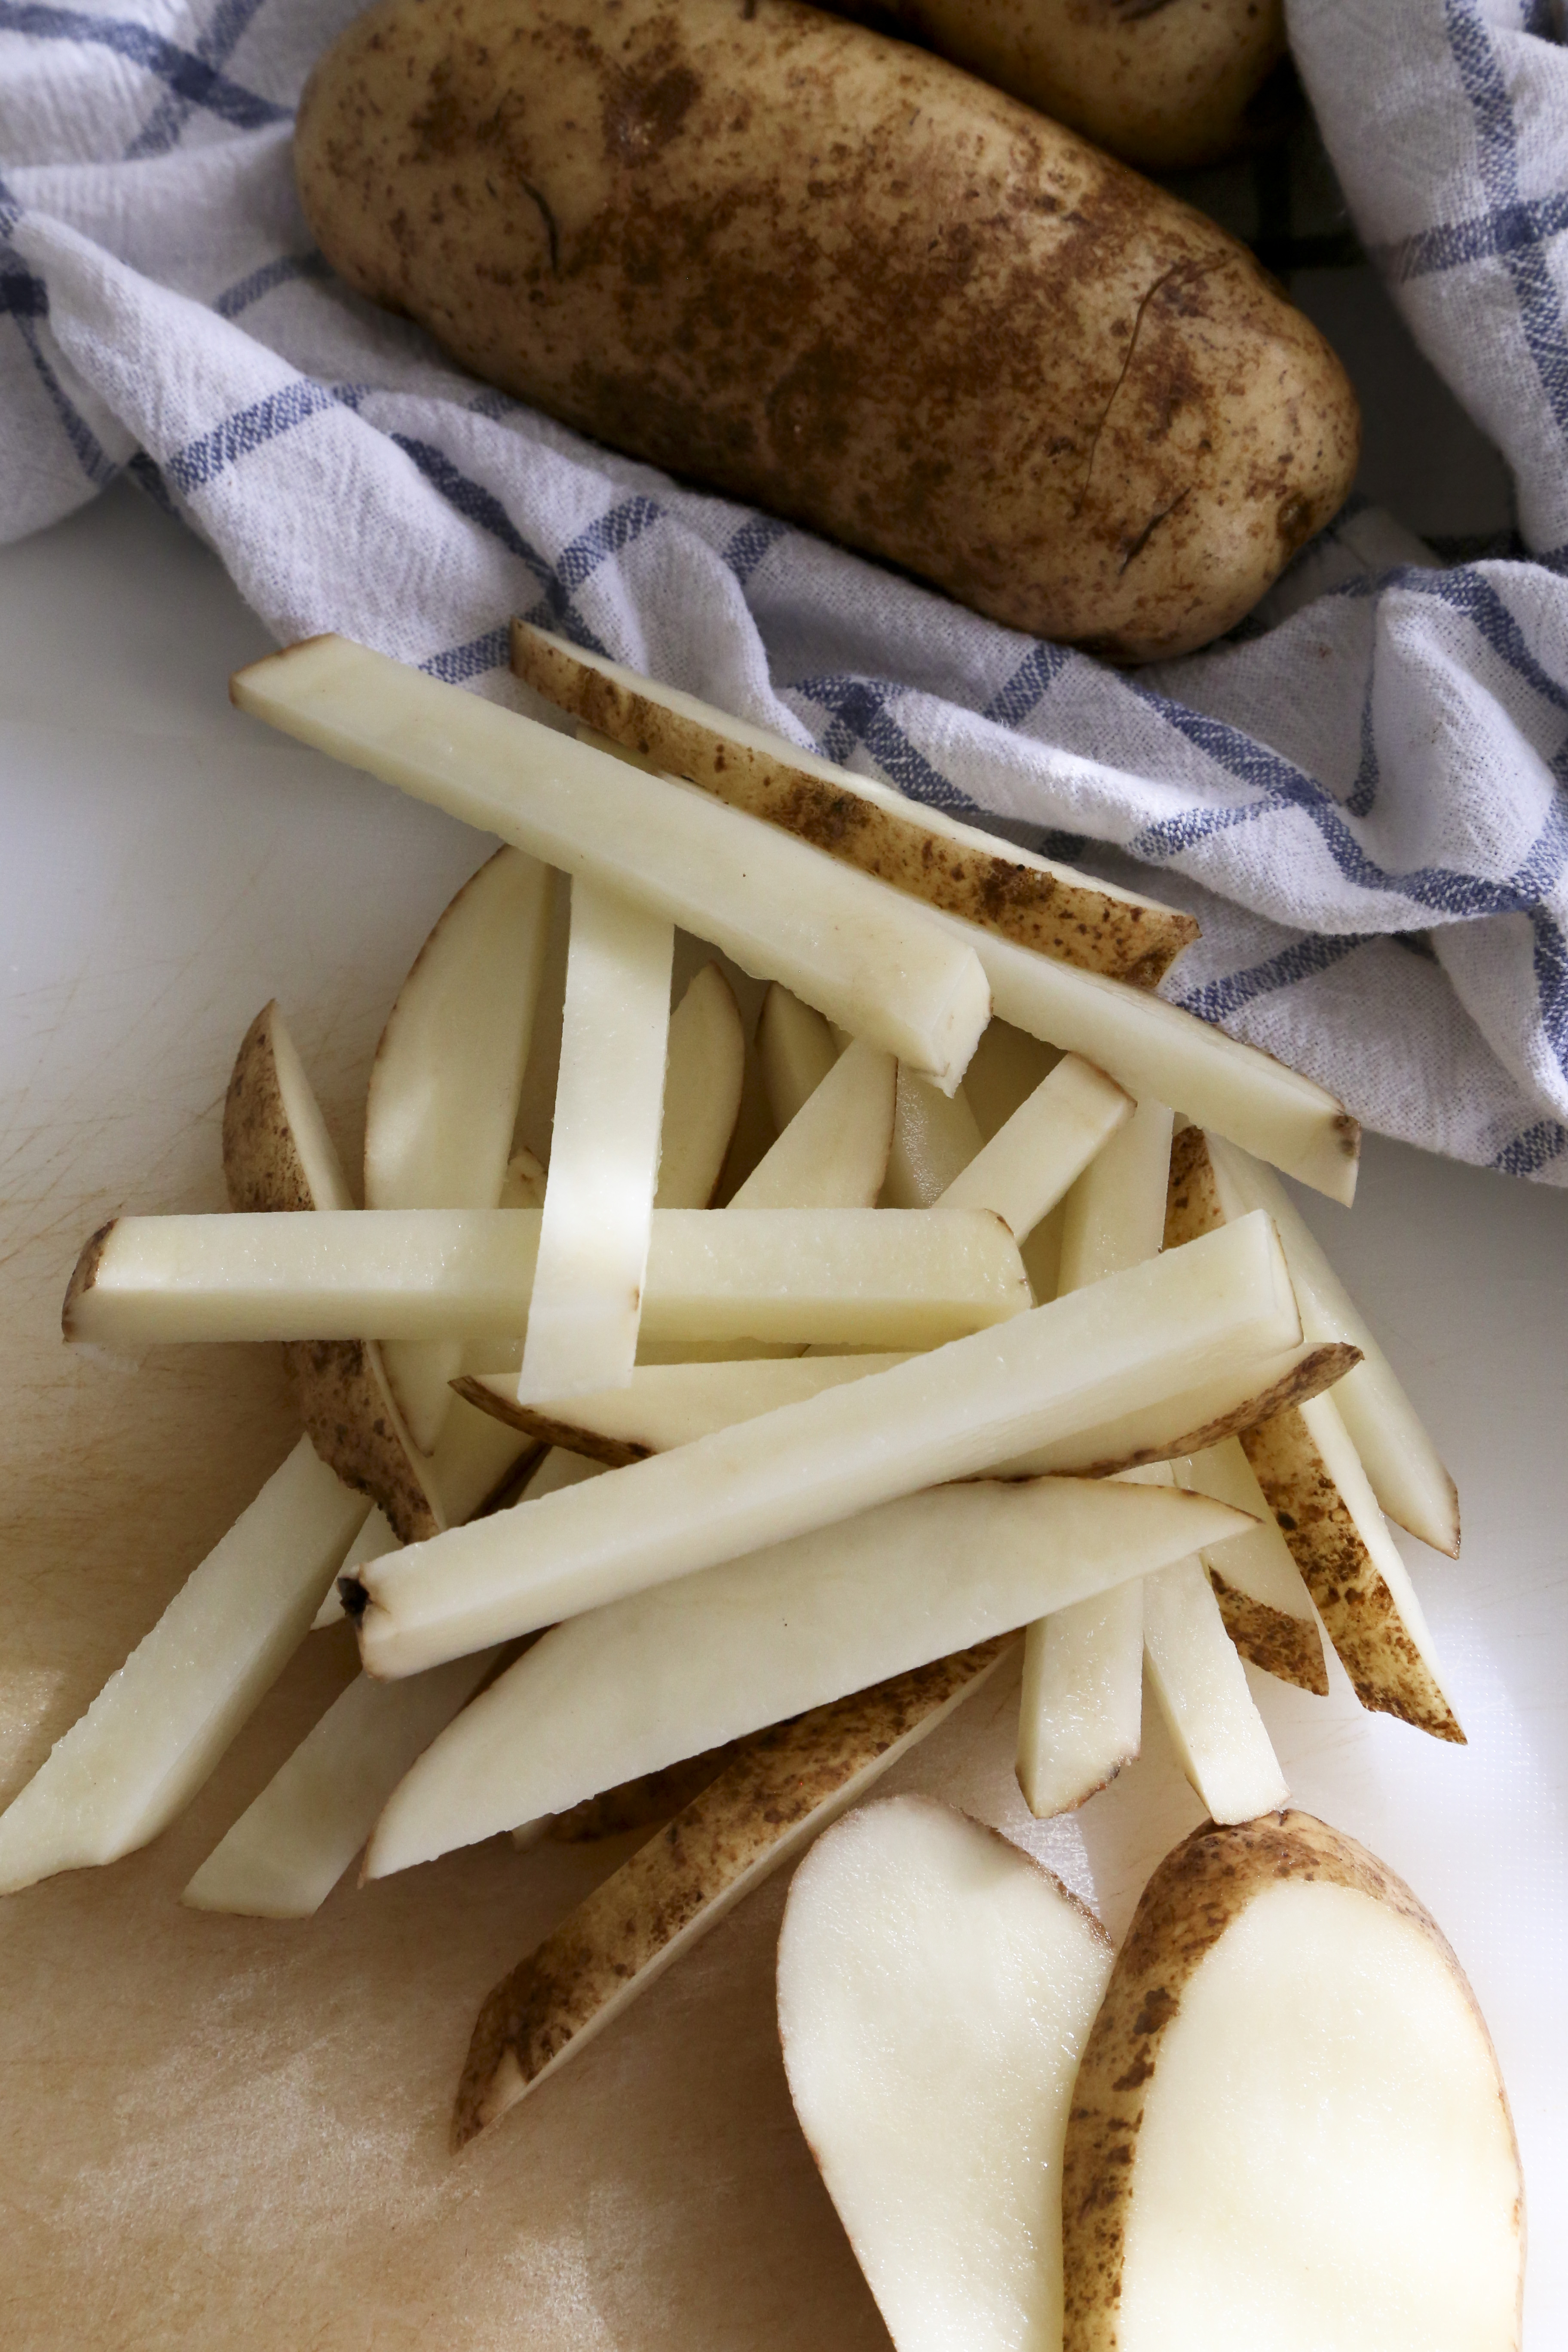
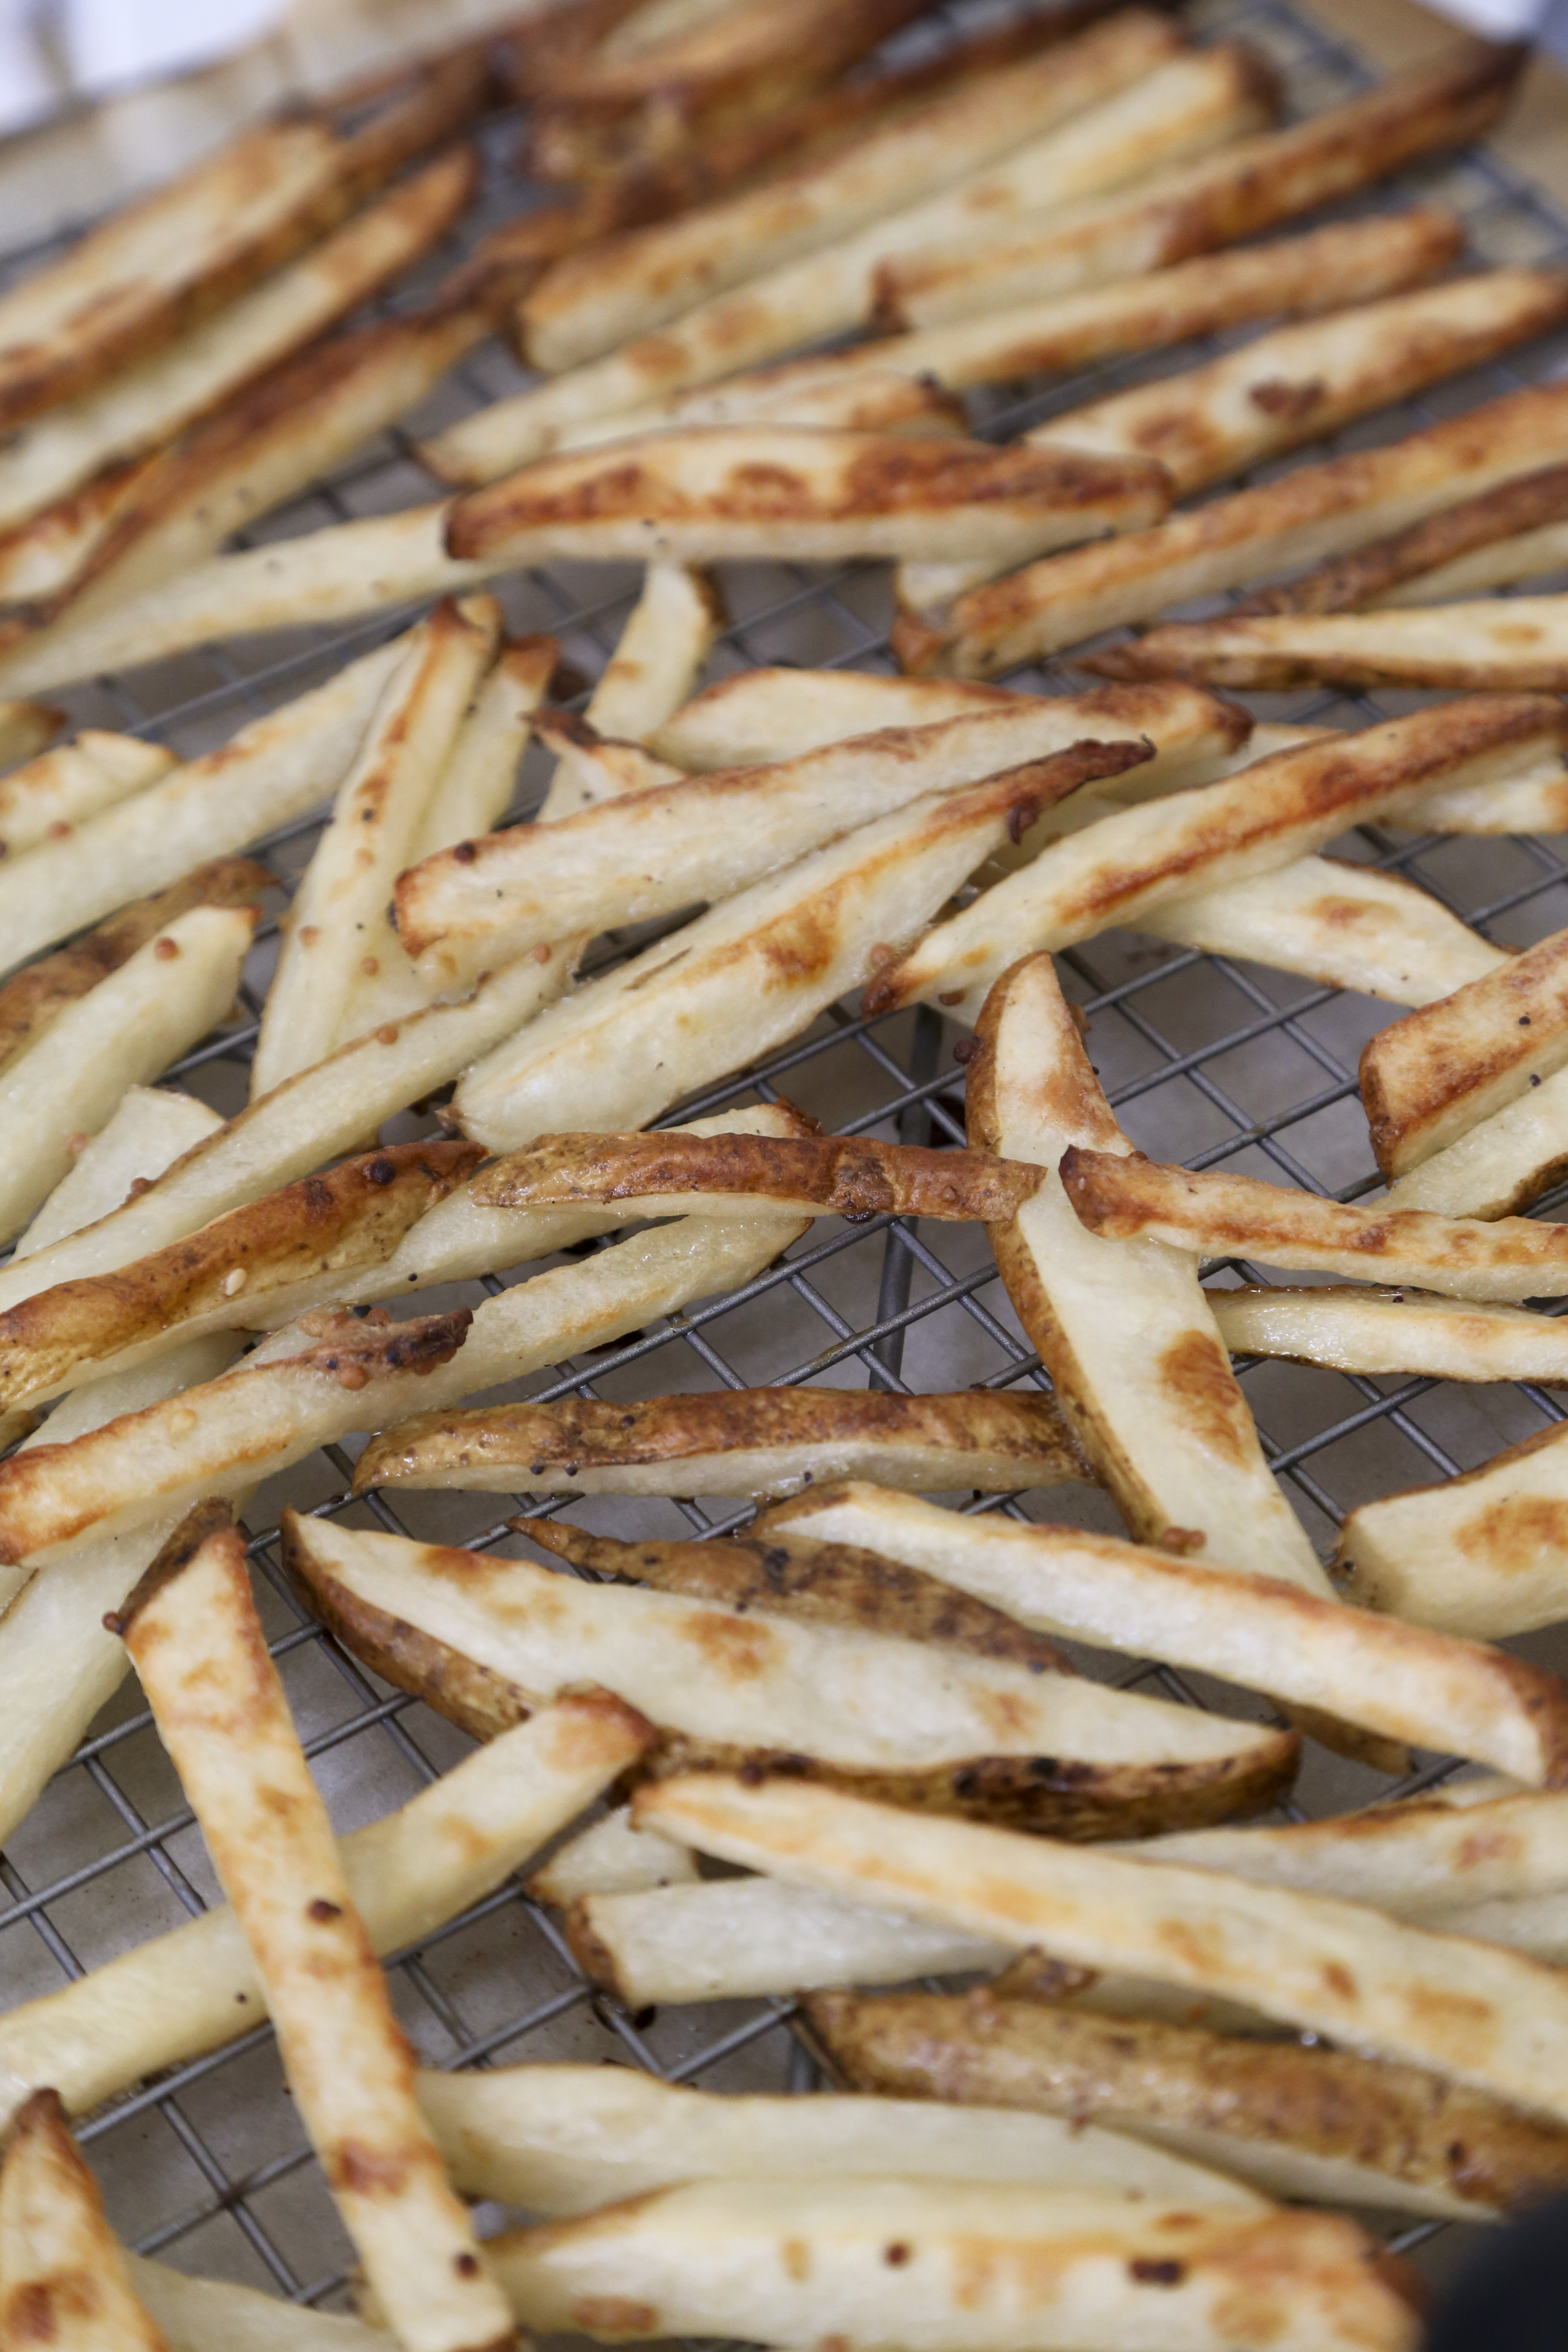
Toss with 2 tbsp of olive oil and 1 tbsp of Deli Dirt. Sprinkle with salt and lay on a cooling rack that is placed over a baking sheet.
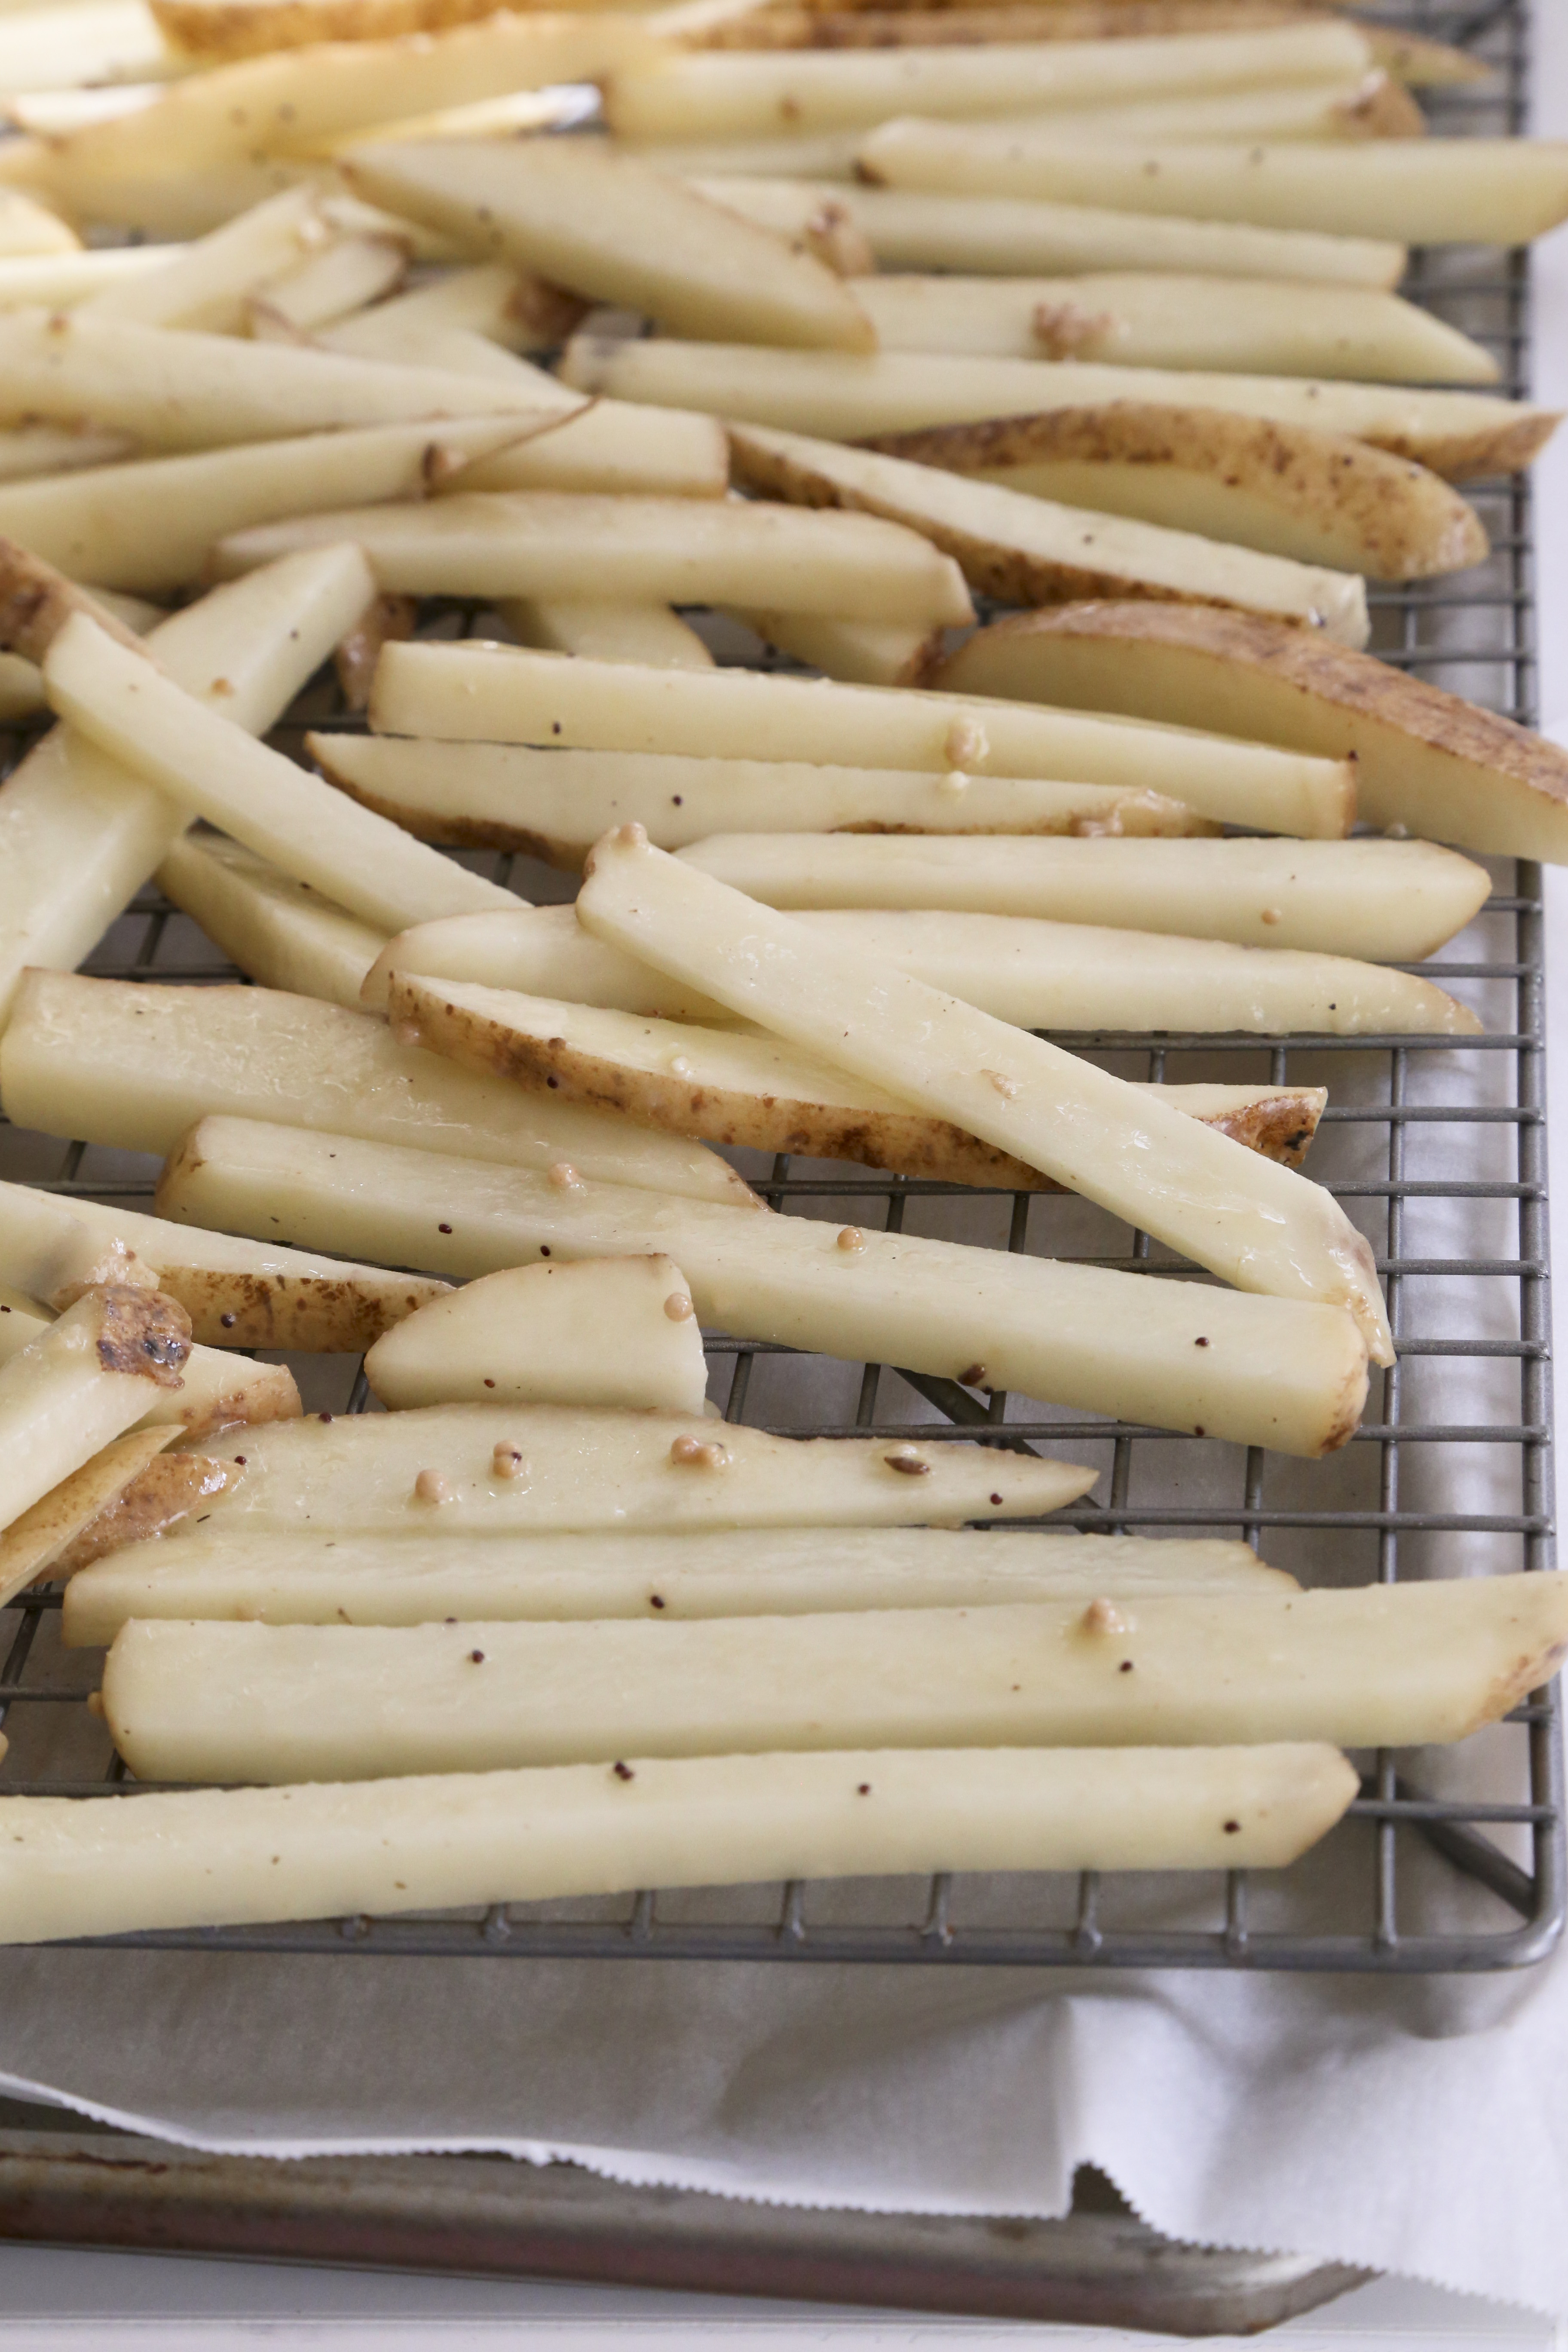
This will help your fries get crisp all around and keep the bottoms from burning. Bake 30-40 minutes or until fries are golden and crispy (start checking them after about 30 minutes, since everyone’s oven is different and you might have cut yours thinner than mine). While your fries bake up, have a dance party. This is not optional.
10 minutes before your fries are ready to go (aka 20 or so minutes after you put them in the oven), brown your sausage in a pan and set aside. Then make your cheese sauce.
Melt butter in a sauce pan, add flour and stir together. Cook for 2 minutes or until golden. Stream in milk very slowly while whisking to break up any clumps that form. Once you’ve added all the milk and whisked smooth. Whisk in the mustard and cheese. Add salt and pepper to taste.
Now assemble. Lay some fries on a plate. Top with sauerkraut (you’ll note in the recipe I said 1/2-1 cup, because I love sauerkraut and ended up adding a ton more after I photographed, but if you don’t care for it as much, add less) and sausage, then drizzle with cheese sauce. Serve immediately.
%3A%20Baked%20Fries%20with%20Sauerkraut%2C%20Sausage%20and%20Muenster%20Cheese%20Sauce%20%5BRecipe%5D)
This recipe will serve 2-4 people. Confession: Jesse and I devoured the entire thing. I don’t feel guilty.
%3A%20Baked%20Fries%20with%20Sauerkraut%2C%20Sausage%20and%20Muenster%20Cheese%20Sauce%20%5BRecipe%5D)
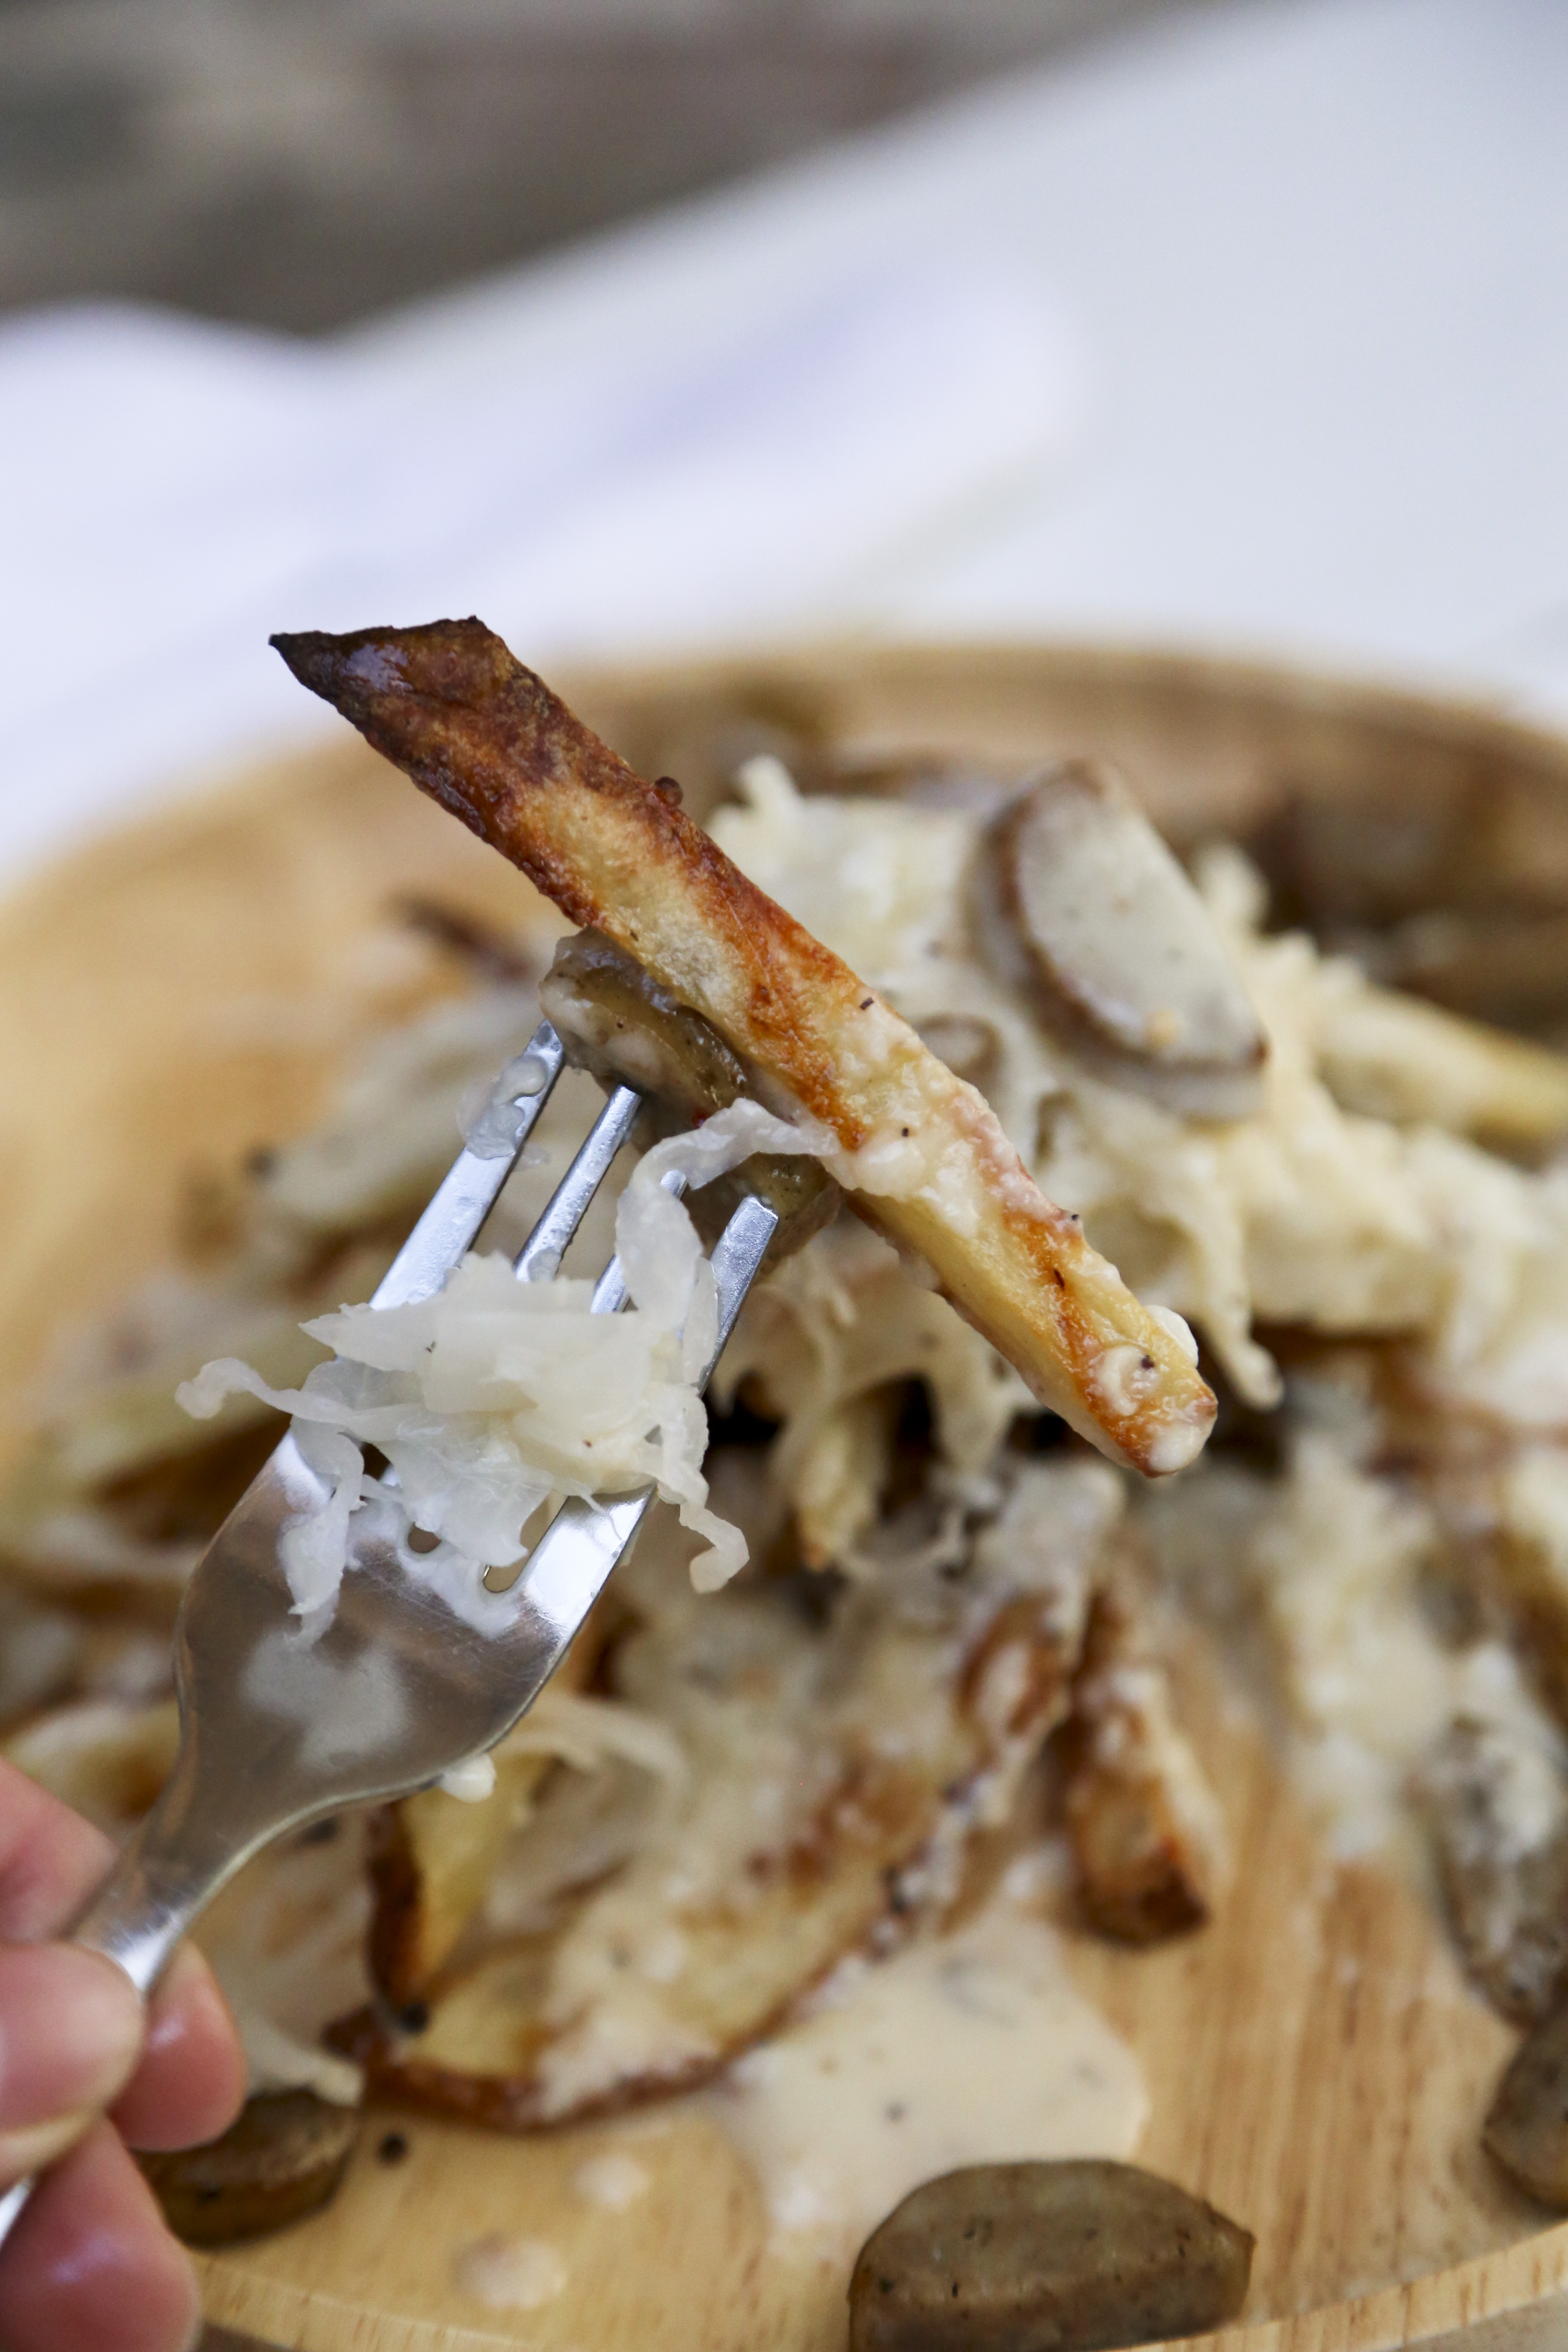
The perfect bite will include a bit of potato, sauerkraut and sausage. I promise it’s delicious. If you wanted to keep this low carb, I bet this would be delicious if you replaced the potatoes with spaghetti squash. Ok, I might have to try that ASAP.
I can’t wait to try more recipes with this awesome mustard. Don’t worry, grilled cheese is coming soon!
Do you love mustard? What’s your condiment of choice?


)
)
)
)


")


