Fall Cupcakes: Gingerbread Cupcakes with Caramel Filling and Pumpkin-Cream Cheese Frosting

You all remember the Fall Cake, right?

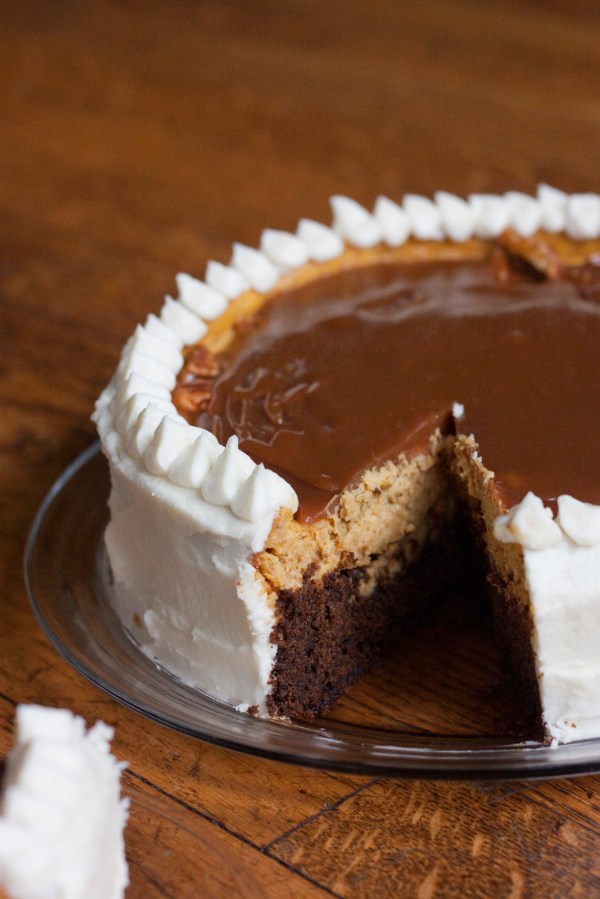
Inspired by my time spent working at a bakery… One layer of pumpkin cheesecake, another layer of gingerbread cake, caramel pecans in between and on top, then covered in vanilla buttercream.

That was it a little too intense for me to make that often.  So if you’re looking for the perfect fall dessert, that isn’t super complicated but will likely impress people, this is it.

Okay so it requires a lot of steps, but I promise it’s not that complicated and super delicious in the end.

Fall Cupcakes

for Gingerbread Cupcakes (adapted from Food Network’s Gingerbread cake)

1 cup canola oil
1 cup sugar
1 cup molasses
1/4-1/3 cup crystallized ginger, finely chopped (plus more for garnish)
2 eggs
3 cups flour
1 tbsp ground ginger
2 tsp ground cinnamon
1 tsp salt
1 tbsp baking soda
1 tsp baking powder
1 cup boiling water

For Caramel Filling:

1 cup sugar
4 tbsp butter
1/4 cup heavy cream
pinch of salt

For Pumpkin-Cream Cheese Icing

8 oz cream cheese, softened
4 tbsp butter, softened
4 tbsp pumpkin puree
1 lb powdered sugar (note you might need more depending on how sweet you like it)
dash of cinnamon
dash of ground ginger (or just use pumpkin pie spice)

Start my making the cupcakes.  Preheat oven to 350F.  Combine the sugar, oil, molasses and eggs in a large bowl.  Stir in crystallized ginger.  Add dry ingredients (flour, baking soda, baking powder, salt, spices), mix until almost combined.  Stir in boiling water.  Pour into cupcake pan lined with baking cups.  Fill only a little past half way.  This is sort of crucial.  If you over fill the pan, you get this:

Sad sunken in cupcake.  Not cute.

So fill them a little more than half way and bake them for about 15 minutes (mine took 14 mins) or until they pass the toothpick test.

Next make your caramel filling.  Heat sugar in a deep saucepan, until the sugar melts.  Once the sugar is a deep golden brown, take it off the heat and quickly stir in butter.  Once the butter is melted in there, add a pinch of salt and stream in the cream as you stir.  Keep stirring until smooth.  Set aside to cool.

At this point, your cupcakes and caramel need to cool completely.  In the meantime, go for a walk, rake some leaves (this really doesn’t apply to you if, like me, live in California…), call a friend, paint your nails, go to the gym, listen to Beyonce and dance a little bit, you get the idea…

Then come back and make the pumpkin-cream cheese icing.  It’s super easy, all you need is a hand or stand mixer.  Throw all the ingredients together and let the machine do the work.  Truth be told this frosting is delicious but not super stiff (that’s what she said).  You can add more powdered sugar if you’d like but I can only take so much sugar, it definitely hardens in the fridge but your piping might not be as beautiful as you’d like.  Oh well, it’s delicious.  Stick it in the fridge while you prep your cupcakes.

Now you can assemble!  Filling a cupcake with caramel is easy.  There are two ways to do it, but both ways involve putting your cooled caramel in a ziploc bag and cutting off the corner to create a make-shift piping bag.  Then you can either:

1. Take a knife and hole in the top and scoop some of the cupcake out.  Then take the “piping bag” and pipe some caramel into it.

2. Shove your finger into the top of each cupcake while they’re still warm.  Same effect.  It creates a hole.  I sorta like this method… some people might have an issue with it.  Obviously, please wash your hands before doing this 🙂 Then pipe in the caramel.

Once you’ve filled all your cupcakes with caramel.

Frost them as you’d like, either with a piping bag and tip or just a knife.  Both look lovely.  Either way garnish with some slices of crystallized ginger.

I swear these taste better the next day.  I don’t know what it is, but true story.  Would I lie to you?  Either way, we’re well into October and speeding into November.

That probably means you should give these cupcakes a try.

Almond-Oatmeal Chocolate Chip Cookies

Did you hear that chocolate may reduce women’s risk of stroke?  In case you really needed a reason to eat more chocolate, now you have one.

I’m only looking out for you, and because I love you so much and I don’t want you to have a stroke, I’m going to share some ways you can eat more chocolate.

Like this

Champagne Brownies

Spicy Chocolate Cupcakes

Double Chocolate Coconut Cookies

Chocolate Wine Cake

Oh and don’t forget these

Chocolate Cupcakes with Caramel Filling, Cream Cheese Frosting and Sea Salt Candied Walnuts

And most recently this:

Almond-Oatmeal Chocolate Chip Cookies

1/2 cup butter, softened
1/2 cup almond butter (I used maple almond butter)
1/2 cup white sugar
1/4 cup brown sugar, heaping
1 egg
1 cup flour
1 tsp baking soda
1/2 tsp salt
3/4 cup oats
3/4 cup chocolate chips (or more, if you’d like)

Preheat oven to 350F.

Cream together butter, almond butter, and sugars.  Beat in egg.  Add dry ingredients (except oats) and blend together.  Fold in oats and chocolate chips.

Place balls of dough on a parchment paper-lined baking sheet.  Bake for 10-15 minutes depending on your oven, or until golden on the edges.  The center will be slightly undercooked but don’t forget they keep cooking even after you take them out of the oven, not to mention a slightly undercooked center is delicious.

I’ll be honest, these were amazing because of the texture.  Although I sort of wish I had used PB instead of almond butter, or maybe added some almond extract in there, and coconut.  Yes, coconut would have been divine. 

But really, the chocolate will suffice, after all that’s all that really matters right now.

So be healthy and go make some Almond-Oatmeal Chocolate Chip Cookies and eat a few handfuls of chocolate chips while you’re at it.

Chocolate Cupcakes with Caramel Filling, Cream Cheese Frosting and Sea Salt Candied Walnuts

Did you see that title?  Yeah, it’s intense.

I have a little bit of a confession though.  I wasn’t going to blog about these.  Not because they aren’t good.  No, no.  They are the most amazing things ever.  But because I wasn’t happy with the photos.  You see, prior to my full time employment, I had time to bake in the morning and take photos in daylight.  Now that I work all day, baking happens at night (unless it’s the weekend of course).

In case you’re not really into taking pictures… pictures look better when taken in natural light.  Truth. I was even tempted to make these again this morning just so I could take pretty pictures in the sunlight! But in the end, laziness (or health consciousness?) prevailed.

That said, nothing is going to change the fact that these are amazing.

Not even a mediocre pictures.

Next time you have a gathering or just really need something sweet, please make these.  They’re wonderful.

Chocolate Cupcakes with Caramel Filling, Cheese Cheese Frosting and Sea Salt Candied Walnuts

1 recipe for your favorite chocolate cupcakes (I like Hershey’s Perfectly Chocolate Cake)
1 cup sugar
4 tbsp butter
1/4 cup heavy cream
2 (8 oz) packages cream cheese, softened
2 sticks of butter, softened
Few cups of powdered sugar
1 tsp vanilla extract
1 cup chopped walnuts
1/4 sugar
1 tsp coarse sea salt

Bake cupcakes and allow to cool completely.  While they are baking, you can make the caramel filling.  Place sugar in a deep saucepan on medium heat.  Allow the sugar to melt (about 10 minutes), stir occasionally until the sugar is a golden brown color.  Remove from heat and immediately stir in butter.  Once butter is mixed in, stream in cream while you stir.  Stir until all combined and smooth.  Set aside to cool.  You can make this a day in advance if you like. Once the caramel is completely cooled, place into a ziploc bag (or a piping bag, if you’re fancy) and cut off one corner so you can pipe caramel.

Next, make the cream cheese frosting.  Using a stand or hand mixer, blend together cream cheese, butter, sugar and vanilla.  I say a few cups of powdered sugar because 1. I never measure and 2. you should use as much as is necessary to get the consistency and amount of sweetness you like.  I’m guessing I used about 6 cups?  Once your cream cheese frosting is ready, put it in the fridge to keep firm until you’re ready to use it.

Next prep the cupcakes.  Scoop out some of the cupcakes to make room for the caramel.  I use a small knife just to make a small hole on top then pull out some of the filling.  Pipe some caramel into the hole.  It doesn’t need to be a ton, but let’s be honest a lot is always delicious.

Now you can make the candied nuts.  First, lay out some wax paper so you’ll have somewhere to place the candied nuts.  This really is an essential first step.  Next in a pan, over medium heat, combine the walnuts and sugar, stir occasionally.  After a few minutes, the sugar will start to melt.  Stir to coat all the nuts.  Once they look golden and candy coated, remove from heat, sprinkle with salt, stir again and then spread them on the wax paper.  Be careful.  At this point they will be very hot.  Give them some time to cool, then go through and separate any pieces and stuck together.

Lastly, now you can finish assembling the cupcakes.  Frost them however you like.  My sister and I went through a different types of frosting styles with different tips, but in the end it doesn’t really matter, since it’ll be covered in delicious candied nuts.  So once you’ve frosted them, lay some salted, candied nuts on there.  Refrigerate so everything gets firmed up together.  Then serve!

(Note: This picture will be infinitely funnier if you’ve read this)

You might be wondering why I decided to bake in the middle of the week.  Well, I suppose it’s not that out of character for me, but I had a reason. It’s my favorite brother-in-law’s birthday.

Happy Birthday, Tim!!  I think he liked them 🙂

In fact, I think everyone that’s eaten them has liked them.  I’m pretty sure that means I might have to make these again.

There has to be another birthday coming up soon, not that I really need a reason to bake.

Have a great weekend!

Weekend of Brunch: Part One

This weekend was delicious.  I really can’t describe it any other way.  I went up to San Francisco and stayed with this fella…

my friend, Daniele.

He’s pretty.

You might remember him from World Cup Waffles where we woke up early made waffles and watched the World Cup.   Now he’s just being amazing in San Francisco.  So I visited, because few people in the world understand my love of food like this man does.  So the first stop on this weekend of fun was brunch, at the place called Plow.

It was quite possibly the most wonderfully amazing place ever.  We shared some millet corn bread muffins.

Austin was obviously intrigued.  It’s my new mission in life to recreate them.

I don’t know if I’ve ever told you this, but I’m a brunch enthusiast.  Eating out usually isn’t that exciting for me.  But brunch.  I have a special place in my heart for brunch. This brunch…

That was November in my mouth.  Daniele said it.  I agreed.

Basically everything was delicious.

After brunch, we decided moving around would probably be a good idea.  That meant moseying to a park and looking at dogs.  Because, well… that’s what we do.

I can pretty confidently say that this summed up the weekend: food, booze, public spaces, staring at dogs and babies, admiring gentlemen… in the least creepy way possible.  But wait there’s more!

Later, back at the ranch Daniele’s house, we might have made an apple crisp.  And I might have poured bourbon in it.  It might have been amazing.

Ok you should probably go try putting bourbon in your apple crisp.  It’ll revolutionize your life.

Well friends, stay tuned for part two.  Part two might be more exciting since right now I’m running on about 3 hours of sleep.

Goodnight!

Coconut Curry Stew and My New Love

Since moving, I had to start from scratch.

I bought furniture.  So now I have 1 bed, 1 nightstand, 1 table and 1 dresser.

I have 1 large plate, 1 small plate, 4 bowls, 2 cups, 1 mug, 1 old frying pan and this:

This is my new love.  It’s amazing.  Cast iron is every overly-domestic girl’s dream.

So when you have someone over for dinner and you only really have one plate (though luckily a few bowls) and one pot, start from scratch with fresh ingredients.  It’s easier than it sounds, I promise.

Wondering what to make?

Coconut Curry Stew, naturally.

It might wow your guest.  Who knows?  He might just be polite.  But either way, make this stew.  It’s easy, delicious, healthy, and requires minimal utensils without sacrificing flavor.

Coconut Curry Stew

2 tbsp olive oil
1 onion, diced
3 carrots, chopped
2 sweet potatoes, chopped into 1/2 inch pieces
1 jalapeno, seeded and chopped
1 red bell pepper, diced
1 can diced tomatoes
3 cloves of garlic, minced
3 cups vegetable broth
2 tbsp curry powder (or more or less depending on how you like it)
1 can light coconut milk
1 can garbanzo beans, drained and rinsed
salt and pepper to taste
1/4 cup chopped cilantro

Heat oil in a pot.  Add onions, carrots, sweet potatoes, bell pepper and jalapeno.  Cook, stirring occasionally, until onions are translucent.  Add garlic, cook for an additional minute, then add tomatoes.  Add broth and curry and simmer for about 20 minutes or until sweet potatoes soften.  Add coconut milk, garbanzo beans, salt and pepper.  Simmer for an additional 10 minutes.  Stir in cilantro and serve.

I served it with some sauteed kale.  I thought it was pretty tasty and super easy to make.

You can store left overs in a jar.  That’s how I roll.

Just keeping it real… or maybe I have no other storage containers…

Welcome to Orange County

Hi Friends,

I moved.  No, not my site.  Myself.  I am now a resident of Orange County, CA.

I won’t lie it feels weird.

Now I’m a big kid.  I’m not in school.  I have a job.  I bought furniture.

I’ve been super busy the past week unpacking, getting schooled by Ikea and eating salad at my sister’s house.

Don’t abandon me just yet.

New posts coming as soon as I’m settled in.

Anyone in Orange County want to be my friend?

Quick and Easy Pear Crisp

This pear crisp saved my dad’s life.

True story.

That cookies and cream ice cream from Thrifty sitting next to it…  That did nothing for him.

But the pear crisp? Bonafide hero.

Let me tell you why.

Last Sunday, I saw my dad about to serve himself some of this peachy, puddingy-looking dessert a family friend brought over.  I had seen it sitting in the fridge for a loooong time, uncovered, not looking too hot.  I get closer, I see that it’s gray.

Now, I’m all for consuming everything and not letting anything go to waste, but your peach dessert should not be gray, nor should it be fuzzy.   I made him throw it away.  I’m sure we can imagine what the results would have been if he consumed that…

But LUCKILY, this guy saved the day, and you can too.

Quick and Easy Pear Crisp

6-7 pears, sliced (you can leave the peel on)
1/2 cup sugar
1/2 tsp cinnamon
1/4 flour (or corn starch), for the filling
1 cup flour (for the topping)
1 cup brown sugar
1 cup oats
1/2 cup butter, softened

Pre-heat oven to 400F.

Combine sliced pears with sugar, cinnamon and 1/4 cup flour.  Put in a greased baking dish.

Make crumble topping by combining 1 cup flour, brown sugar, oats and butter.  Use your fingers break up the butter and combine it with the dry ingredients to make small clumps.

Sprinkle with crumble topping.  Bake 30-45 minutes or until the topping is golden brown and the pears are bubbling.

Serve warm with ice cream and thank goodness you won’t be calling the diarrhea hotline.

Pepian, a Traditional Guatemalan Dish

Today was election day in Guatemala.  I’m not a Guatemalan citizen and my parents left in 1979, but today turned out to be a super Guatemala day at Casa De Leon.

My cousin hung our Guatemala hammocks

and my aunt made Pepian.

Let me tell you about pepian.  It might be my favorite Guatemalan dish (even though I’m obsessed with black beans and plantains).  It’s basically meat and vegetables in a thick sauce made of pepitas and sesame seeds.  It has a distinct toasted taste that I can’t entirely describe because it doesn’t taste like anything else I’ve ever eaten.

But I will say, it’s absolutely delicious.  I’ll admit, it might be a bit of an acquired taste, but that’s probably because (like I said) it’s unlike anything else I’ve ever tasted.  I definitely recommend giving it a try, especially if you make a trip to Guatemala, you have to try it.  But if you’re making it at home and are worried about finding the ingredients here in the US, find a latino grocery store.  I can almost guarantee they’ll have everything you need.

Pepian

1/2 cup pepitas, heaping
1/3 cup sesame seeds
1 small piece chile pasa
1 small piece chile guaque
1 chile arbol
4 lbs pork ribs*
1 bunch of cilantro
2 onions
6 garlic cloves
6 roma tomatoes
1 red bell pepper
2 slices of toast, well toasted
2 carrots
3 guisquil (known as chayote in Mexican grocery stores)
2 cups green beans

*Note: This is also commonly made with chicken.  If you choose to use chicken, make sure you use drumsticks or thighs with bone-in.

Put the meat in the pressure cooker with the cilantro, 1 onion, 3 garlic cloves and salt.  Cover with water.  Cook 12-15 minutes, until meat is tender.  If you don’t have a pressure cooker you can boil it in a regular pot, it will just take longer.

In a pan, toast pepitas until golden.  Put them on a plate and set aside.  Next toast the sesame seeds and the three dried chiles (pasa, guaque and arbol),

until sesame seeds are a deep golden brown.

Now that your dry ingredients (pepitas, sesame seeds, dried chiles and toast) are all toasted, grill (or blacken?) the fresh ingredients.  In a pan, on medium heat (without any oil) grill the onion, garlic, tomatoes and red bell pepper.

The tomatoes will start to blacken and soften.  The tomatoes will fall apart, that’s okay! Turn off the heat.  By now, your meat should be fully cooked and tender.  Remove the cilantro and discard.  Now you need to blend together all the ingredients.

We do this in two batches since our blender is pretty small.  Using the liquid from the meat (we used all of it), blend together the toasted pepitas, sesame seeds, 3 chiles, bread, tomatoes, red pepper, garlic and onion (you can also blend in the garlic and onion used to cook the meat).  It will take a while to get smooth, about 2-3 minutes.   While it’s blending add salt to taste.  We actually don’t use salt, we use chicken bouillion. This is pretty common in Guatemalan cooking.

You can probably even find this brand at latin grocery stores. But in all honesty it’s probably healthier to just use salt.

Once you’ve blended all the ingredients together, you’ll get a thick sauce.  Pour the sauce and meat into a pot.

Add carrots and guisquil (chayote) and simmer until almost tender.  Lastly, add green beans (since those cook pretty quickly).  We were out of these so we didn’t add any vegetables, but I think it tastes a million times better with them.  If you’ve never tried guisquil/chayote.  Try it!  It’s delicious!  You can probably find it at any latin grocery store (it’ll probably be labelled as “chayote” since that’s what it’s called in Mexico).

Once the vegetables are cooked, serve over rice and enjoy!

Chocolate Pudding Trifle and My Other Pet Peeves

There are a few things that make me inexplicably mad.

I know they’re completely irrational, but they simply push my buttons.  I try my hardest to not get visibly angry but whenever they happen, my blood boils.  Let me share them with you, because well, that’s what I do on this blog.  I hope that doesn’t bug you.

1.  I hate, hate, hate being asked the same thing over and over again by the same person.

Example 1: My brother does it to bother me at this point.  In the past 3 weeks he’s asked me how to make peach pie filling at least 485892849552344 times.  I’m not exaggerating.  The answer is always the same (peaches, sugar, cinnamon, flour).

Example 2: When I made pies in jars for my friend’s wedding, my mom asked me pretty much everyday for a month when the wedding was, where and other details I didn’t know because I was neither in the wedding nor getting married.

2.  Making chocolate pudding trifle.

I get it.  It looks pretty, right?  But it infuriates me.

My mom asked me to make it twice in the past two weeks.  I don’t understand why she loves it so much.  It’s the first thing I ever learned how to make.  In fact, I got the recipe on the Food Network website when I was in high school.  The real recipe sounds nic,e because it comes from Magnolia Bakery but I made it with cool whip and that’s how my family loves it.

The reason this makes me so mad is dumb.  It’s really because I’m a brat.  This is quite possibly the easiest dessert to make.  It requires little-to-no baking abilities.  It’s basically just assembling a dessert.   That’s what makes me angry.  The crazy baker in me that wants to make huge elaborate, fancy desserts hates that this is made with broken chunks of chocolate cake (you can use box mix), crushed oreos, cool whip and instant chocolate pudding from a box.

I tried to redeem it by making the cake from scratch.  But I think I had a sour face the entire time I assembled the two that I made the past few weeks.

3. Wet bathroom floors.  I don’t even need to explain that one.

4.  When my cake gets stuck to the bottom of the cake pan.


Then it all falls to pieces and it doesn’t look pretty.  Lesson learned, always use parchment paper to line your cake pans.

5.  When I run out of corn starch while making a custard.   Runny custard really just means sweet, eggy milk.

Doesn’t that just sound gross?  Yeah.

So the moral of the story is don’t repeatedly ask me to make chocolate pudding trifle, and if I’m nice enough to rise above my distress and make it for you, you better pray that my cake doesn’t stick to the bottom of the pan (even though it doesn’t matter for that dish) and that I don’t run out of ingredients.

Instead, just pour me a glass of wine (or bourbon, whichever is on hand) and call it a night.

Wedding Favors: Pies in Jars

I have a strange love of weddings.  I’m not sure if it’s the romantic idea of being in love or the fact that they involve a big party, but regardless, I love weddings.

This weekend, I went to the wedding of two of the sweetest people I know.  Not only are they sugar, but they entrusted me with making their wedding favors.  Luckily, they didn’t hire me to be their wedding photographer (although that would have been fun and probably would have taken more pictures if that had been the case!), because I’m horrible and didn’t take a single picture of the bride and groom together.   I’m going to chalk that up to the fact that I was far away sitting in the middle of the row and I’m short.  I did manage to get a photo of the beautiful bride, Courtney.

Everything about their wedding was beautiful and totally fit their personalities.

I loved the flowers

and the cake

and the bridesmaids and their bouquets and dresses

and the table settings

oh my was I obsessed with the table settings…

But back to their wedding favors.

I made mini peach pies in jars.

The fabric on the jars matched each table setting.  Super cute idea!

Truth be told:  I had wayyyy too much fun making these.

I won’t lie, they’re not the quickest thing to make, but I think they added a great touch to this wedding.  I looked around as people sat at their tables and were pleasantly surprised to find a pie.  It made me smile and I think the bride and groom liked it too 🙂

Thanks Courtney and Andy for letting me contribute to your special day!  I wish you all the happiness in the world!

If you, or anyone you know, in the Los Angeles/Orange County area wants pies in jars at their wedding/baby shower/party/event, contact me at foodologie00@gmail.com!