Hi All. I have so many things to tell you about… OC Restaurant Week (that’s happening now!), my first attempt at mac and cheese, gnocchi making. So many things!
But sadly, I’m having technical difficulties with some photos and my internet just plain sucking most days. So while I get that sorted out, let’s talk about things I’ve been dying to make lately, but haven’t had a chance to…
Crepe Cake. I don’t even really like crepes. I just want to make tons of crepes, and layer them with some amazingly delicious fillings. I have so many ideas for a wonderful crepe cake. I hope it happens soon. If you’ve made one tell me if it’s amazing or not.
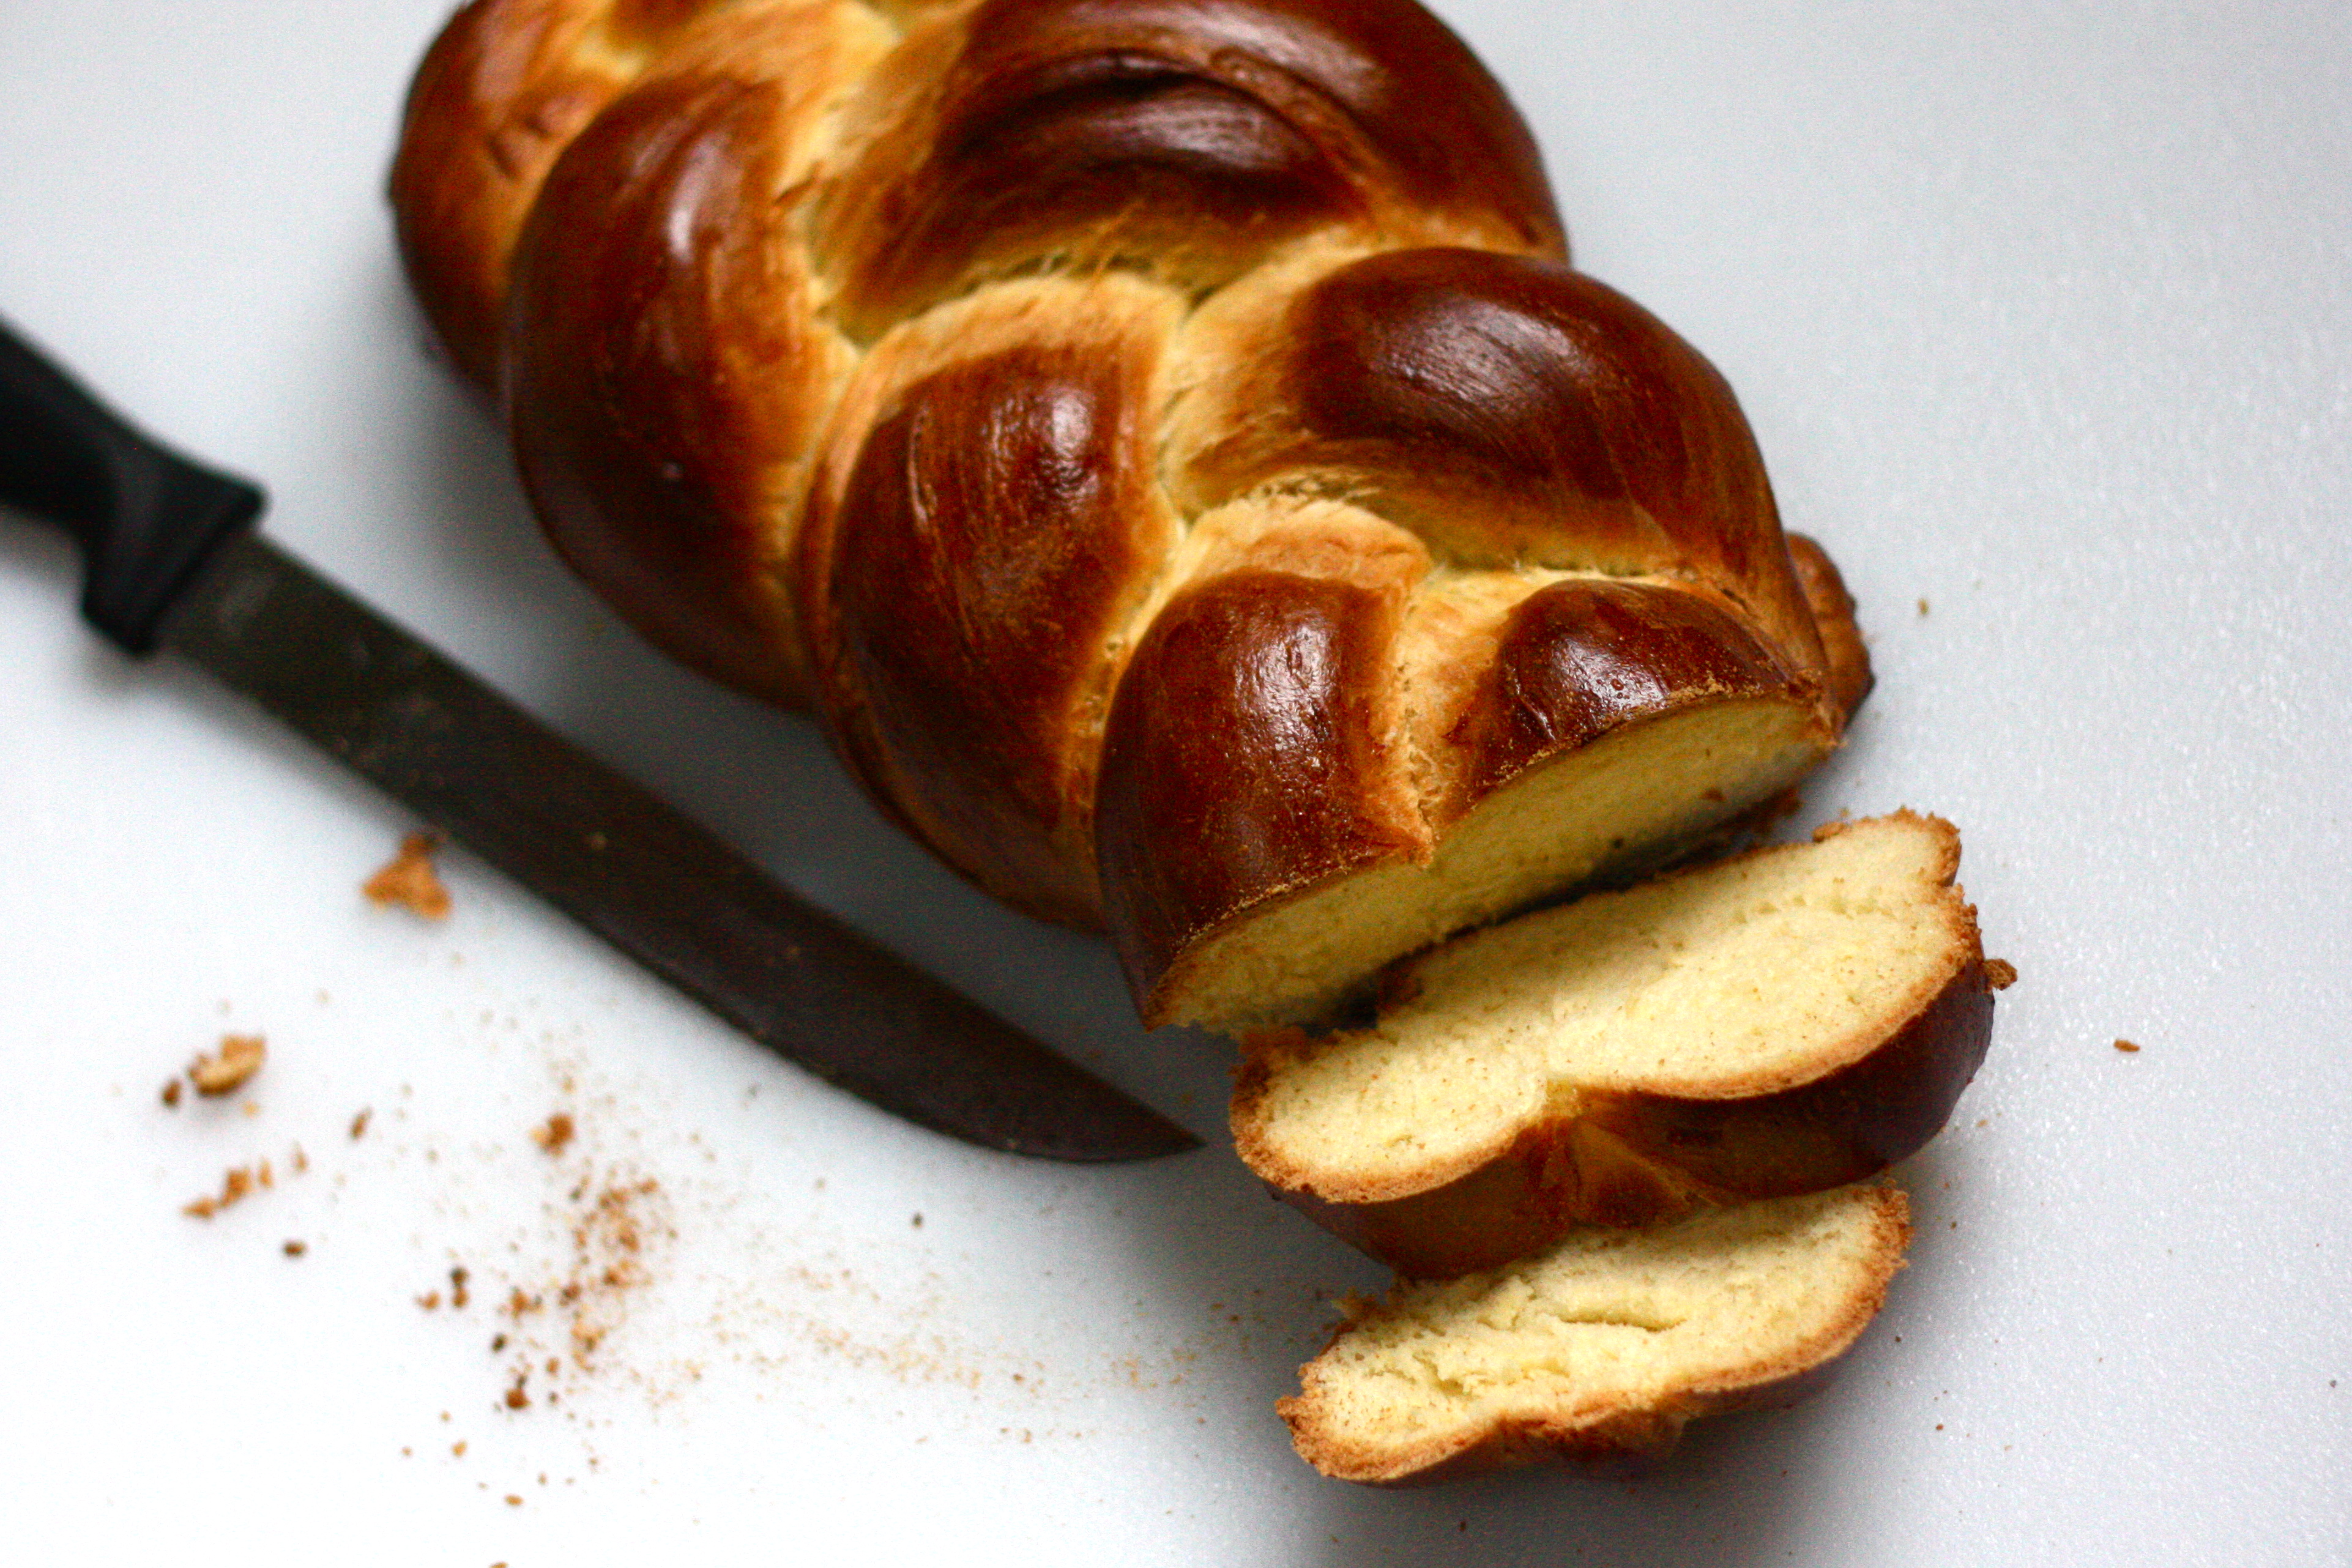
Bake Bread. I haven’t made bread in a really long time. In fact, I think the last bread I made was the Challah in the photo above. I’d love to make a good, hearty wheat bread, or maybe some pretzel rolls.
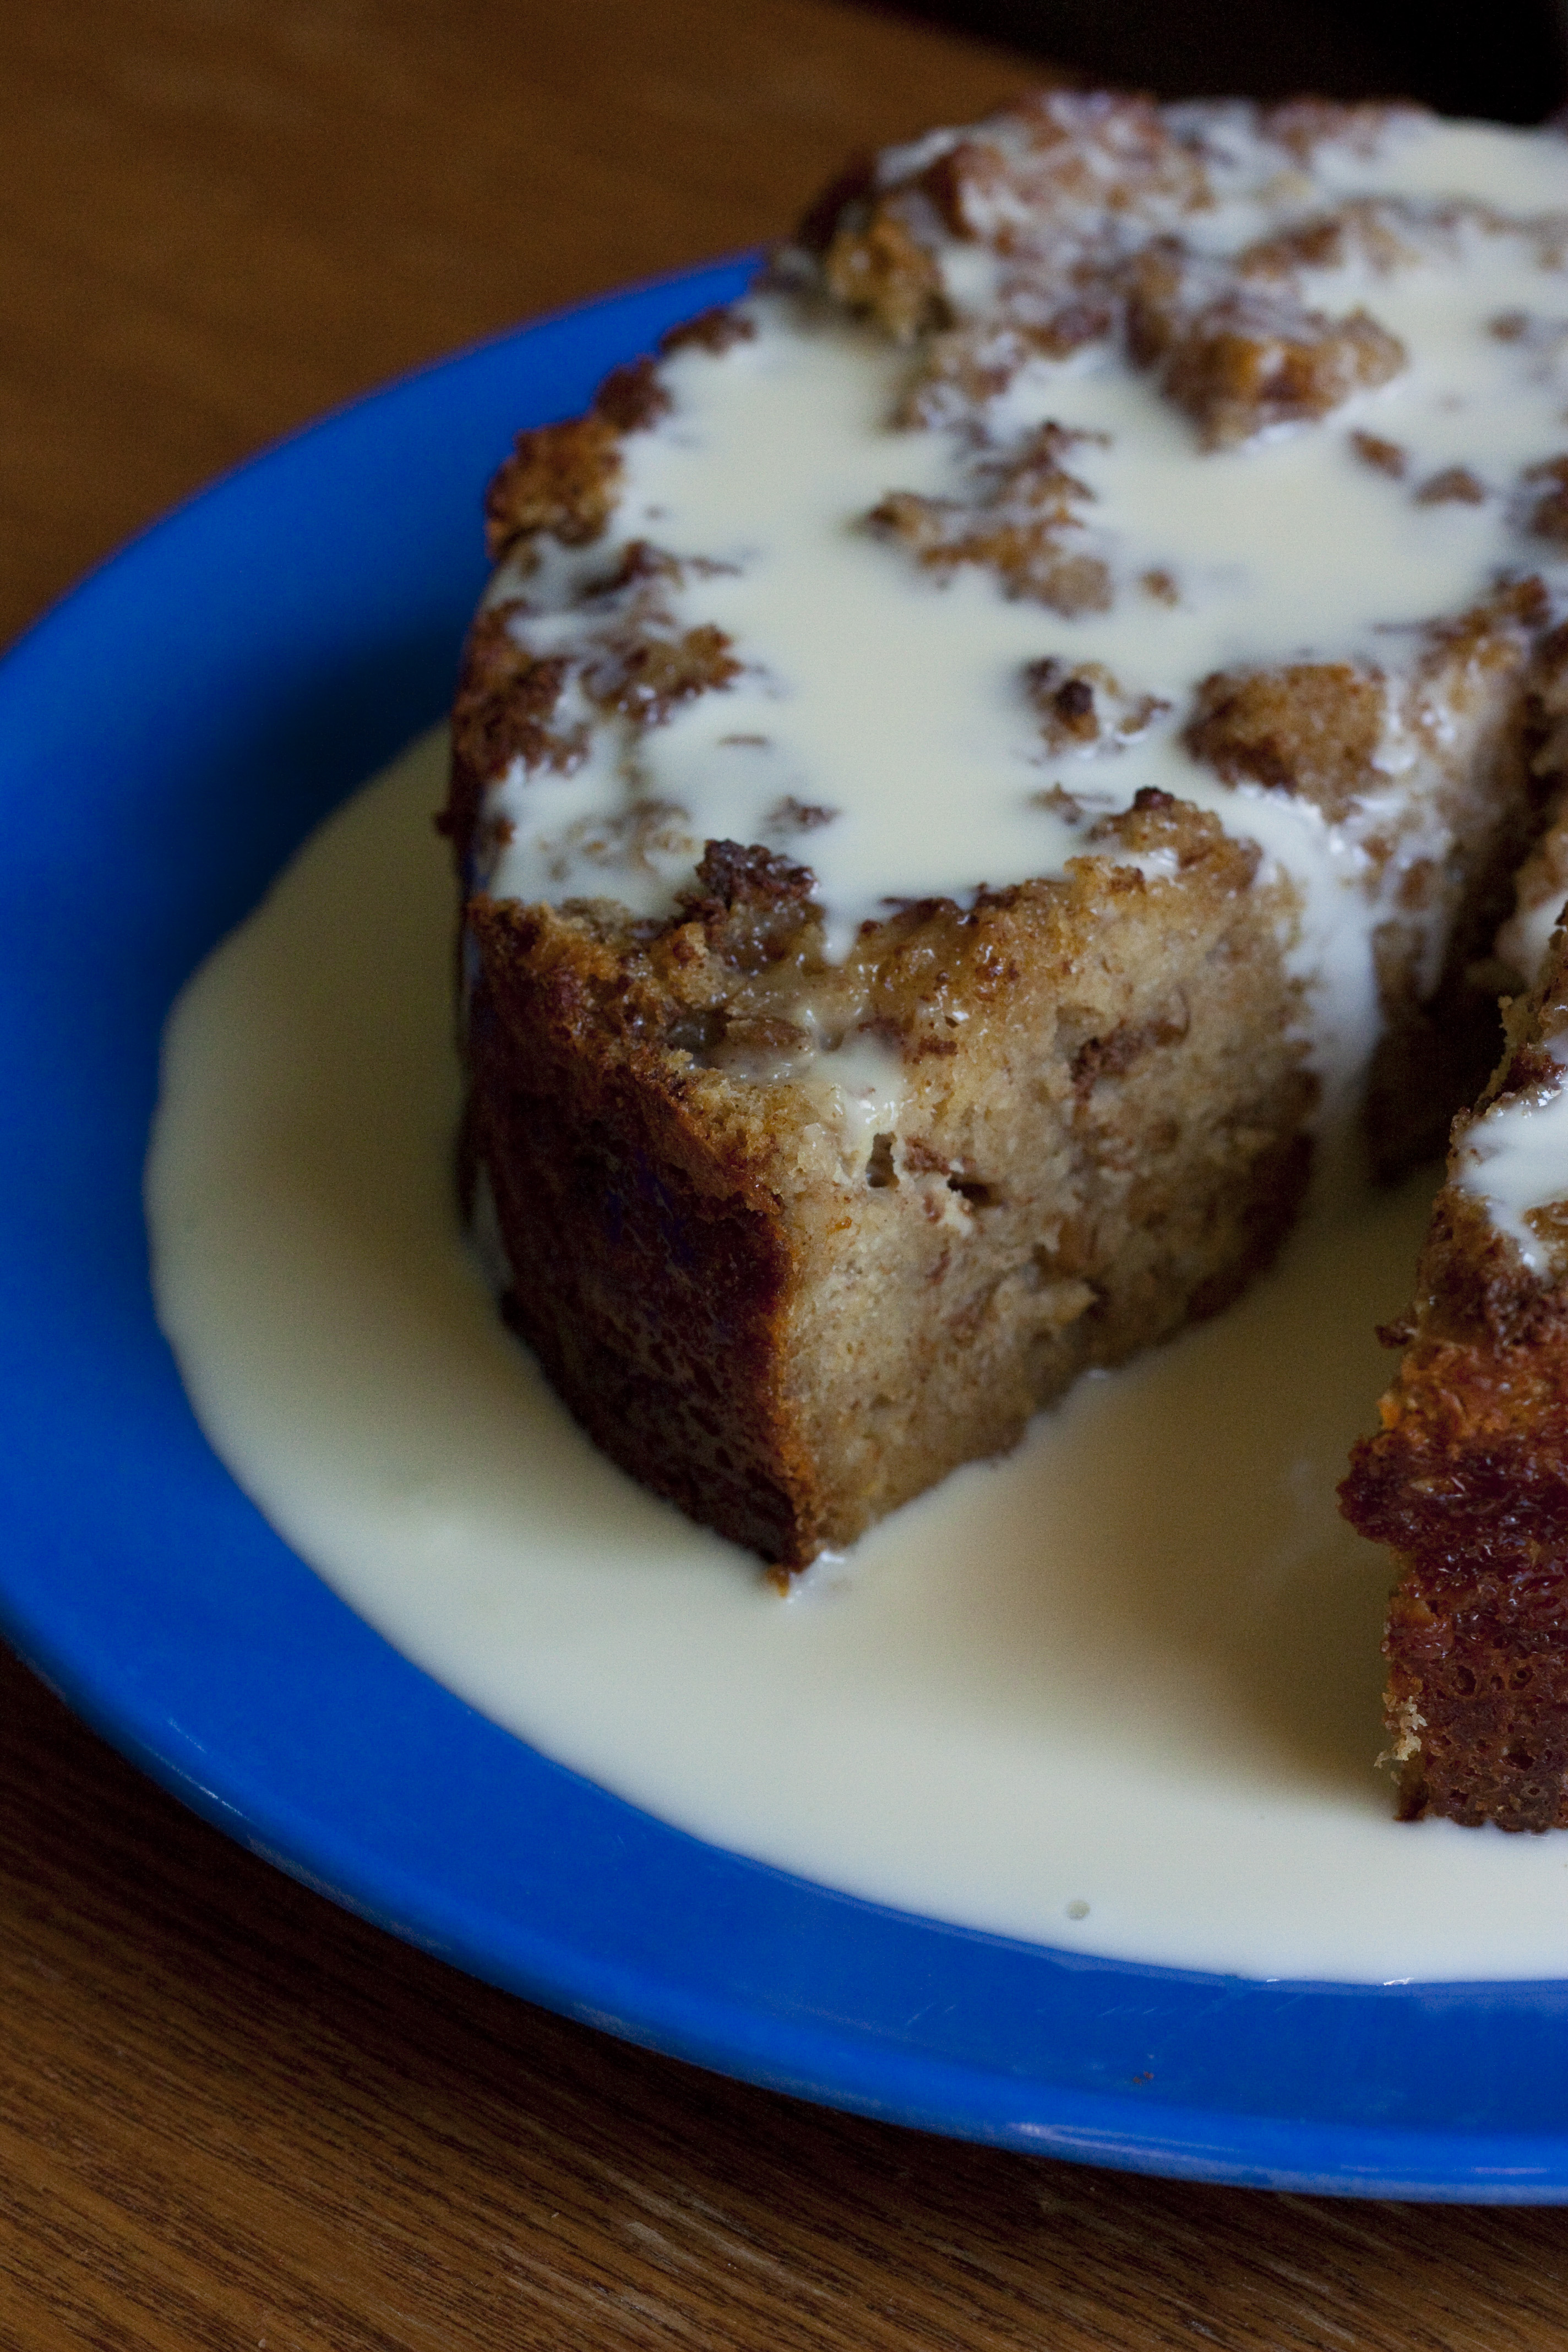
Along those lines… bread pudding. I made some not too long ago, but I didn’t try it and I hated my photos. That probably means I need to remake it. Sometimes I still reminisce about this Bourbon Bread Pudding I made a long time ago…
Memories.
I’m also really curious to experiment with new flours and healthier baking options. I remember I made that Bourbon Bread Pudding because I made some wheat berry bread that didn’t taste very good. Back then I used to experiment. What happened to that?
Well I’m off to take my Dad to the airport. Hope you’re having a fantastic weekend and making (and eating) lots of tasty things!
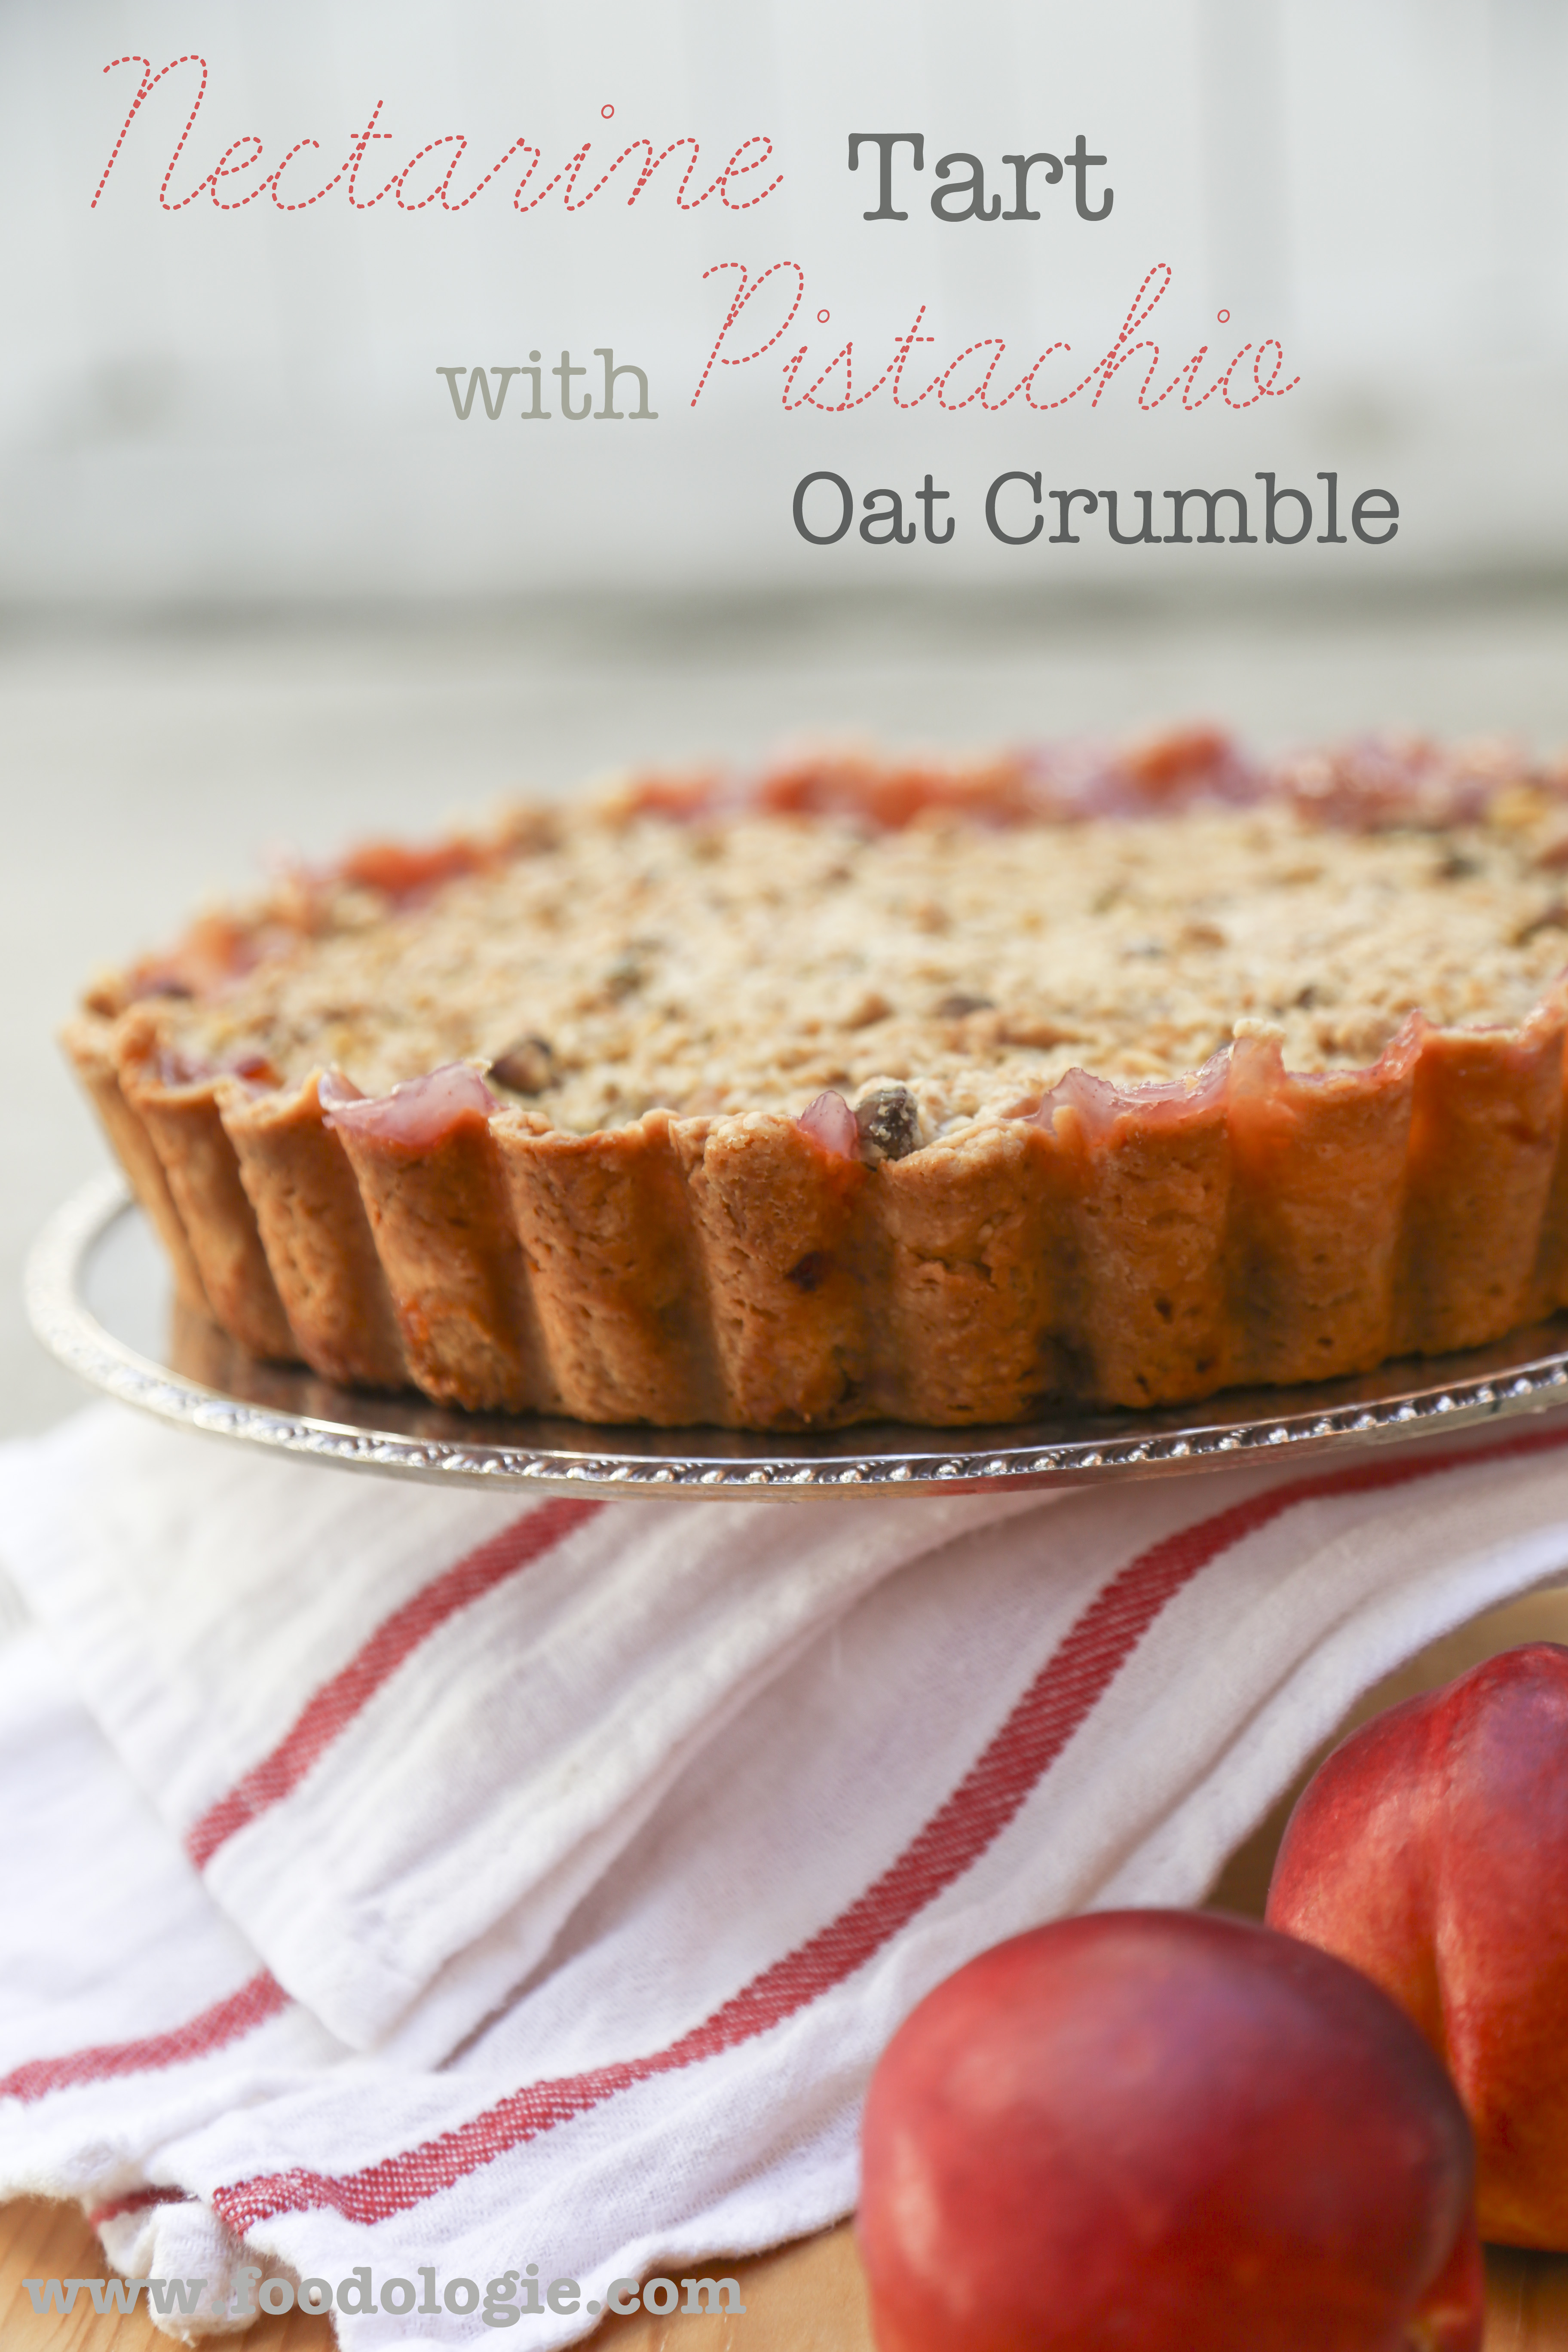
What’s the difference? Great question. There’s probably an official answer but honestly to me they’re the same thing. The only difference is the type of pan you make it in. But honestly, you can make any tart recipe into a pie and any pie recipe in to a tart. So whether you want to call this a pie or a tart, I’m ok with either.
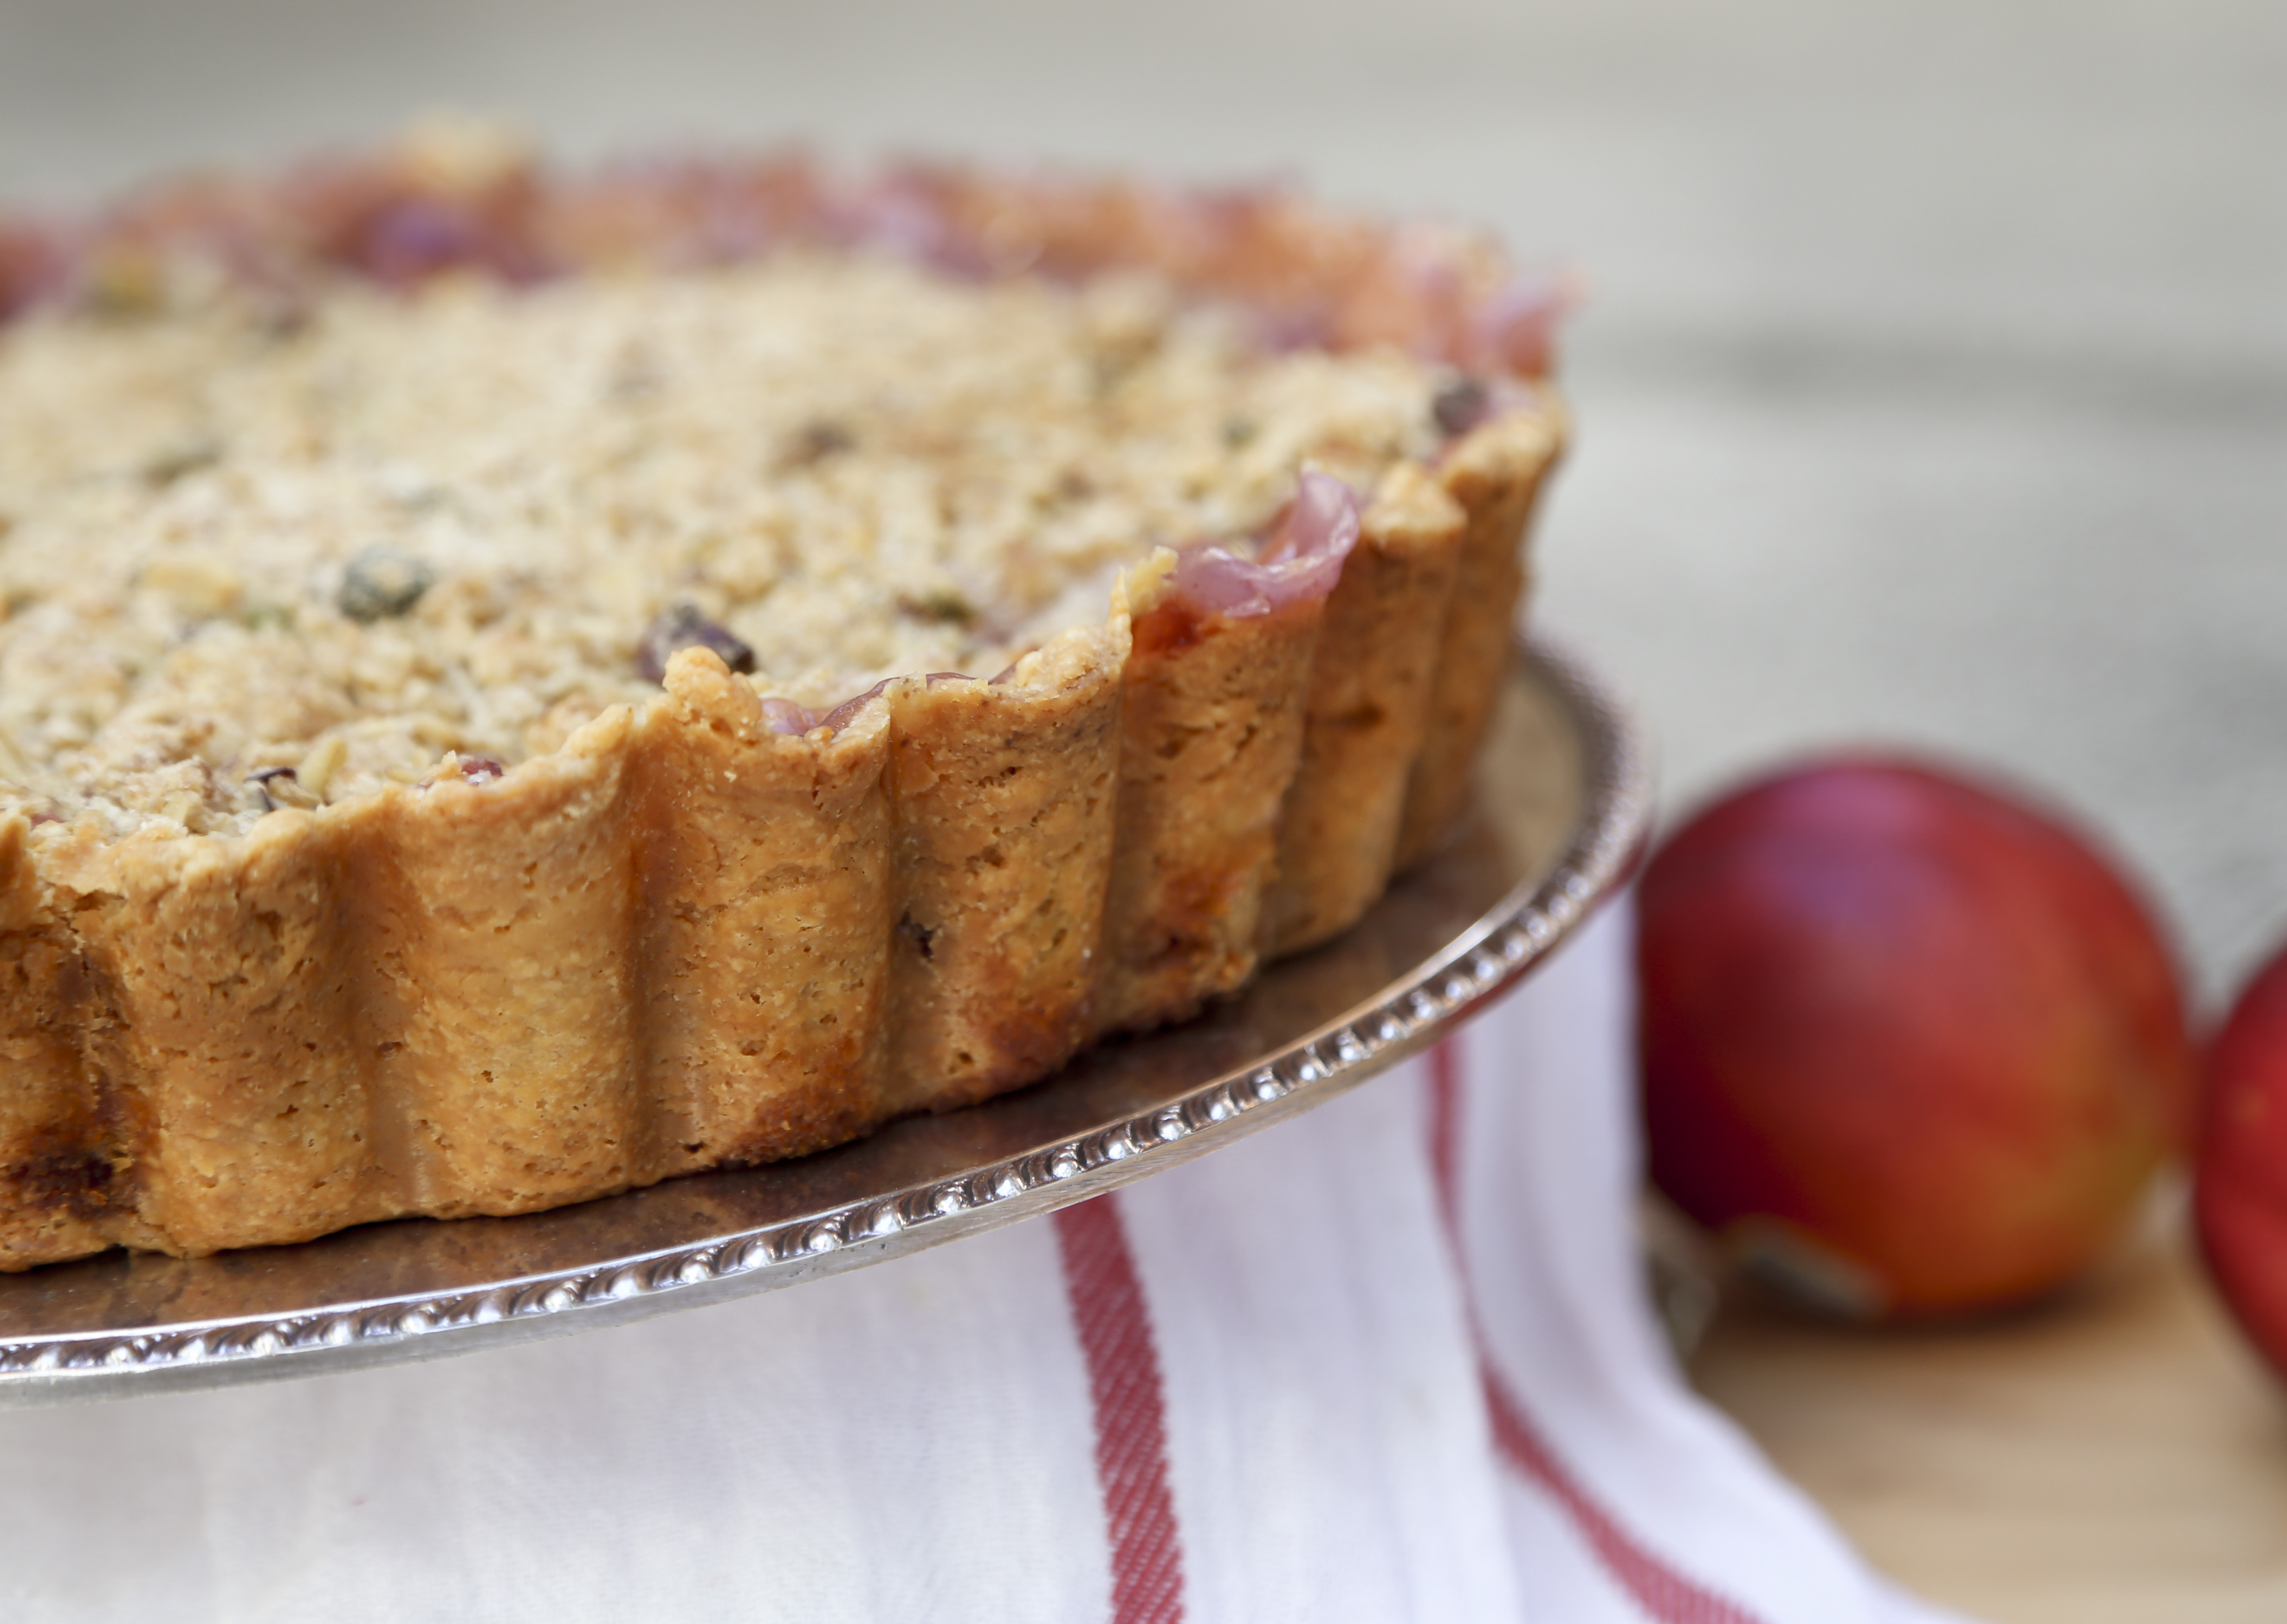
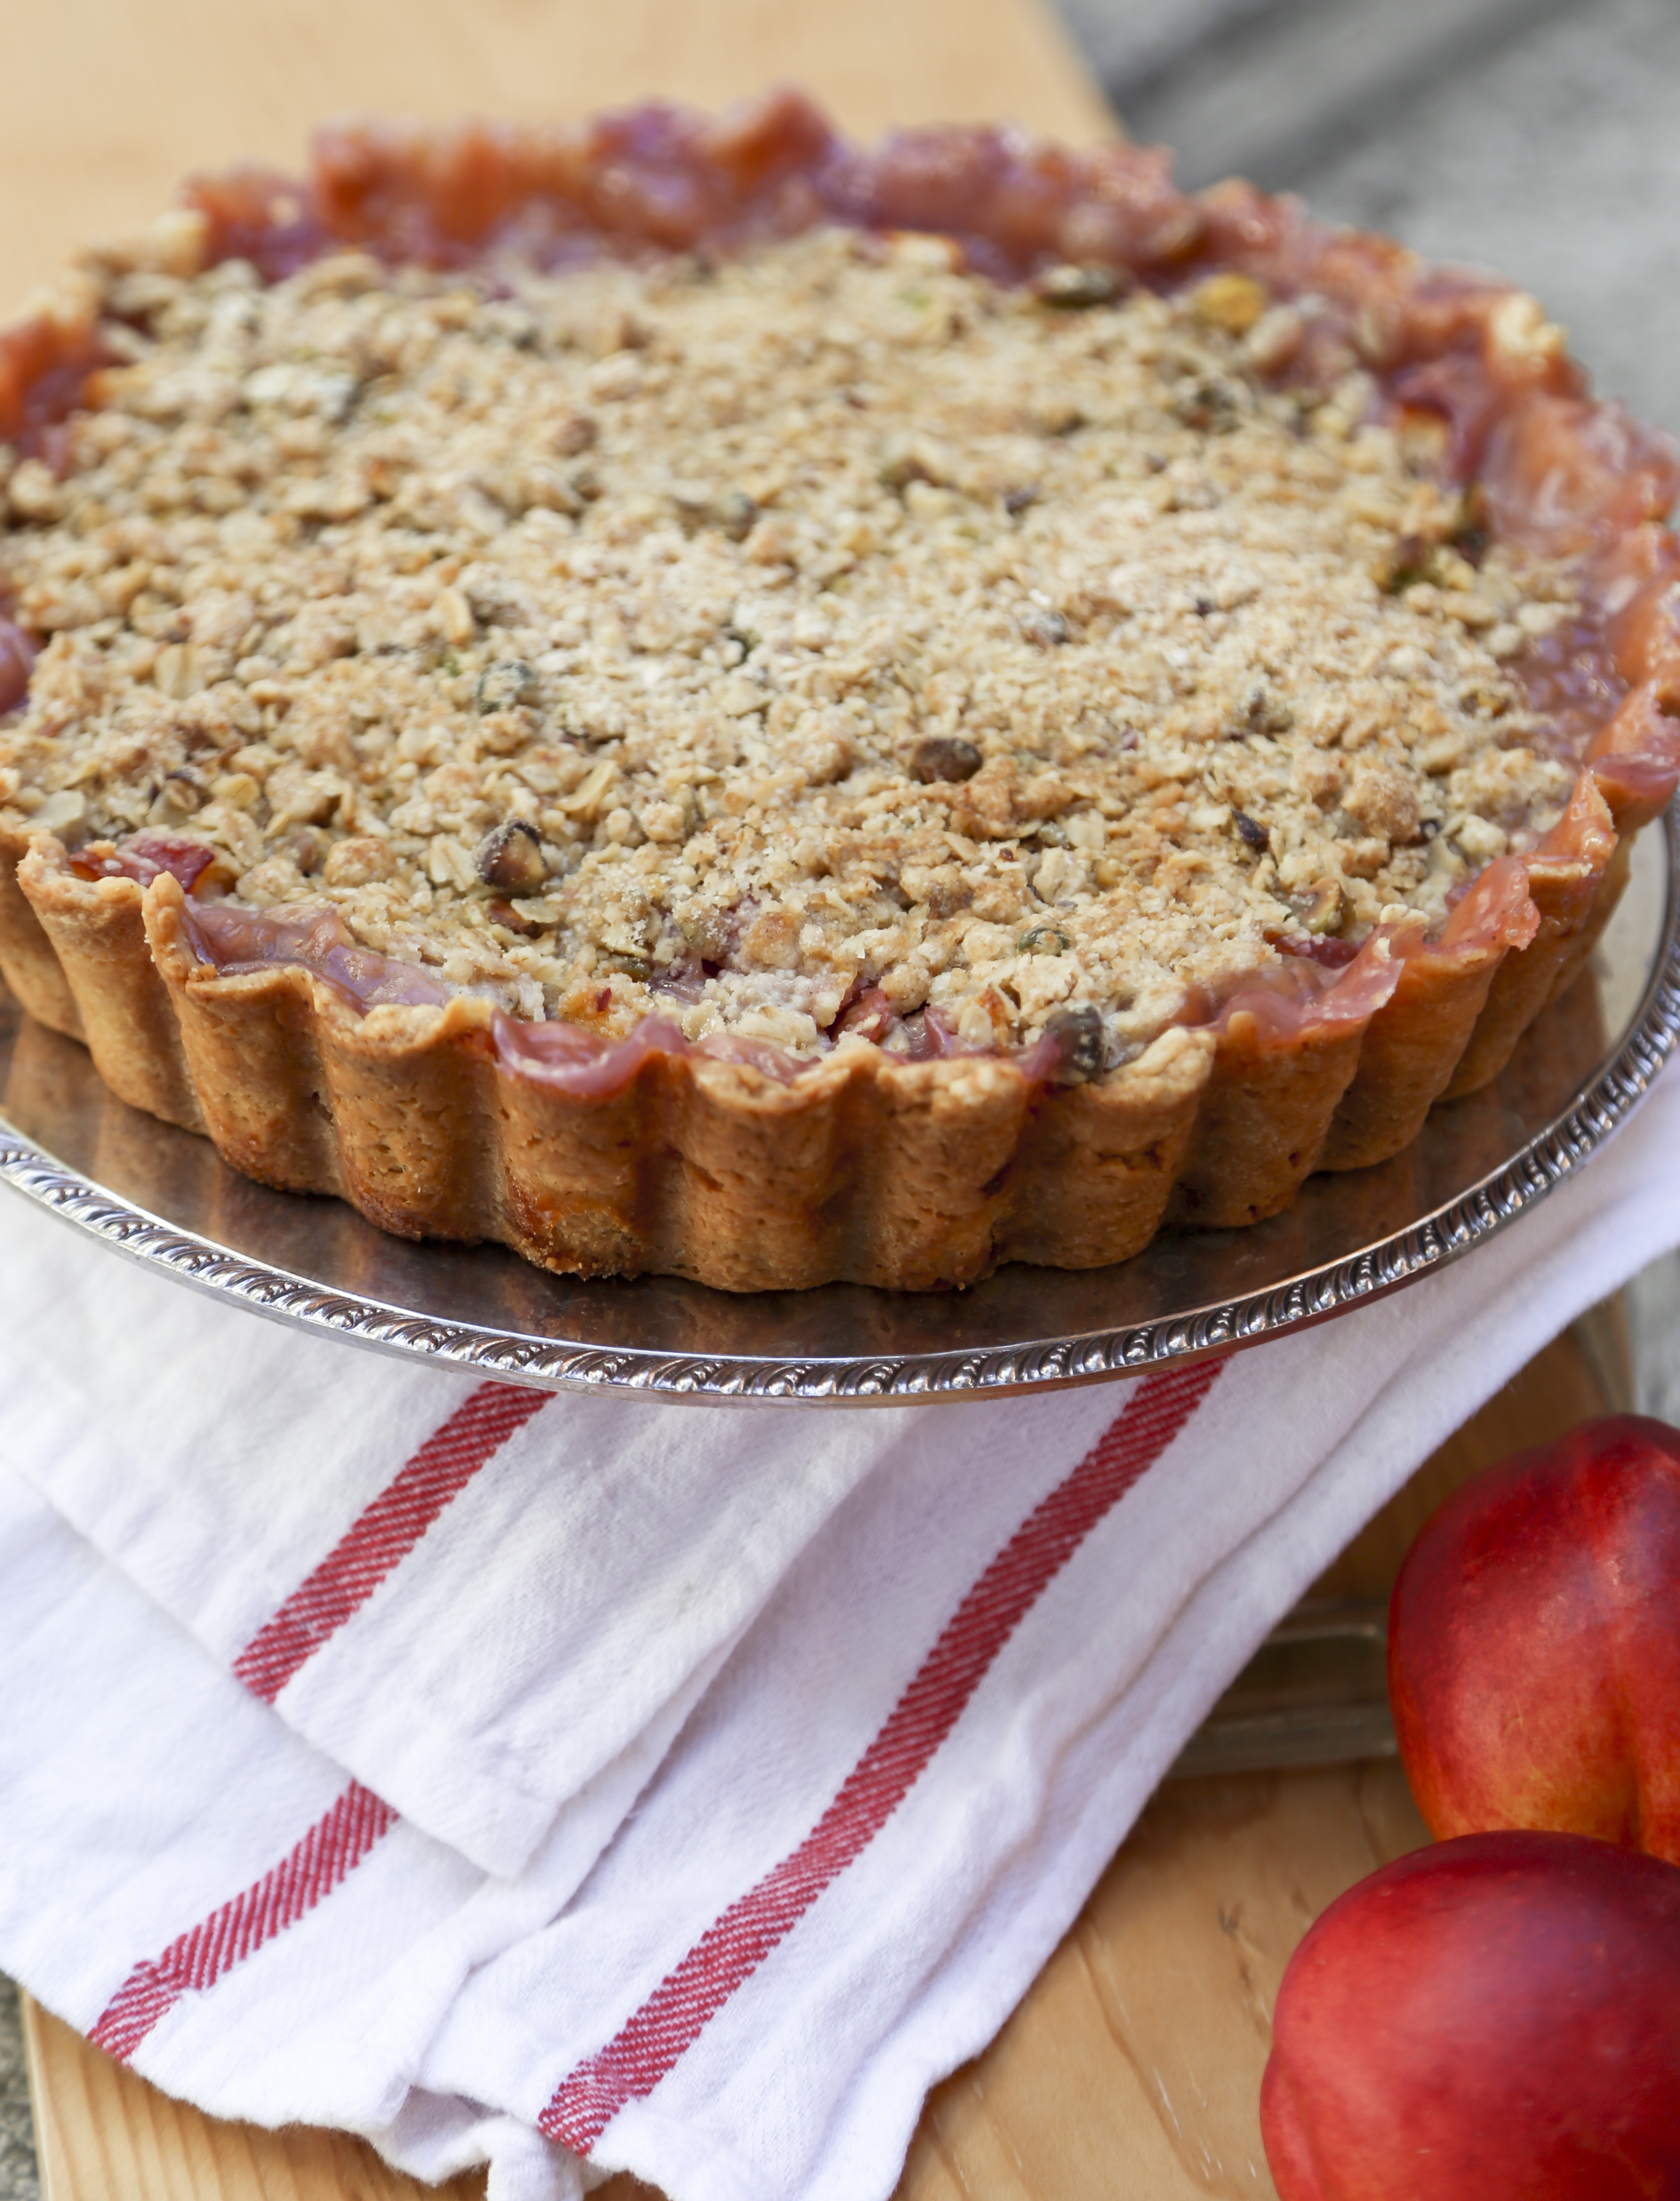
I took this to a potluck and I think I called it a pie. But now that I think about it, I made it in a tart pan so it should be called a tart. A tart sounds fancy, doesn’t it?
Pie sounds homey. Tart sounds regal. I’m ok with fancy business, but let’s be honest, I’m not a fan of expensive. My tart pan was $2.50 at the Good Will. I wanted to keep this dessert low budget too. I went to the store and looked for the cheapest fruit available. That’s my strategy because generally the cheapest fruit is in season.
Nectarines were $0.50/lb. So awesome. It took about $1.50 worth of fruit to make this tart. Beautiful and frugal. I’m into it.
Nectarine Tart with Pistachio Oat Crumble
For Crust:
175g All Purpose Flour (about 1 1/4 cup) 1 tbsp Sugar pinch of Salt 1 stick of Butter, cold 2 tbsp (maybe more) Ice Water
For Filling:
8 Nectarines, diced 1 1/4 cup Sugar 1/4 cup + 2 tbsp Flour 1/2 tsp Cinnamon (optional) 2 tbsp Rum (Optional)
For Topping:
1/2 cup Flour 1/3 cup Oats 1/4 cup Brown Sugar 2 tbsp White Sugar 1/4 Pistachios, chopped pinch of Salt 4 tbsp Butter (plus extra for placing on top) 1 tbsp Rum (optional)
Prepare pie crust by combing flour, sugar and salt. Using your fingers, break the butter into the flour mixture until it resembles very coarse crumbs (even pea sized is fine). Add ice water and bring it all together into a ball using your hands. Wrap in plastic wrap and refrigerate a few hours. You can make this up to two days in advance (or much longer and freeze it).
Once the dough has rested enough (a few hours or days), roll out and place into a 9 inch fluted tart pan (this will also work in a pie dish). Place in freezer while you make the filling and topping.
Pre-heat oven to 350F.
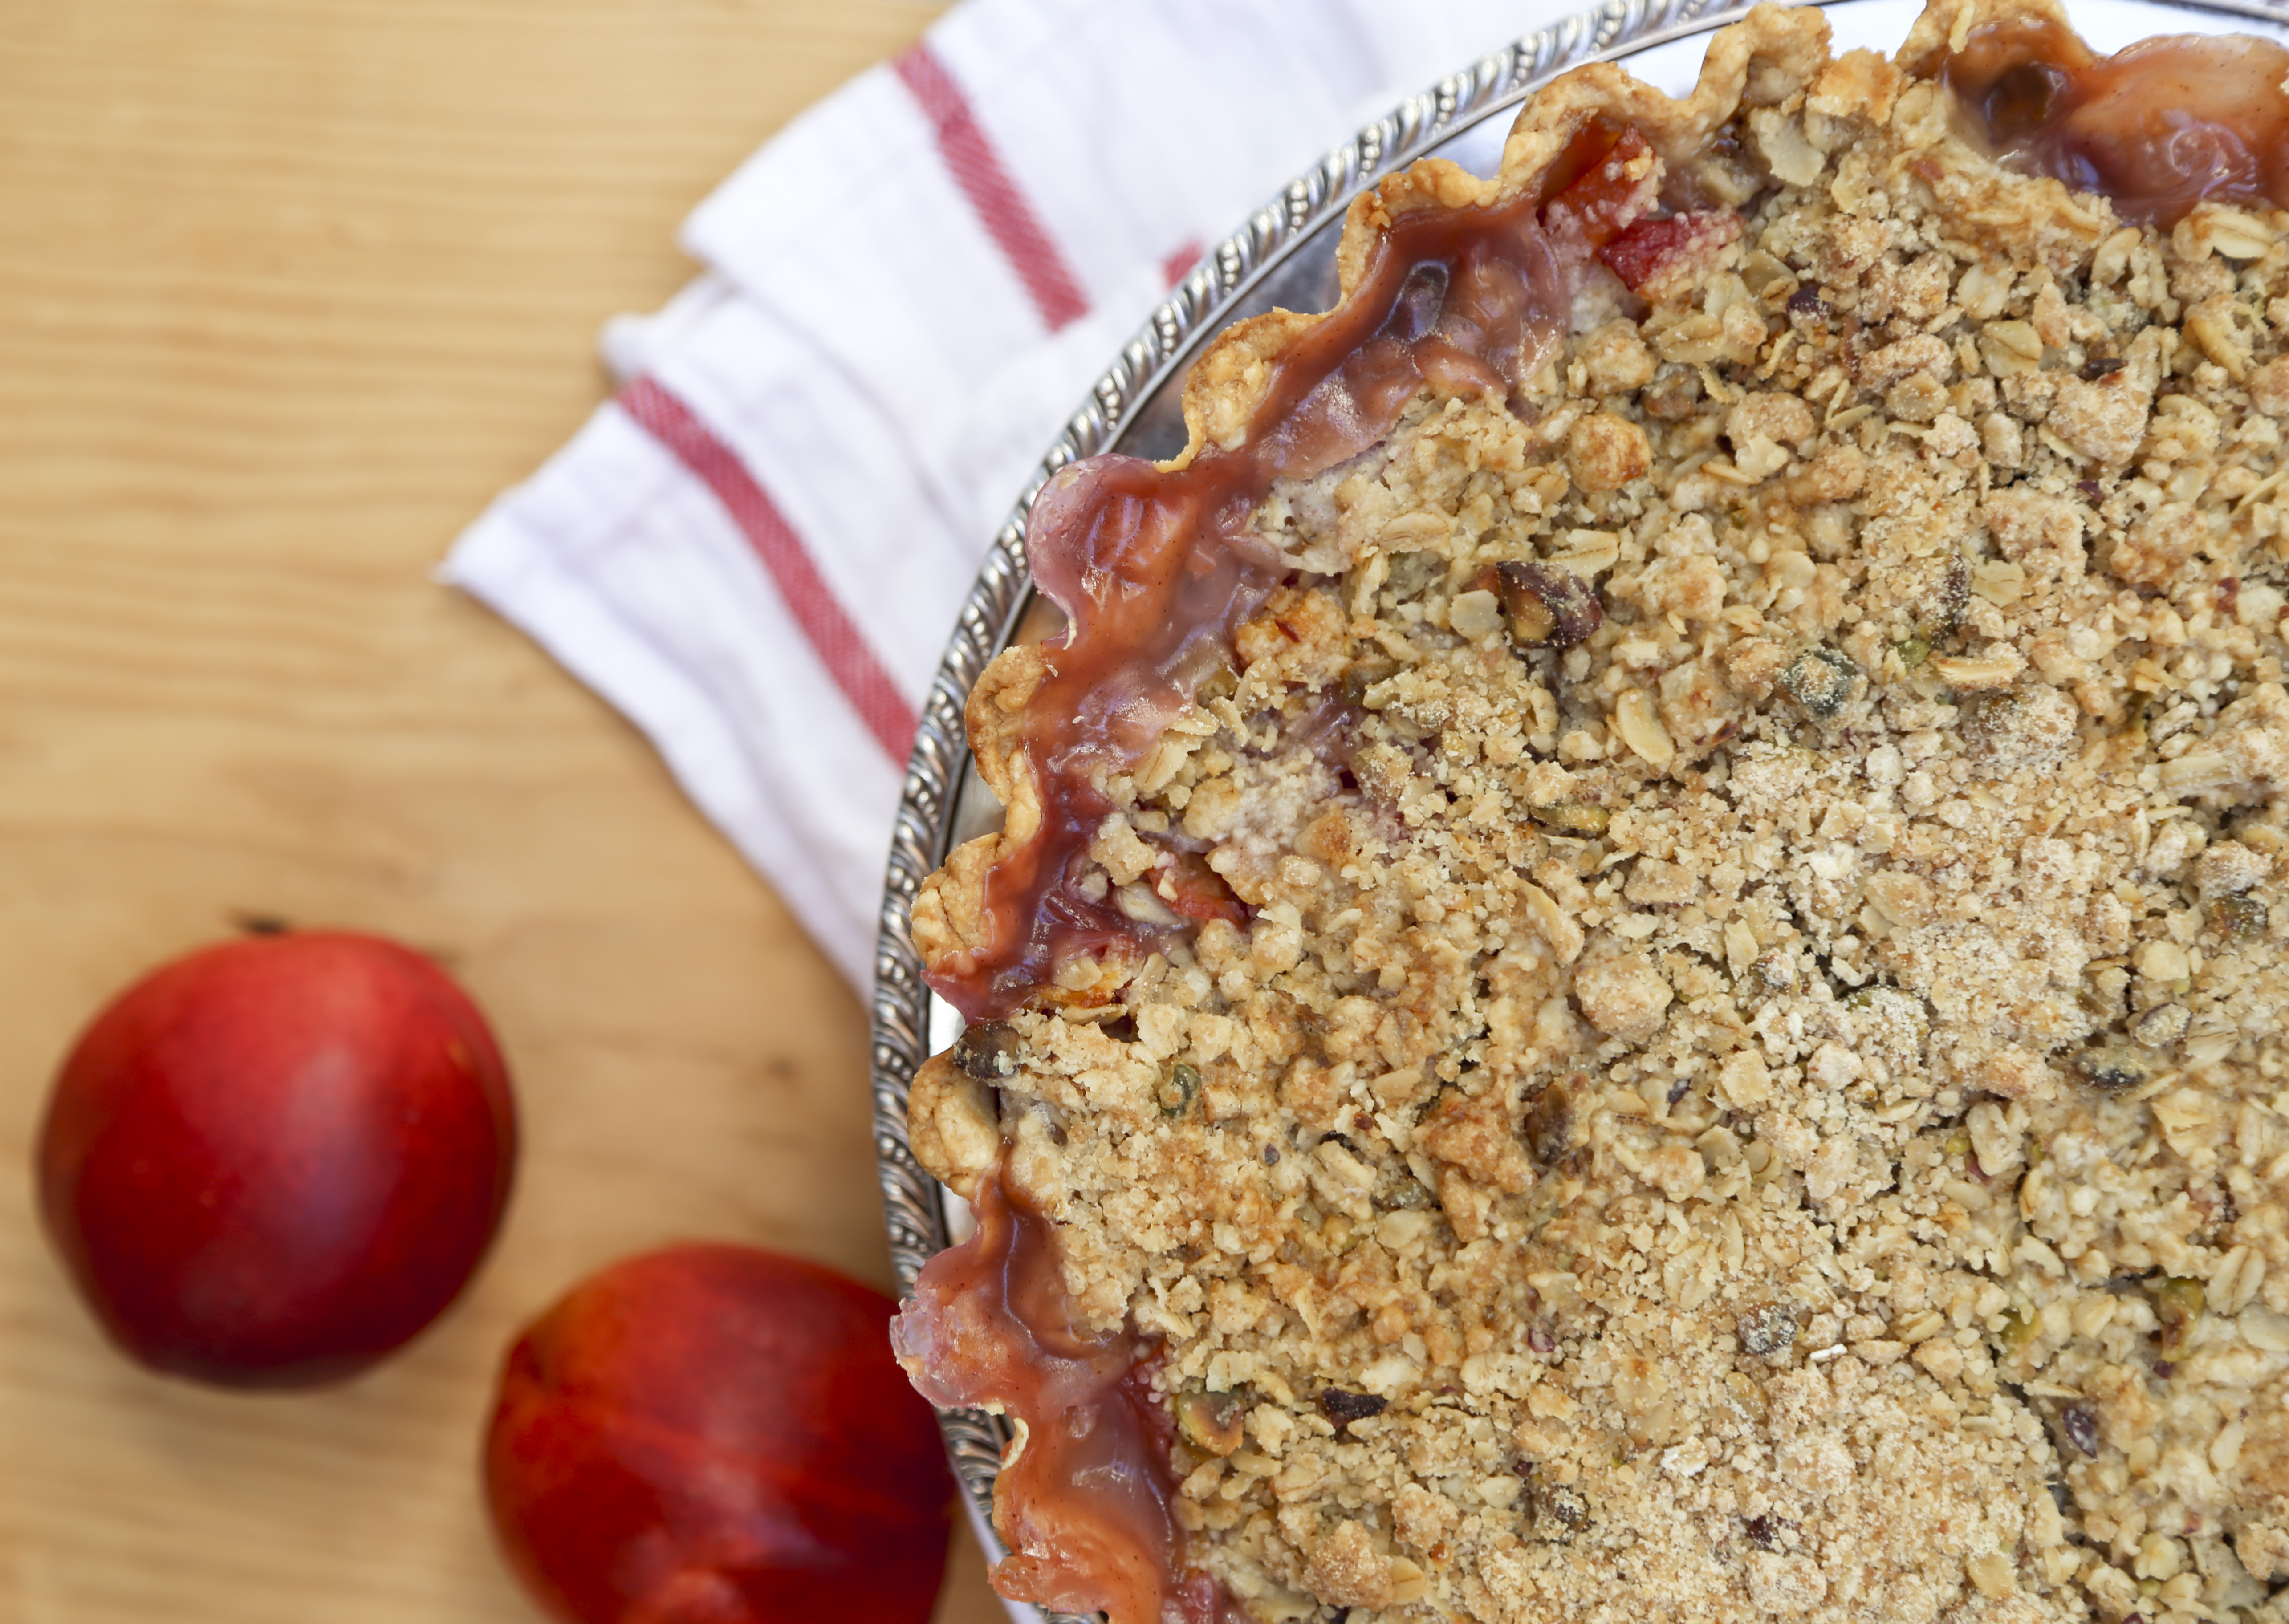
Dice nectarines (leave the skin on) and combine with sugar, flour, cinnamon and rum. Set aside and make the topping. In a bowl, combine ingredients for filling. Using your fingers, work ingredients together (feel free to add more pistachios if you’d like) until the texture of coarse crumbs.
Now assemble tart. Place nectarine filling into prepared tart pan. Top with crumble topping. Lay a few thin pats of butter over the top. Bake for about an hour and a half, or until filling is bubbling and top is golden.
Allow to cool completely. Serve and enjoy!
This was a big hit. I was a fan. I loved the crumble topping with pistachios in it, and let’s be honest… nectarines > peaches, but we never see nectarines in a pie/tart. I’m not sure why, but I’m glad I changed that. Also, everyone should leave the skin on the fruit. Just saying…
For some reason I’m thinking plum pie needs to happen sometime soon, because I never see plums in a pie.
What’s your favorite fruit pie? If you have an awesome recipe, share it in the comments!
What’s your go-to blog for recipes? We all have them, because these days… it’s so much easier to Google than to search through an array of cookbooks.
Me and half of America have Smitten Kitchen as our go-to blog for recipes. I haven’t made too many things, because most of the time I like inventing things but I’ve made a few and every one is great.
This past week I was dogsitting…
and had a massive zucchini from the garden to use. First I made an zucchini mozzarella bake, which I will tell you about soon, but there I still had about 1/3 of the zucchini left. I’m telling you this thing was the size of a small animal (probably roughly the size of the two pugs above). I wish I had taken a picture of it.
So with 1/3 of an enormous zucchini sitting on the counter as two pugs stared at me, naturally, I turned to Smitten Kitchen for direction. Now, I have to tell you… I’m a terrible person. I never actually read her blog posts. I only ever look at the pictures and recipes. Does anyone else do that?
We all have different motivations for following blogs, right? For me, Smitten Kitchen is all about pictures and recipes.
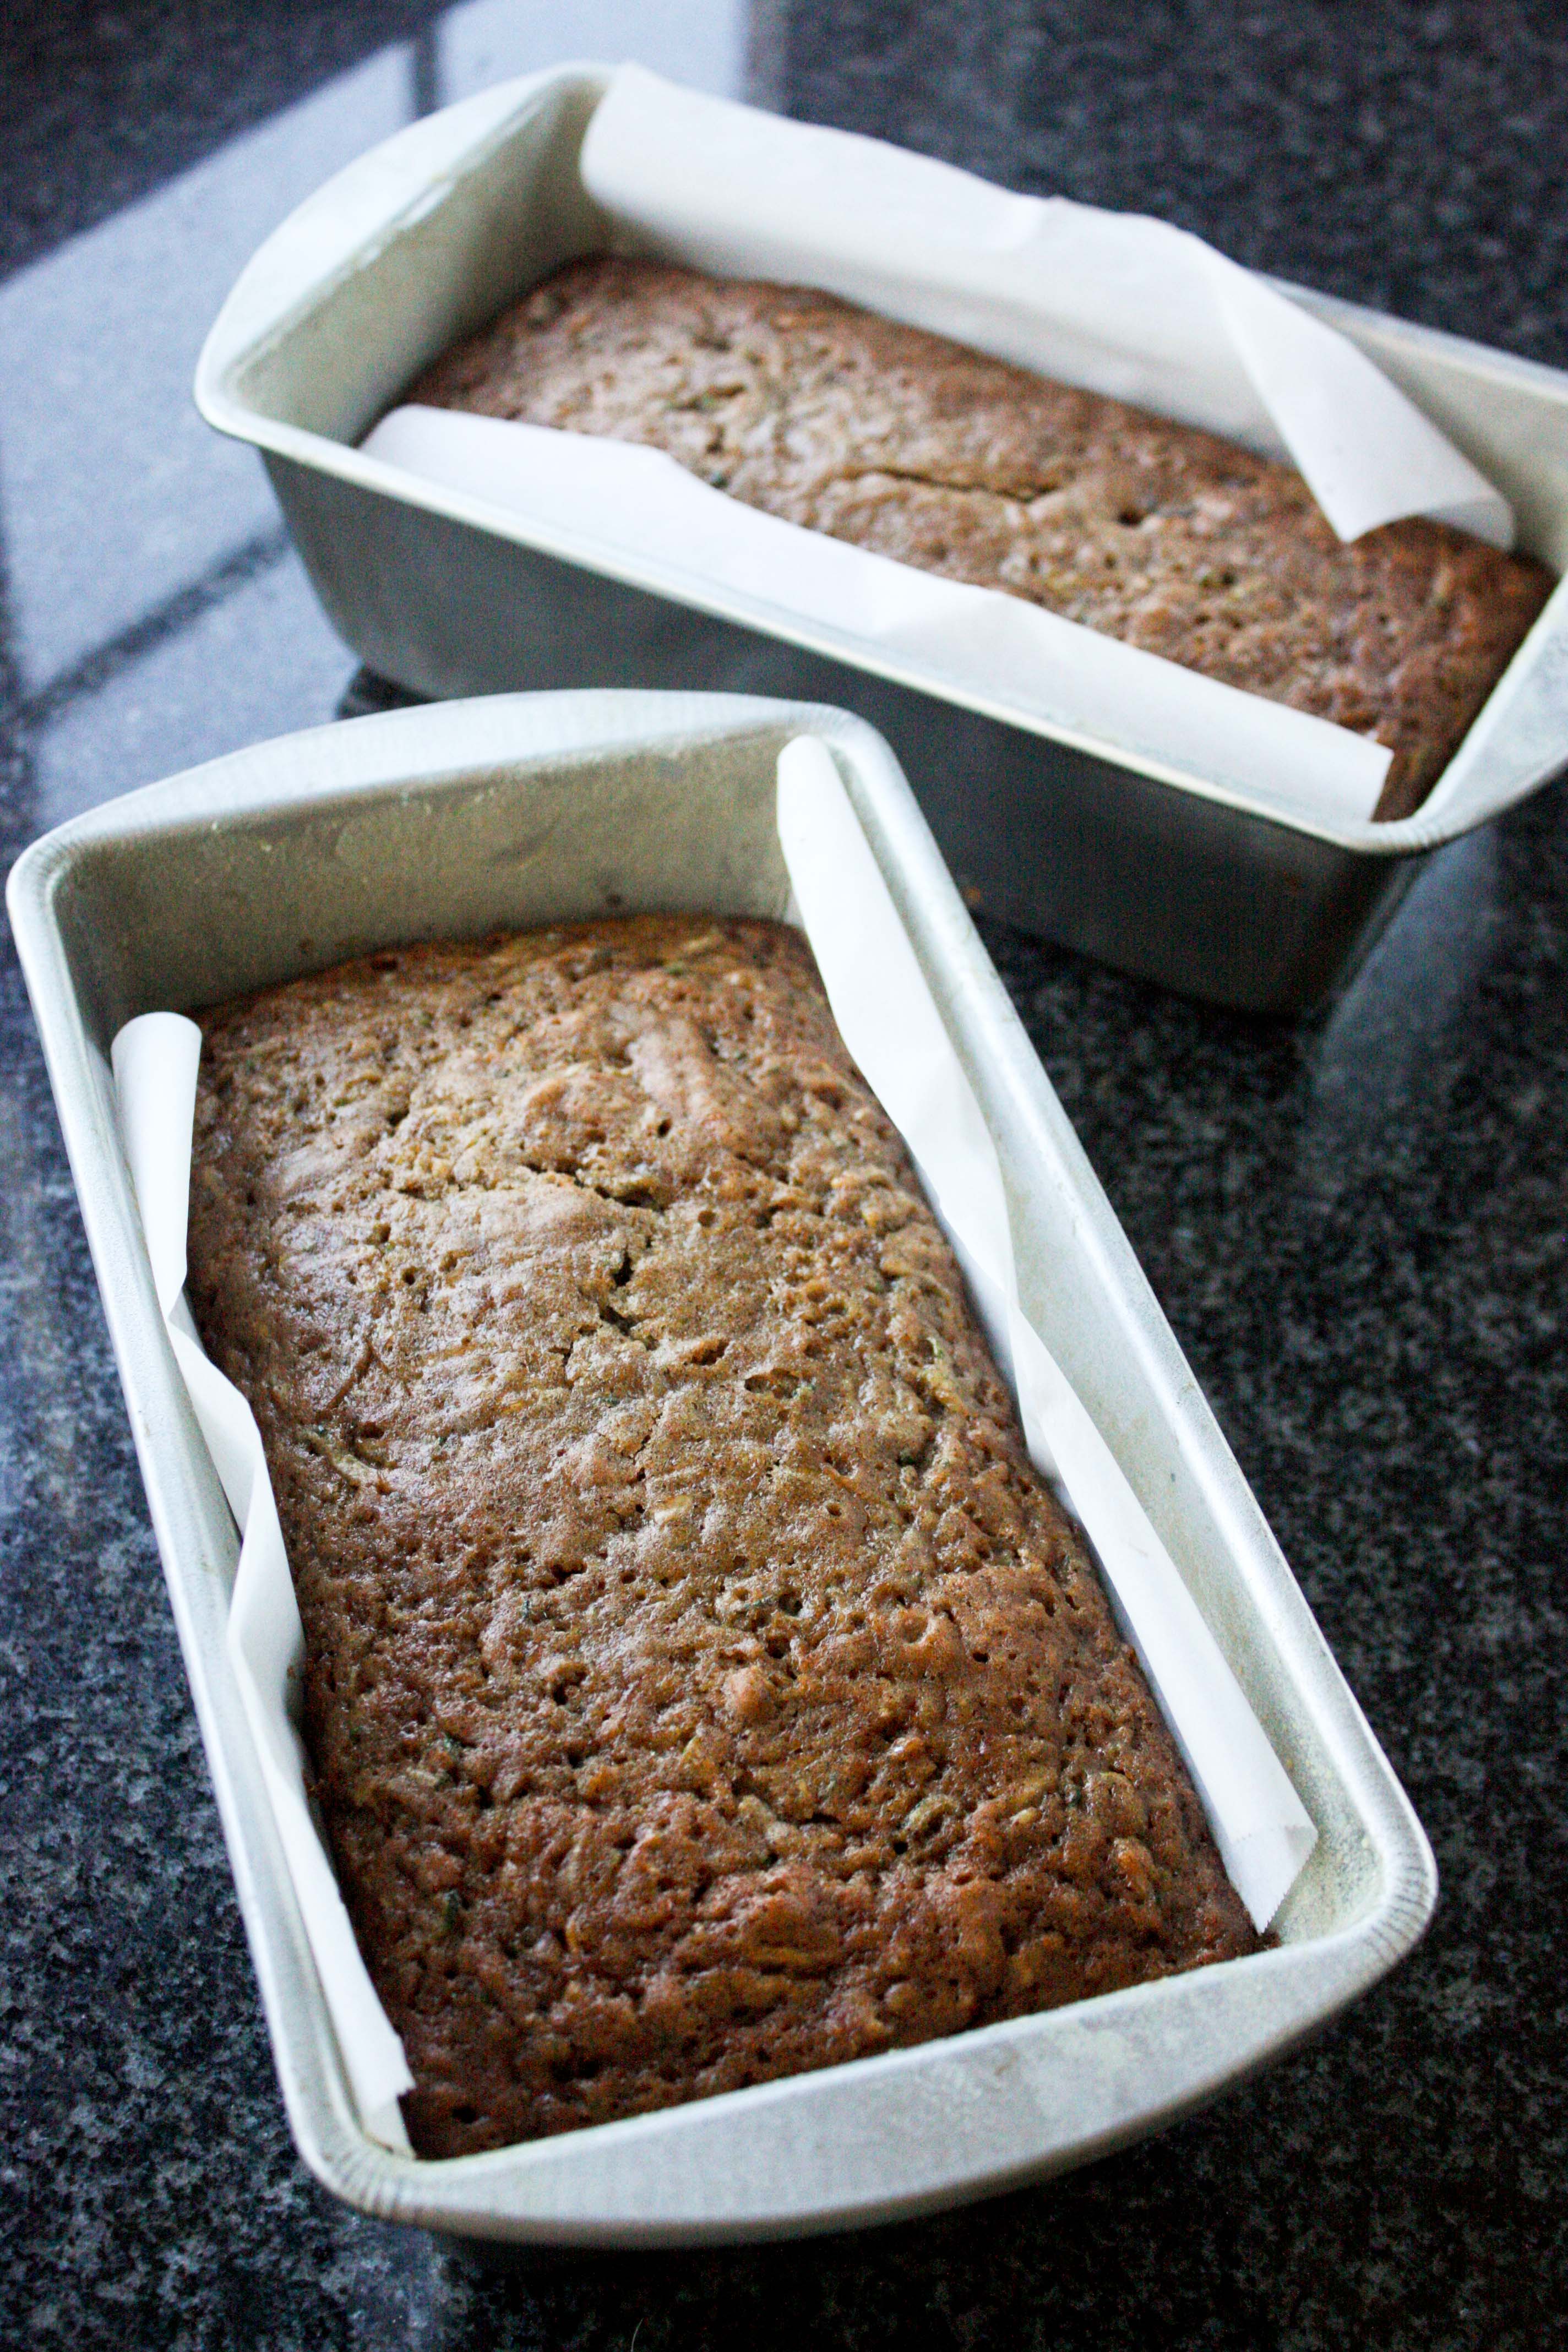
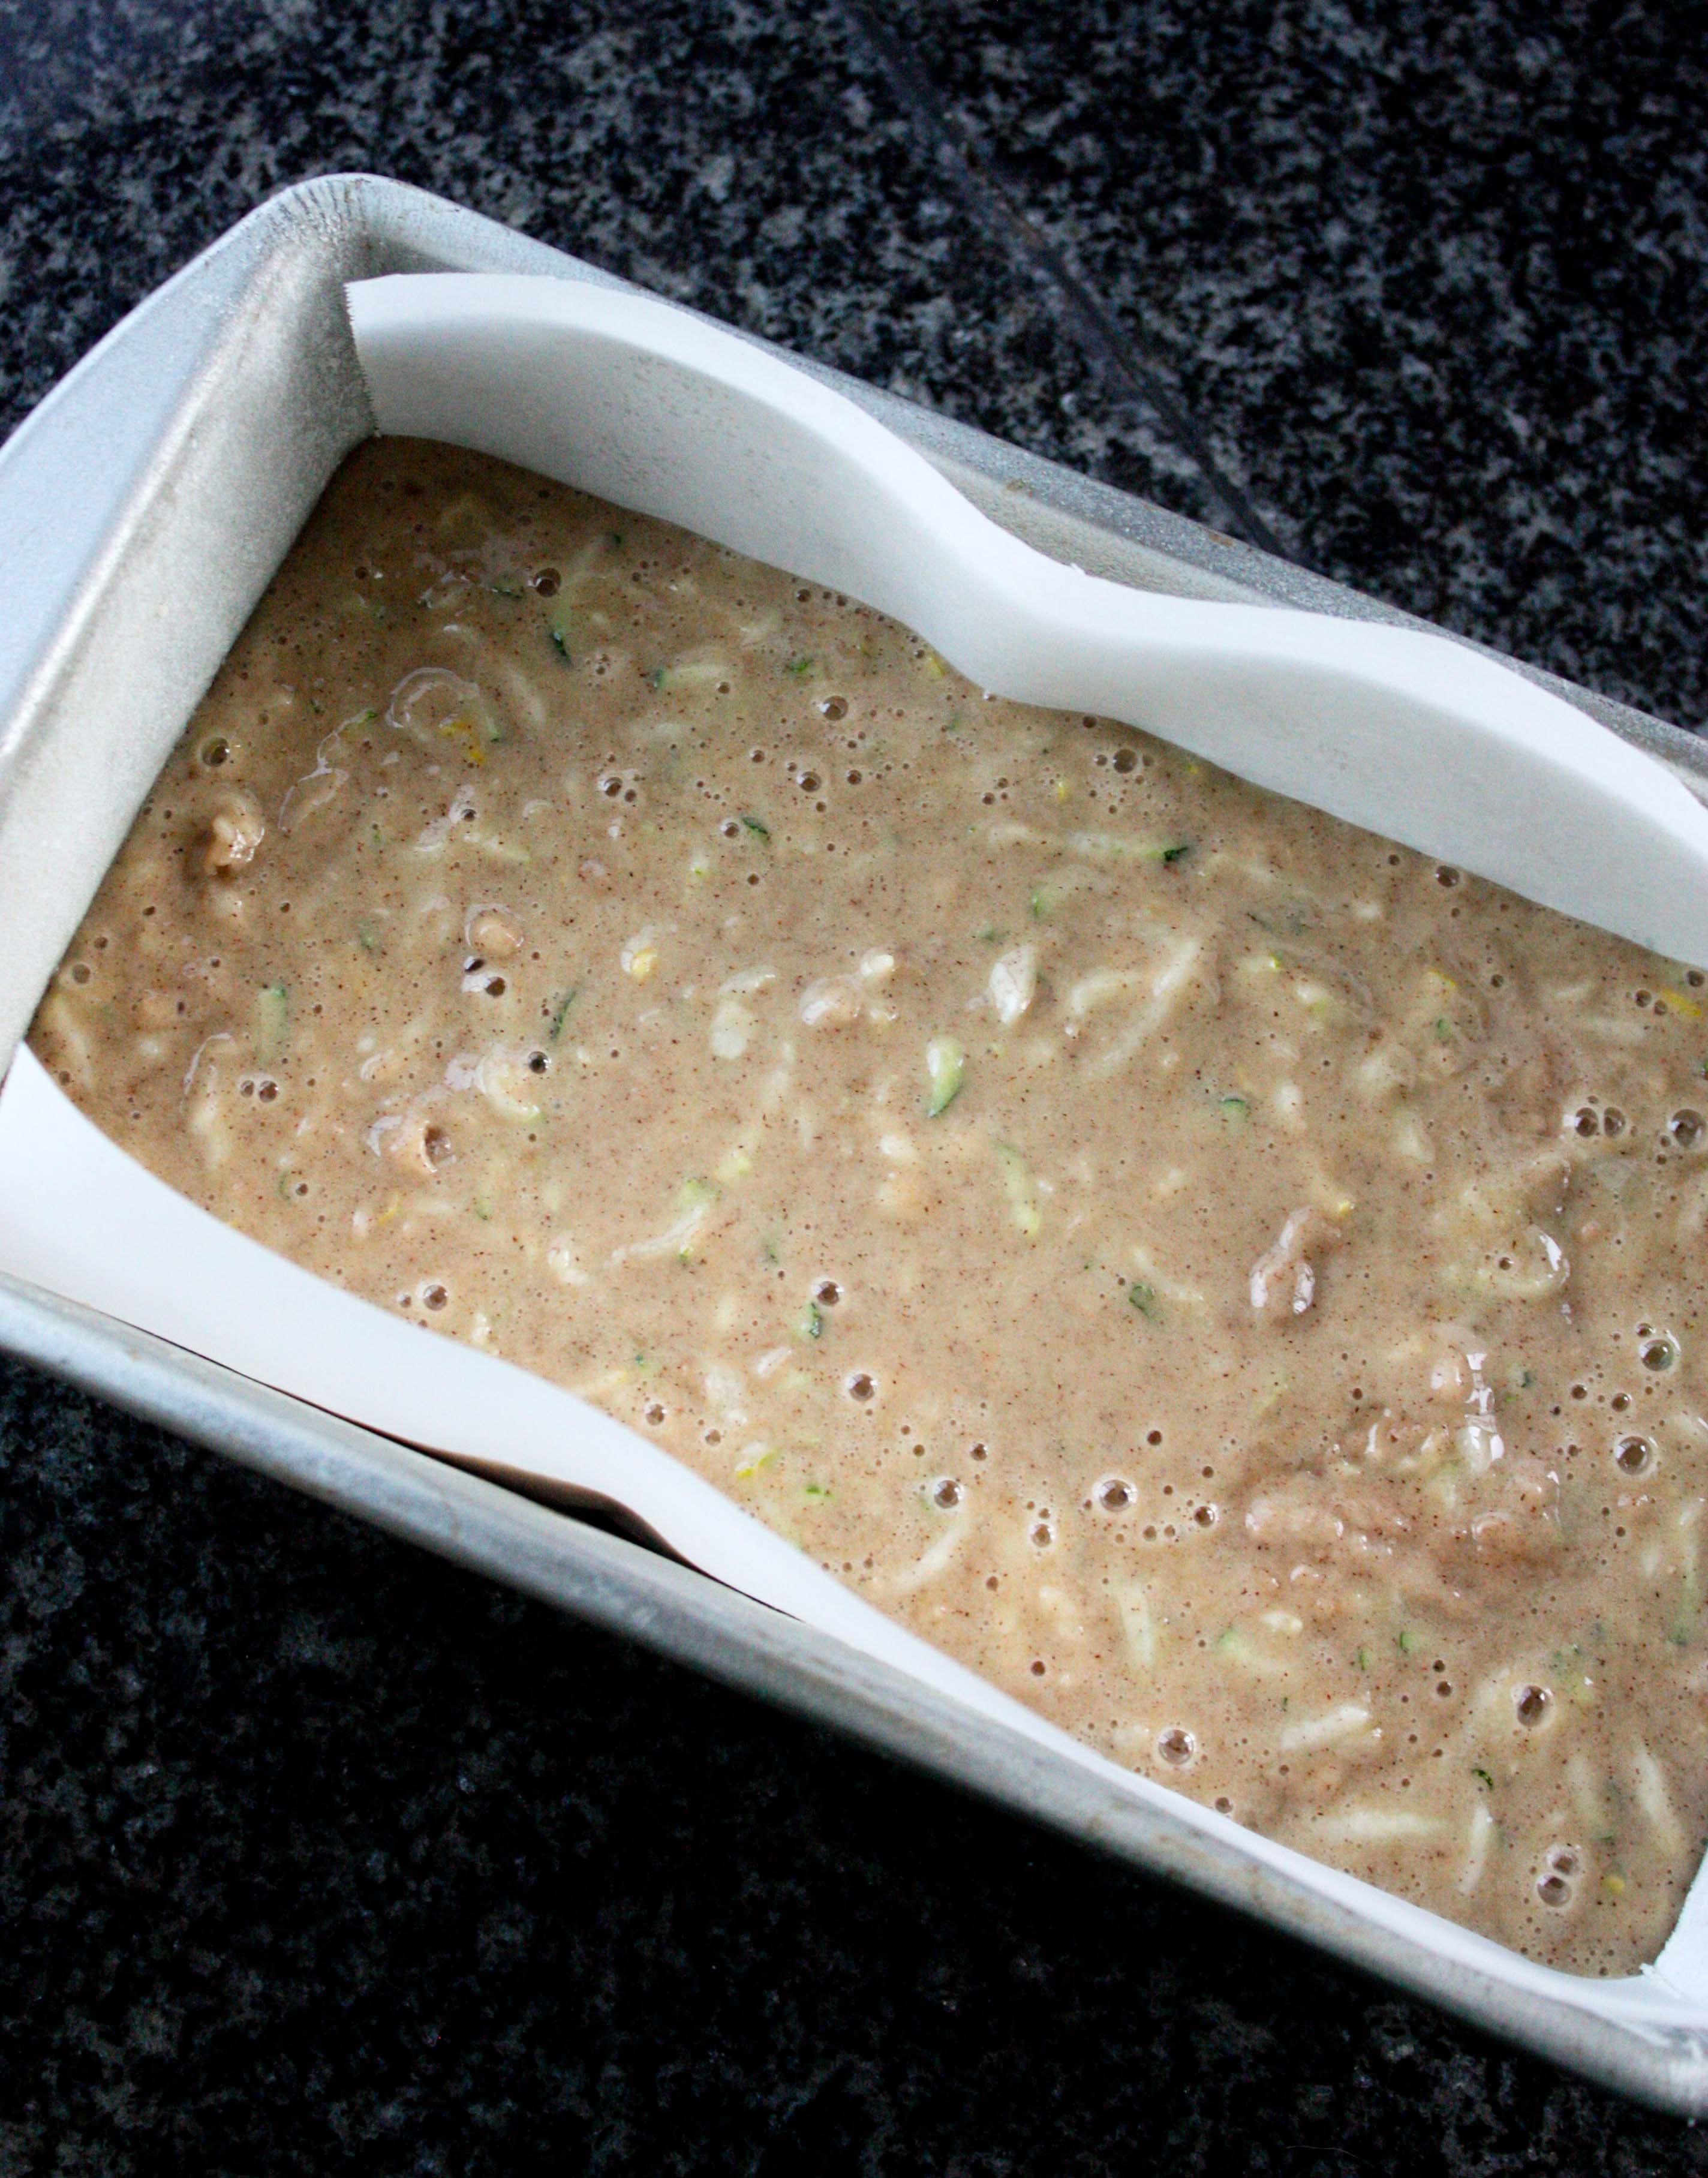
So back to Zucchini. I made zucchini bread, because I was feeling traditional.
I usually never do this, but I actually followed this recipe pretty much to the T (but omited the nuts and added chocolate chips). I chose to add chocolate chips because for some reason chocolate and zucchini sounds like a natural combination.
*Note: I didn’t measure the zucchini so I actually think I added more like 3 cups
Line two loaf pans with parchment paper. Pre-heat oven to 350F.
In a bowl, beat together eggs, oil and sugar. Once combined, add zucchini and vanilla extract. Stir to combine. Add dry ingredients and chocolate chips. Stir until just combined. Pour batter into two loaf pans.
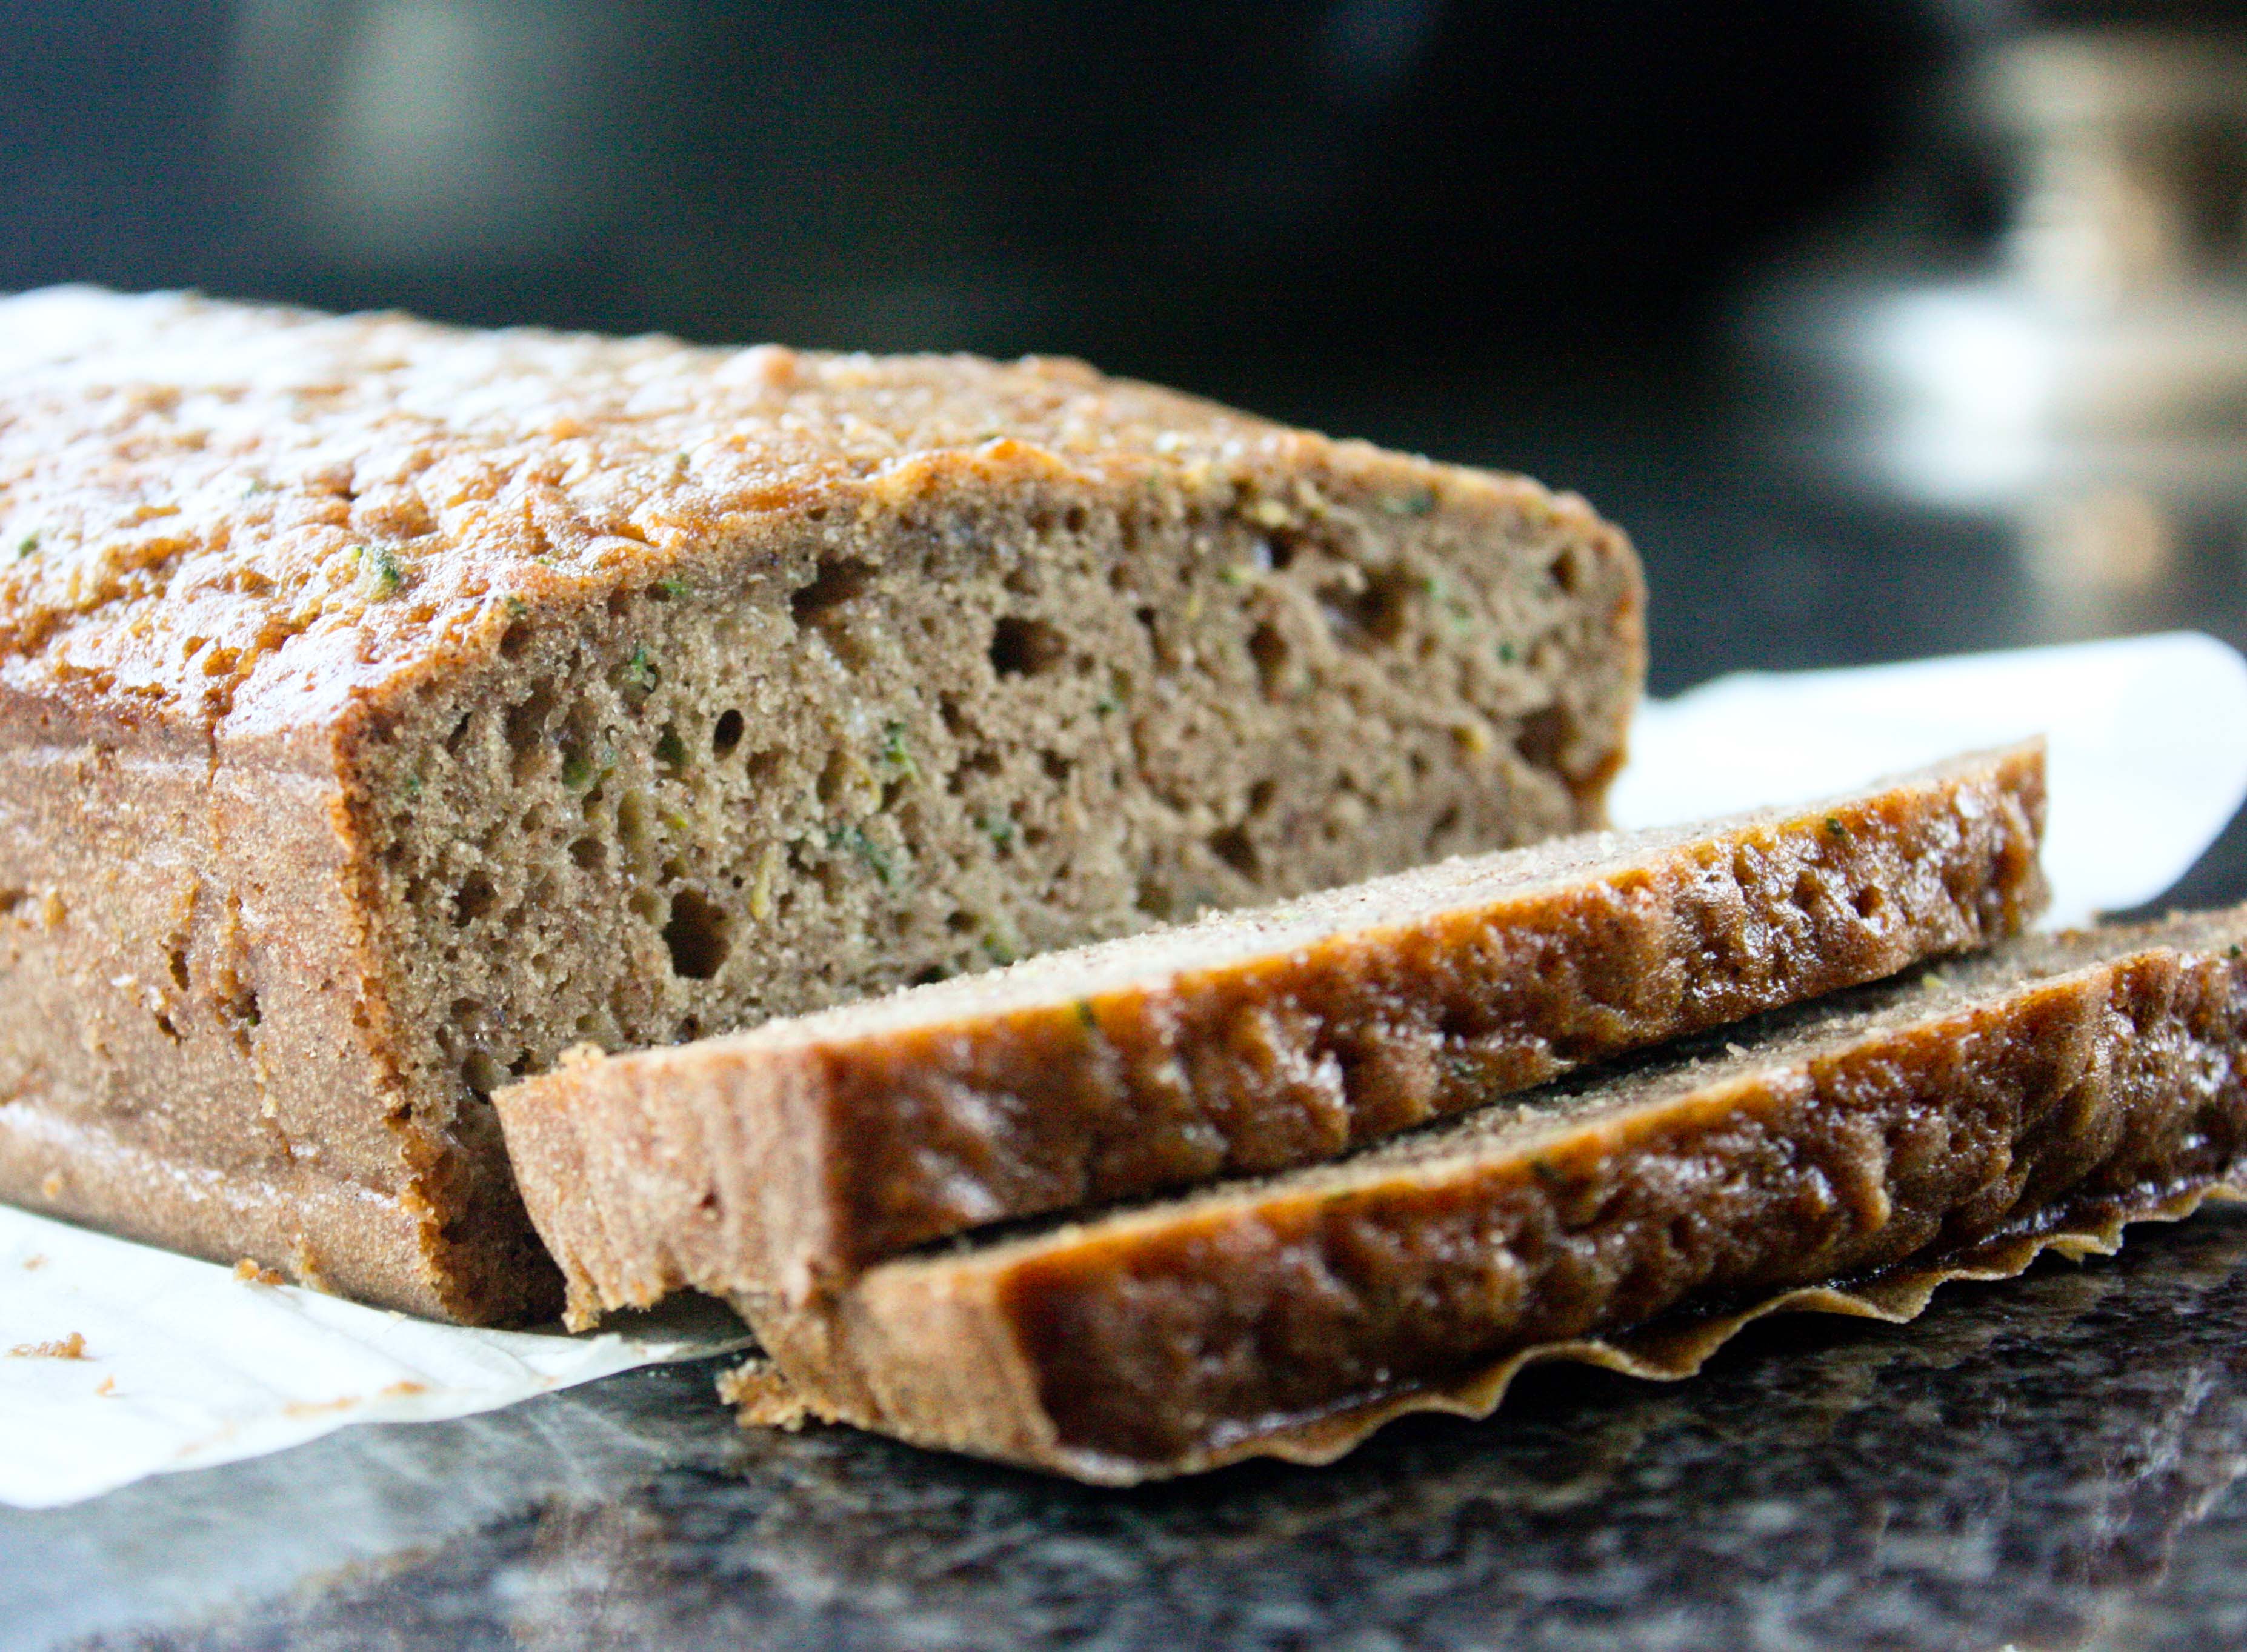
Bake about an hour (mine took about an hour and 10 minutes, remember all ovens are different).
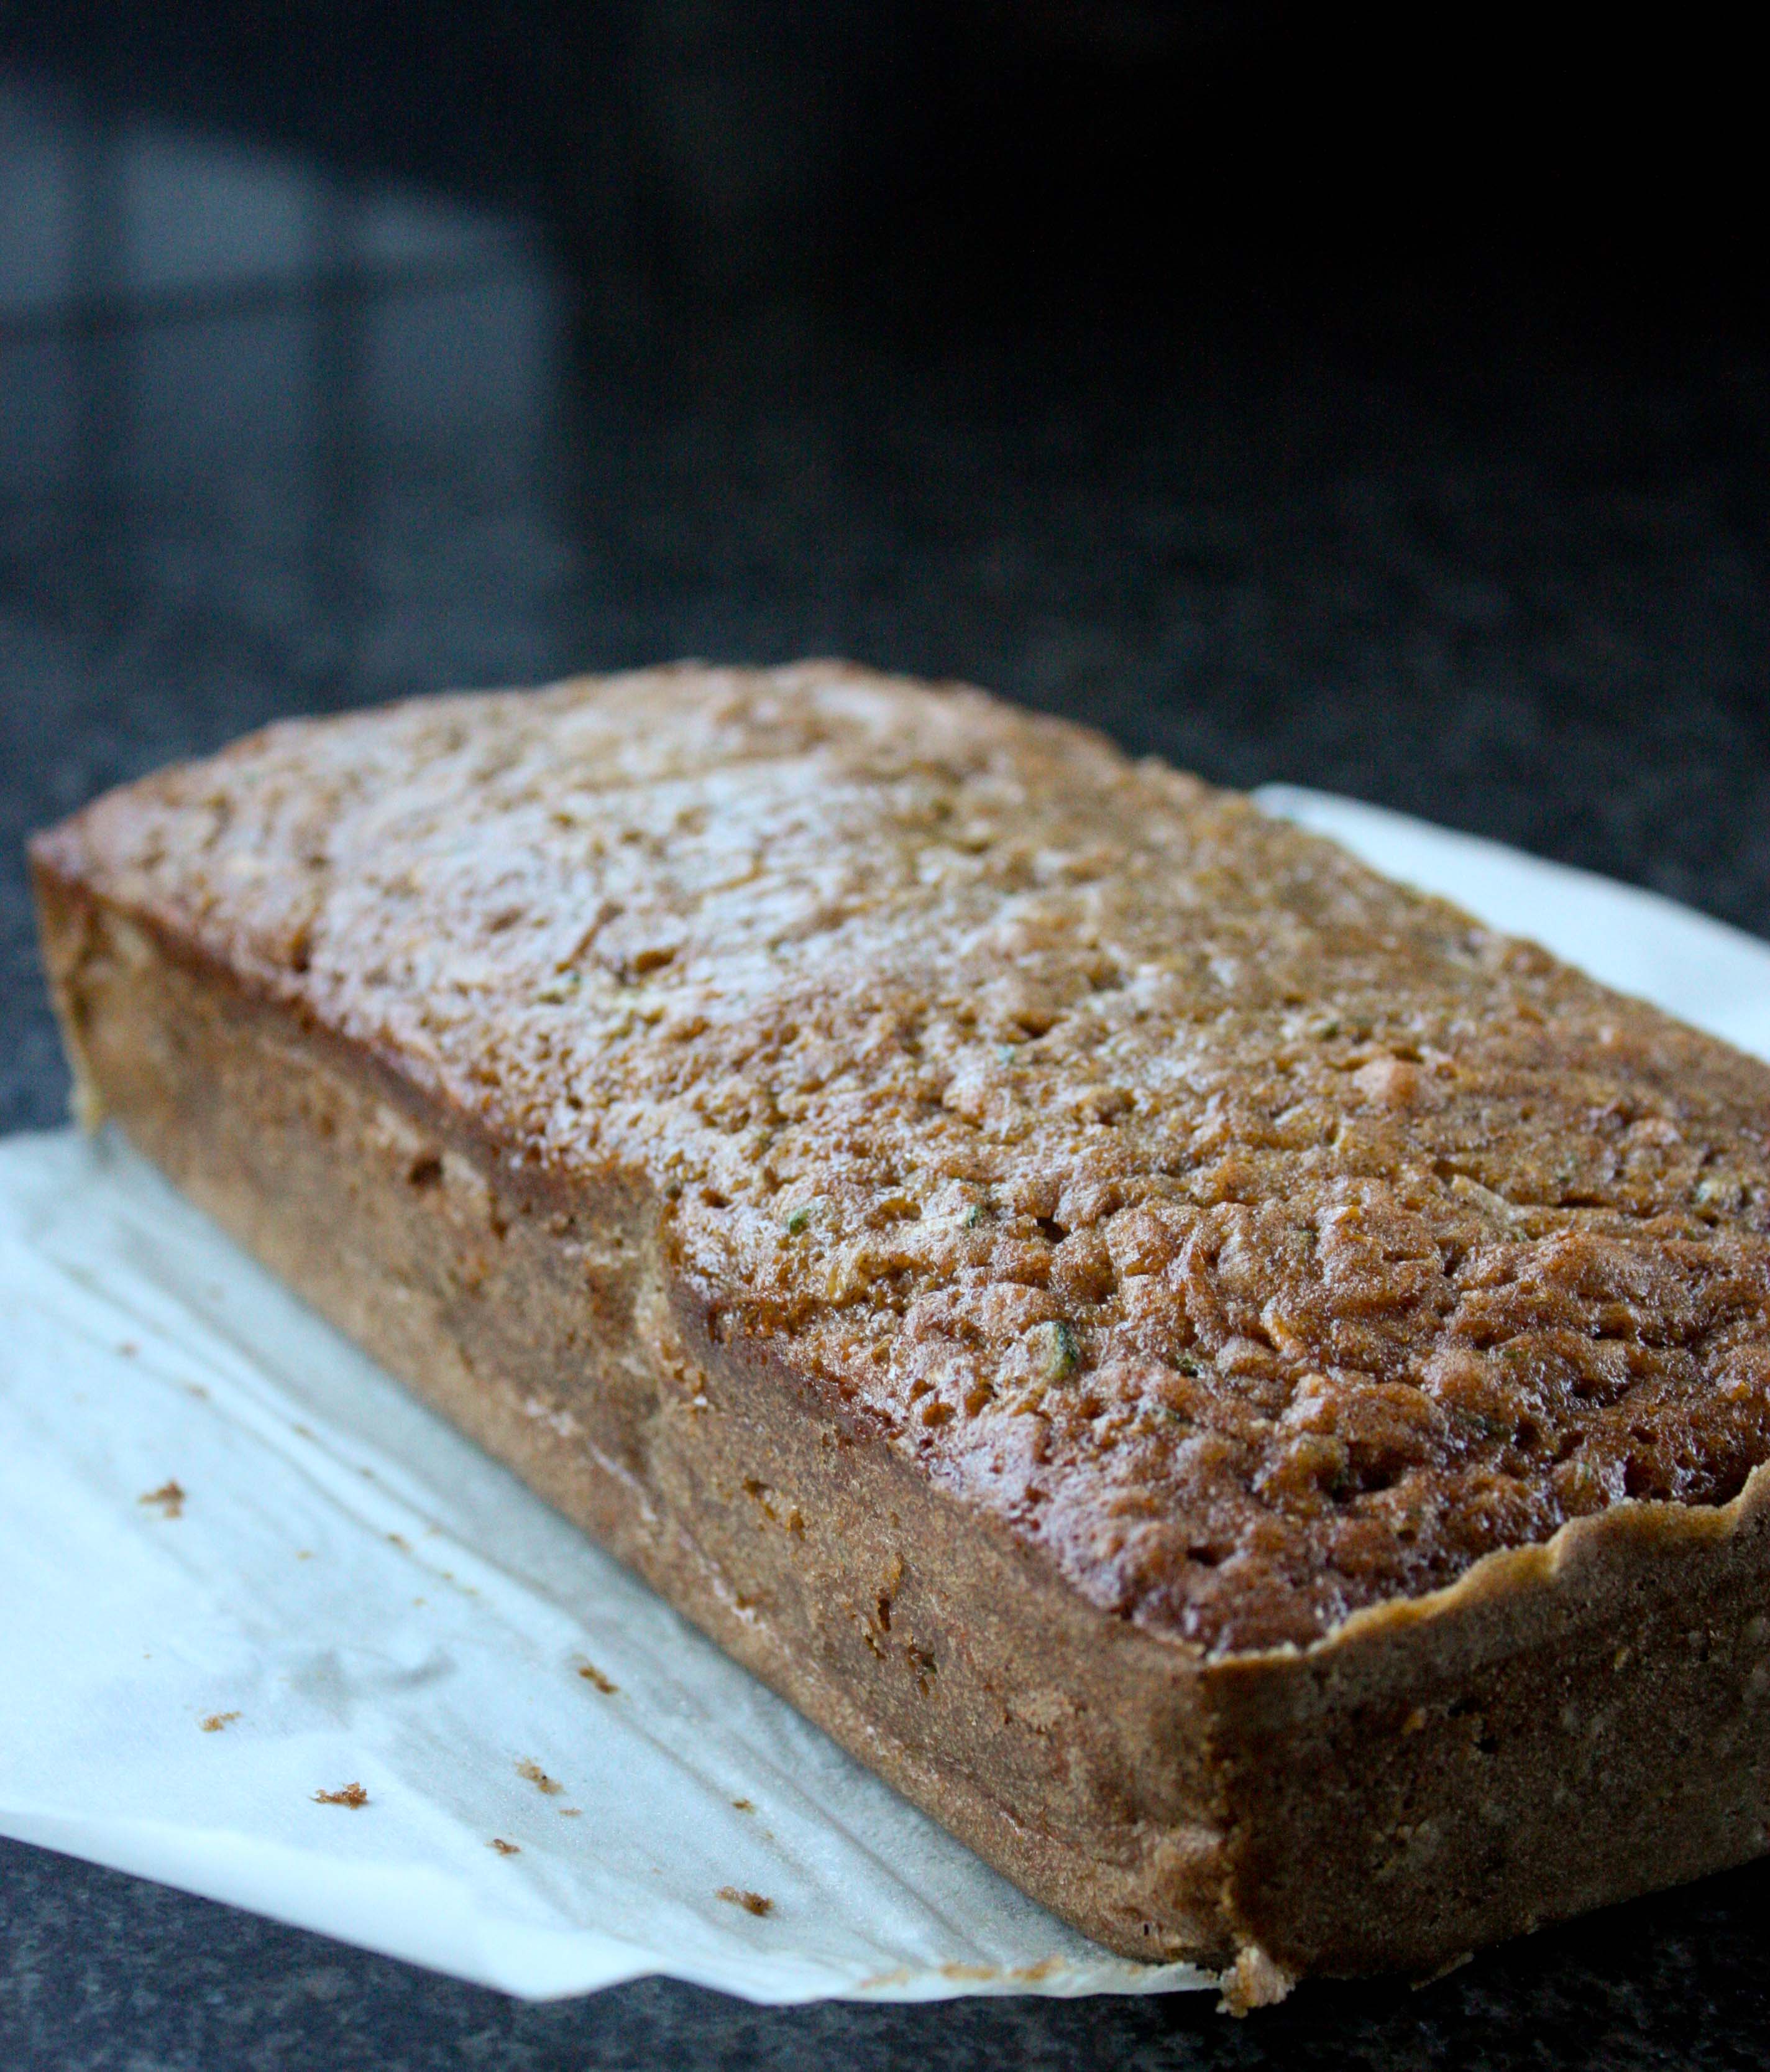
Allow to cool completely. Then remove from pan (parchment paper makes it super easy to pull out of the pan). Slice and serve.
I took these two loaves to work and they were gone in a day. That’s probably because I ate half of it on my own. It was pretty delicious. The loaves are sort of dense, but super moist, which is always appreciated.
Normally I hate chocolate chips in quick breads, but this was fantastic. If you ever put chocolate chips in my banana bread or pancakes, we won’t be friends anymore, but in zucchini bread… bring it on!
So there you have it. Sometimes you need a go-to blog for a recipe.
What’s your go-to blog for recipes? Are there any blogs you read solely for pictures and recipes?
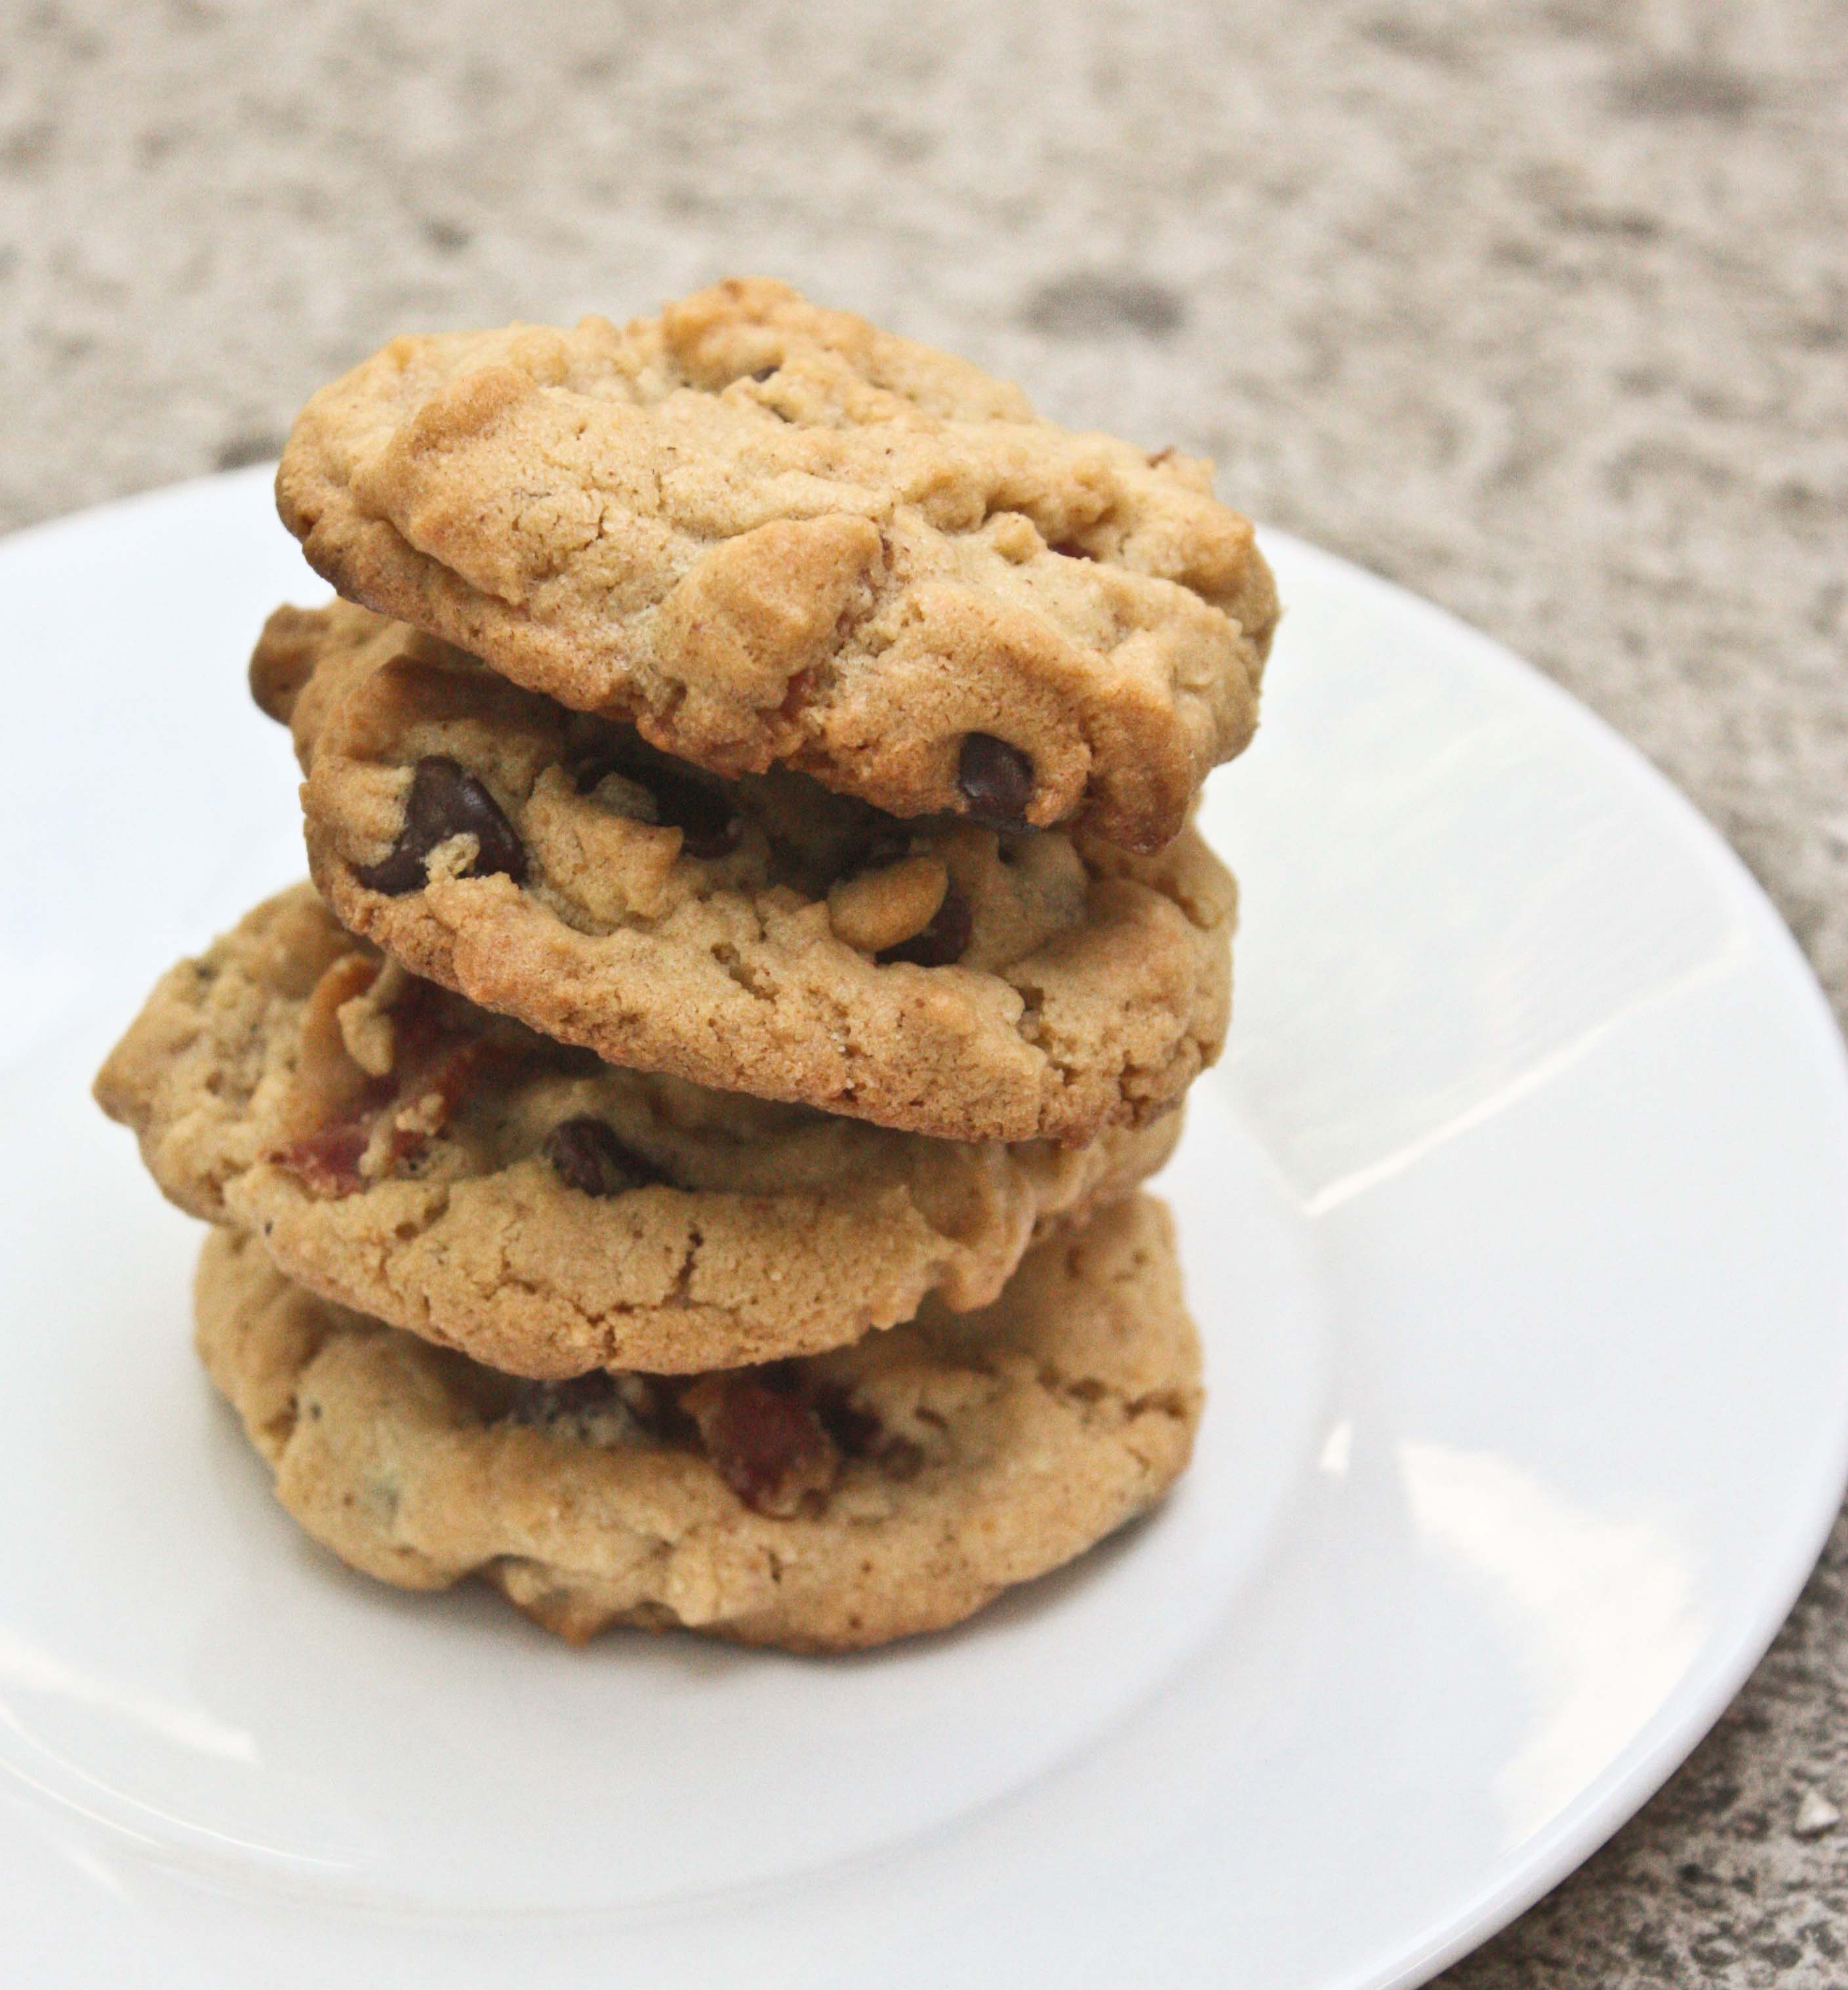
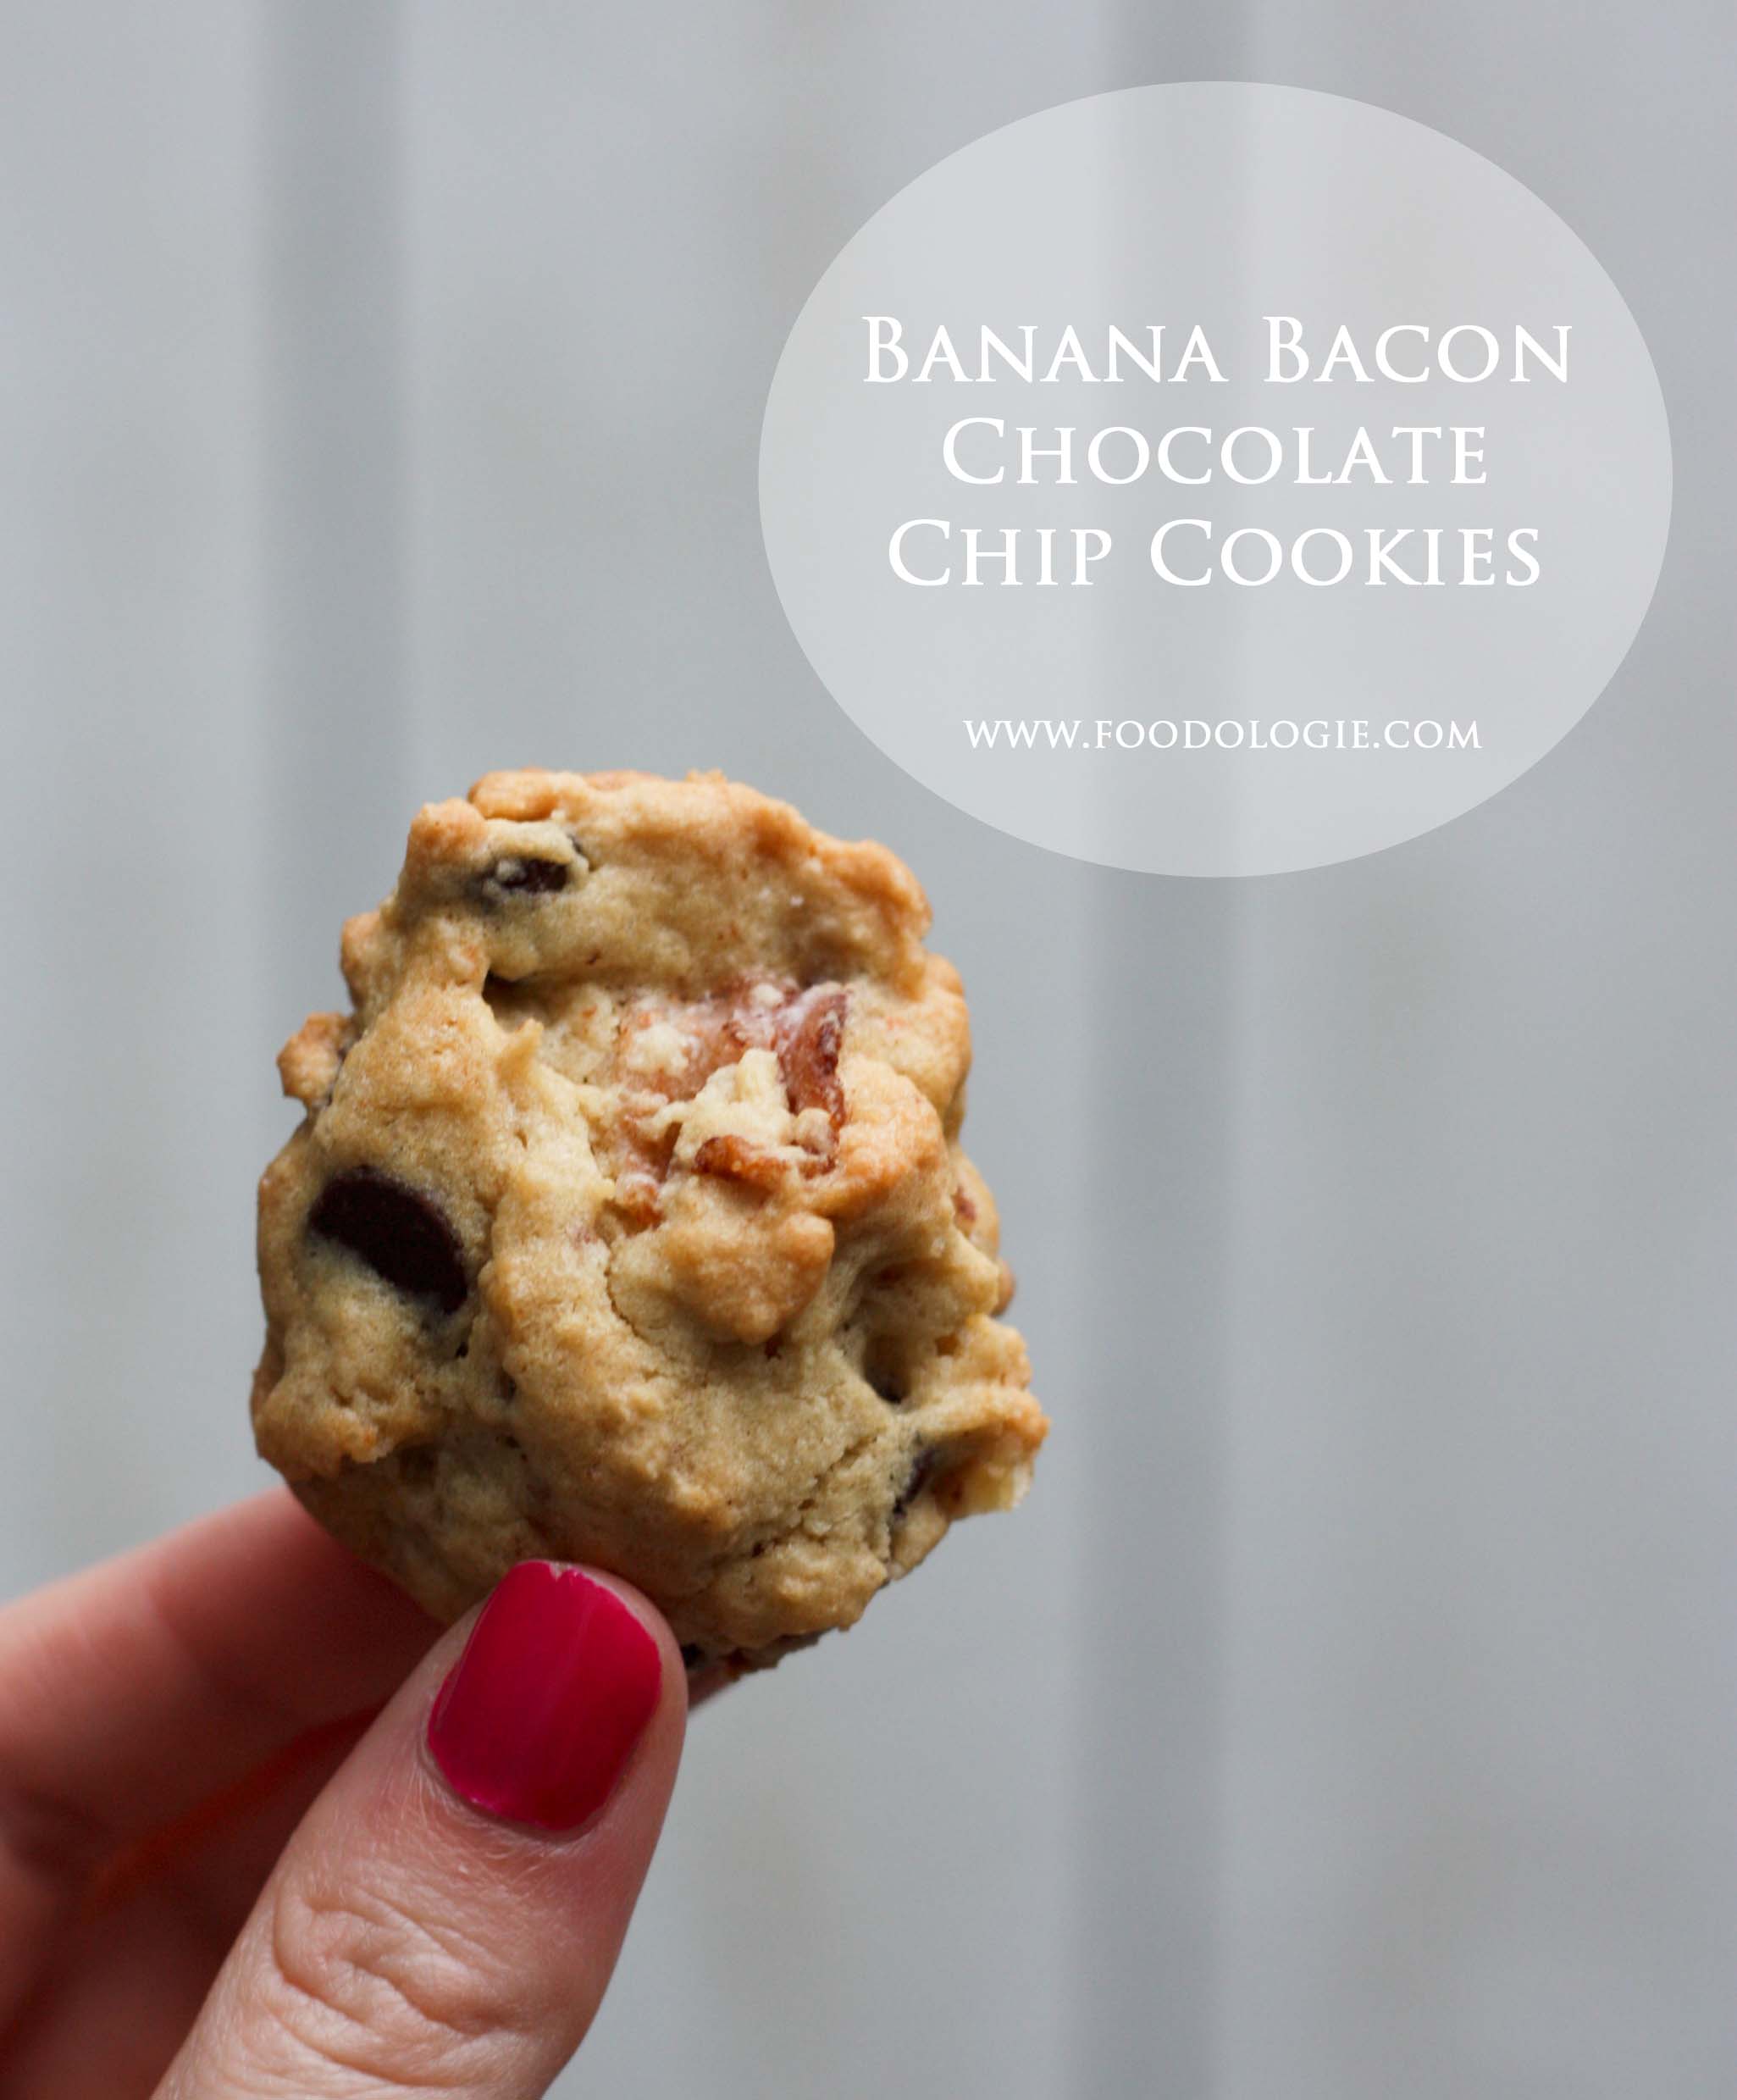
When a friend comes to visit from across the country, they deserve a treat. When a friend says she wants a dessert with bacon, you oblige and make these:
My friend Liz loves bacon more than anyone I know. We have that bond of former roommates so I know the lady loves meat (no pun intended, get your mind out of the gutter).
Lucky for her, bacon in dessert is totally having a moment, or is that just me? If you haven’t had bacon in a dessert yet, you need to try it asap. Start with these cookies…
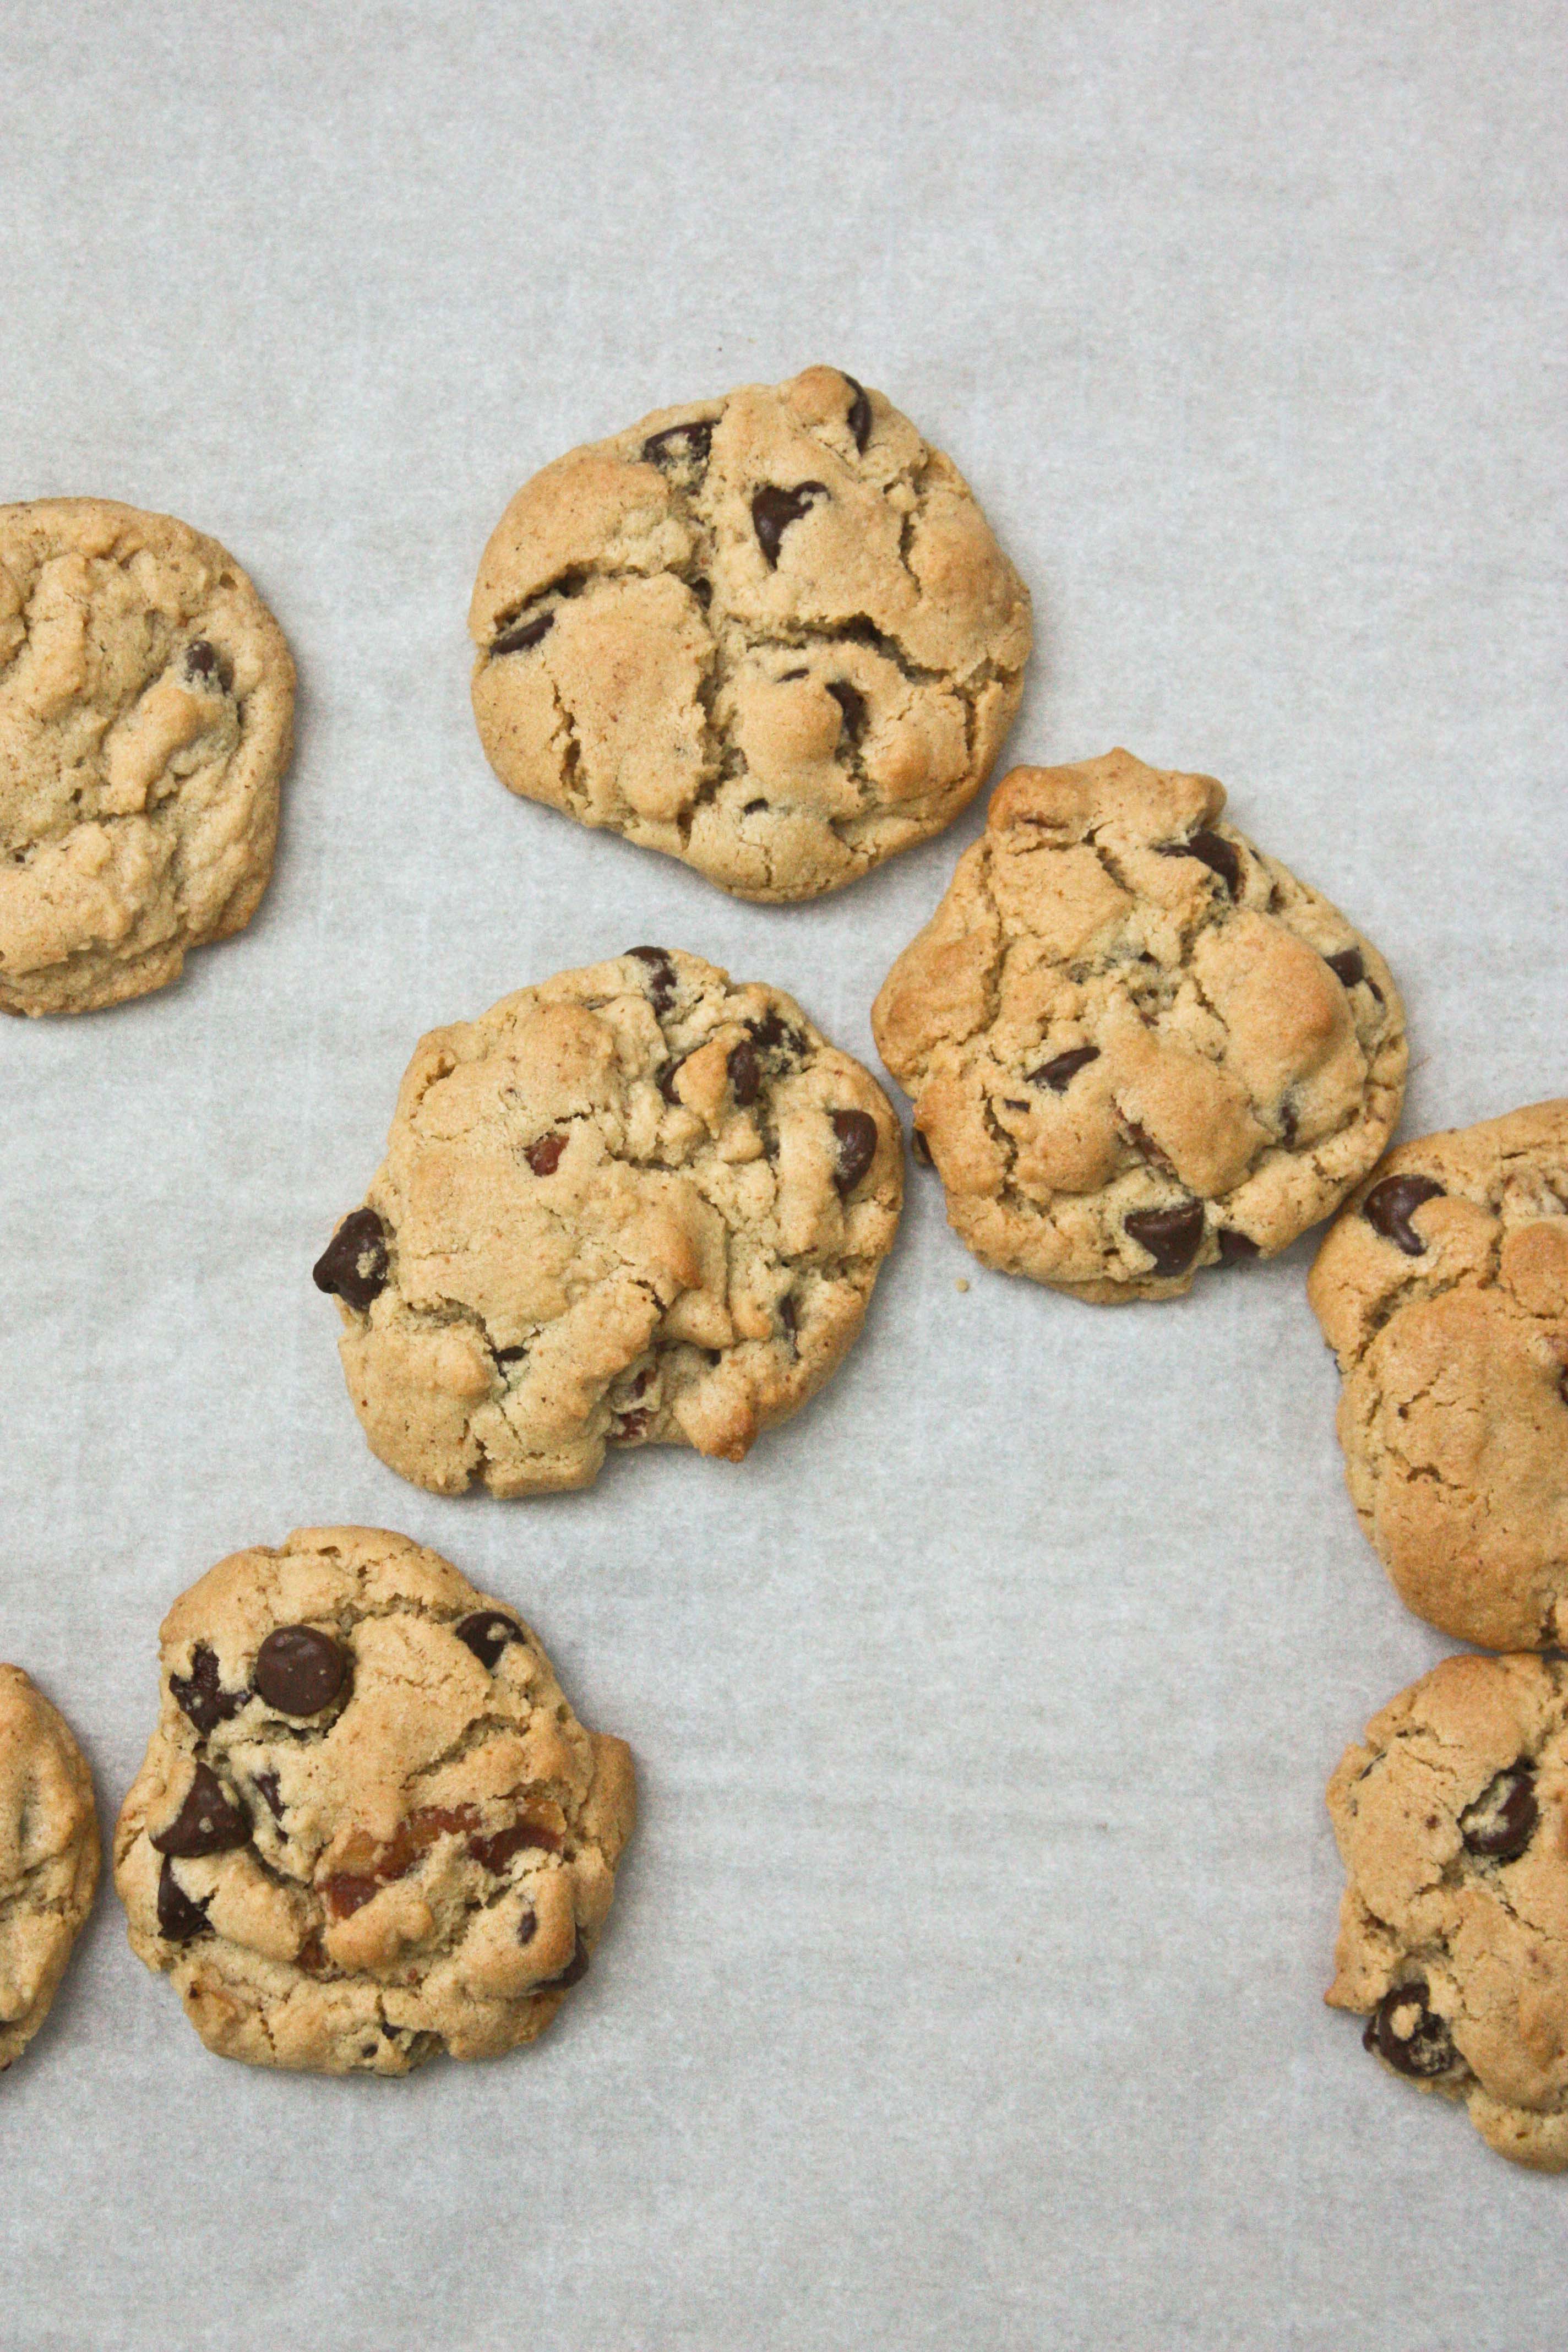
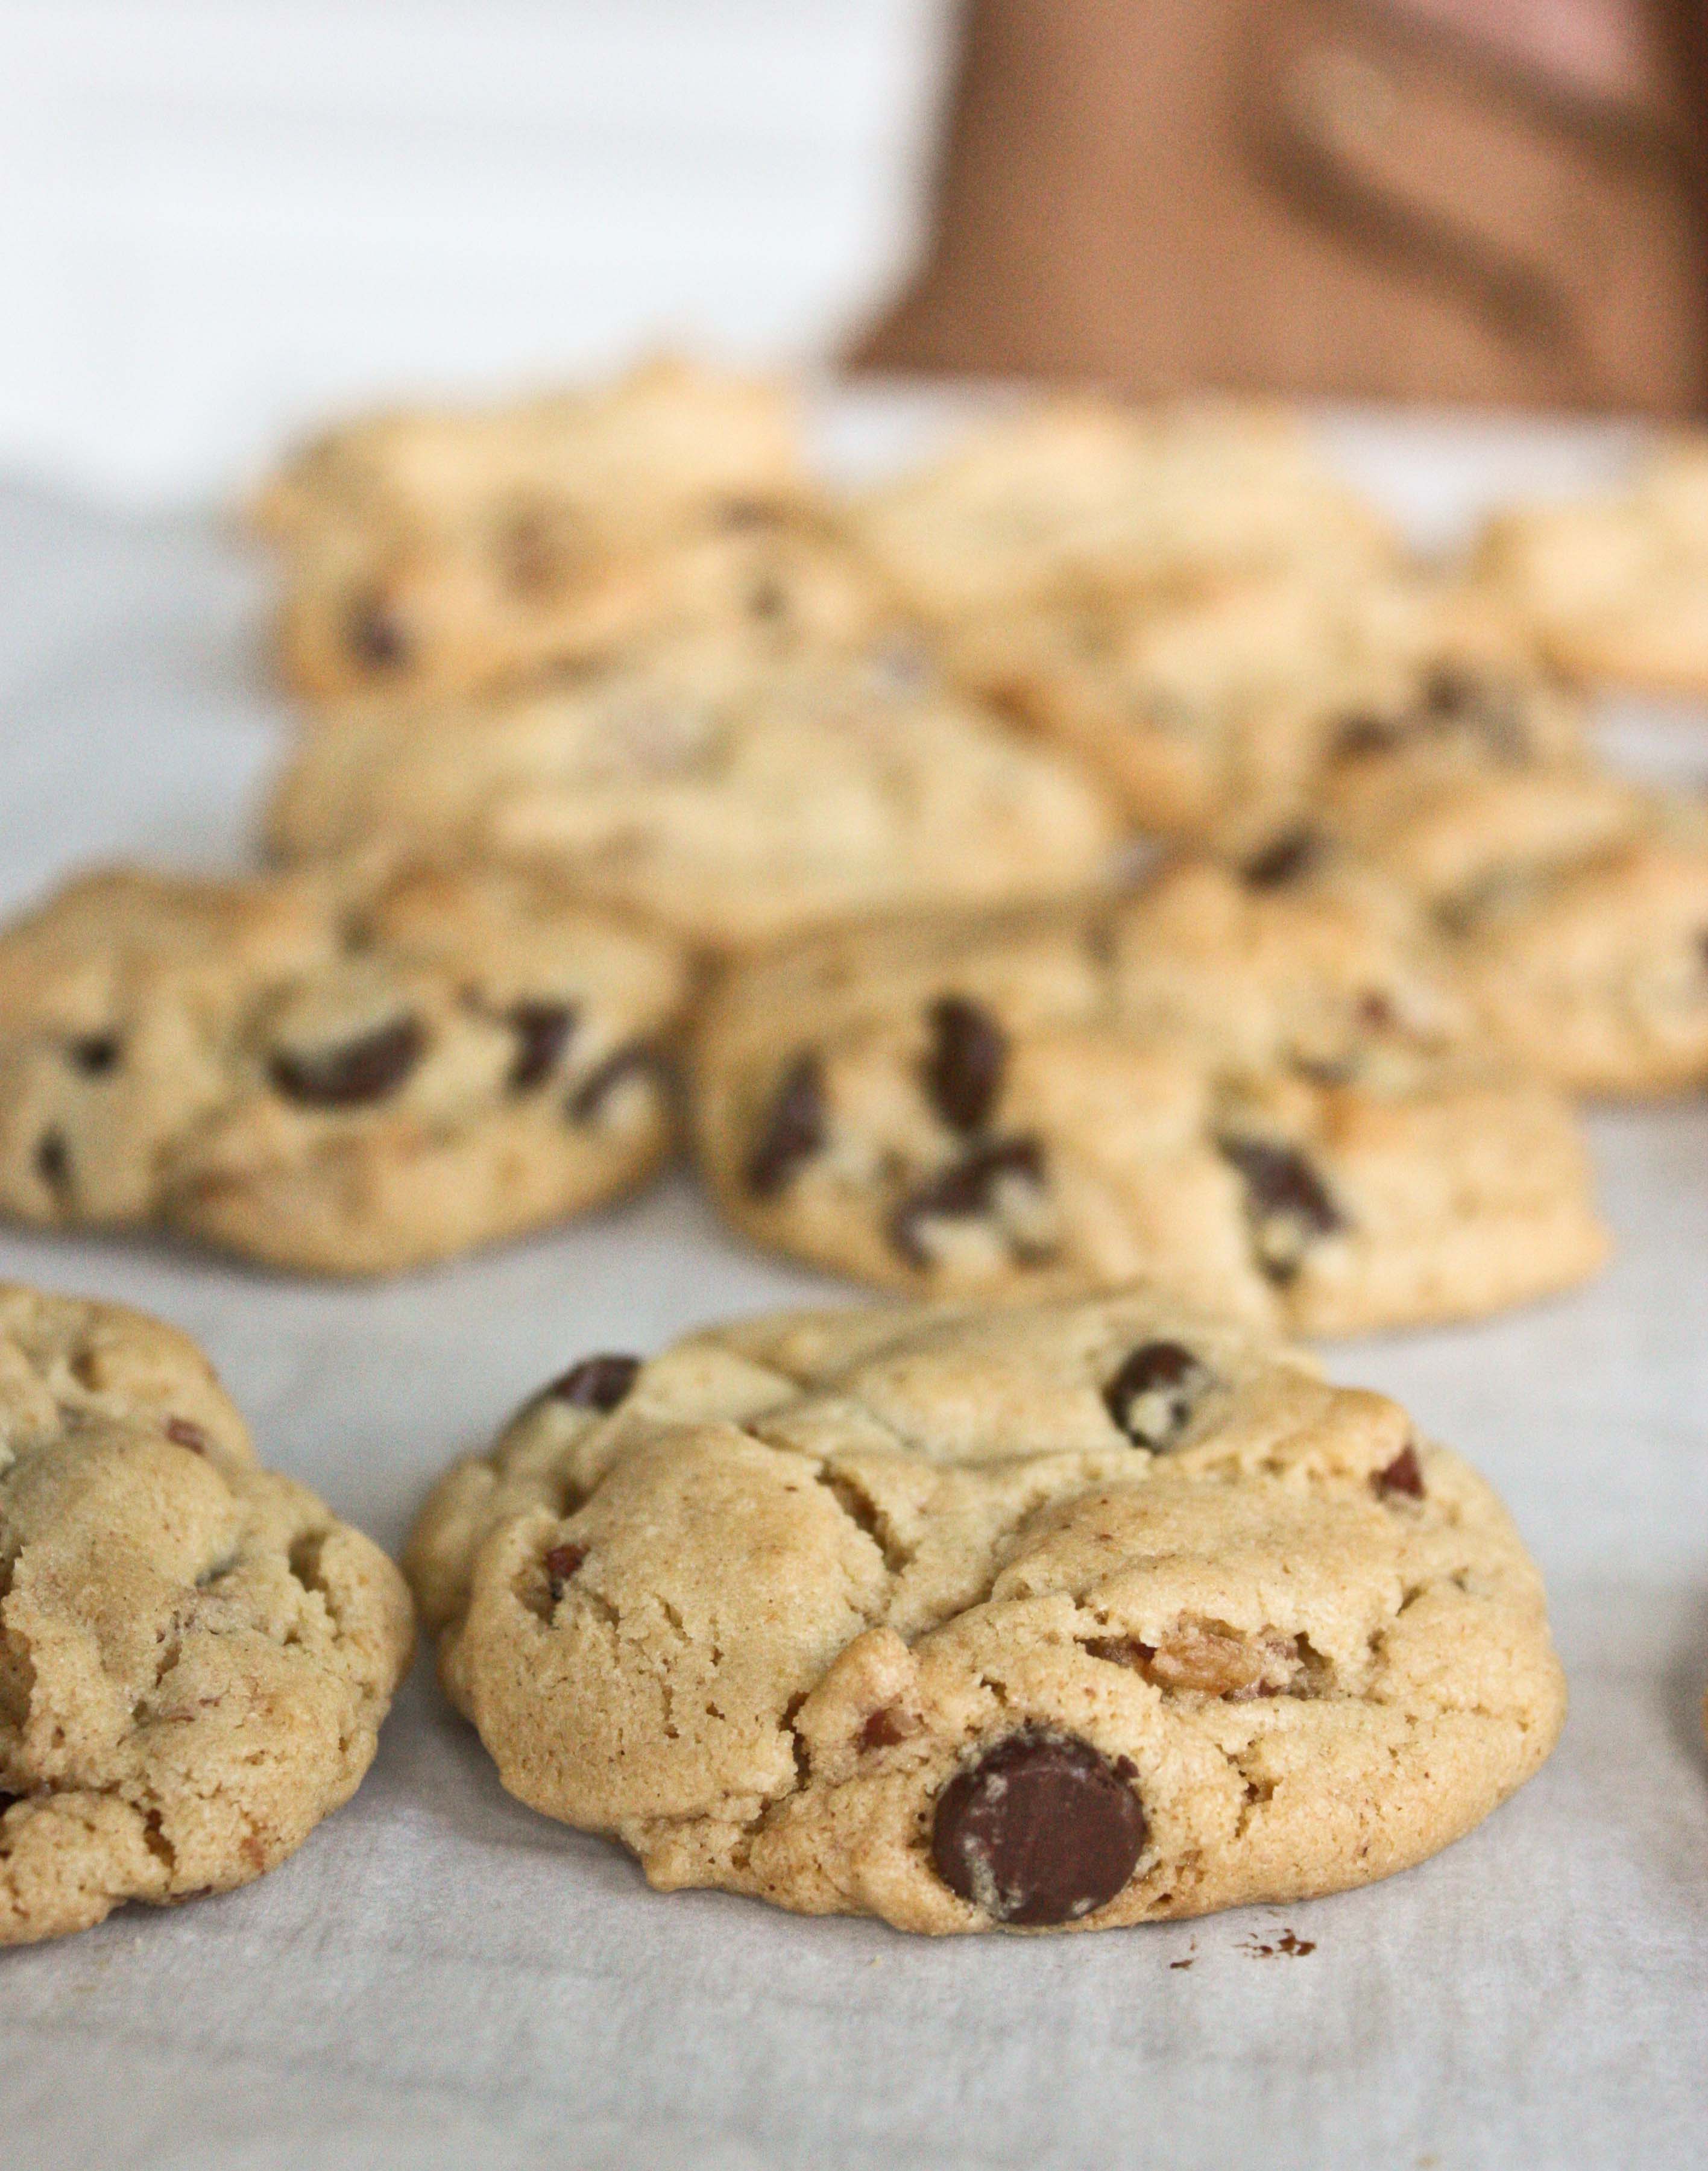
Peanut Butter Bacon Chocolate Chip Cookies
3 slices of bacon, fat reserved
1/4 cup softened butter* 1/2 cup peanut butter 3/4 cup brown sugar 1 egg 1 cup all purpose flour 1 tsp baking soda 1/2 tsp salt (omit if using salted PB) 1 cup chocolate chips
In a pan, fry bacon over medium heat until very crispy. Reserve fat and allow to cool completely. Chop bacon and set aside.
Pre-heat oven to 350F.
Beat together butter, peanut butter and bacon fat (*note if you don’t want to use bacon fat, you can just use 1/2 cup of butter and omit the bacon fat). Add sugar and beat for an additional minute or two. Add egg and beat for an additional minute. Add flour and baking soda (and salt if using) and beat until almost combined. Lastly, fold in chopped bacon and chocolate chips.
Form dough into walnut-sized balls, place on a parchment paper lined baking sheet and bake for 10-13 minutes or until golden on the edges. Allow to cool completely and serve! Makes about 2 dozen cookies (or maybe more… I wouldn’t know because I ate a ton of the cookie dough).
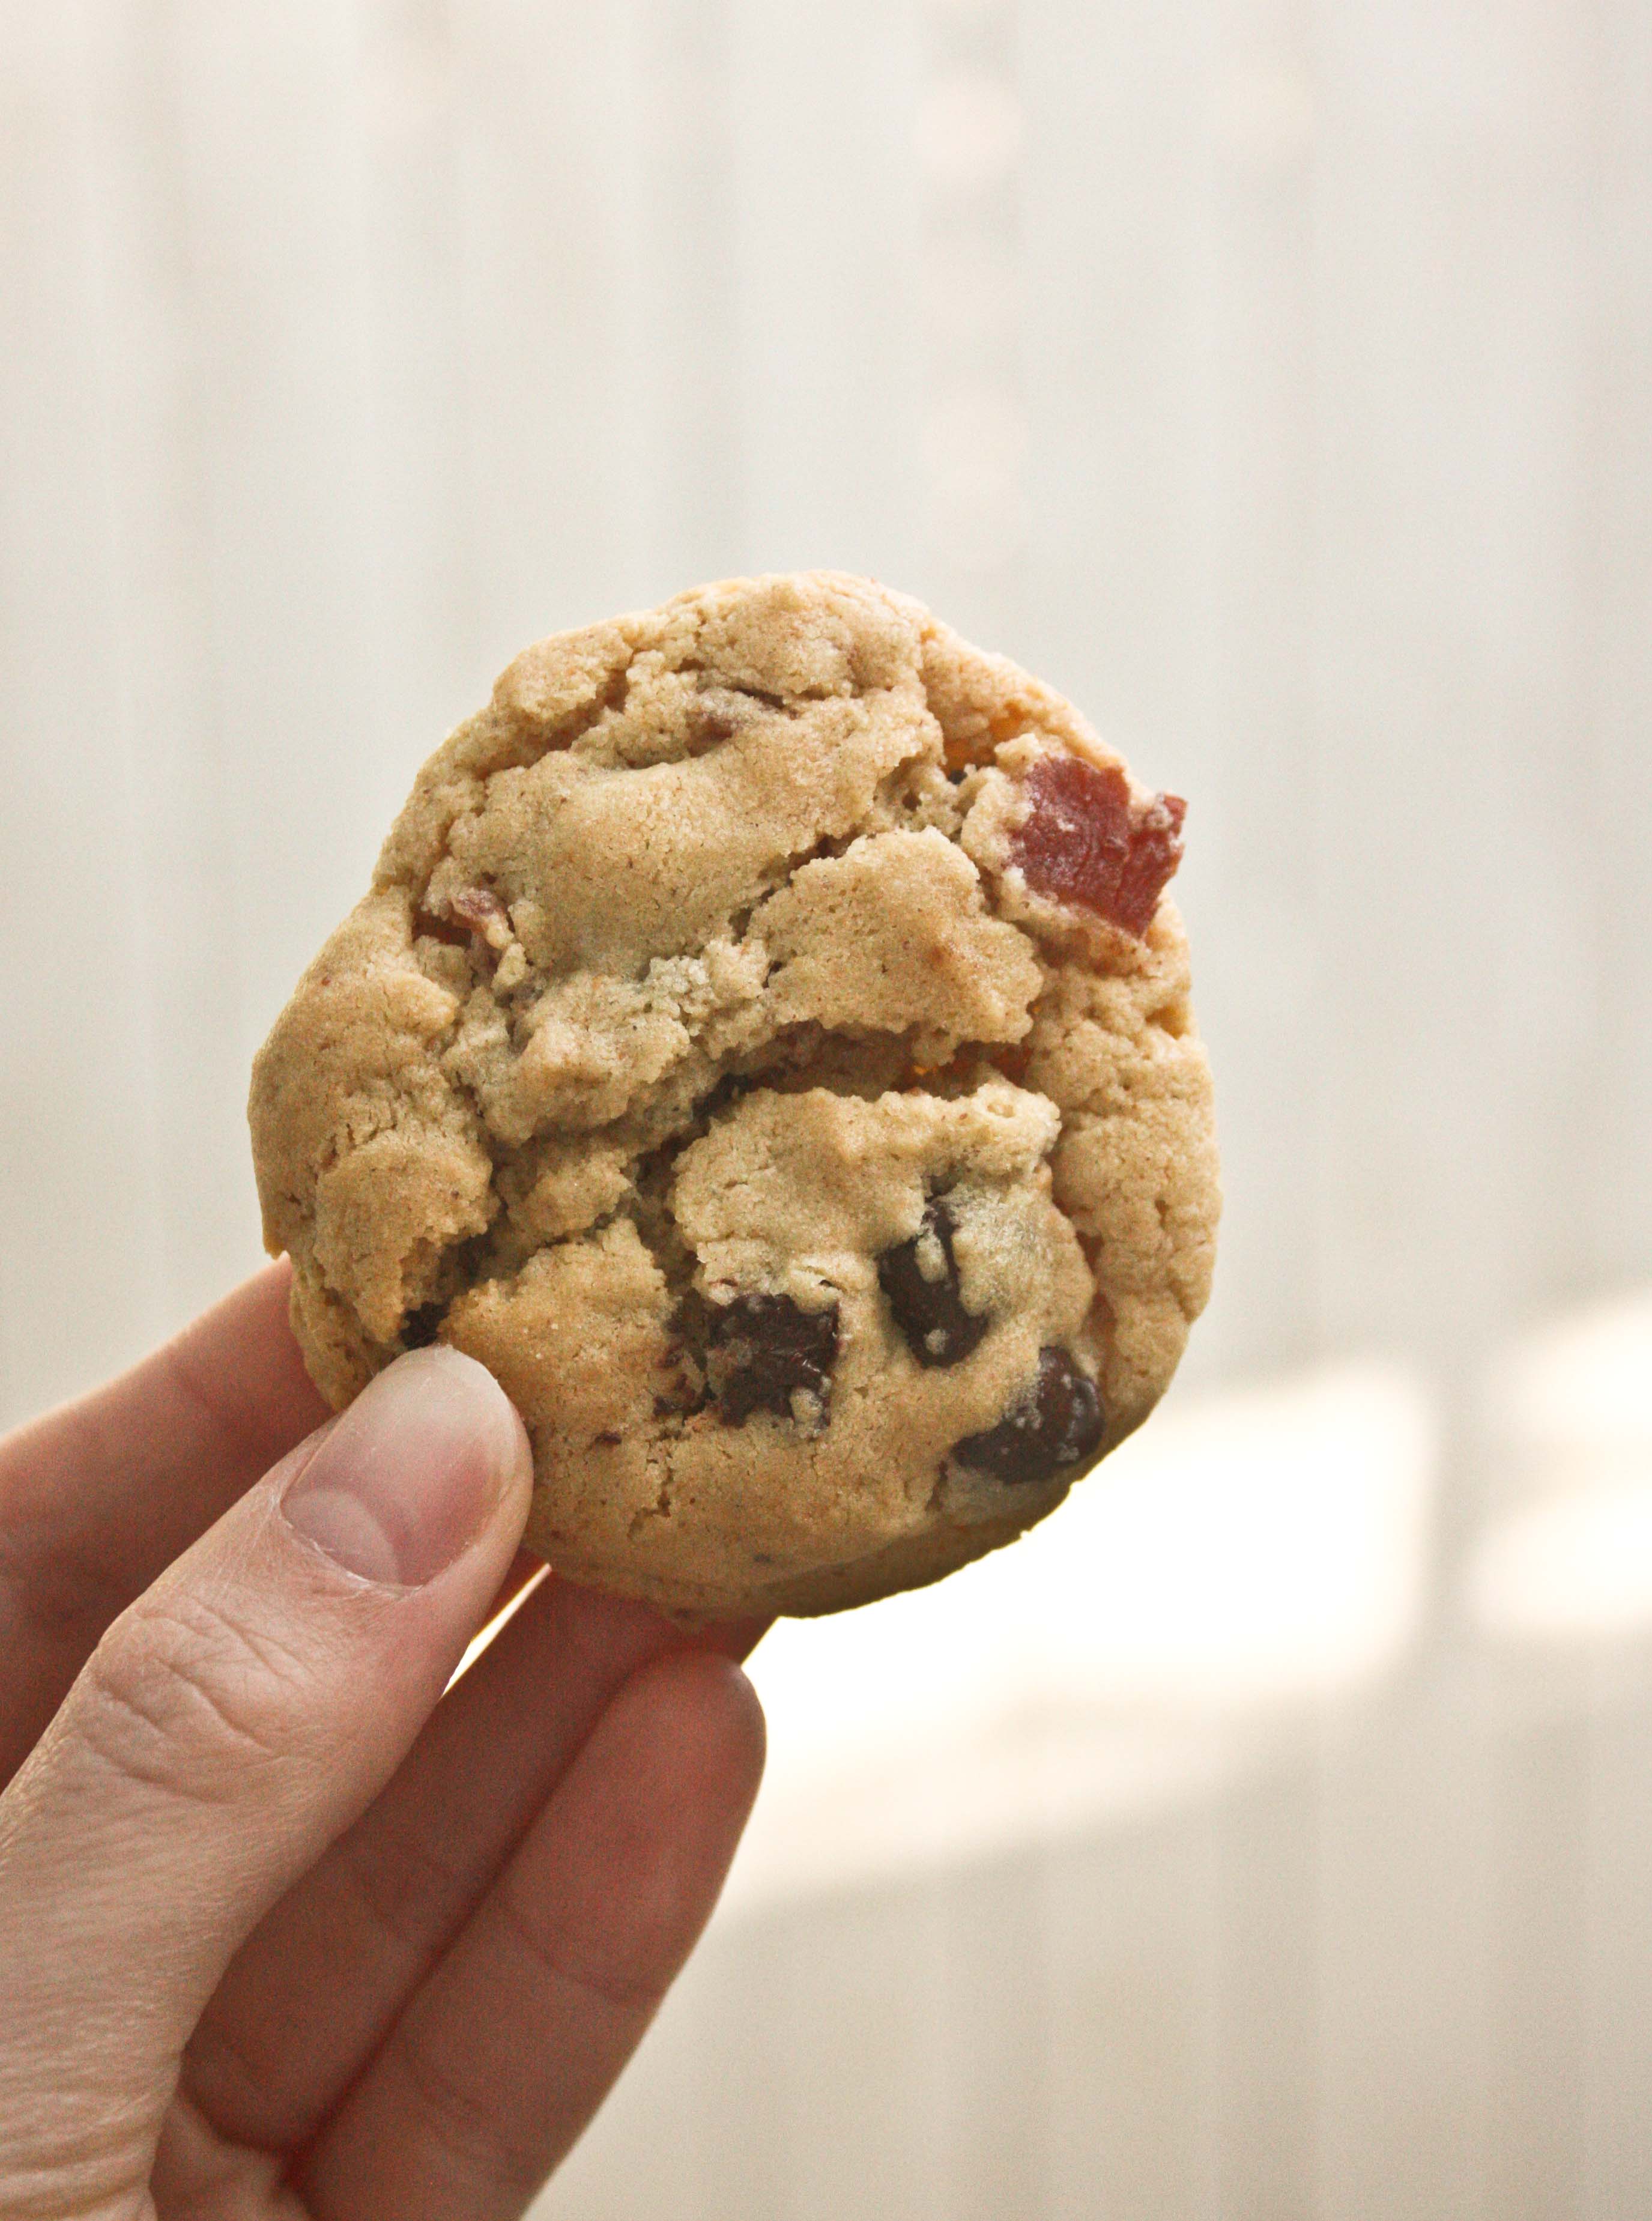
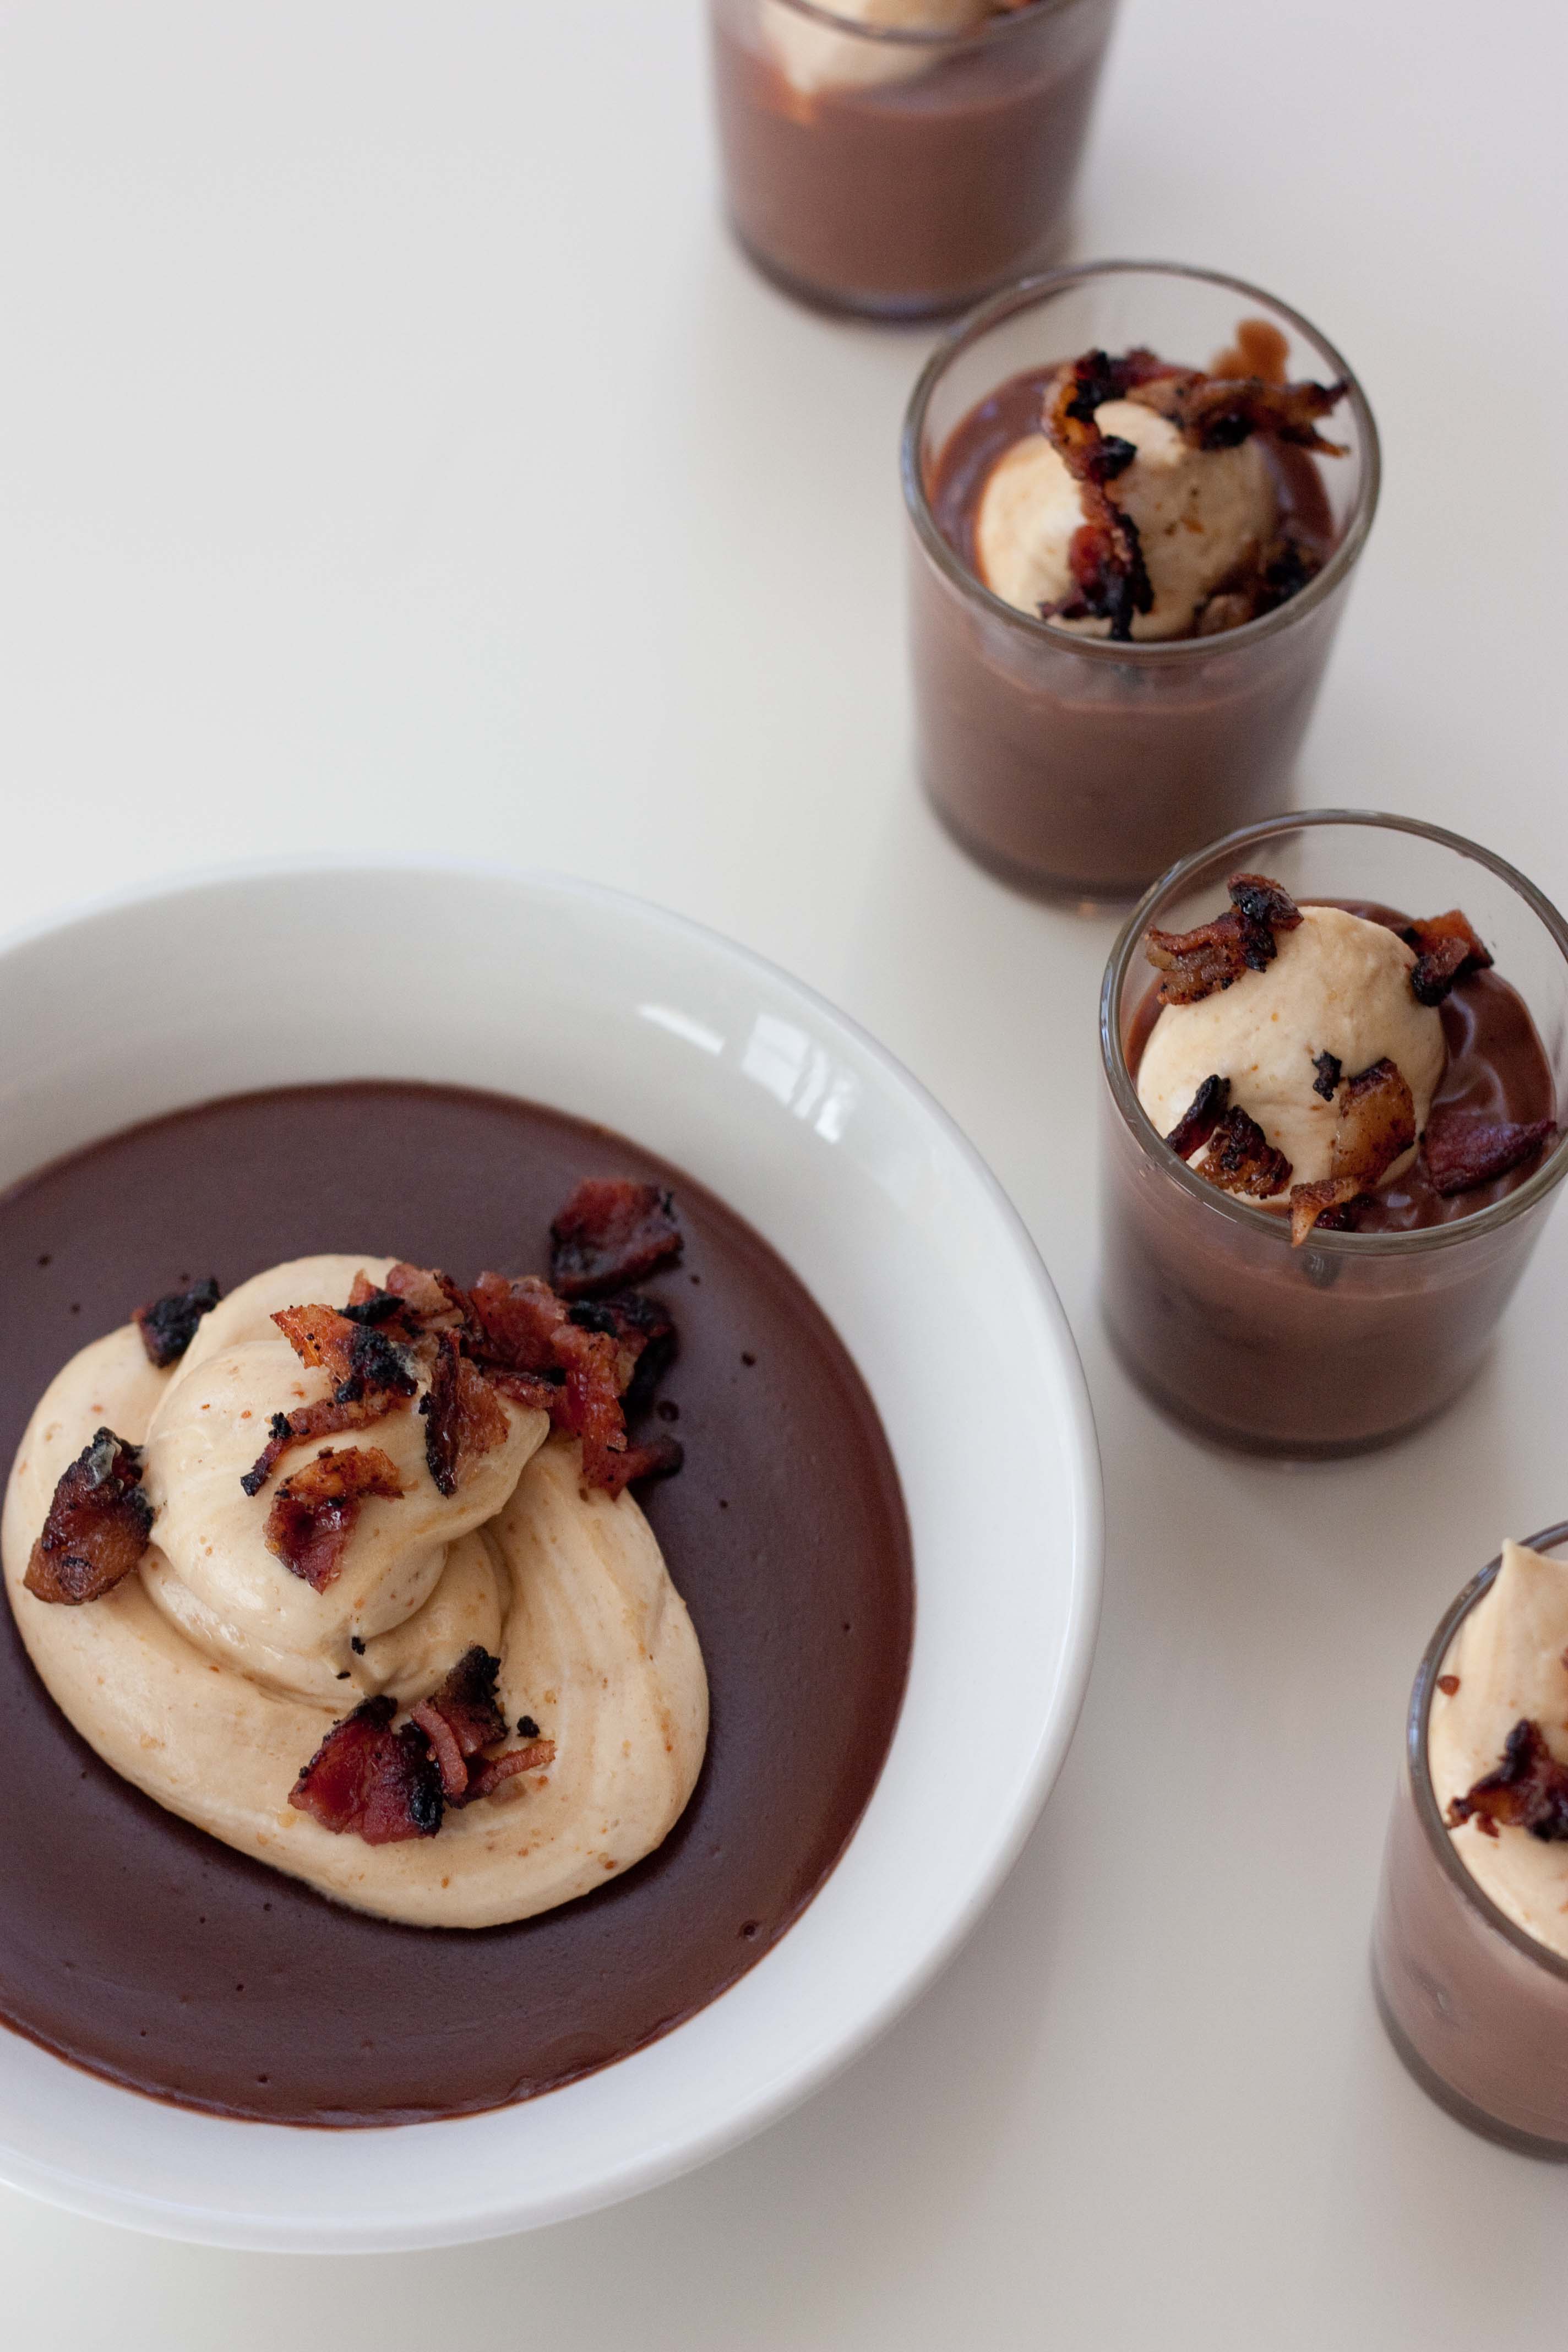
If your friend loves bacon but isn’t a fan of peanut butter… not to worry, I have a solution for you:
This blog post was original a dramatic complaint about how my life isn’t perfect. I just re-read it, and I feel dumb, capricious and immature. Because I realize all the things I worry about are trivial. There are far more serious things in life than the fact that I have a pile of student loan debt, a mean comment from a reader or a little bit of back pain.
Last week, I thought I was having a terrible week. Things kept going wrong, or so it seemed. But I was wrong.
This week is far more terrible, because terrible things didn’t happen to me. They happened to my loved ones, and that is a million times worse.
So in those moments when I feel like my life is crumbling, like a pie crust that doesn’t have enough water to help it stick together, food is important. Those moments are when pie is essential.
Really though.
Even if you don’t eat it, because by now I know turning to food when things aren’t going well is wrong, make the pie and give it away.
Give it to a loved one who isn’t having the best day, or a friend you haven’t talked to in a long time.
Pie doesn’t heal all wounds, but it helps.
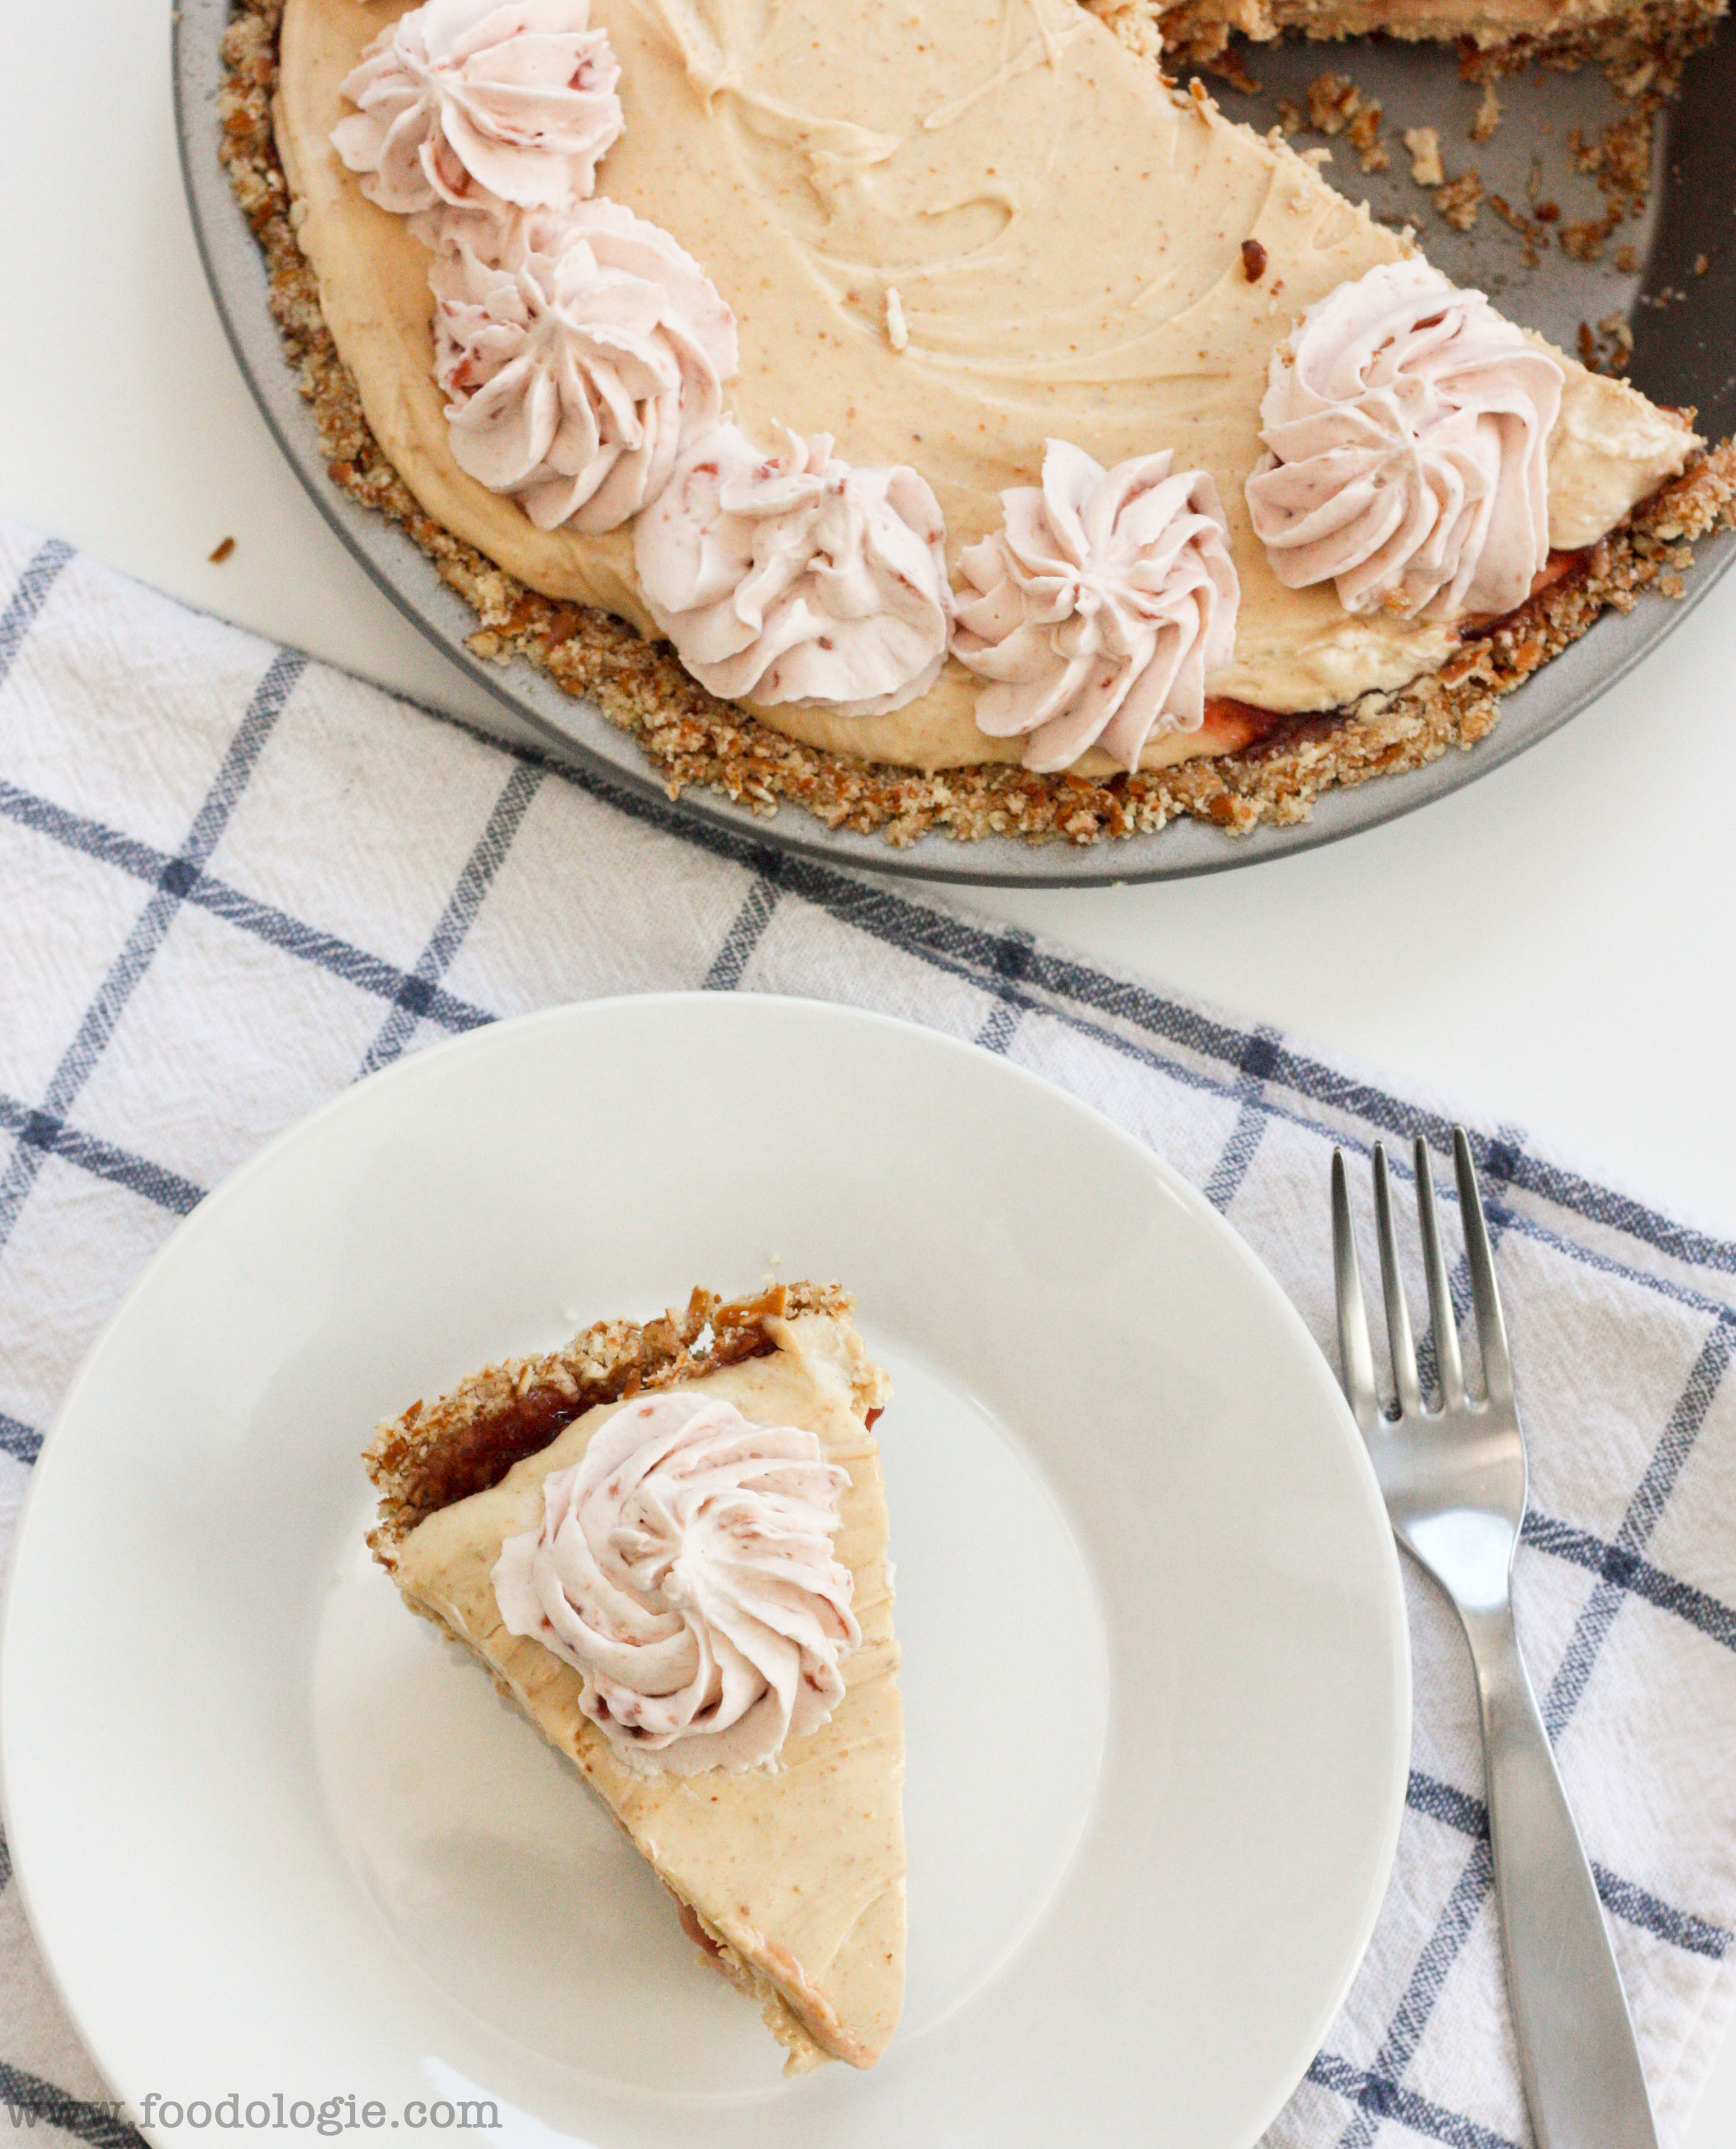
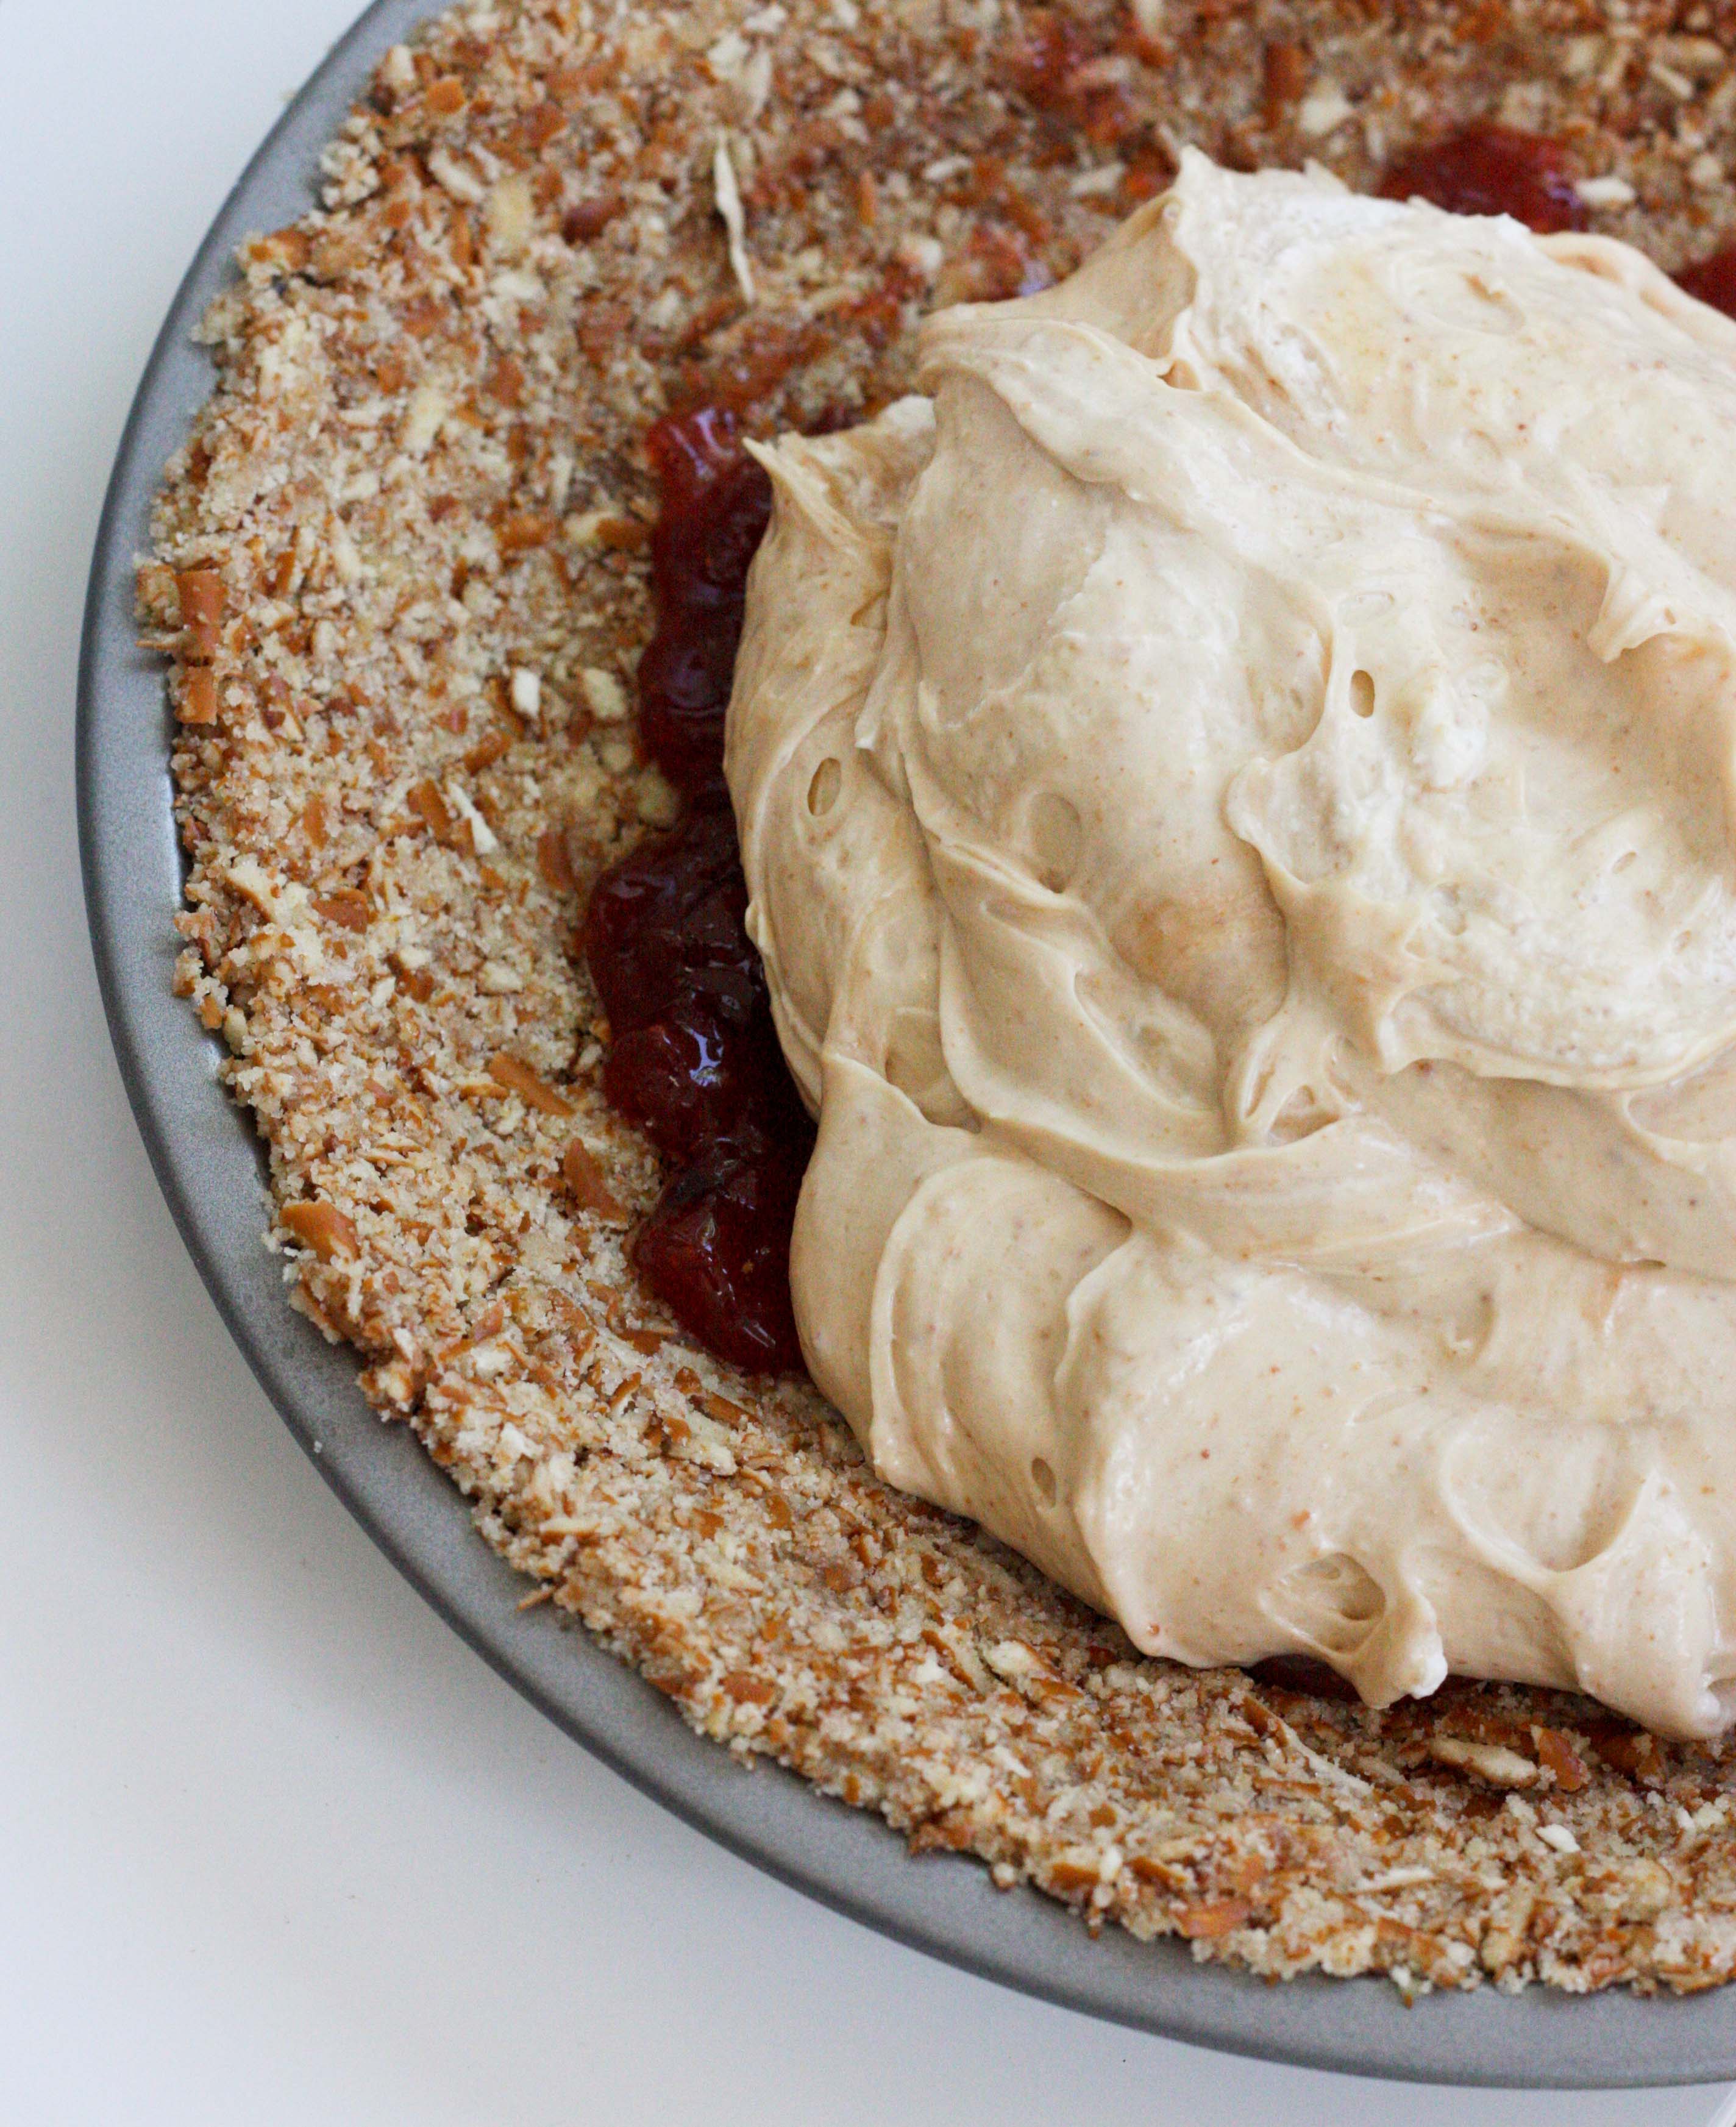
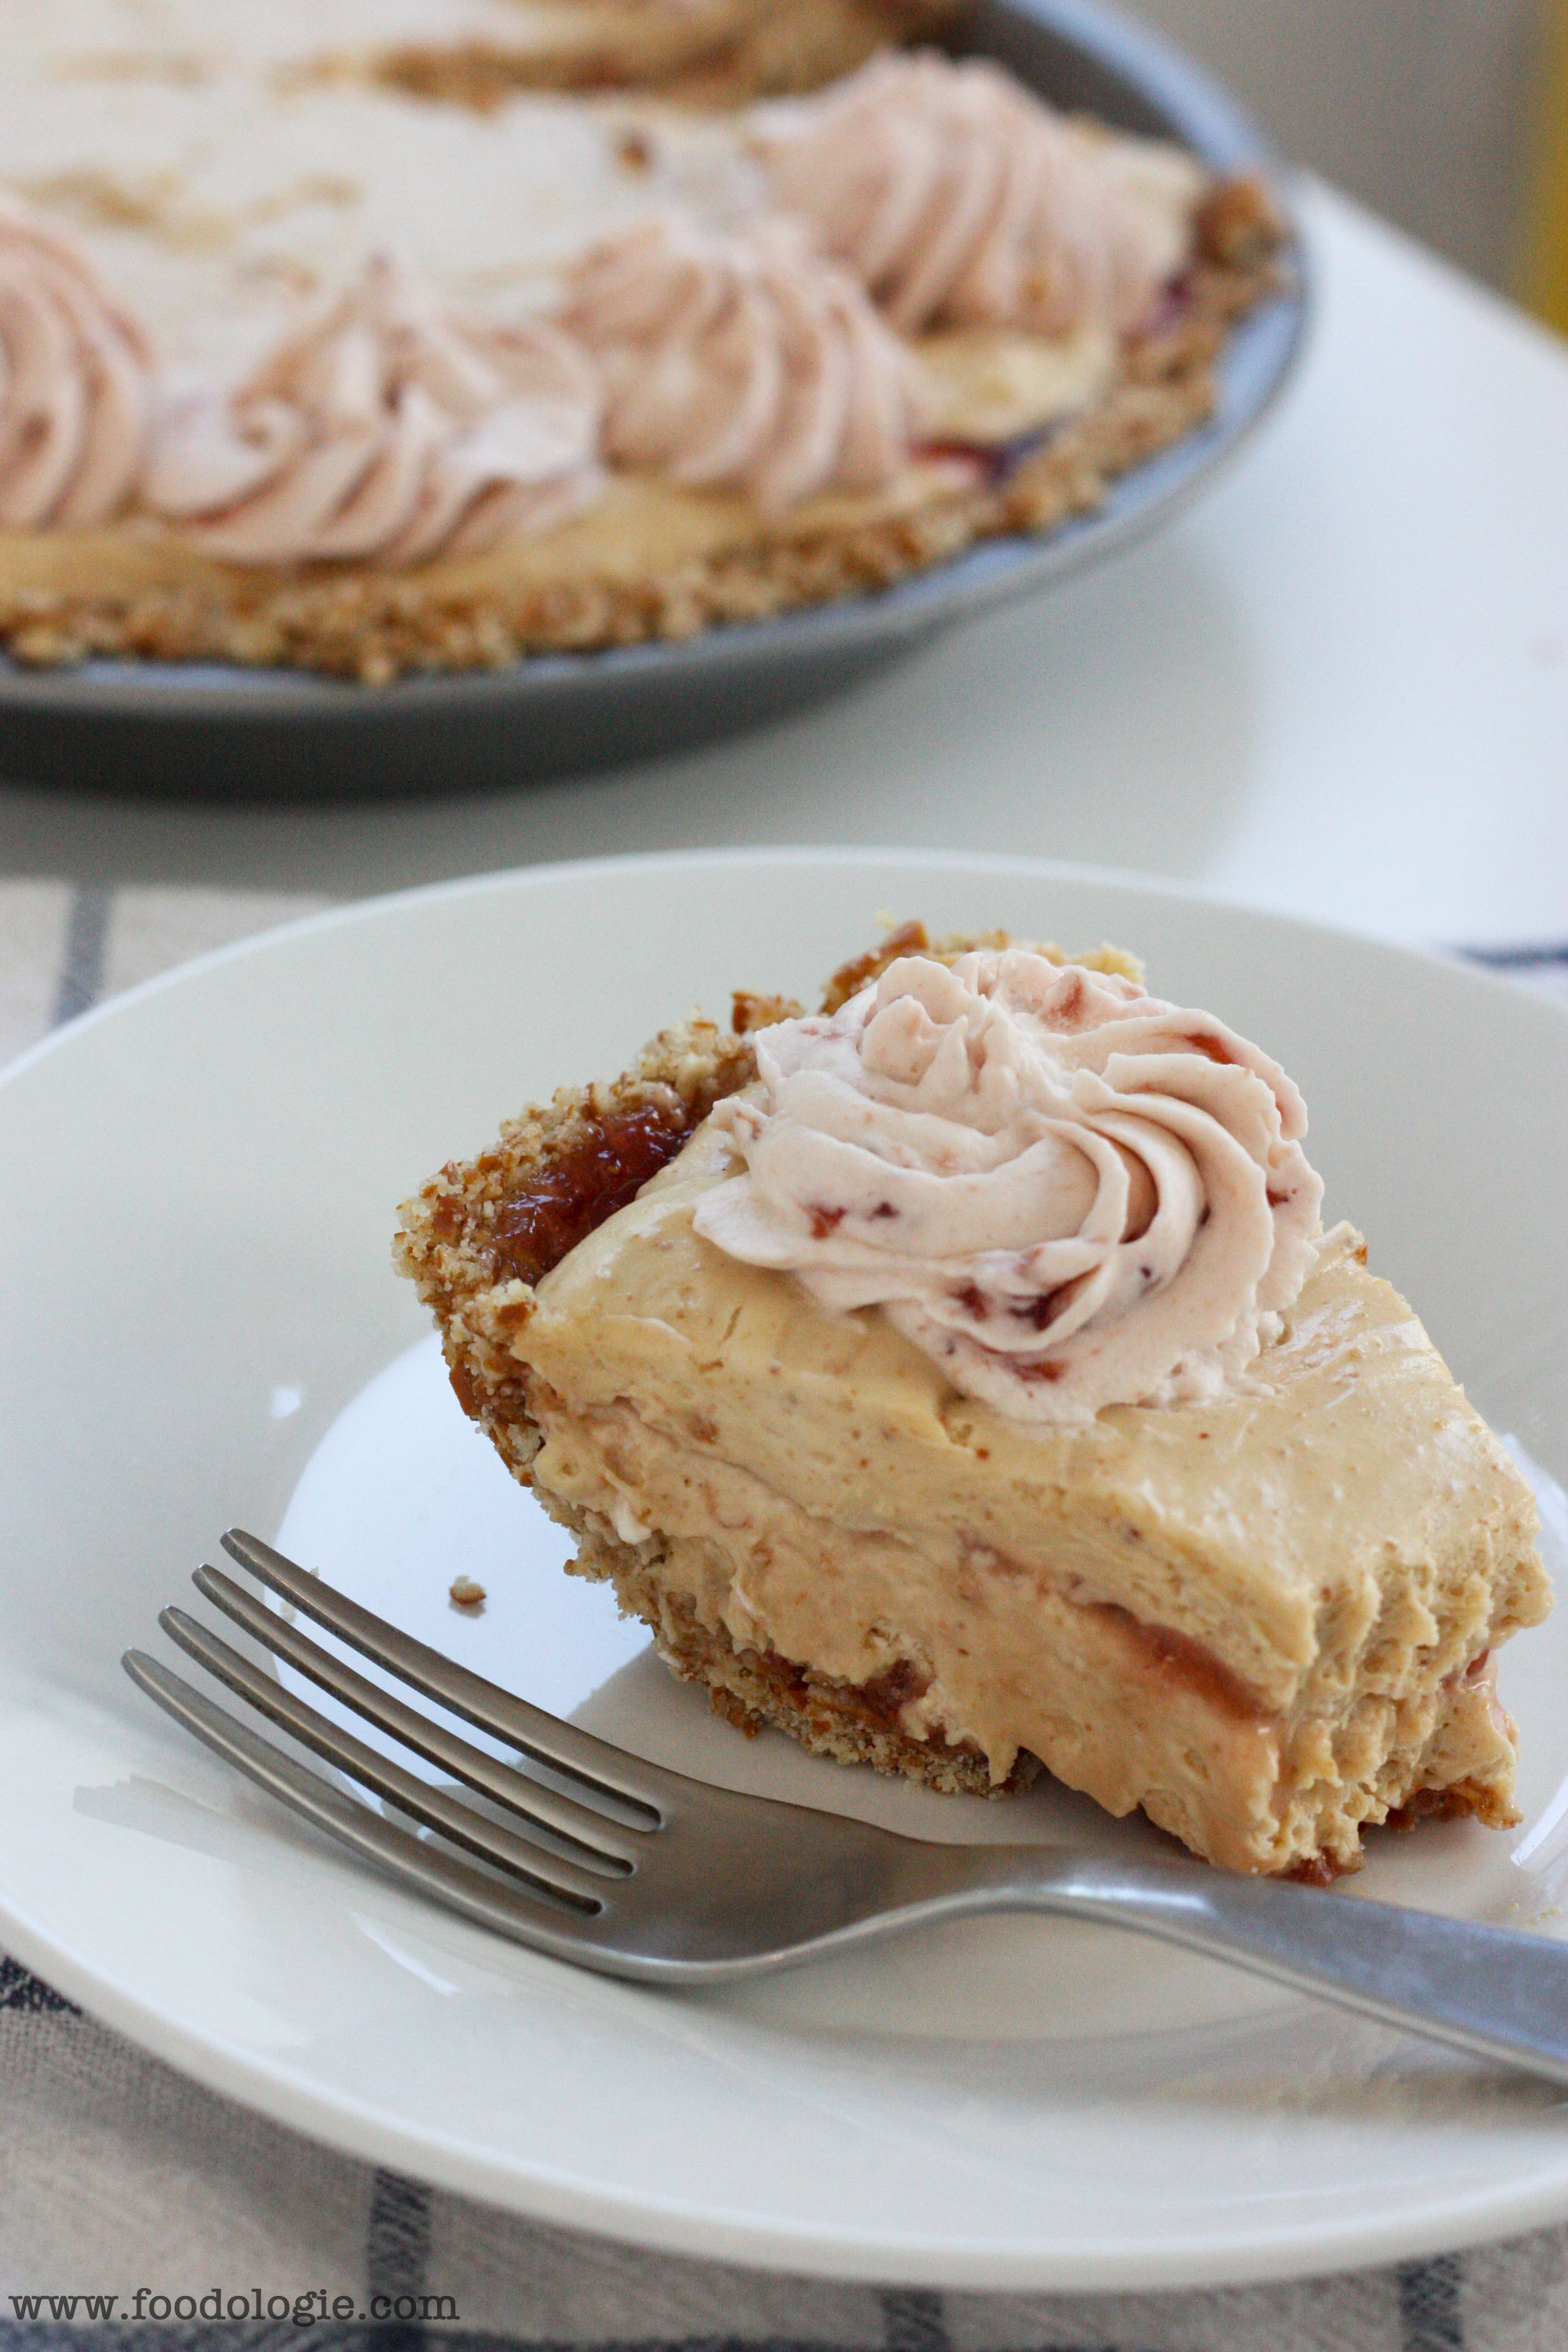
Peanut Butter and Jelly Pie in a Pretzel Crust
1 1/4 cup of pretzel crumbs 1/2 cup butter, melted 1/4 cup sugar 1/2 cup peanut butter, smooth natural 4 oz cream cheese, softened 7 oz sweetened condensed milk 1 1/2 cups heavy whipping cream, divided 1/2 cup + 3 tbsp strawberry jam
First make your crust by mixing together pretzel crumbs, butter and sugar. Press into a 9” pie dish and place in the freezer until ready to use.
Next, beat together peanut butter, cream cheese and sweetened condensed milk. Beat 1/2 cup of heavy whipping cream until if holds firm peaks. Fold whipped cream into peanut butter mixture until combined. Set aside.
Beat remaining 1 cup of whipped cream. Once it start to form peaks, add in 3 tbsp of strawberry jam. If you want to avoid clump, blend your jam before adding it to the whipped cream. Set aside.
Next assemble the pie. Spread half of the jam on the bottom of the pie crust. If it’s hard to spread, feel free to add a little water or blend it to make it smooth. Next spread on half the peanut butter mixture, then another layer with remaining jam. Top with remaining peanut butter mixture. Transfer whipped cream to piping bag and pipe strawberry whipped cream onto the pie, alternatively you can just spread it.
Refrigerate for a few hours or overnight and serve cold to someone special.
This is comfort food to the max, because sometimes we need a little comfort and a big hug.
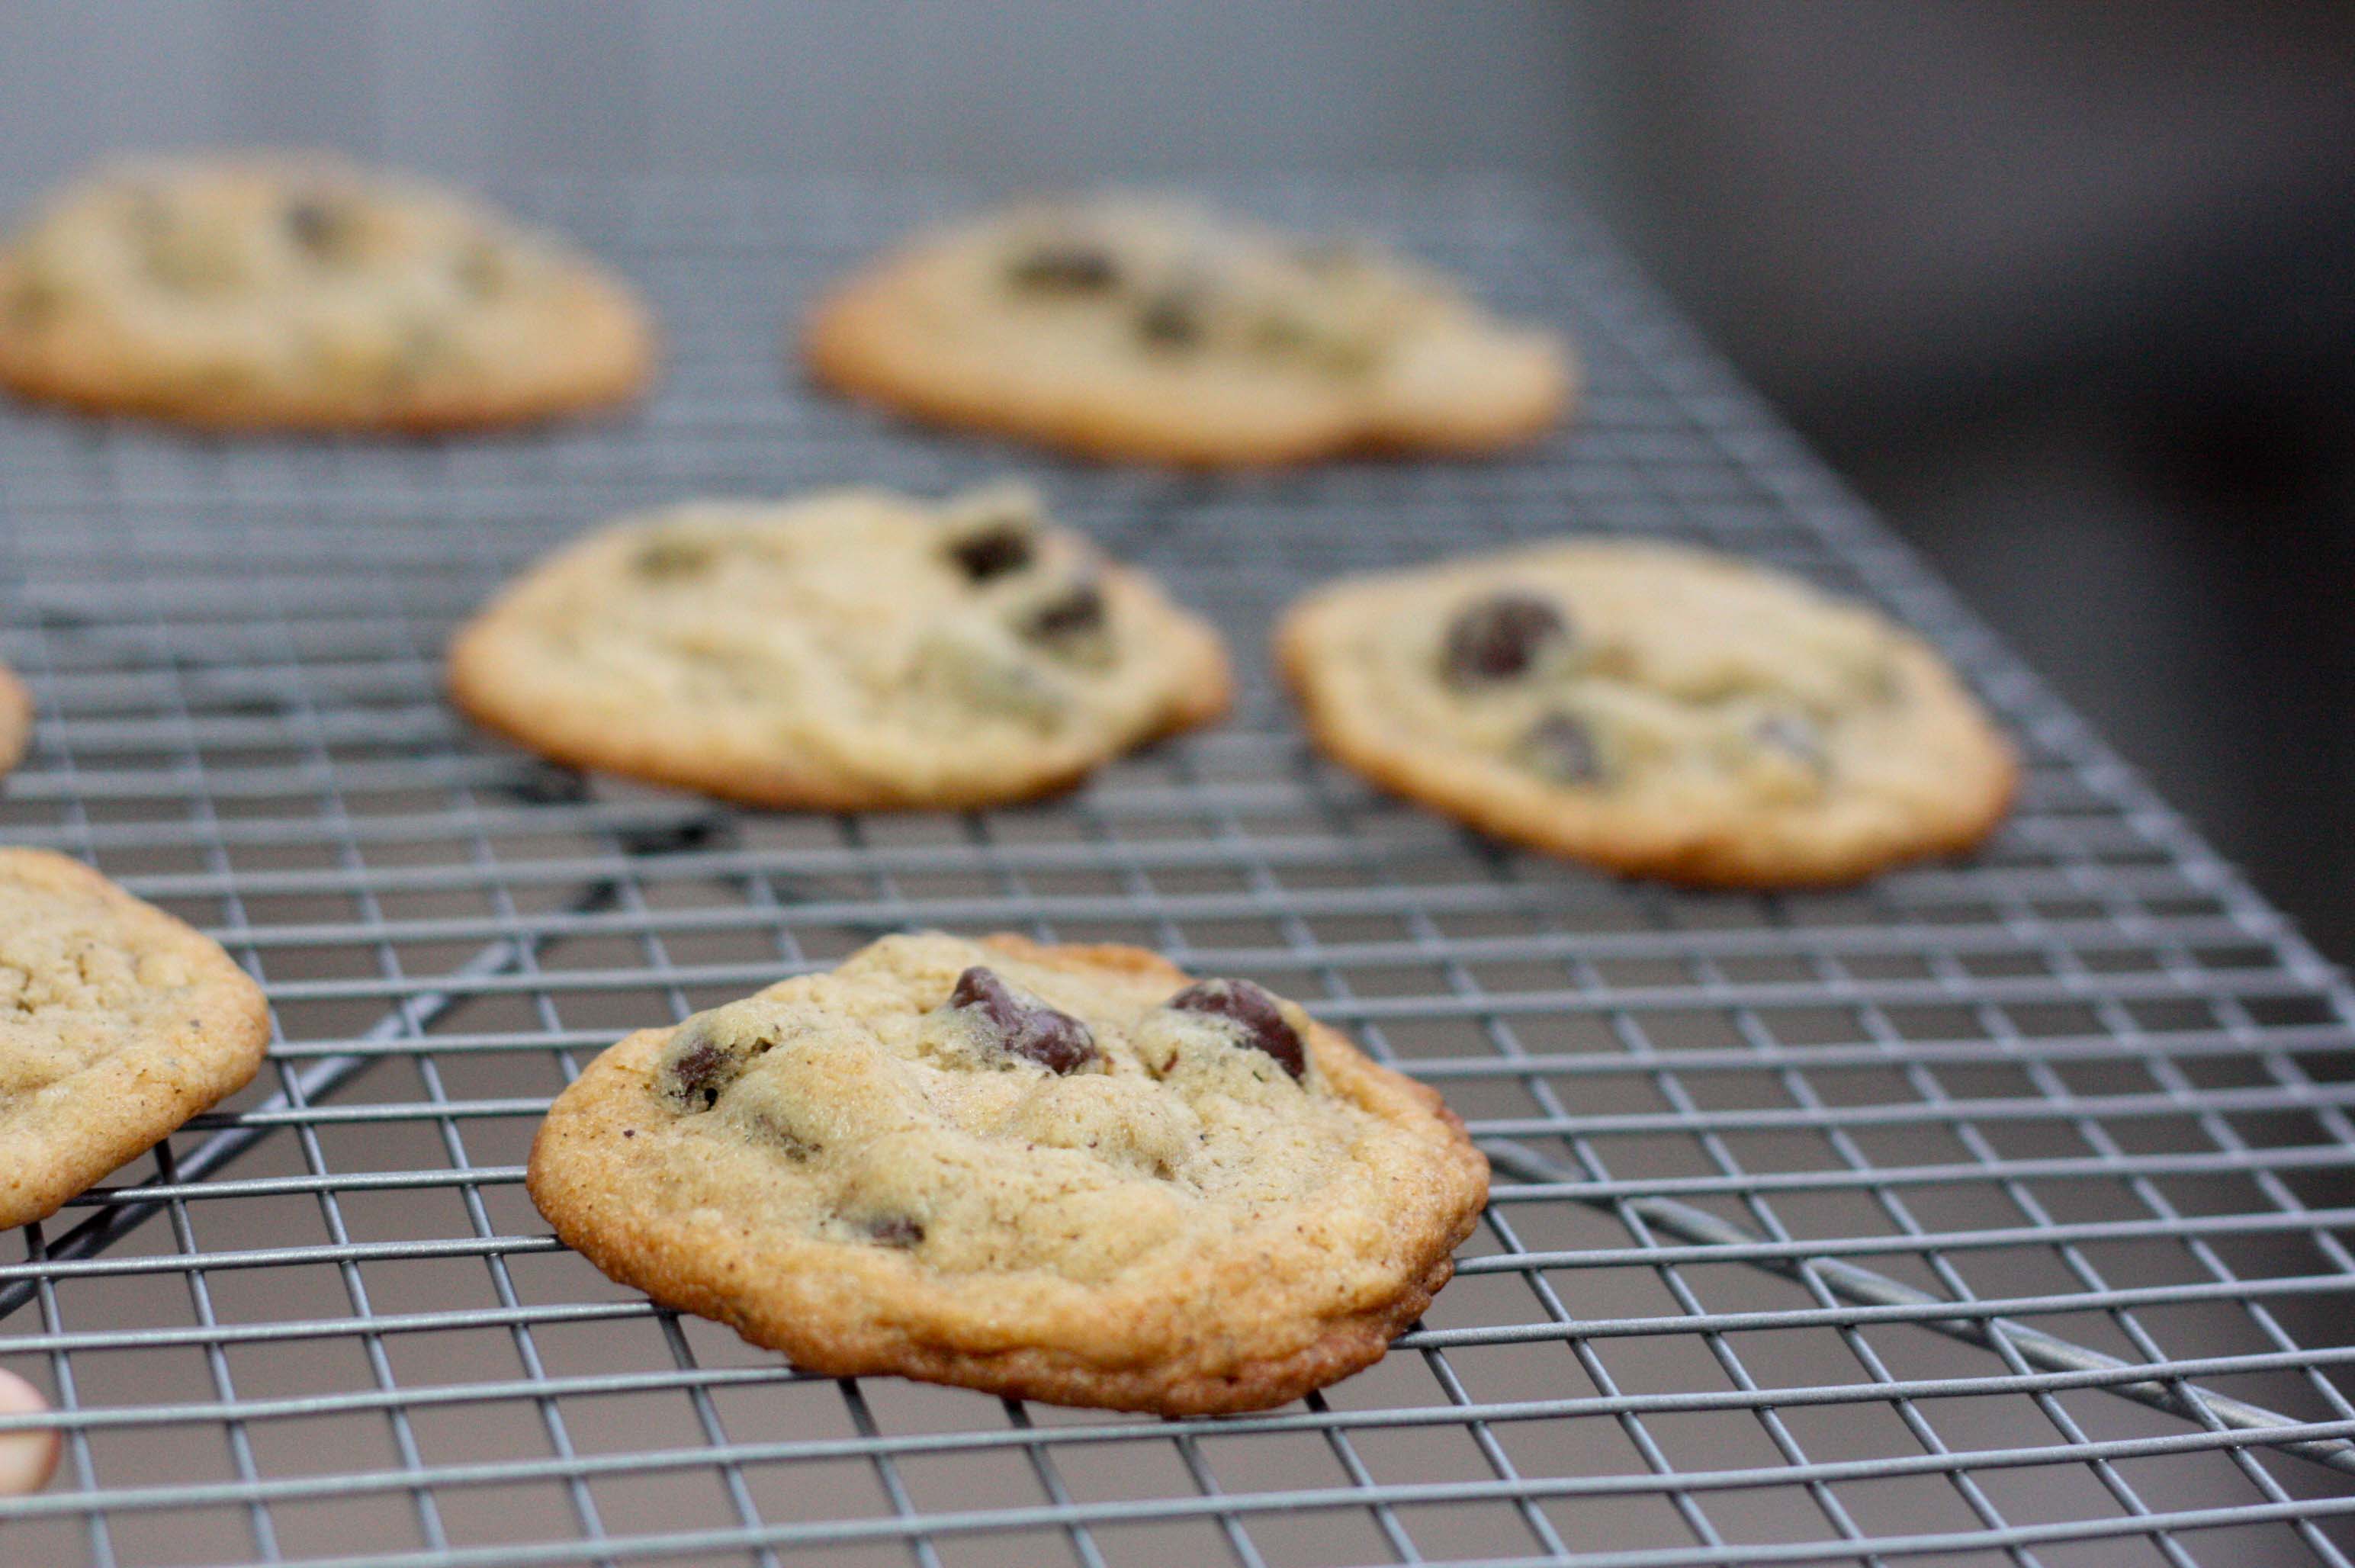
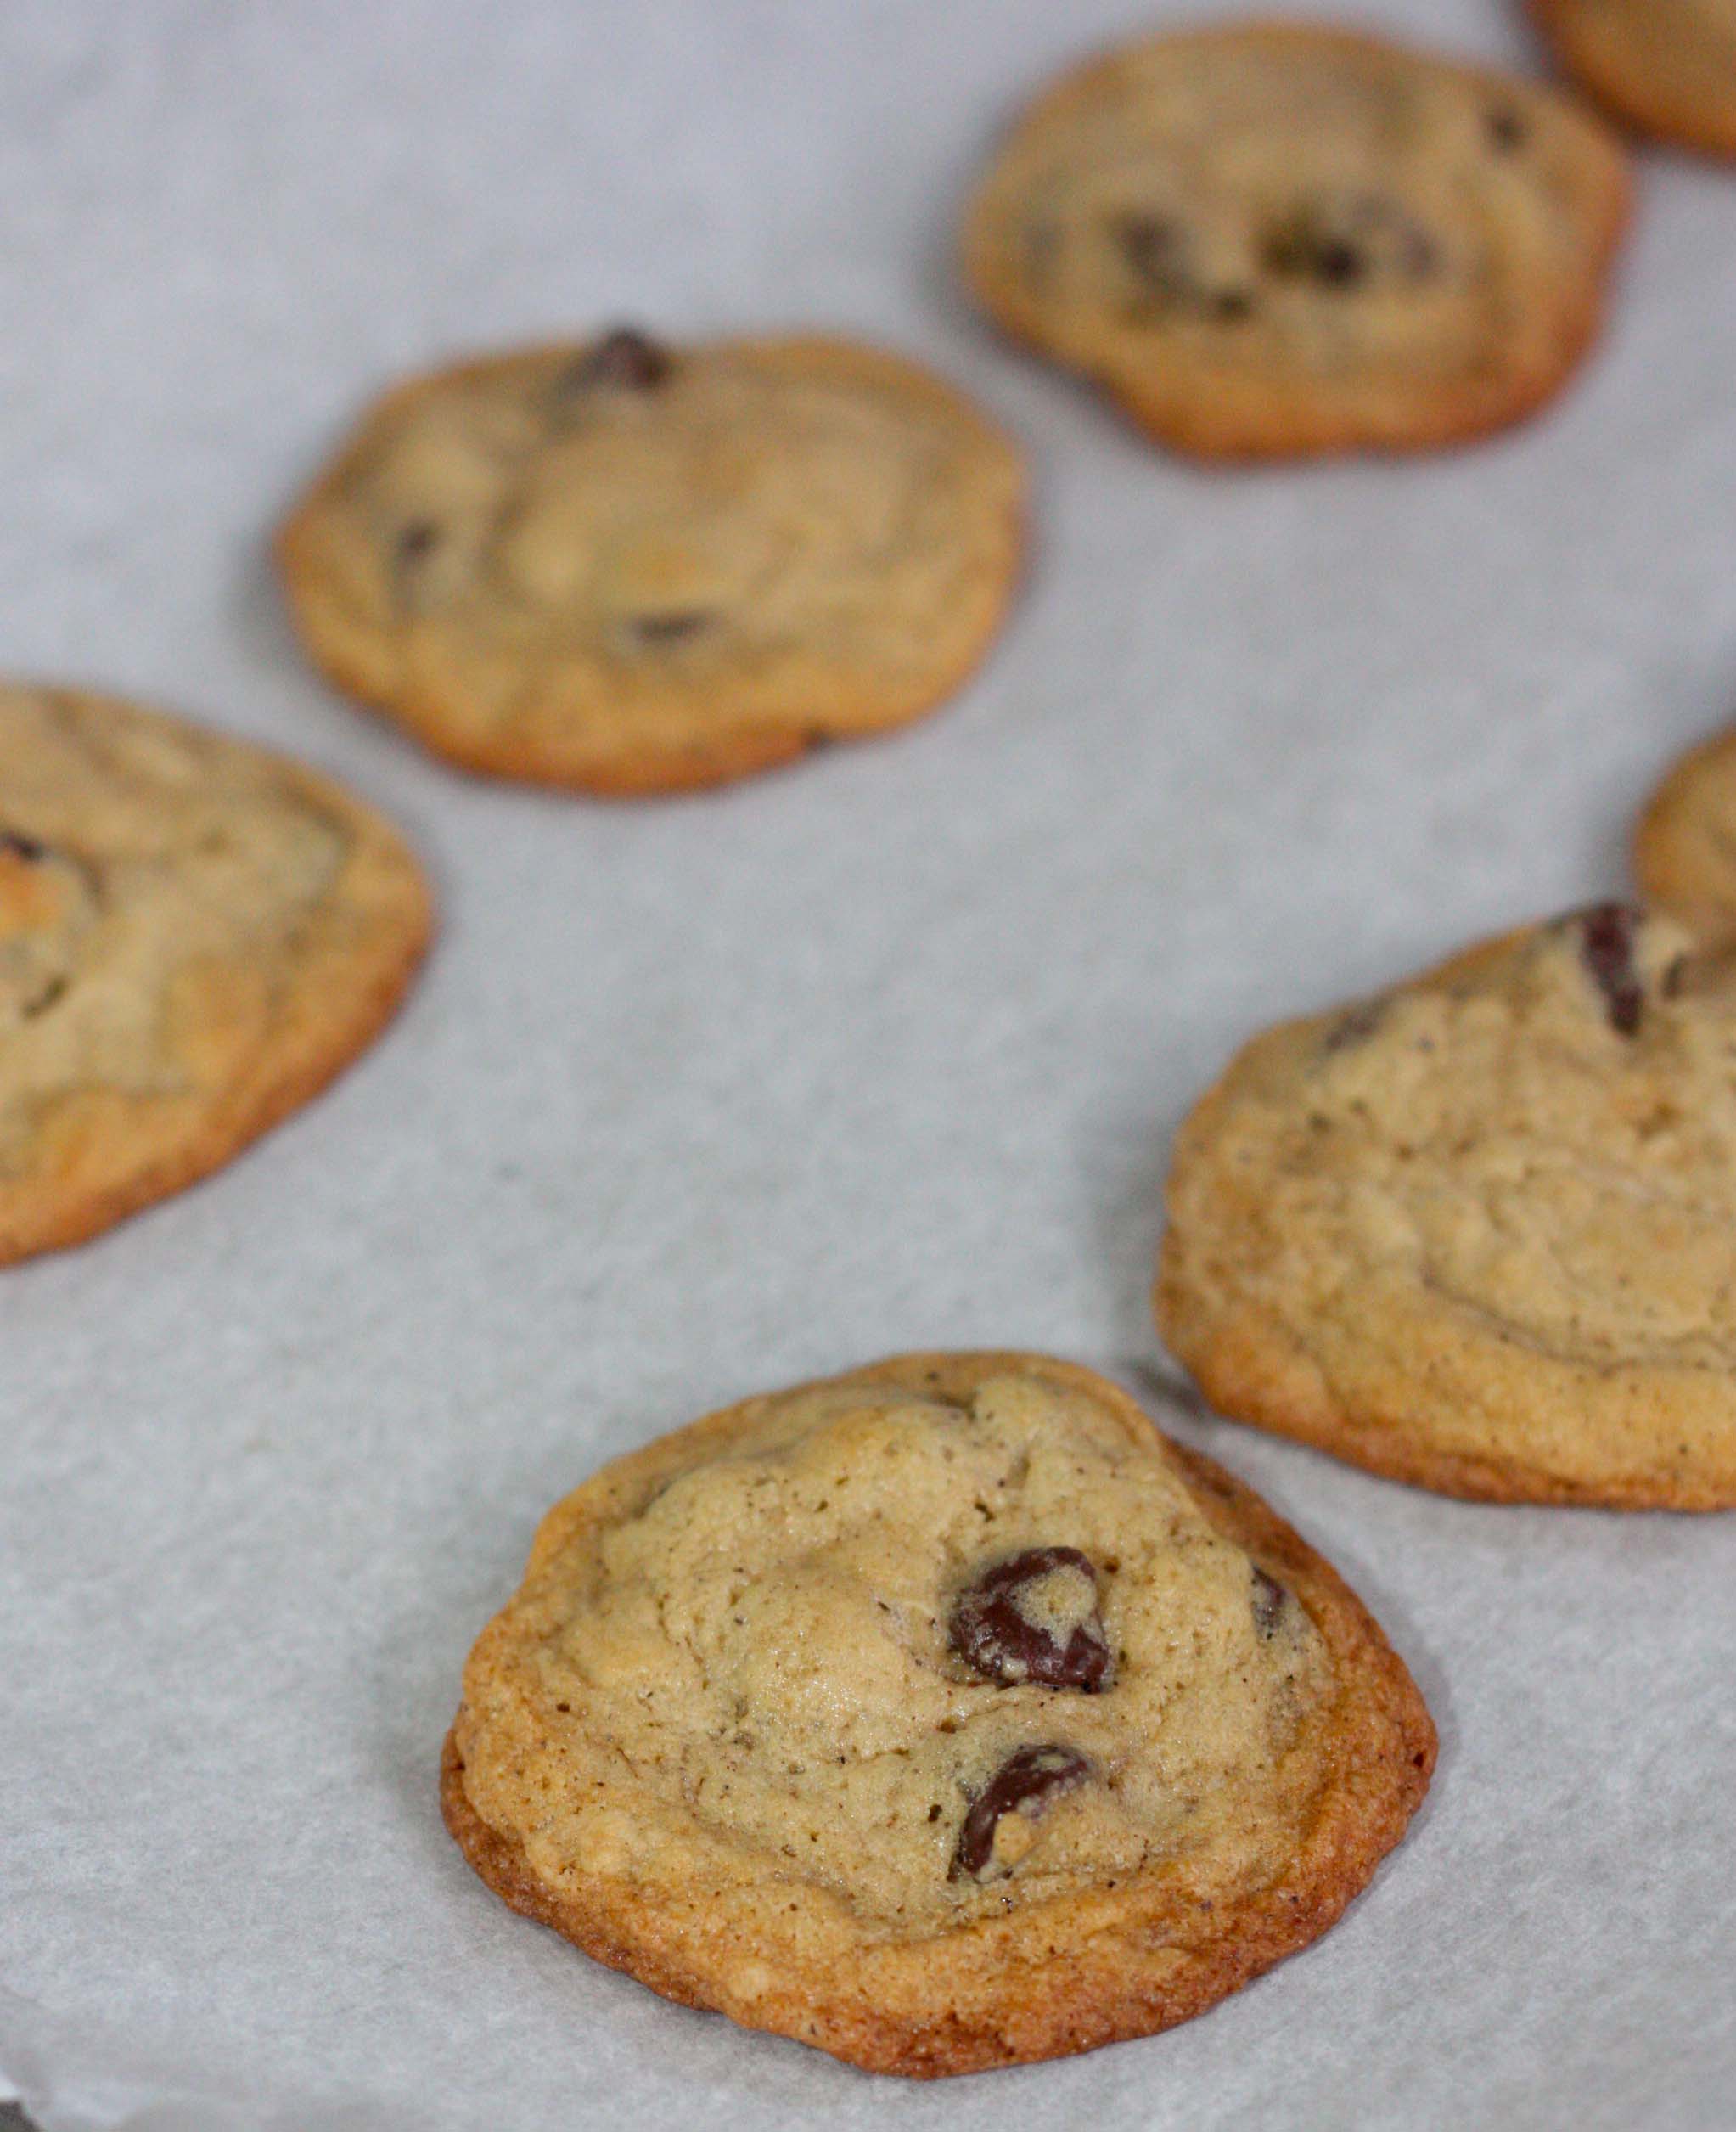
Until about 5 days ago, I thought “brown butter” was a crock of shit.
I hate to be crass, but let’s be honest, food bloggers are some of the best bullshitters I know. Don’t worry, I’m include myself in that sweeping comment.
I mean really, we love to make basic things and give them a fancy name that hipsters will repin like crazy and drive traffic to our sites.
I’m just calling it like it is. And you know what hipsters love?
Butter. Especially brown butter.
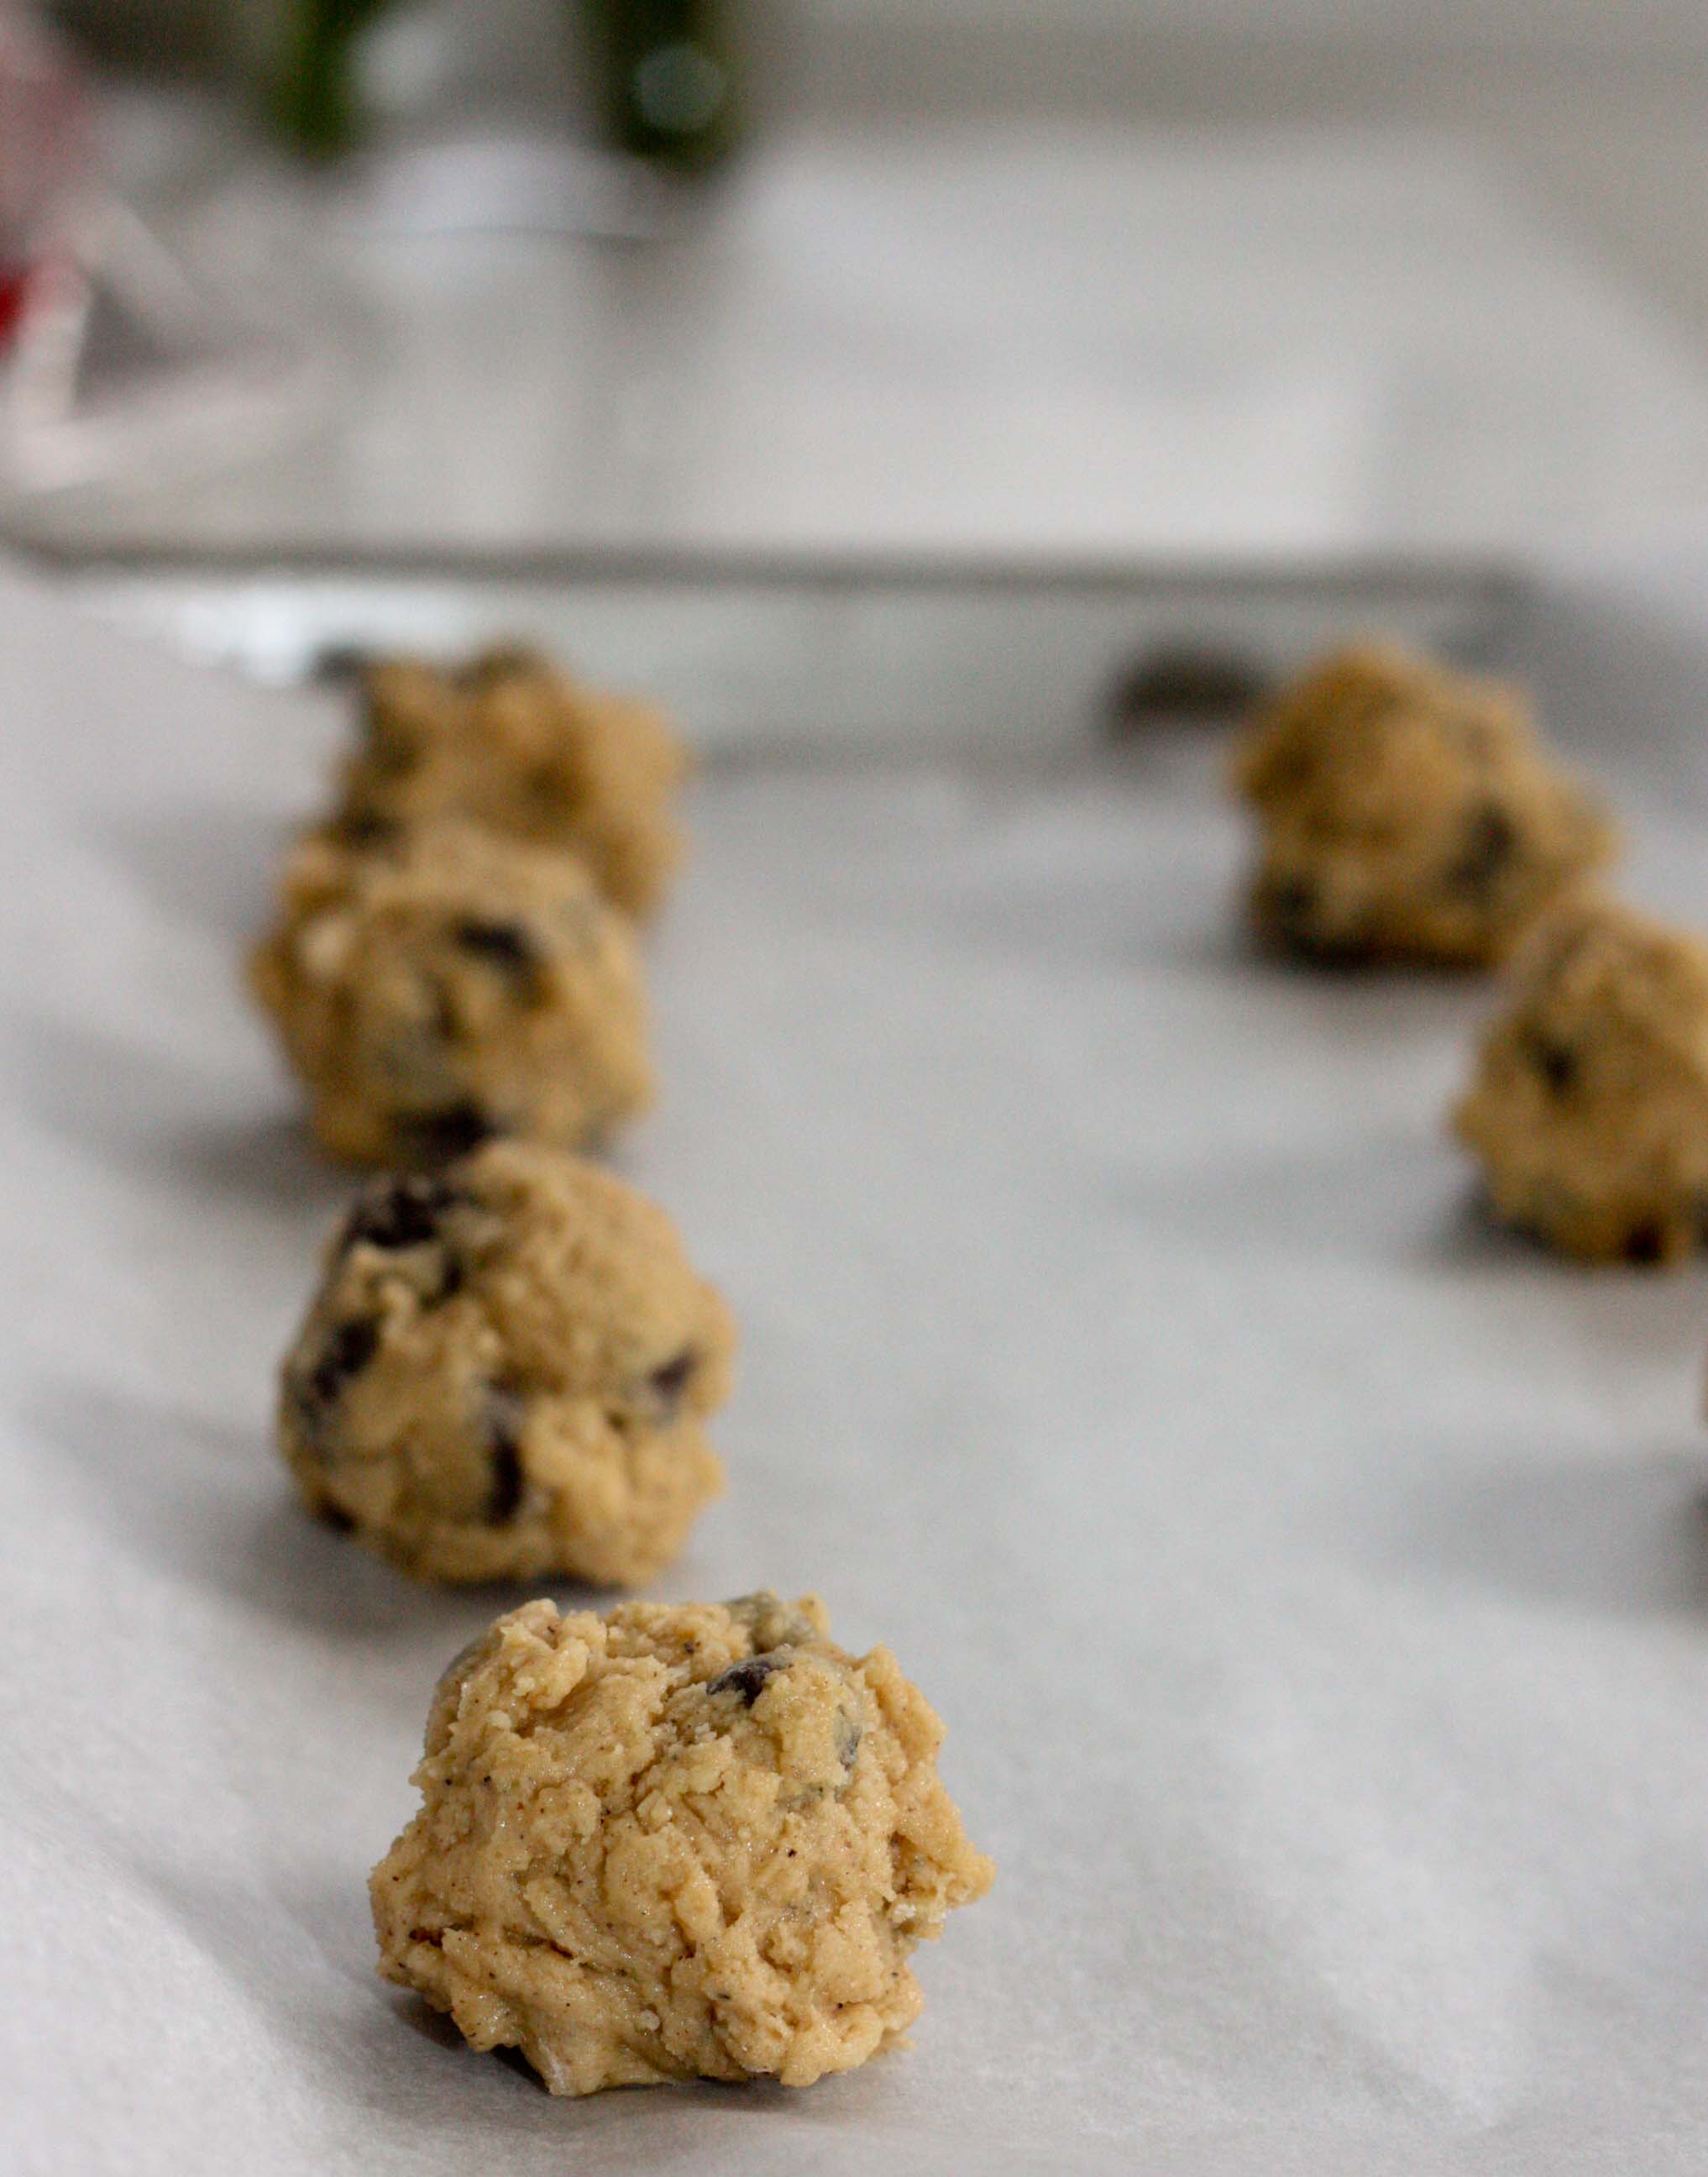
So for a long time, I avoided anything with brown butter, because it just sounded sort of silly, but then on Friday I was bored and I needed to make dessert for the next day. So I thought to myself, why not give it a shot?
At worst it, it’s still just a damn cookie. At best, it’s an amazing cookie.
1 stick of butter 1 cup + 2 tbsp all purpose flour 1/2 tsp salt 1/2 tsp baking soda 1/2 cup brown sugar 1/4 cup white sugar 1 egg 2 tsp vanilla extract 1 cup dark chocolate chips
In a pan, melt butter over medium heat. Allow to brown, about 5 minutes. Remove from heat, transfer to large bowl and allow to cool to room temperature. In the meantime, combine flour, salt, and baking soda in a bowl and set aside.
Once the butter has cooled, cream together butter and sugar until fluffy. Add 1 egg at a time, then vanilla and continue to be beat for about a minute. Add in flour mixture. Mix until almost combined. Fold in chocolate chips until dough is just combined.
Place dough in the freezer while oven preheats to 350F.
Once oven has pre-heated, form dough into walnut sized balls. Place on parchment paper-lined pan and bake for 8-10 minutes, or until golden around the edges.
Remove from oven, leave on pan for a few minutes then transfer to a cooling rack until cool. Then serve! This recipe makes about 20-24 small ish cookies. If you want larger cookies, bake longer and you’ll probably get about 10.
So I’m going to go ahead and tell you that these are great.
I’m going to swallow my pride and admit I was wrong. Brown butter is pretty tasty. They weren’t lying when they said it gives it a nice nutty flavor.
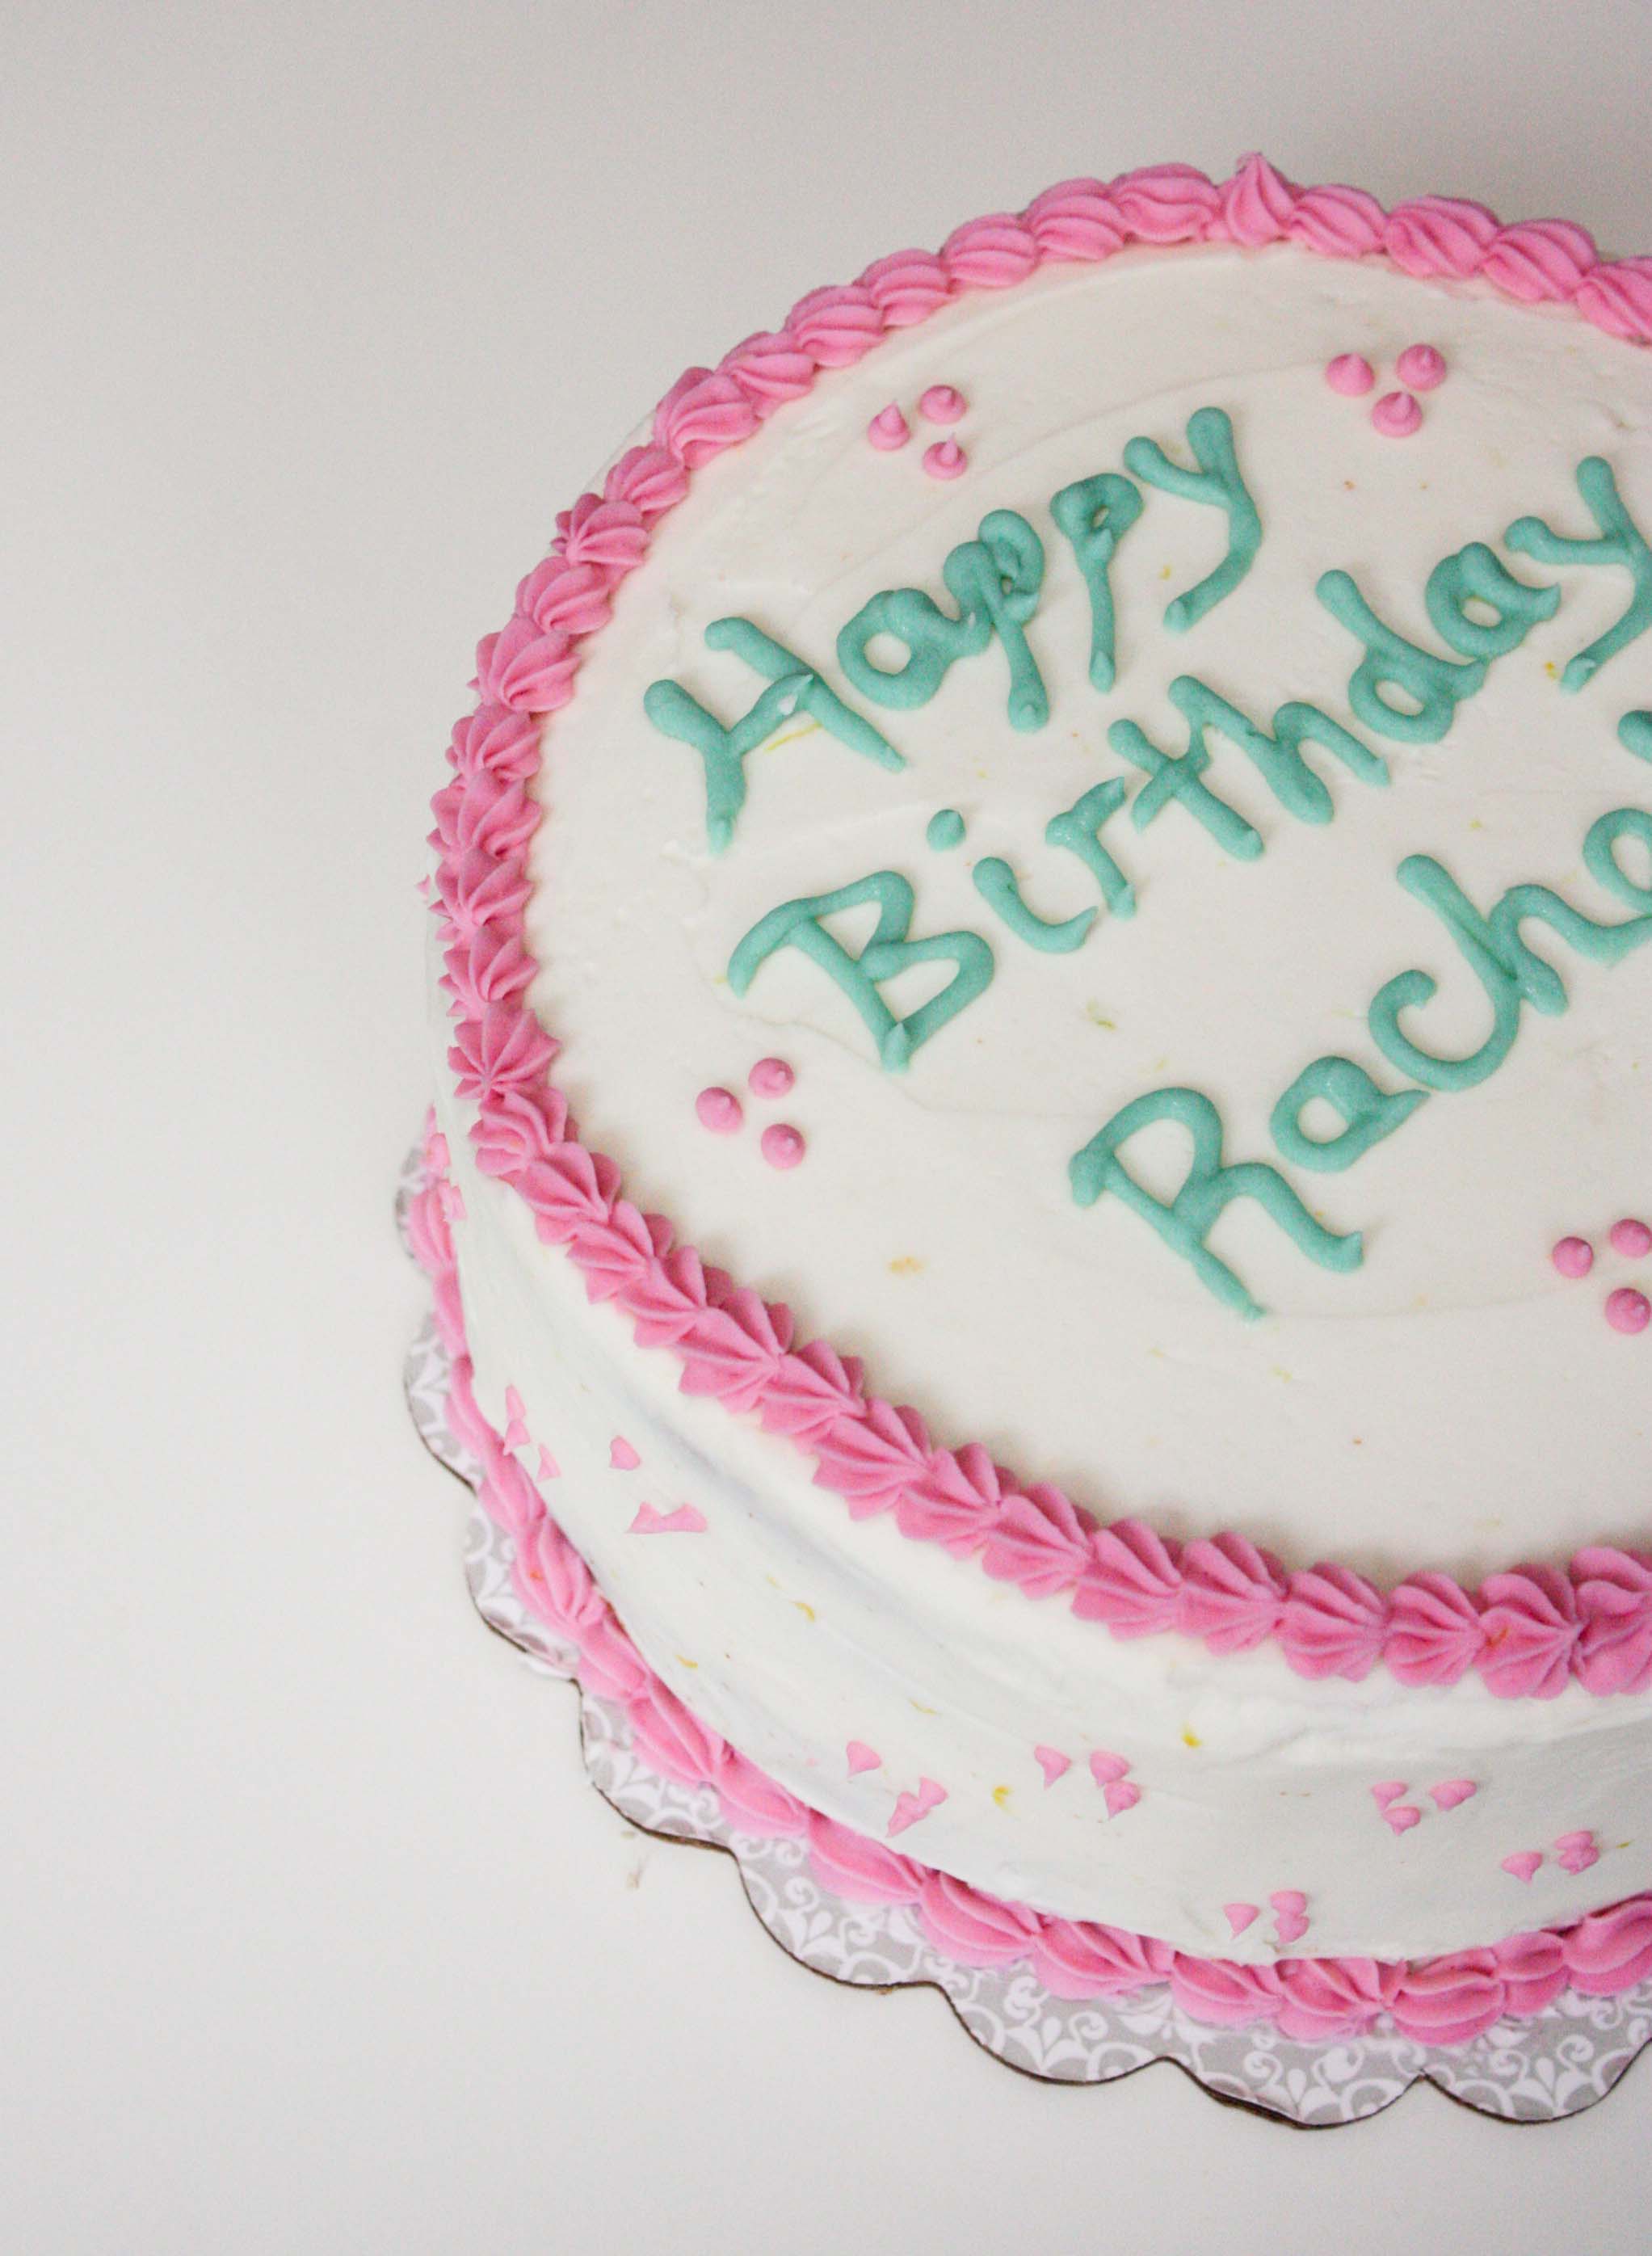
Ok but really I think cakes are awesome. I also think they’re super labor intensive so I get why people buy them instead of make them, but I really think more people should take up cake making.
This past weekend, I made three layer cakes.
So from my experience of making three cakes in a row, I wanted to share with you a few tips and tricks to making the perfect layers cakes, along with some of my favorite cake recipes.
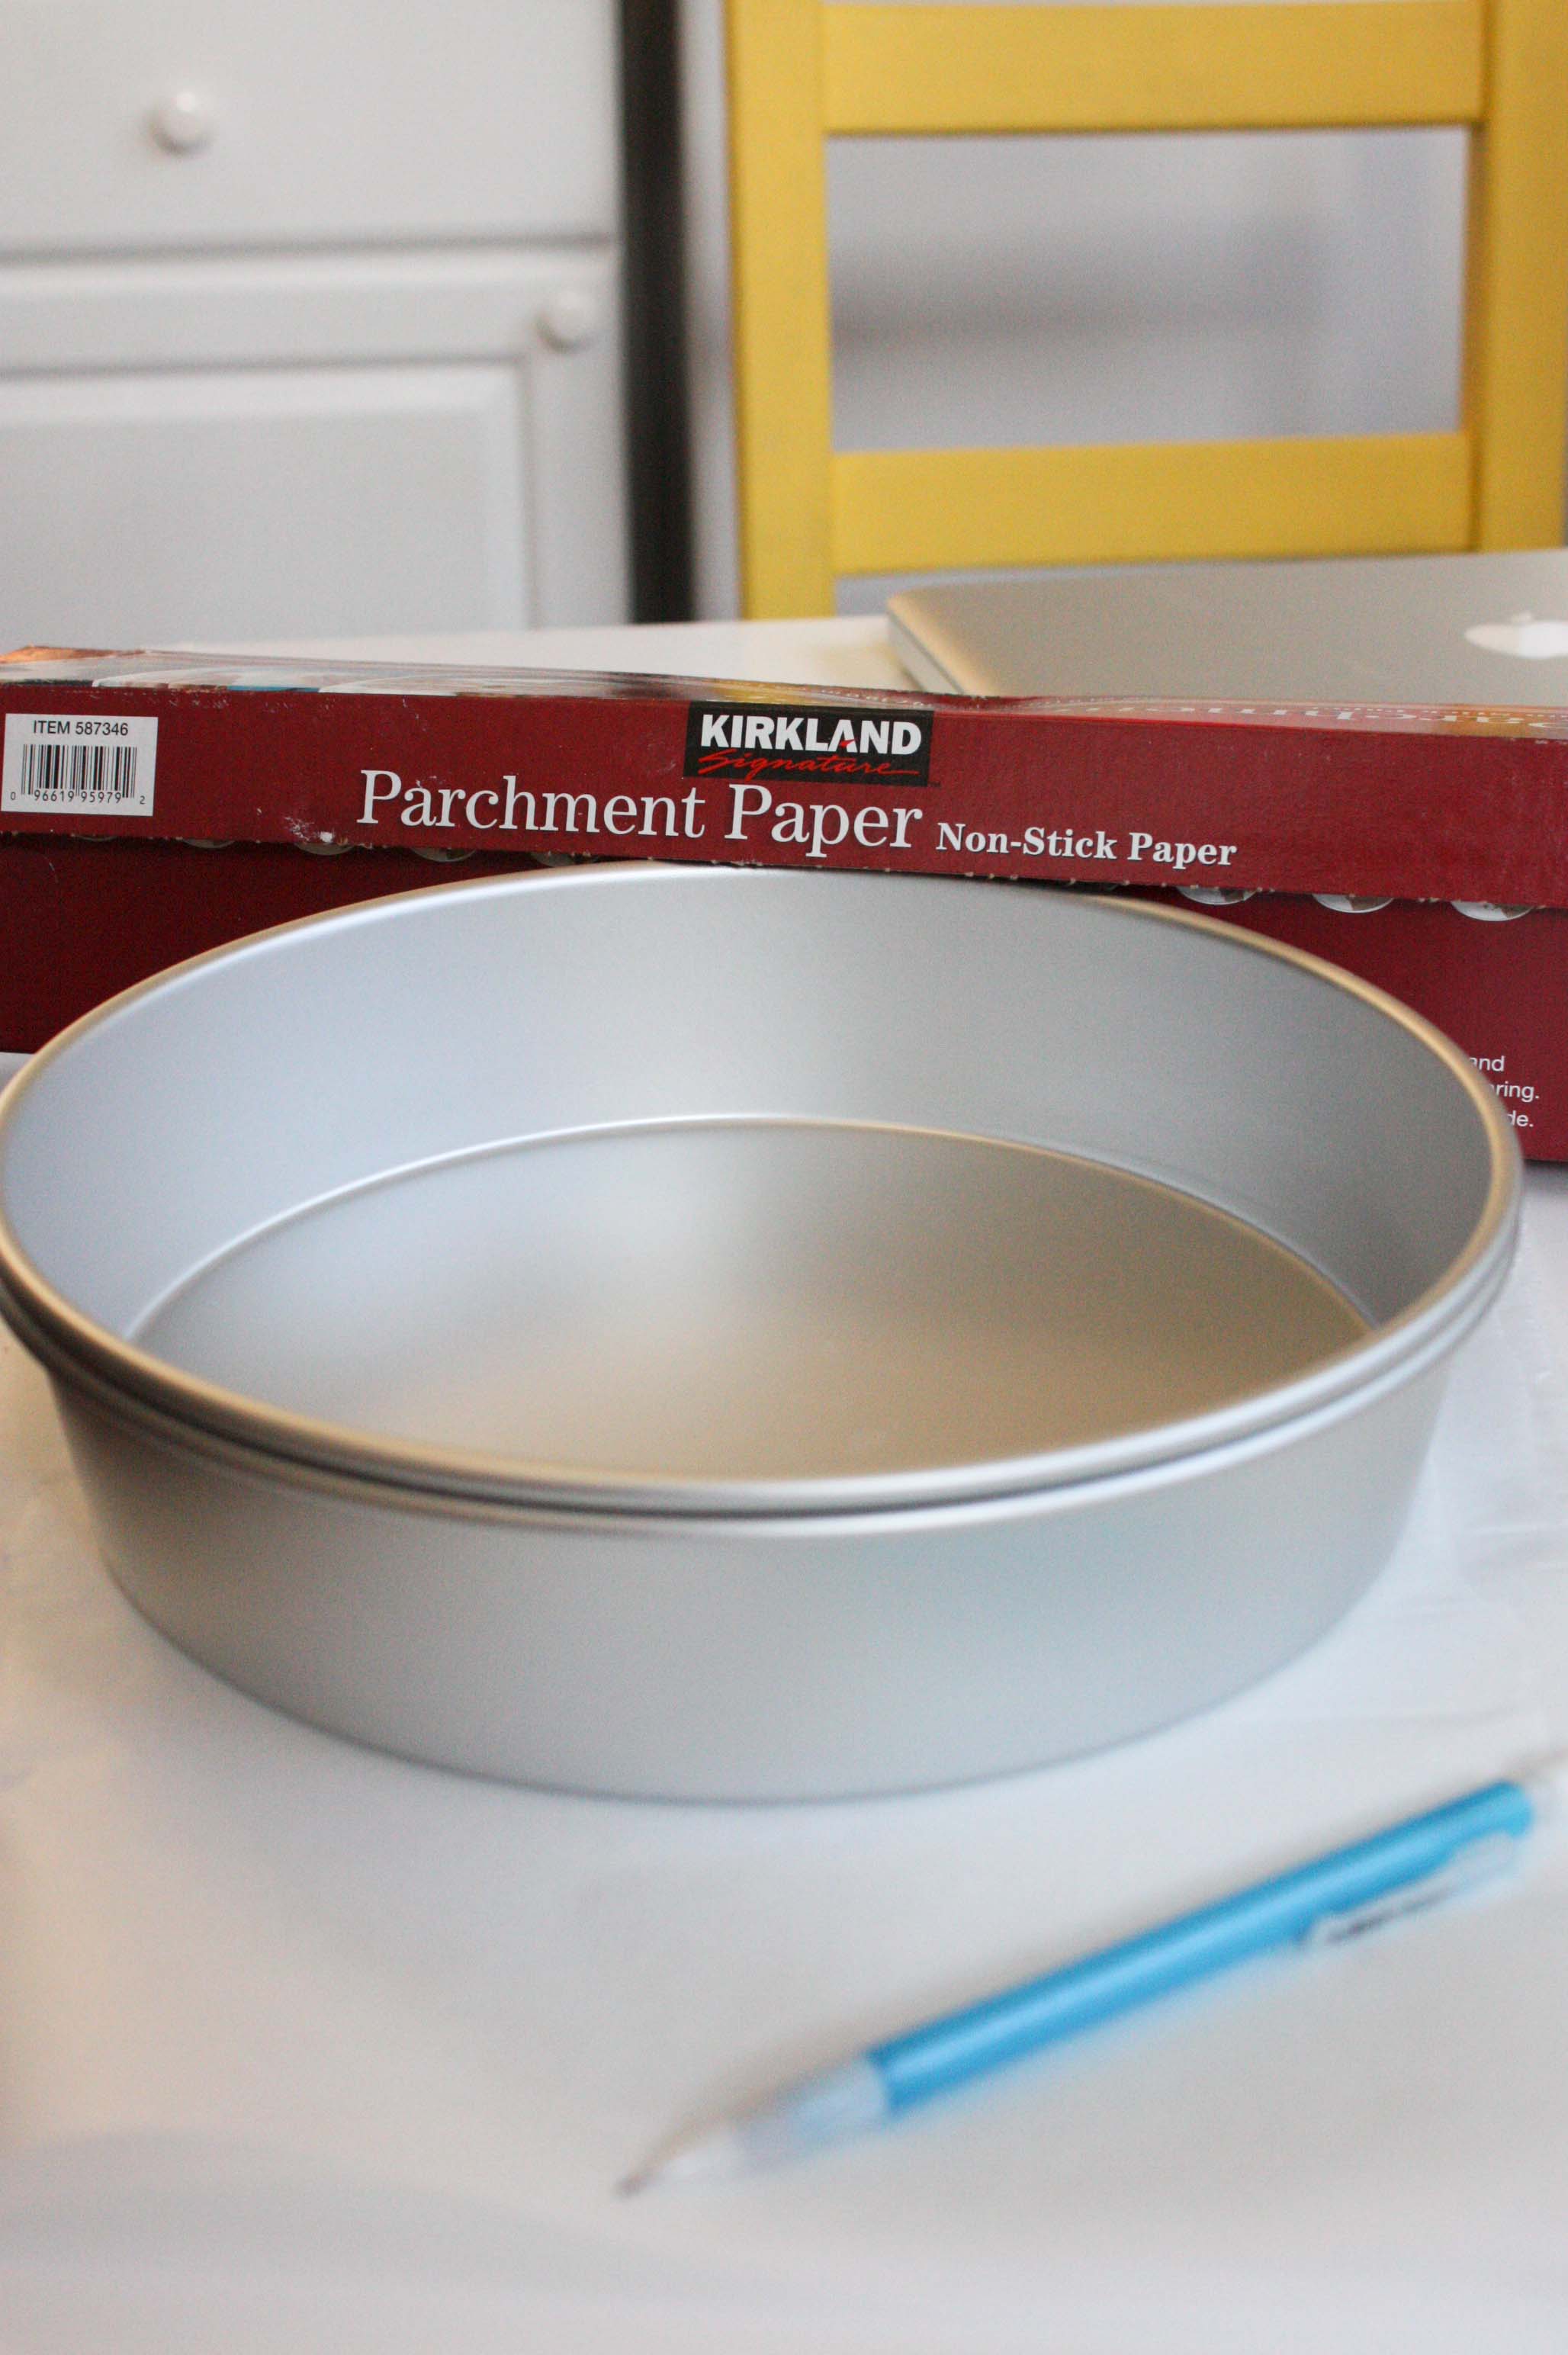
1. Use the right cake pans.
I used to have these fancy cake pans from Sur La Table, and I’ll be honest… they sucked. My cakes were always uneven. First I thought my oven temperature was just weird, but then I moved and my cakes were still crooked. So I bought new cake pans. I bought the cheap Wilton ones at Michael’s (I say cheap because I never walk into that store without a 40% off coupon), and my cakes are perfectly even now. So my tip: go for aluminum cake pans!
2. Parchment paper IS your friend and always grease and flour your pans.
Wouldn’t it suck to do all that work and have them stick to the pan? Yes. It’s happened to me, and it sucks.
Ever since, I will never make a cake without parchment paper. Honestly, my least favorite part of making cakes is this step. I feel like I’m in kindergarten cutting out parchment paper circles. But it’s a must. Just do it.
3. Bake in advance and freeze.
My cakes were all for Saturday and Sunday. I started baking on Tuesday. A cake sitting out from Tuesday til Saturday would be dry and gross, but a cake wrapped in parchment paper, double wrapped in plastic wrap then frozen, is still great for the weekend. The trick is to make sure the cake is completely cooled before you freeze it. You can flash cool it on a cooling rack in the freezer, but before you wrap it up. Just make sure it has cooled completely before you wrap it up, if not you’ll get condensation that freezes into ice. Not cute.
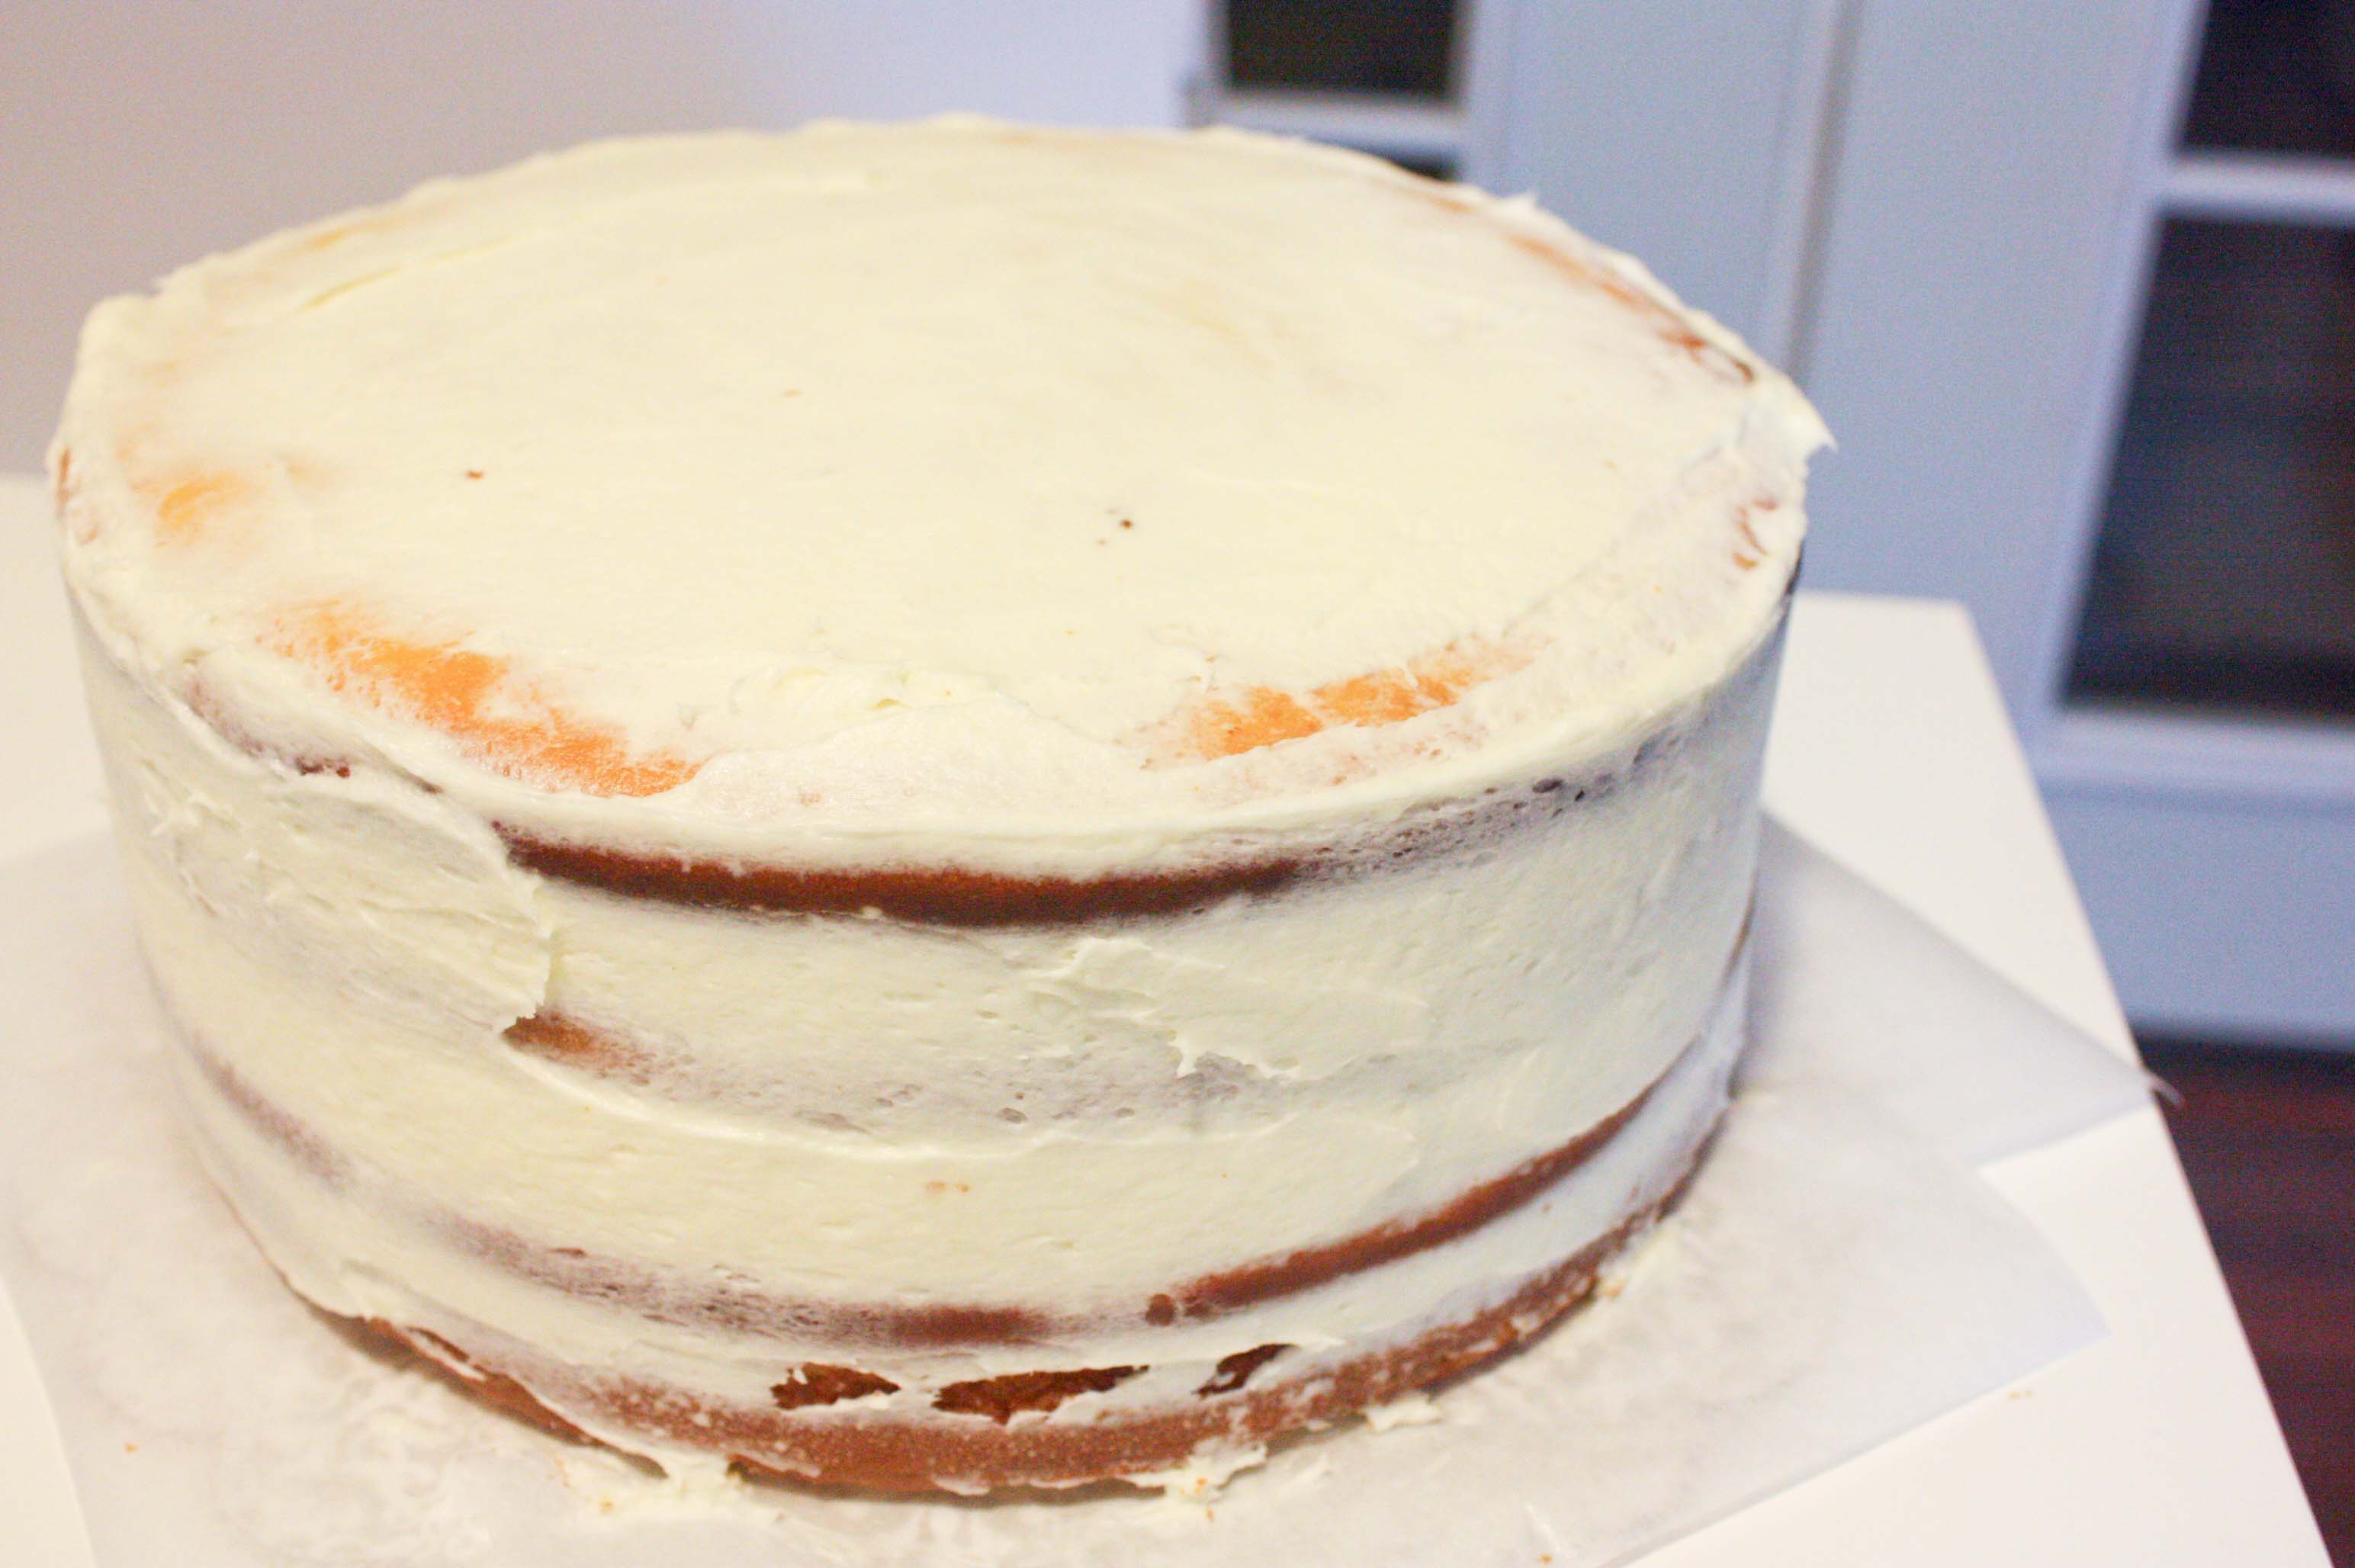
4. A cake without a filling is no fun.
One of the cakes I made was lemon cake with a raspberries and cream filling. The others were chocolate and banana cakes with peanut butter filling. Feel free to make your fillings a day or two in advance, cover them with plastic wrap and refrigerate.
5. Leveling the cake is important
I finally broke down and bought a cake leveler. It’s a good idea to level the cakes before you freeze them. The leveler is basically a metal wire, it’s not super strong and probably won’t cut through a frozen cake. You can also just use a knife…
6. ALWAYS do a crumb coat
A fine layer of frosting before you actually frost is essential. It holds it all together and prevents you from getting a crumby cake. If your crumb coat is going on a frozen cake it’s even easier because the crumb coat gets firm faster. Once you’ve got a crumb coat, stick the cake in the freezer for a few minutes to let the coat harden before you frost. EXTRA: Put pieces of parchment paper under the cake so you don’t have to worry about a dirty plate/dish. You just pull out the pieces when you’re done frosting and you have a clean plate/cake circle!
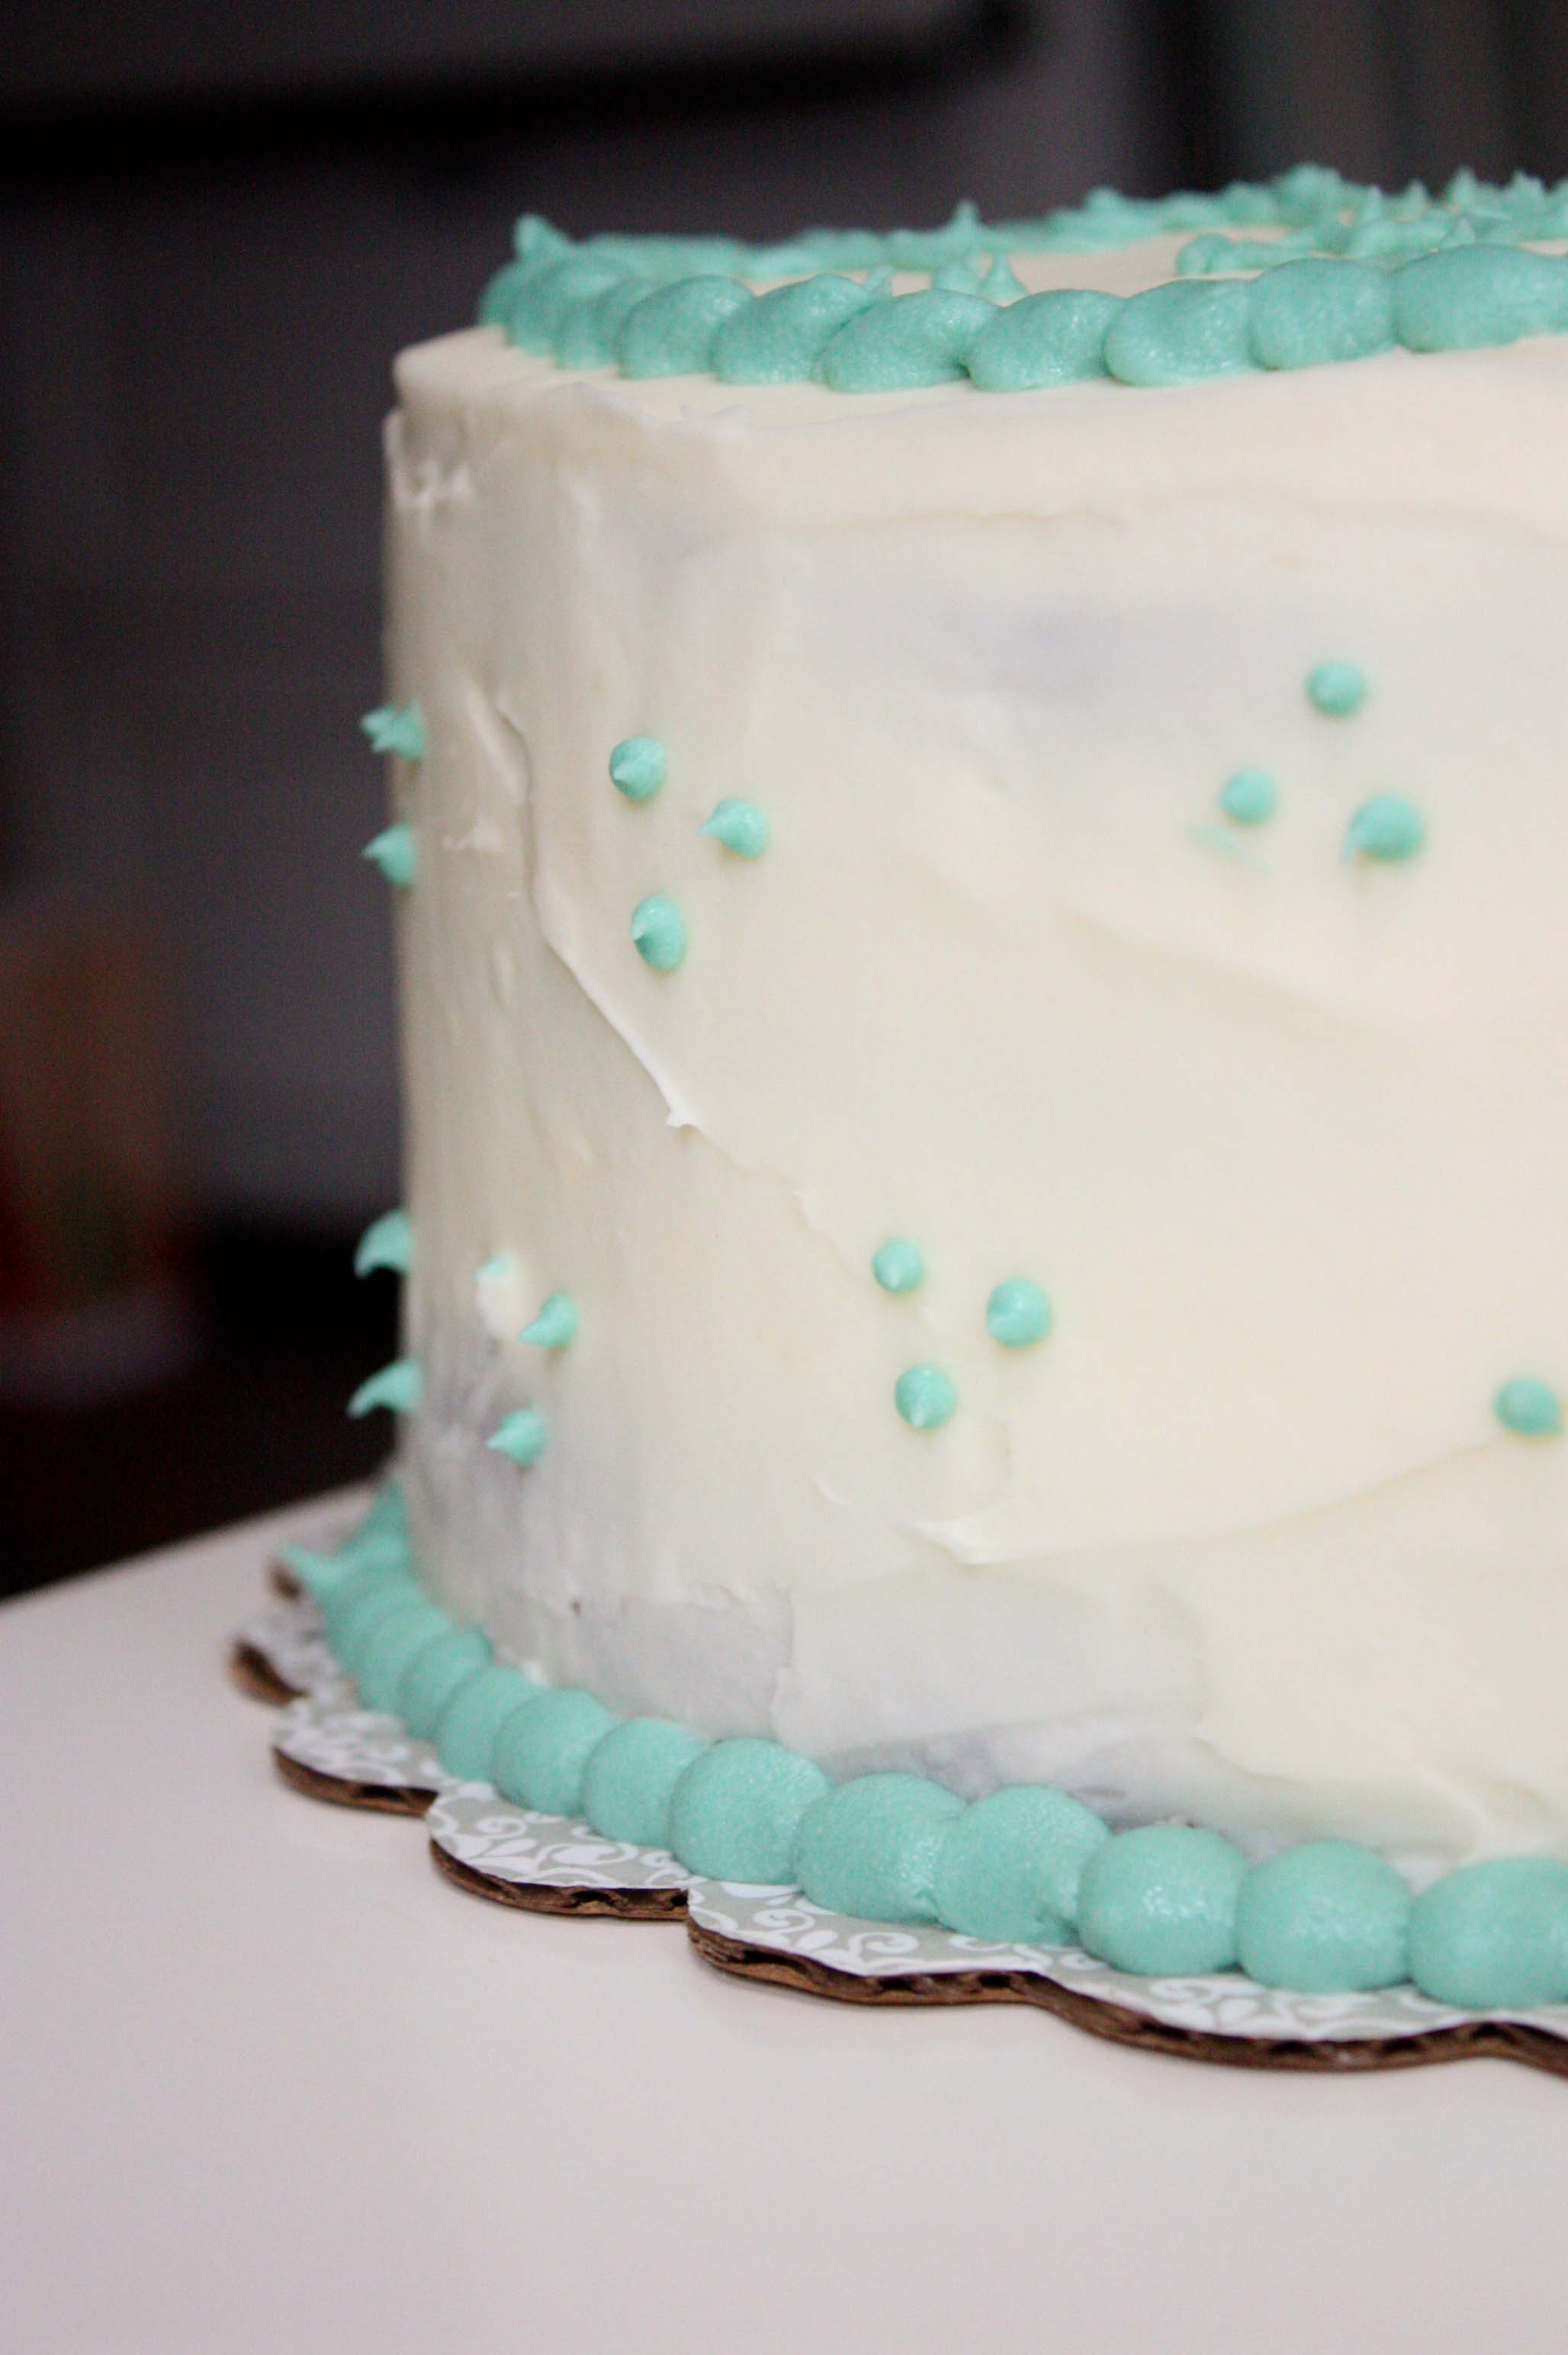
7. Use a long knife to frost
I’m not fancy. My cakes aren’t perfect, but I think they do the job. I don’t have all those fancy spatulas you can buy to frost cakes. I use the 8″ slicer knife that came in my knife block. It’s not serrated and it’s long. Gets the job done. A small butter knife makes it hard to get smooth edges all around, so I recommend a long knife.
8. Use cake circles and boxes
To make your cakes go from homemade to slightly fancier, go to Michael’s or any cake supply store and buy cardboard cake circles and a box. I took one of the cakes to a restaurant and the waitress was surprised to find it was homemade. On that note, if you go to a birthday dinner at a restaurant, call ahead and make sure they don’t charge you to cut the cake. I had heard of corkage fees but never of cake cutting fees. Apparently it’s a thing in Hollywood. Just saying.
Remember, no matter what your cake looks like, it should taste great. So on that note, here are some of my favorite cake recipes:
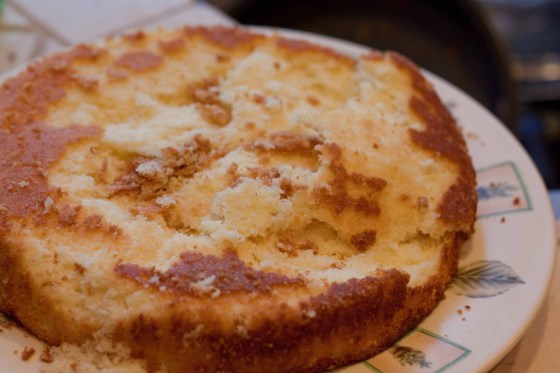
Hershey’s Chocolate Cake: This is my go to chocolate cake recipe. I follow it exactly and it never fails.
Epicurious Moist Yellow Cake (I easily turn this into a lemon cake by replacing half buttermilk with lemon juice, adding some lemon zest and a pack of lemon jello instant pudding)
Rum Layer Cake: This cake is probably one of the most delicious cakes I’ve ever made. Everyone loves it. It’s just plain tasty.
As for fillings, which per #2 is essential, get creative. Here are some ideas I love:
Mix lemon curd with cream cheese and whipped cream for a quick and delicious lemon mousse filling. Throw some fresh raspberries in the mix and it’s a perfect filling for a lemon cake.
Chocolate Ganache is always a winner. Try adding orange zest or passionfruit puree to it to spice up your normal chocolate cake
Whipped Cream: Sometimes you just need simplicity. Whipped cream in the middle of a fluffy cake is divine. Try it.
Mix peanut butter, cream cheese, condensed milk and whipped cream for a delicious peanut butter mousse filling. Oh. My. Goodness. Amazing. Just try it.
Remember these tips next time a birthday, party, holiday rolls around. Making cakes doesn’t have to be crazy hard. It can be super fun!
What’s your favorite cake combination?
I’m currently a huge fan of banana cake with peanut butter filling and cream cheese frosting!
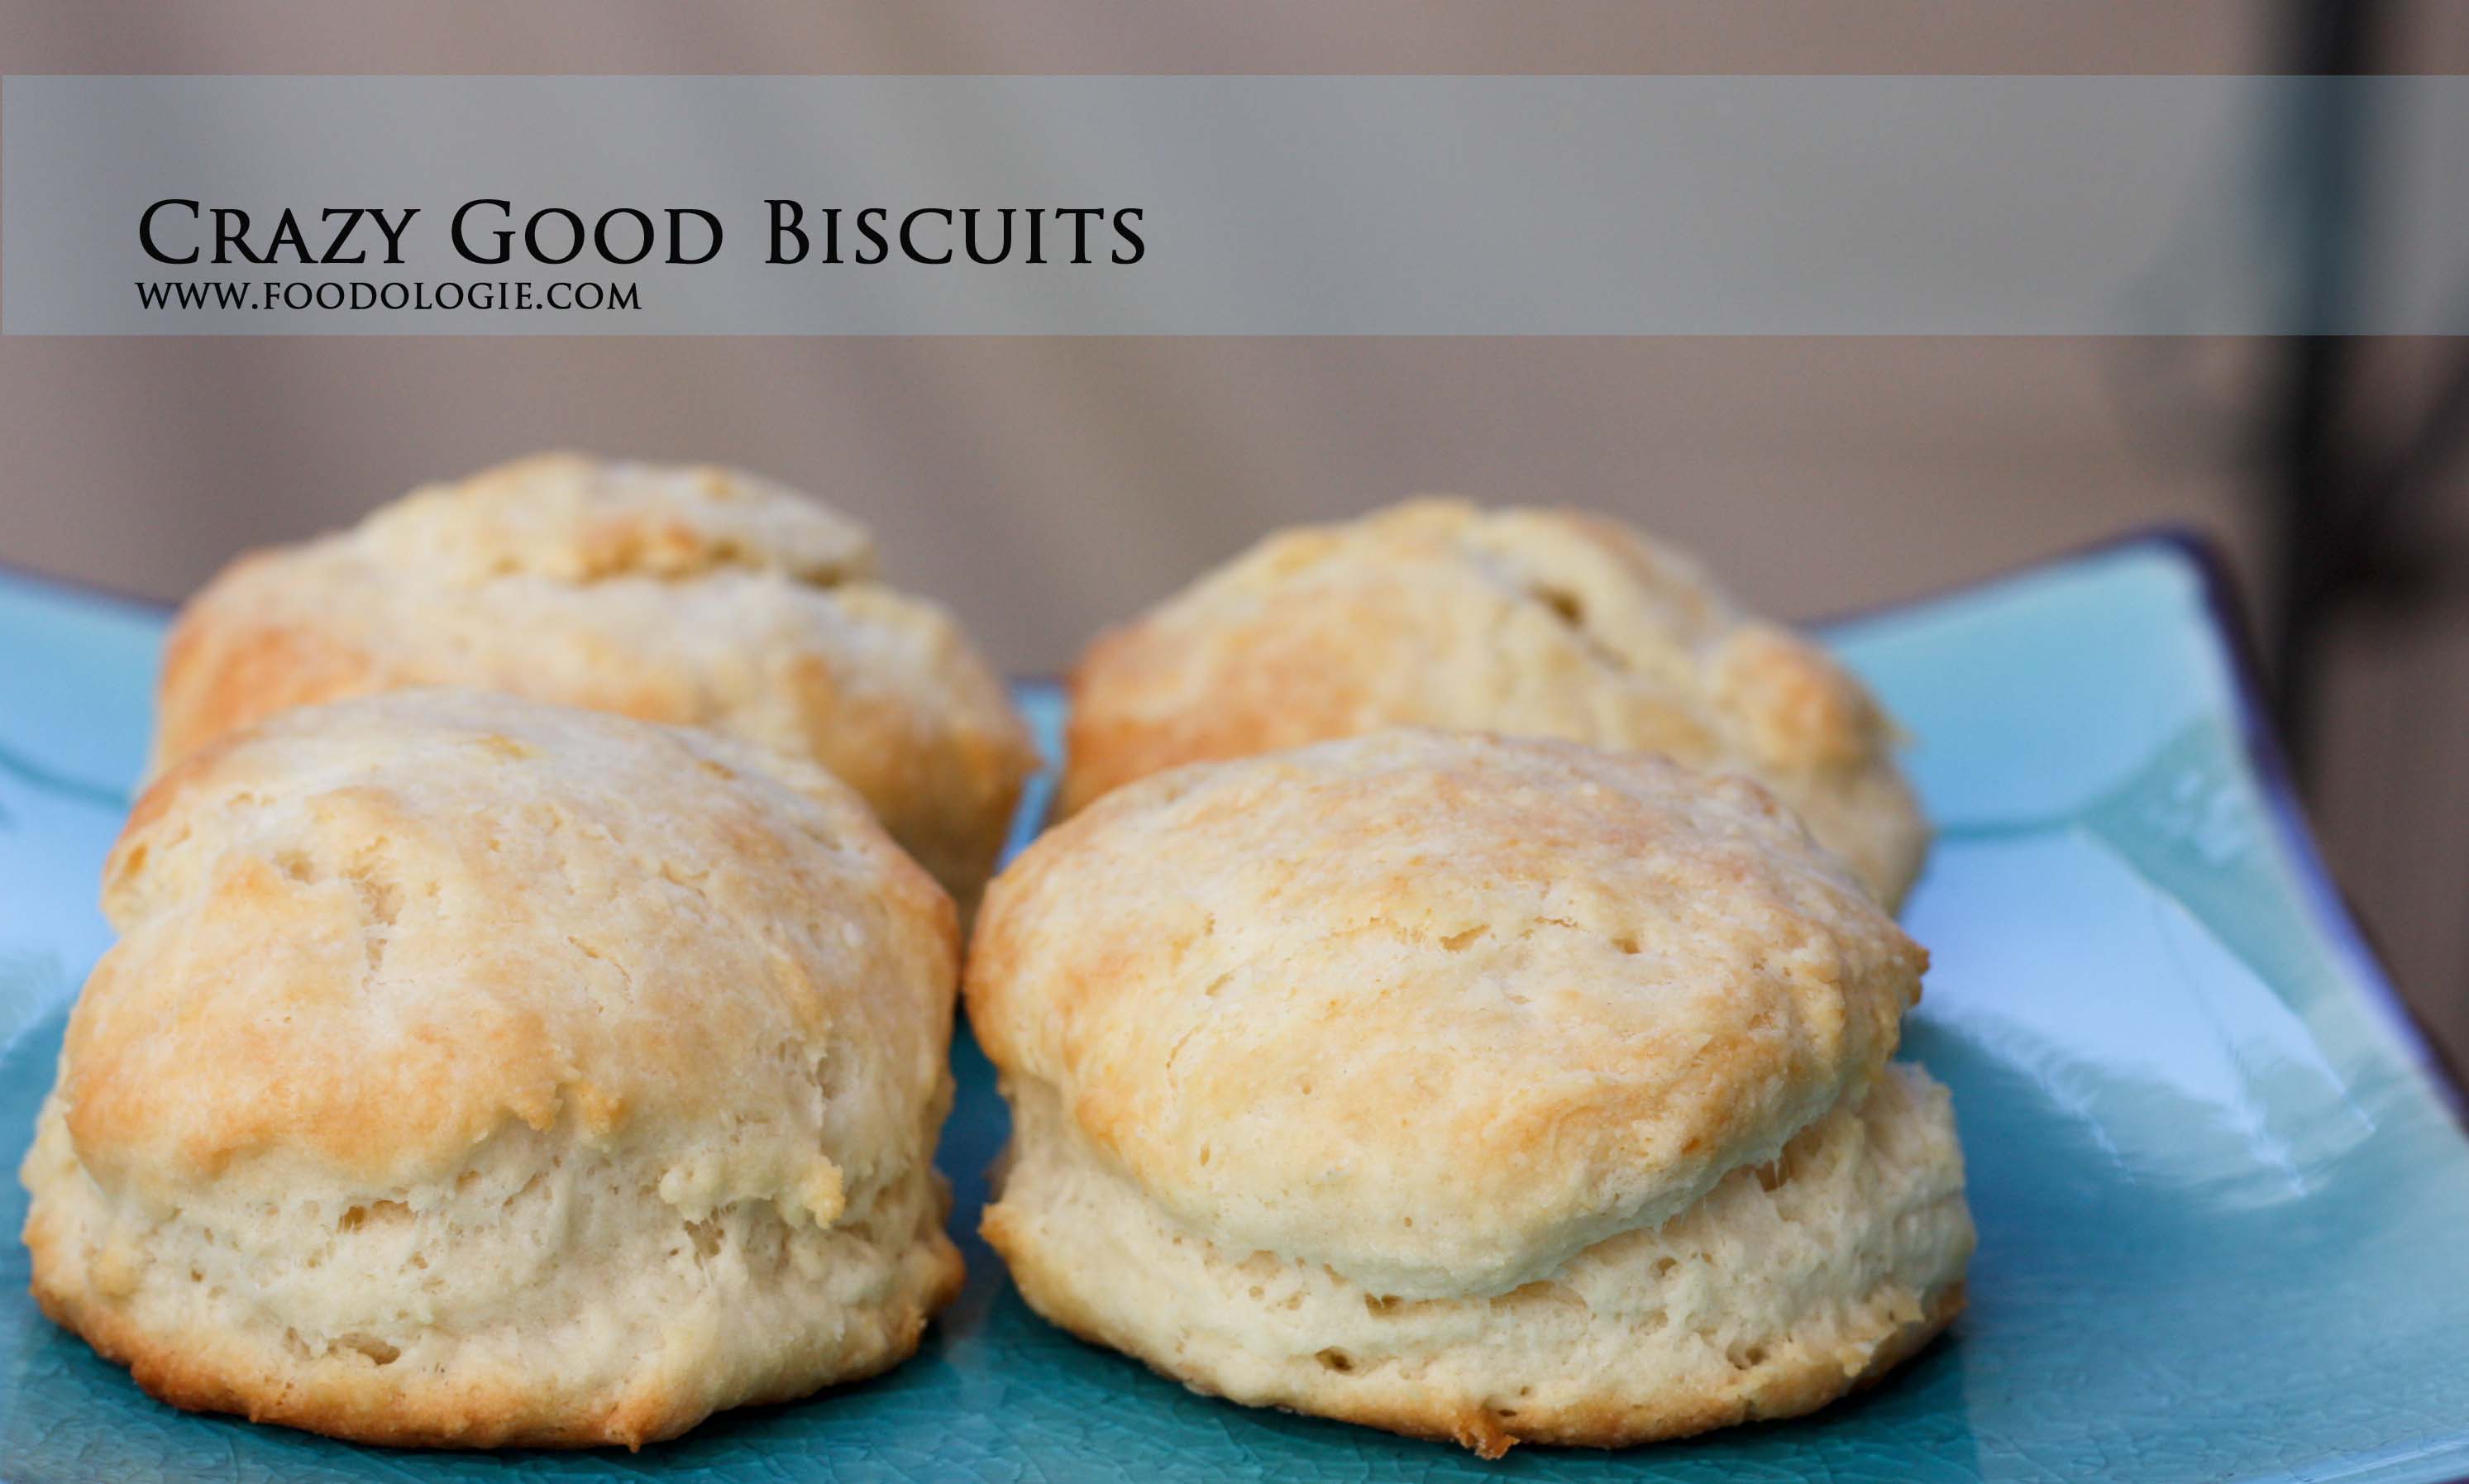
My boyfriend confessed to me that one time, I ate his biscuit.
That sounds totally gross. Let me back up. Once night, we had a crazy hankering for KFC. So like any normal couple, we satiated the craving with a bucket, 4 biscuits and 2 sides. Apparently, after dinner, I wrapped up the leftovers and told him to take them. When he went home, he forgot them.
The next day, lunch rolled around and I ate the last biscuit, but left Jesse the remaining chicken and sides. At least that’s how I remember it.
Yesterday, he confessed. I ate the last biscuit and he was silently sad about that for a while.
Naturally, I laughed and apologized profusely. Then, of course, made some biscuits to make amends for my biscuit-devouring habit.
2 cups flour (plus extra for rolling out) 2 tbsp baking powder 2 tsp sugar 1 tsp salt 5 tbsp butter, cold 1/4 cup plain greek yogurt 1/4 cup heavy cream 1/2 cup milk 1-2 tbsp melted butter (for brushing)
Preheat oven to 425F. Combine dry ingredients in a bowl. Add butter and using your fingers work the butter into the flour until you get coarse crumbs. Next, add yogurt, cream and milk and stir with a spoon until combined. Turn onto a floured surface and knead 2 or 3 times, then form into a disk shape. Pat it down with your hand until it’s about 1 inch thick. Using a biscuit cutter or the bottom of a cup (I used the bottom of a mason jar I use to make pies in jars, so mine were small biscuits), cut out biscuits and place onto a parchment paper lined baking pan. Repeat until all dough is used up. Brush with melted butter and bake 10-15 minutes (this will vary depending on the size of your biscuits) until golden brown. This will make about 2 dozen biscuits (depending on size).
Serve with whatever you like. We like to keep it Latin so we ate them with carne asada, grilled corn and squash.
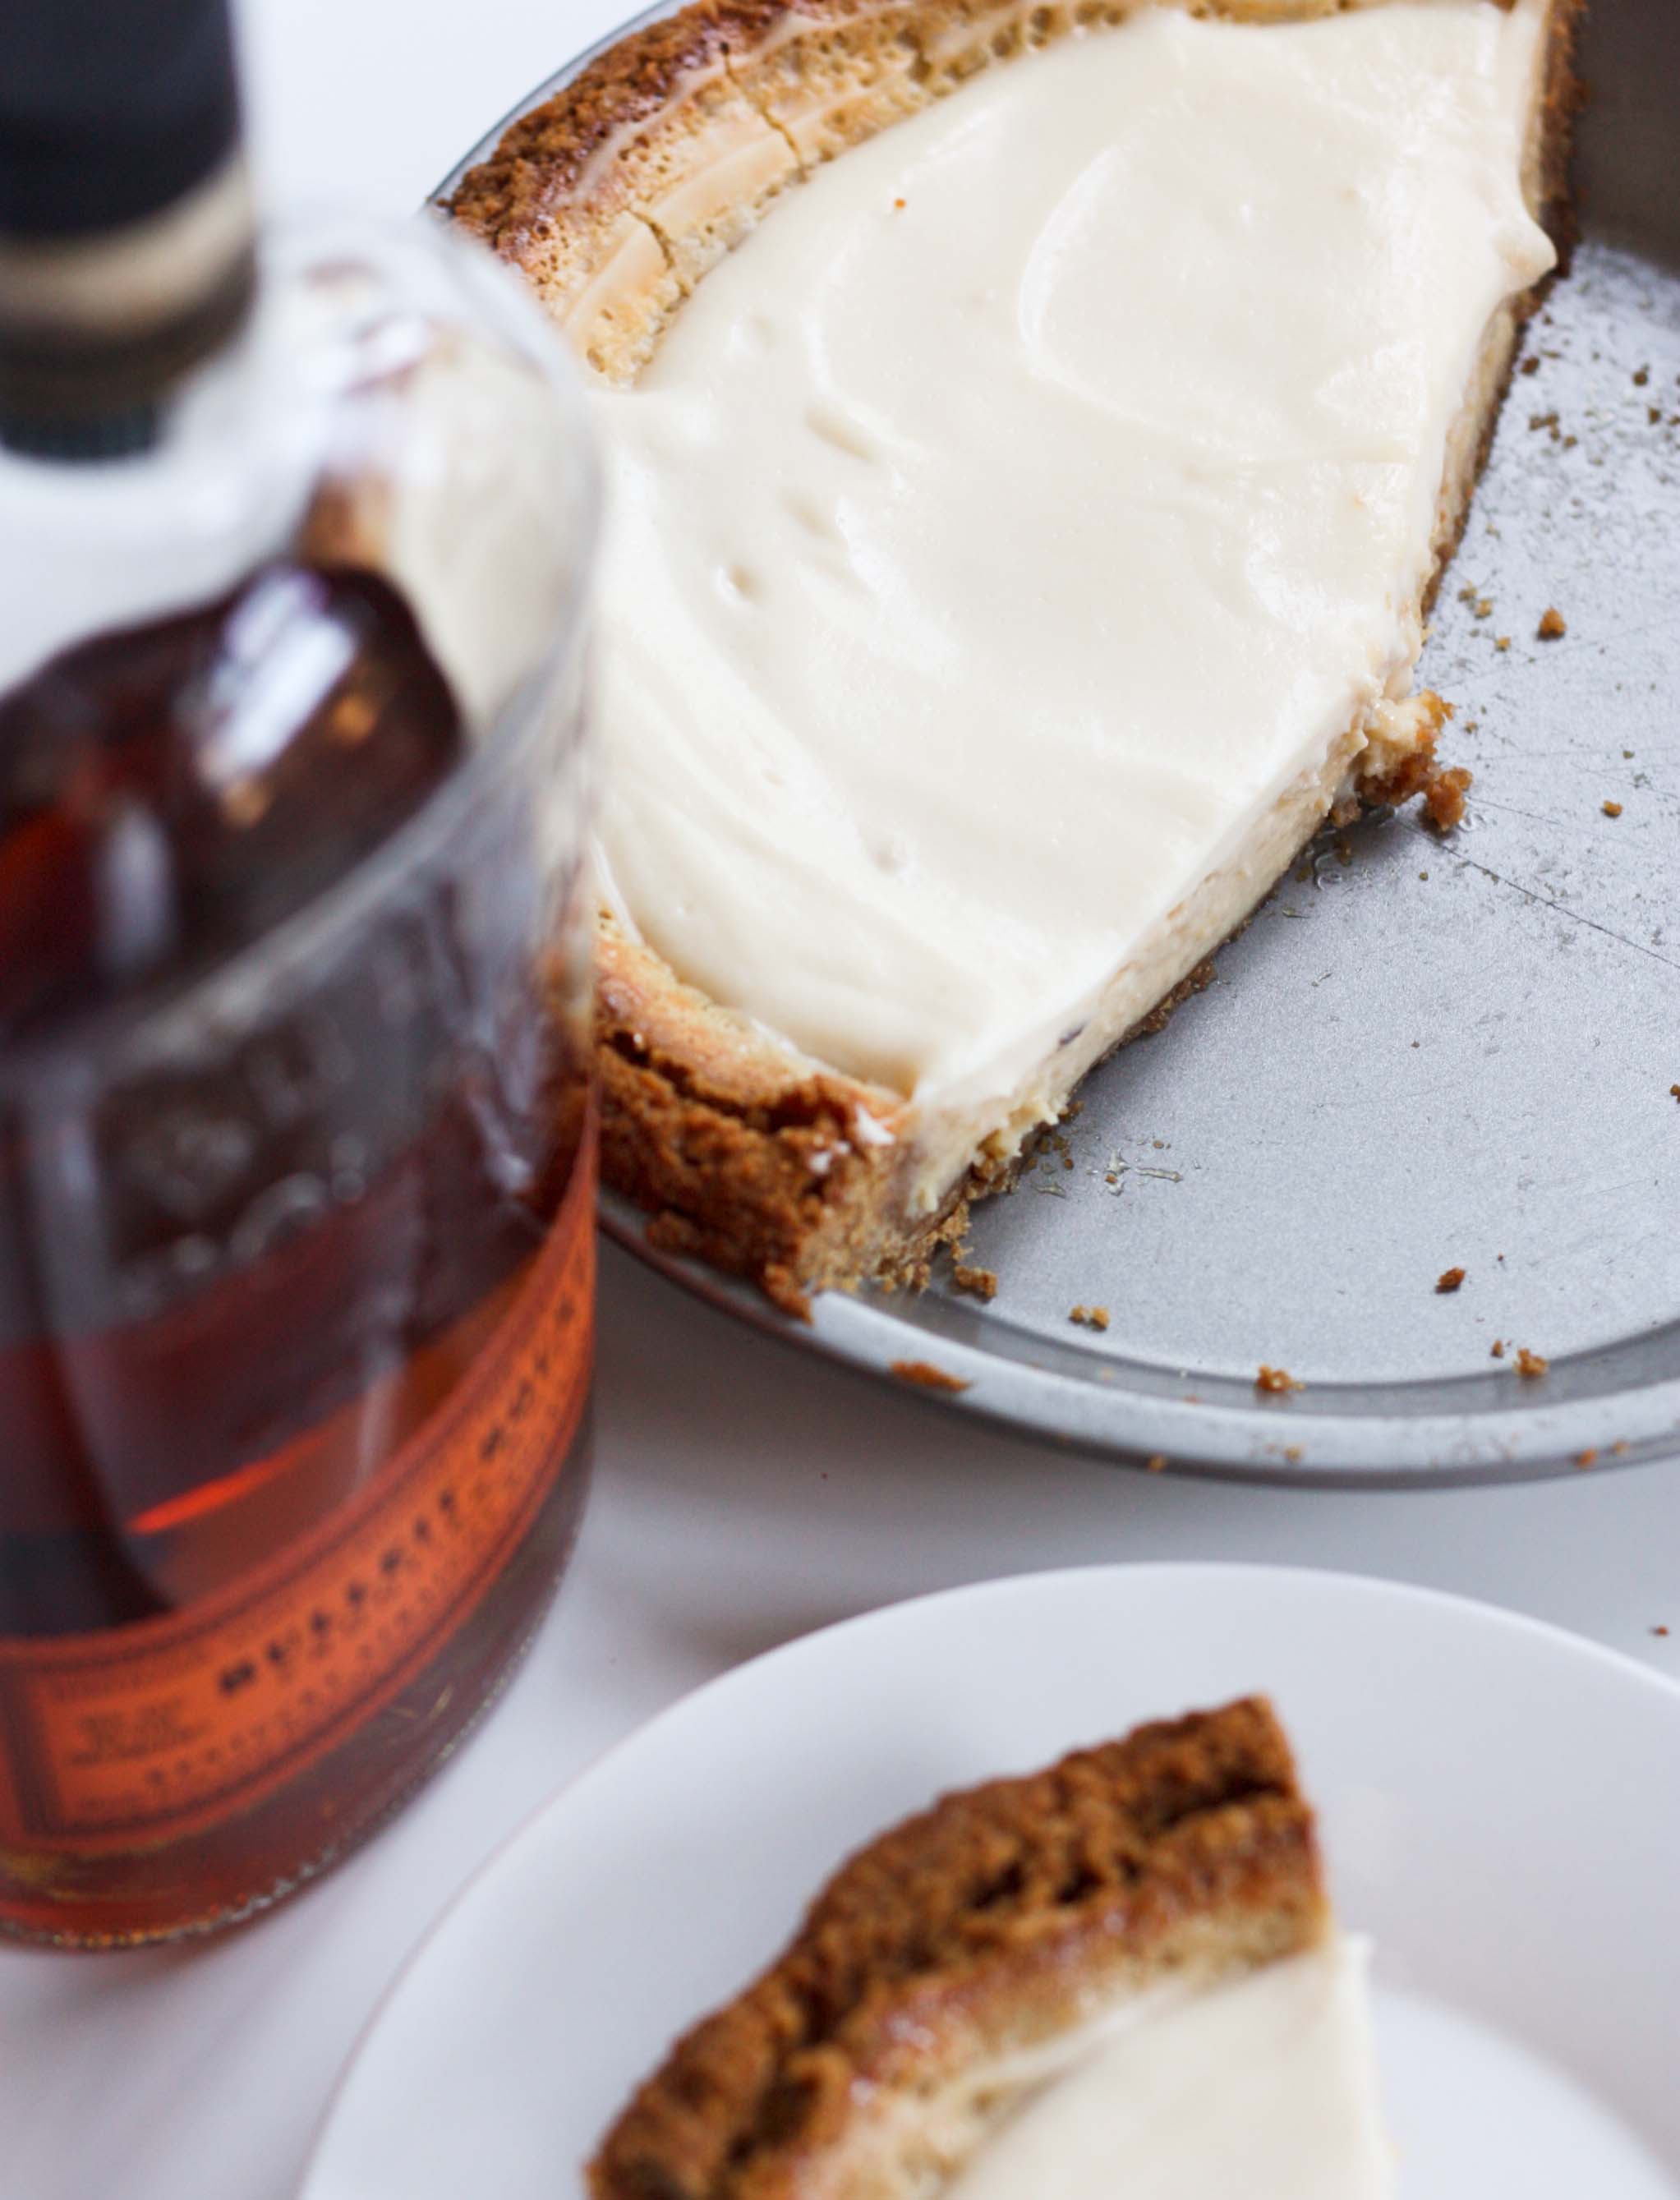
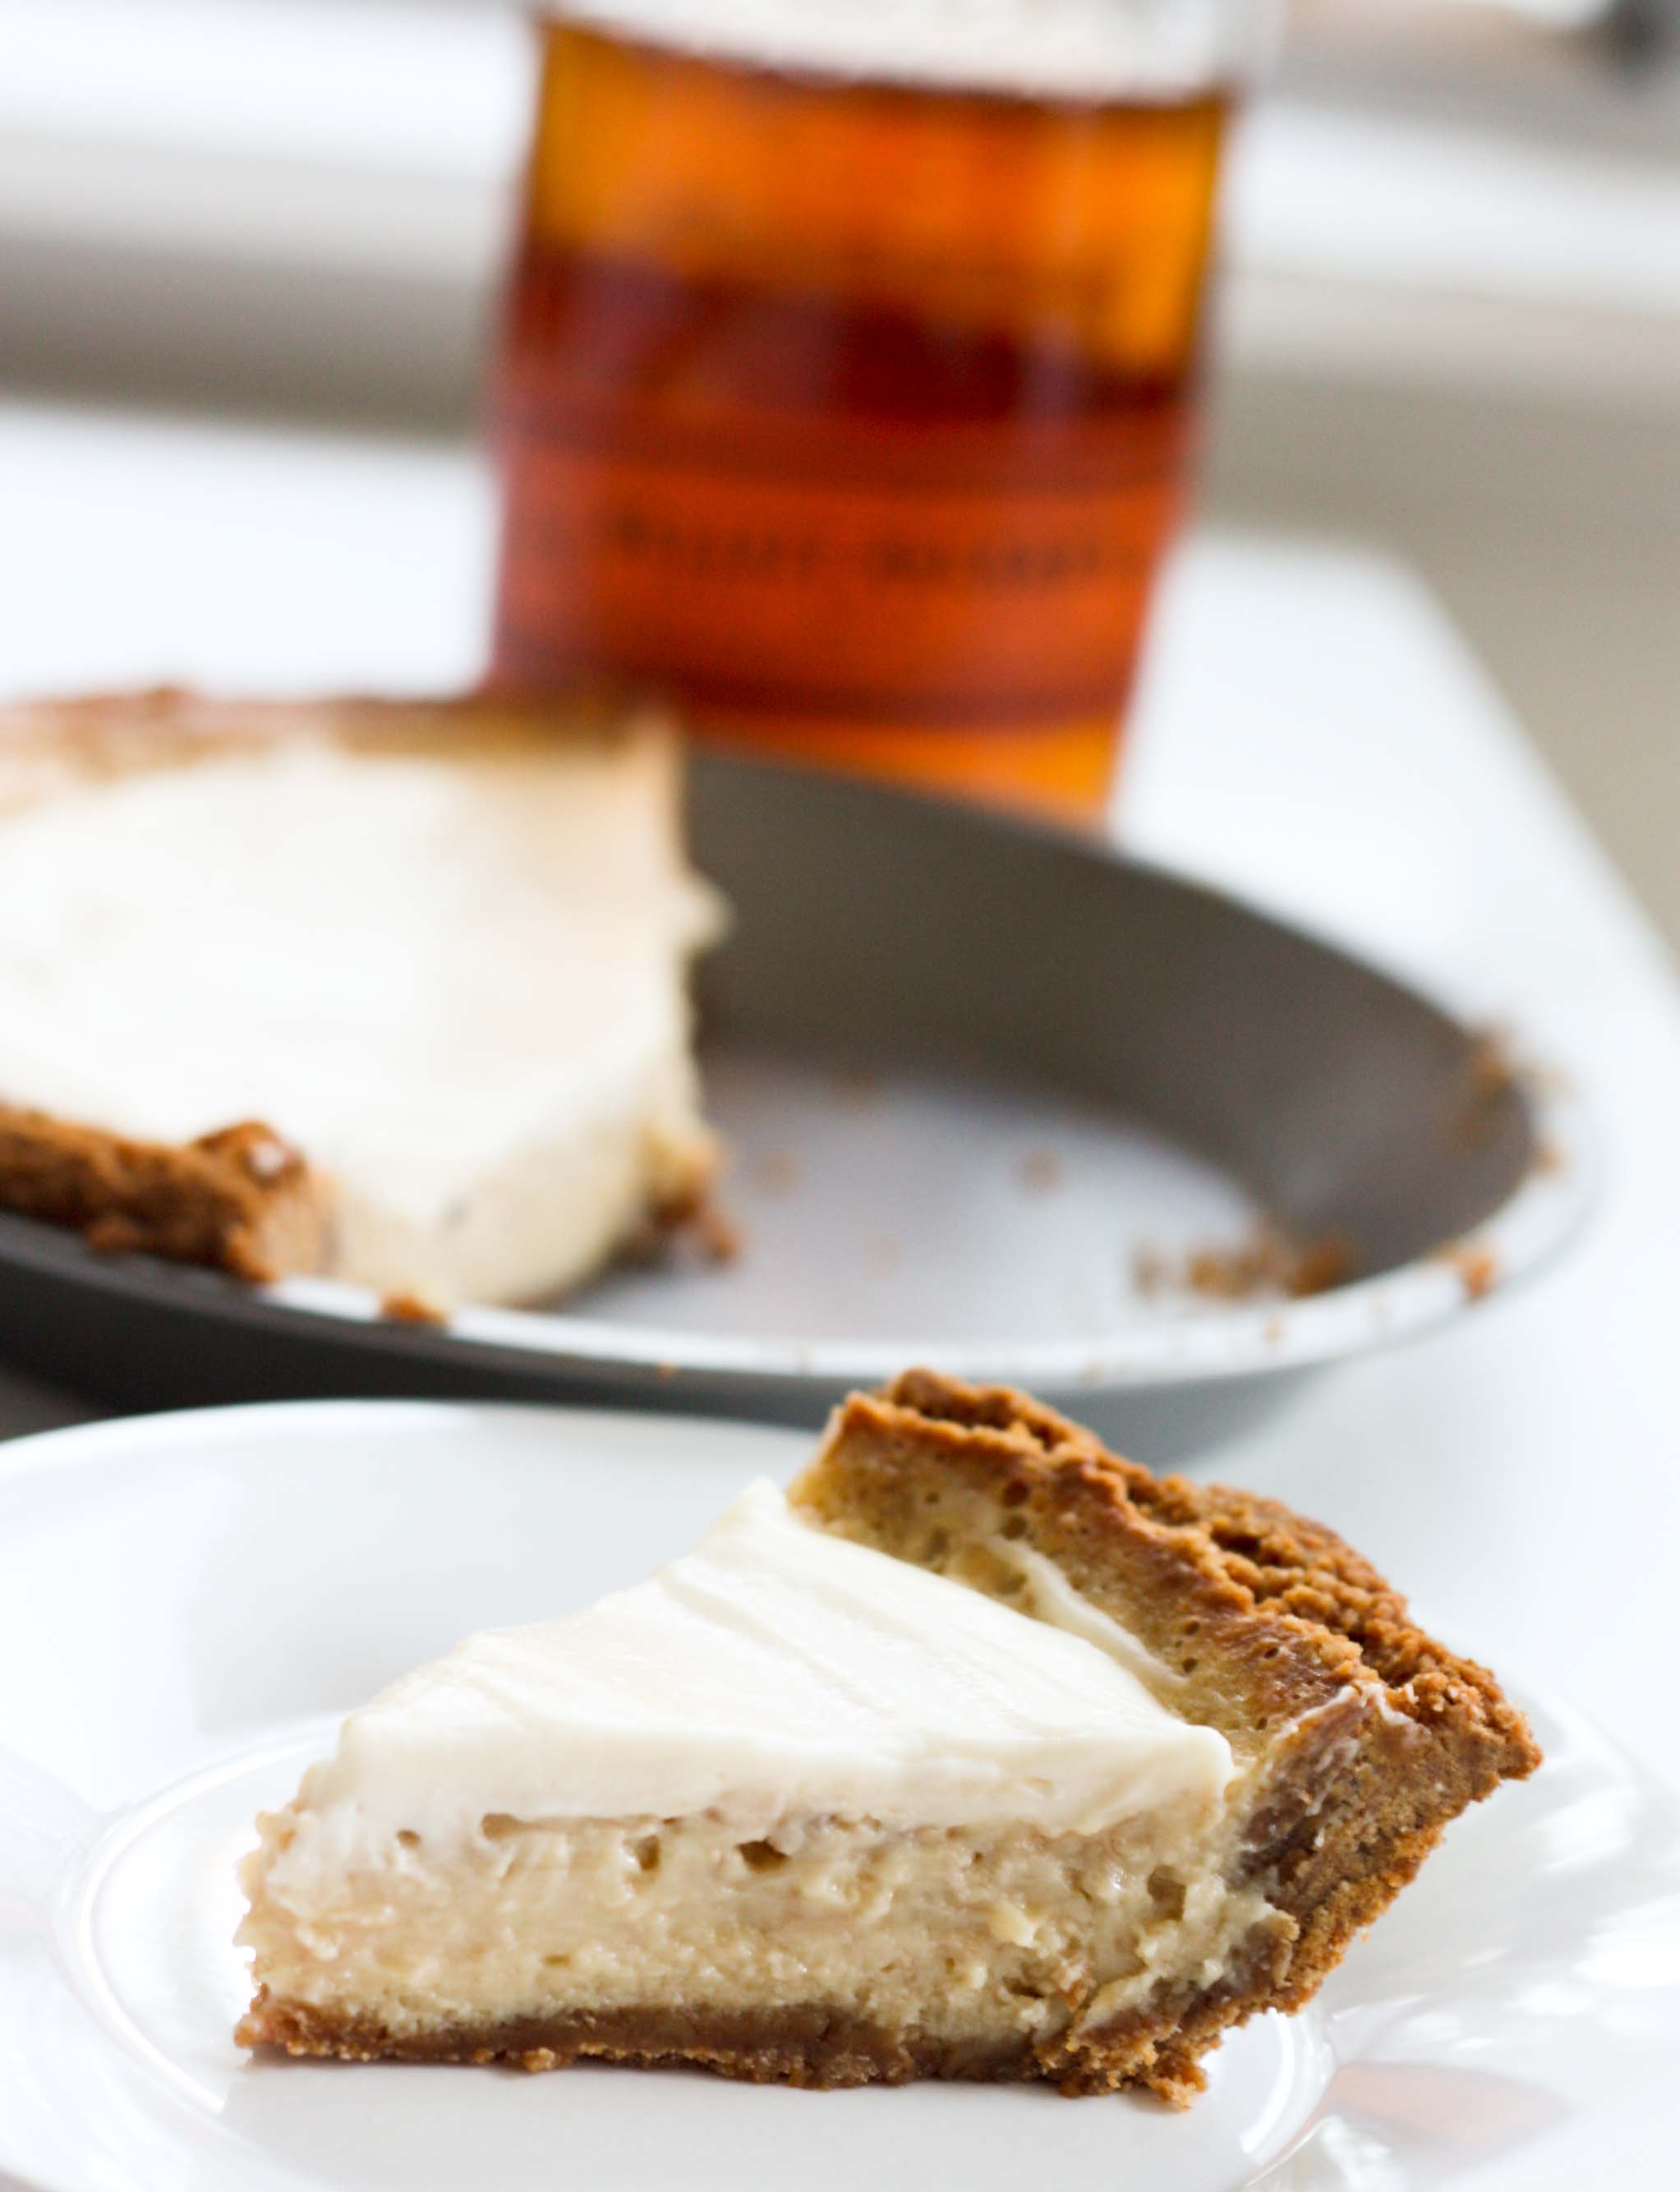
I wish I could say that New Years Resolutions mean that pies are on hold for a while. But no. No no, I don’t wish that, because pies are always a good idea.
You know what else is a good idea: bourbon. Oh and bananas. We can’t forget bananas. I eat one everyday; they’re good for you. I don’t have bourbon everyday; we won’t talk about that. But in this pie form, I might be willing to do so. Although pie everyday might not be a good idea either, resolutions remember?
How about a resolution to try new things? I’ll be honest, the bourbon flavor is subtle, not overpowering. It’s pretty much perfect, like this pie. And really aren’t you tired of traditional banana cream pie? If you are, or even if you’re not, try this:
Bourbon Banana Pie
1 stick of butter, melted 1 1/4 cup graham cracker crumbs 1/4 cup powdered sugar 2 egg yolks 3/4 cup mashed banana (about 1 1/2 medium bananas) 1 (14oz) can sweetened condensed milk 3 tbsp Bourbon or other Whiskey 1 cup sour cream 1/4 cup sugar
Pre-heat oven to 325F.
Combine graham cracker crumbs, melted butter and powdered sugar. Press into a 9 inch pie dish. Put in the fridge until ready to use.
In a large bowl, beat egg yolks for a few mins. Beat in banana, sweetened condensed milk and 1 tbsp bourbon. Pour mixture into prepared pie dish. Bake for 45 minutes (or until no jiggles when you shake it). Allow to cool completely. Once pie has cooled, make topping. Mix together sour cream, sugar and remaining 2 tbsp bourbon. Spread over the top of the pie. Refrigerate for a few hours and serve!
So given my obsession with adding alcohol to everything, it might seem like I’m an enormous lush. Trust me, I’m not cool enough to be one of those people. Pie on the other hand…
I’m definitely cool enough for pie. So are you. Go make this pie! or Pin It for future reference 🙂 This is one you’re going to want to try.
Sometimes I wish I had a fashion/style blog like Kendi Everyday, but then I remember I lack a unique sense of fashion (hence why I feel the need to text pictures of my outfits to my friends for approval).
I simply cannot accessorize. If you can, bless your heart.
More importantly, I’ve noted that these style bloggers all have fabulous significant others (or something or other) who can take fantastically flattering pictures of them in random parts of cities. No luck there for me either.
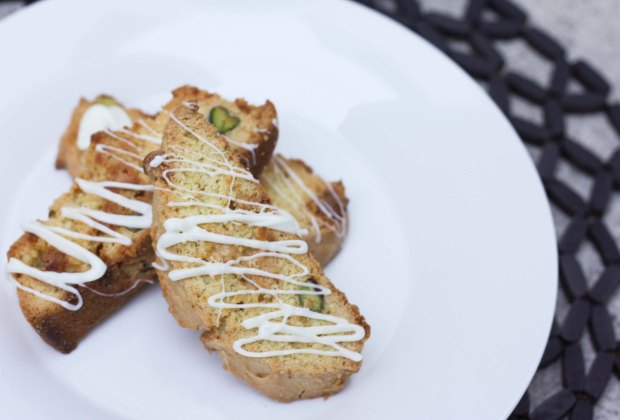
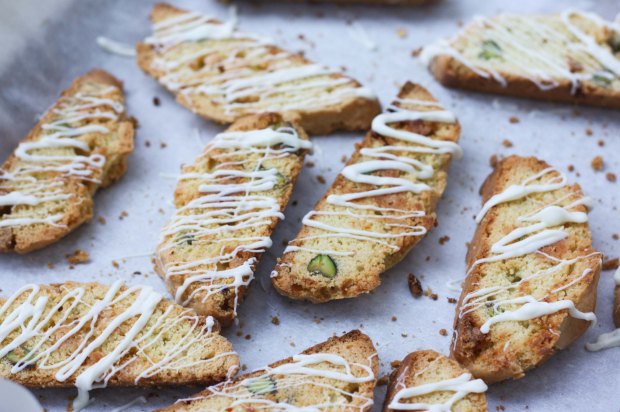
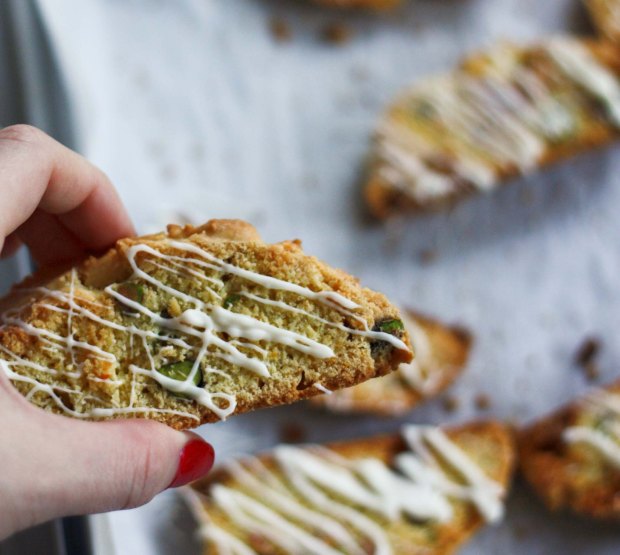
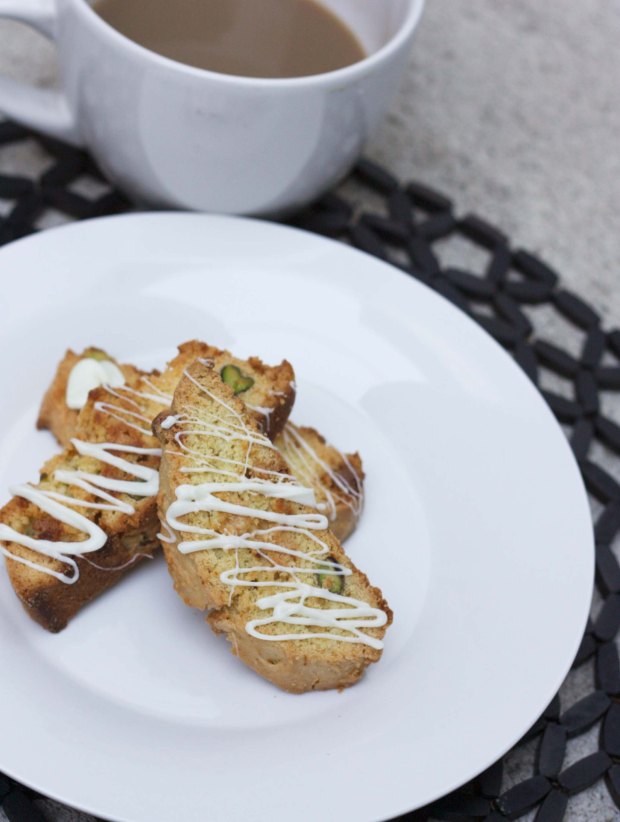
Instead, I oogle style blogs on a regular basis and stick to making food… like biscotti. Biscotti is like the silky scarf of cookies, don’t you think?
Better than the average cookie and even more divine when dipped in hot coffee. The orange and pistachio combination. Classic. Like a black dress.
1/2 canola oil 1 cup white sugar 3 eggs zest of 2 oranges 1 tsp vanilla extract 3 1/4 cup flour 1 tbsp baking powder 1 cup shelled pistachios 2 cup white chocolate chips (plus more for drizzling) 1-2 tsp canola oil
Preheat oven to 375F. Beat together canola oil, sugar, eggs, orange zest and vanilla until well combined. Beat in flour and baking soda until almost combined. Add pistachios and 1 cup of white chocolate chips. Divide dough in half. Form into two logs about 2 or 3 inches wide and place on baking sheet lined with parchment paper. Bake 25-30 minutes or until golden. Remove from oven allow to cool until you can handle it without burning yourself. Reduce oven temperature to 325F. Then slice at a slight diagonal into half inch slices. Lay onto baking sheet again and bake 5 minutes on each side. Allow to cool completely.
Once cookies are completely cooled, place white chocolate chips into a bowl and microwave for 30 seconds. Stir and repeat until chocolate is melted. Add a teaspoon or two of canola oil until the chocolate is a little runny (but not too much). Drizzle over cooled cookies. Allow chocolate to harden and serve with hot coffee or tea. Makes about 40 cookies and can be stored in an air tight container up to 1 week.
If you, like me, are lacking in the style department, don’t despair. These cookies will distract anyone from noticing that your shoes don’t match your outfit and you’re missing an earring.
Save the cash you would spend on a new pair of boots and get yourself a Kitchen Aid stand mixer. That’s what I did today…