Dark Chocolate Dreams Flourless Chocolate Cake + A Giveaway!

I love peanut butter.  We all know this.  I eat it by the spoonful.  It’s a problem I’m working on.

Last year, Allison and I threw a Peanut Butter Throwdown (aka an awesome party where we made crazy peanut butter sandwiches sponsored by Peanut Butter & Co.).  So to say I’m a fan of Peanut Butter & Co. is kind of an understatement.  A few weeks ago, they sent me and a few bloggers their new 31 Days of Dark Chocolate Dream cookbook, full of recipes featuring Dark Chocolate Dreams.

So after having the cookbook for a few weeks, eating spoonfuls of Dark Chocolate Dreams and mulling over which recipe to make, I finally decided on the flourless chocolate cake.

flourlesschocolatecakewtext

Valentine’s Day is right around the corner and this is the perfect treat for you special peanut-butter-loving someone.

Dark Chocolate Dreams Flourless Chocolate Cake

from 31 Days of Dark Chocolate Dream

Nonstick Cooking Spray
Unsweetened Cocoa Powder, for dusting
1 cup (2 sticks) unsalted butter
2 cups Dark Chocolate Dreams Peanut Butter
1/4 tsp salt 1 (12 oz) bag Semisweet Chocolate Chips
8 large eggs, at room temperature

Pre-heat oven to 350F. Generously spray 10 inch round cake pan with nonstick cooking spray and dust with unsweetened cocoa powder.

Make a double boiled by filling a medium-sized saucepan half way with water and placing a large glass bowl on the top of the pan.  Bring the water to ta boil and add the butter, peanut butter, and salt to the bowl.  Mix until well incorporated and turn off the heat.  Add chocolate chips and stir until the chocolate is completely melted.  Remove the glass bowl from the double boiler.

Use an electric mixer to whisk eggs for 3-5 minutes or until the volume doubles.  Fold 1/3 of whipped eggs into the chocolate-peanut butter mixture and gradually add the rest of the eggs until mixture is well combined.

Pour mixture into the prepared cake pan and bake for 20-25 minutes, or until the edges of the cake separate from the pan and the center is springy.  Cut and serve immediately with vanilla ice cream.

flourlesschocolatecake

So in real life, I halved this recipe and put it in a 6 inch cake pan.  I still baked it for 20 minutes, and it turned out perfect.  I topped it with whipped cream and a cherry, because cherries make everything a little more special.  So if you’re looking to downsize this recipe, that’s a great option!

Ok so are you ready to try this now?

Peanut Butter and Co. is being super awesome and giving away a 31 Days of Dark Chocolate Dreams Cookbook and a 28oz Jar of Dark Chocolate Dreams to a Foodologie reader!

To enter, head over to Facebook and enter the giveaway on my Facebook page click the Giveaway tab at the top.  The giveaway is open to US Residents and will end on February 14th at midnight!

You can enter by:

You know you want some free peanut butter, especially to make this cake, because it’s delicious.  Head over to Facebook now and enter. You’ve got nothing to lose 🙂

What It’s Like to Do a Juice Cleanse

Juice cleanses are EXTREMELY popular these days.  In general, I try to shy away from fad diets (oh yeah remember, Paleo? No thanks!), but I decided to give a juice cleanse a try for one reason: I don’t really see it as a fad diet, because you don’t generally do it for more than a few days.

I see juice cleanses as more of a reset button.  A way to get you back on track.  A lot of people concentrate on the healthy eating reset aspect of a juice cleanse, but I was reading The Juice Cleanse Reset Diet and one of the authors mentioned how she was over-worked, stressed and not feeling great and juicing really helped her.

That really spoke to me.  I usually try to avoid talking about work on my blog, but recently, it’s been really stressful.  I haven’t been sleeping well, I’ve had terrible headaches for days on end, and it’s been affecting my mood and energy level.  This morning when I woke up (after yet again sleeping through Crossfit, something that makes me really angry at myself), I knew I needed to change something.

Now before I go any further, I should tell you, I work at Ritual Wellness on the weekends.  So I’m very familiar with their cleanses and their juices.  All their juices are cold-pressed and certified organic, which in my opinion is important.  Why bother to do a juice cleanse if you’re going to concentrate pesticides along with your nutrients?

Ritual is a pretty awesome company owned and operated by two inspiring women.  I’ve been working there for a few months, not really wanting to do a juice cleanse, but enjoying the positive healthy environment.  But then yesterday, I decided I needed something to reset myself.

Just as a full disclaimer: I am an employee of Ritual Wellness, but I purchased this cleanse on my own and the opinions are my own.

1 Day Cleanse

That morning I woke up with big dark bags under my eyes and I knew something had to change.  So I drove over to the Ritual JuiceBox at the CAMP on my way to work (job #1, NOT at Ritual) and picked up a one-day Seasonal Reset Cleanse.  If you’re in the OC area, you can stop by any one of the 3 locations and pick up a cleanse (if not you can order online and have it delivered to your door).  It’s super easy.  At the store, you can sample all the flavors to make sure you like them and go home with a cleanse you’ll like.  I picked up the Season Reset Cleanse, but instead of the seasonal flavor, which is Cranberry Orange right now, I chose Red Energy because I like it better.   So here it goes…

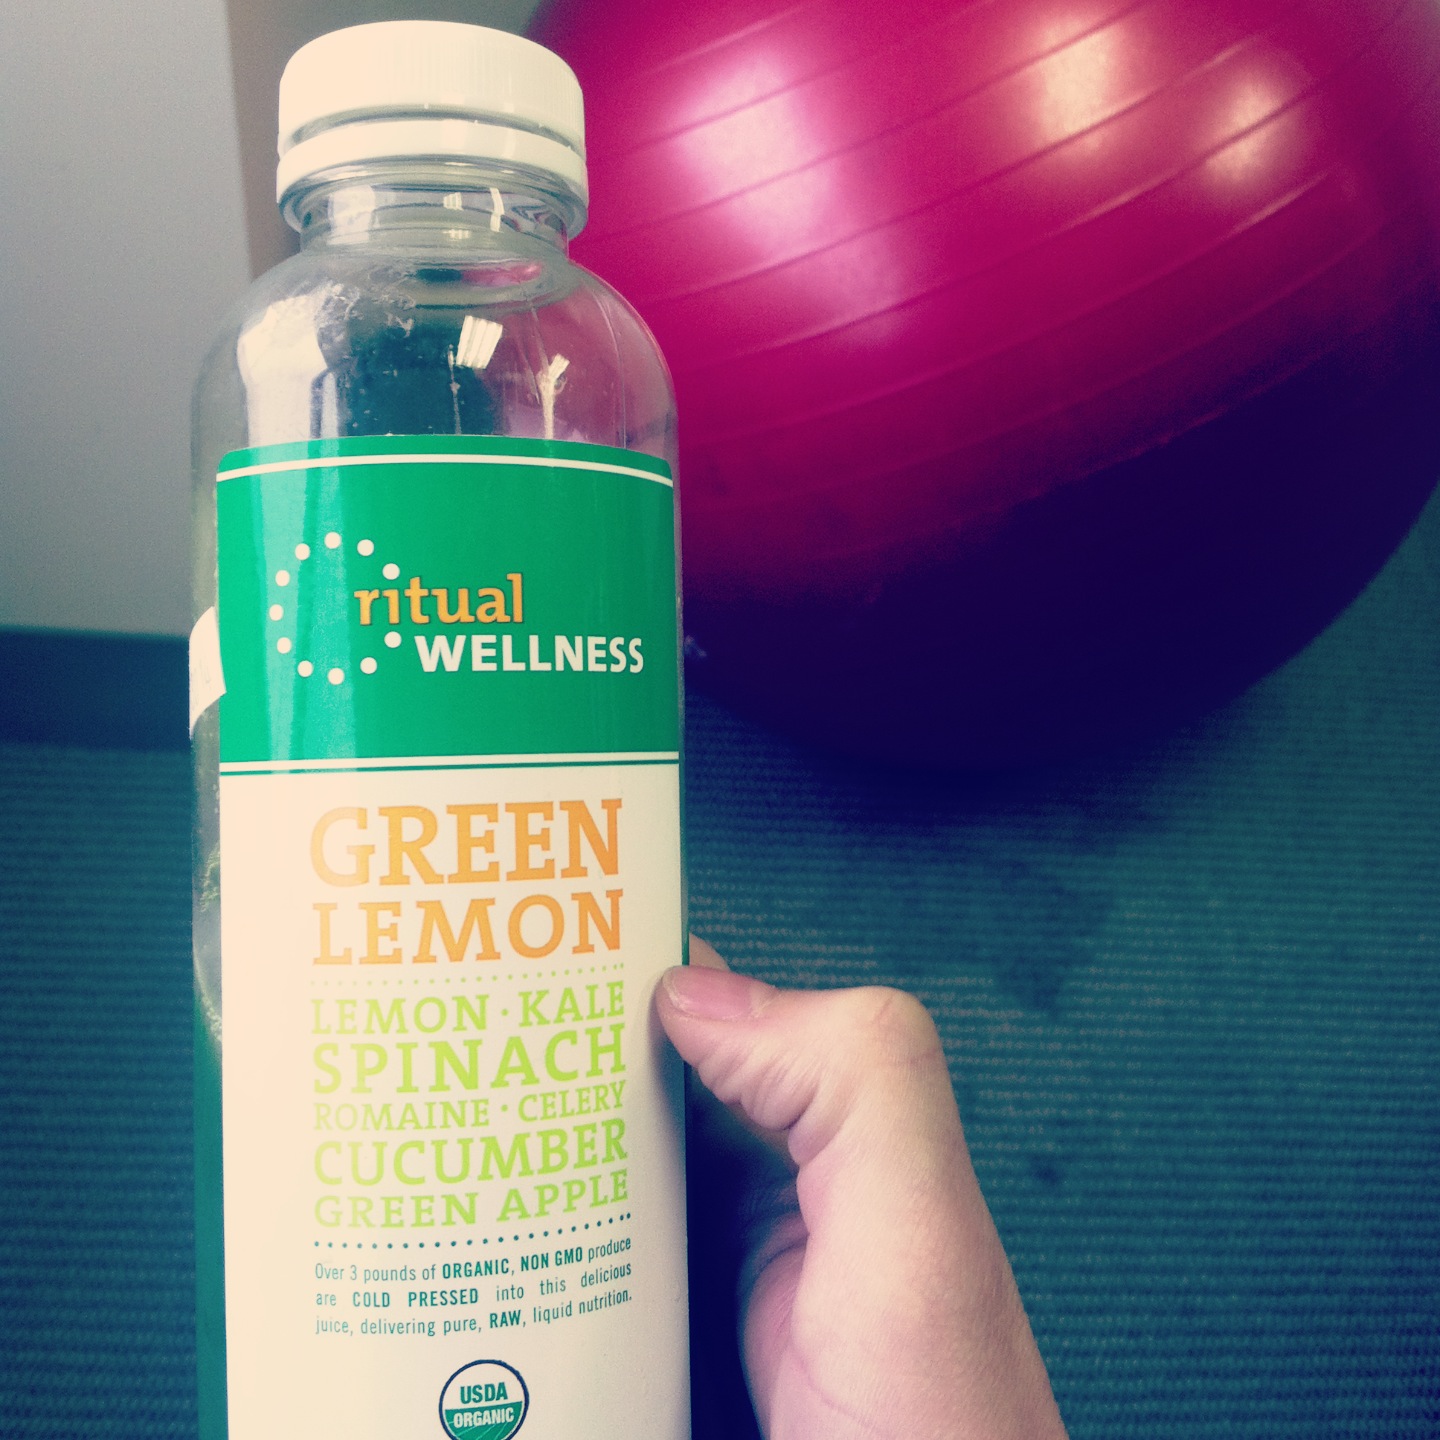
8:30am: Juice #1: Green Lemon: Lemon, Spinach, Romaine, Kale, Celery, Cucumber, Green Apple

IMG_2093

I started drinking this in the car right after picking it up.  I really like this juice, but I’ll be honest, you might not.  That’s true for all the juices, not just this one.  Green juices are an acquired taste, because they don’t taste like the boxed crap from concentrate that we’re used to.

The good thing is, the more you drink them, the more you love them.  If you rarely eat vegetables and are a little picky, you probably won’t think they taste amazing, but really that’s the whole point of the cleanse for many: to reset your palate so you learn to like fruits and vegetables.

I also had a cup of black coffee when I got to work, because I’m addicted. I already had a headache when I woke up, so I didn’t want to make it worse.

10:30am: Juice #2: Red Energy: Beet, Apple, Carrot, Pear, Celery

IMG_2094

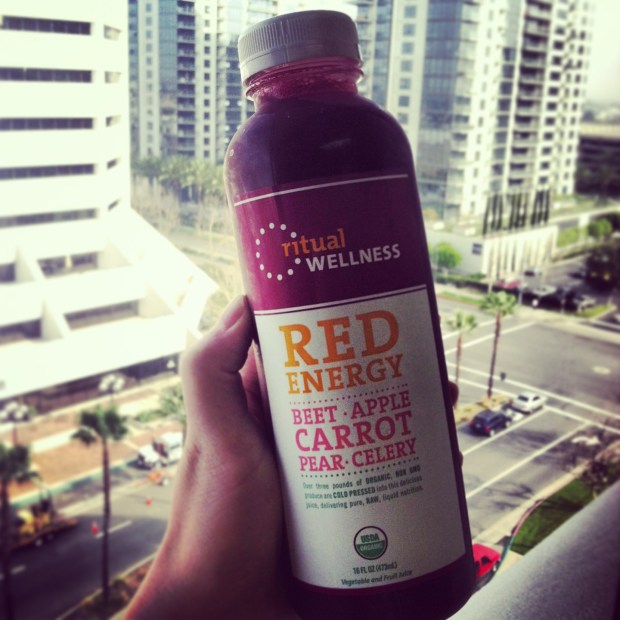
I love Red Energy.  It’s just plain tasty (in my opinion). It was a welcome treat mid-morning.  I realized it takes me about 30-45 minutes to get through a bottle, so I constantly feel like I’m consuming something.  I’m generally not hungry in the mornings so this was no problem for me.

1:00pm: Juice #3: Spicy Greens: Romaine, Ginger, Pineapple, Turmeric, Cucumber, Celery, Lime, Parsley

IMG_2095

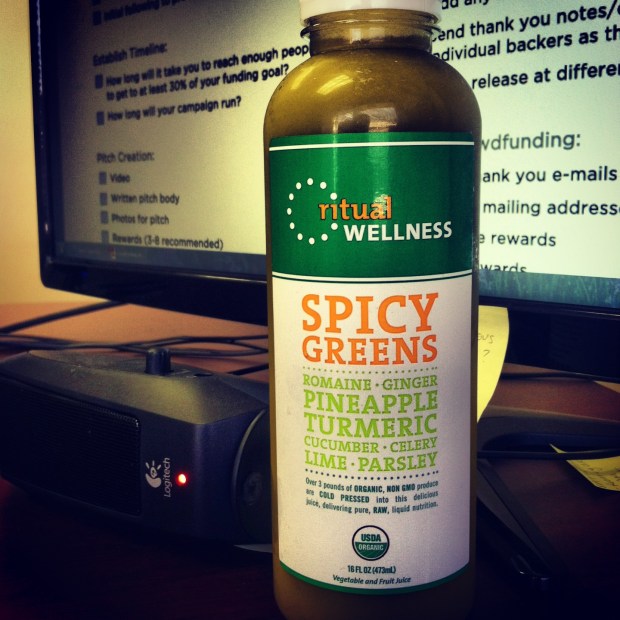
Probably my least favorite of the juices, but still tasty.  Started to feel mildly hungry around this hour (or maybe it just feels like lunch time?), the juice and water helped.

Note: by this point I’ve had about 30 ounces of water in addition to the juice.  I’ve peed probably 10 times… TMI?

3:30pm: Juice #4: Spicy Lemonade: Alkaline Water, Raw Agave, Lemon, Cayenne

IMG_2096

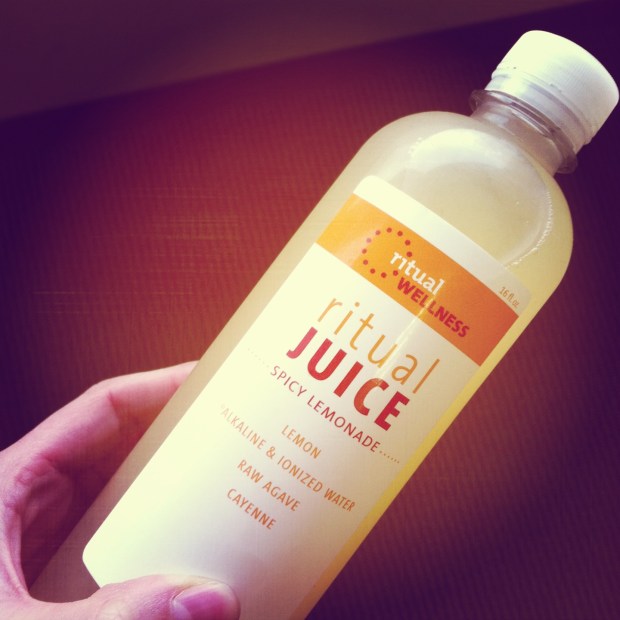
I meant to have this one at 3:00pm, but I had a meeting from 3-:330, so I held off until after.  I think since I was busy I haven’t had a chance to think about hunger at all.  But surprisingly I’m not that hungry and I definitely don’t feel sluggish.  So that’s a plus!

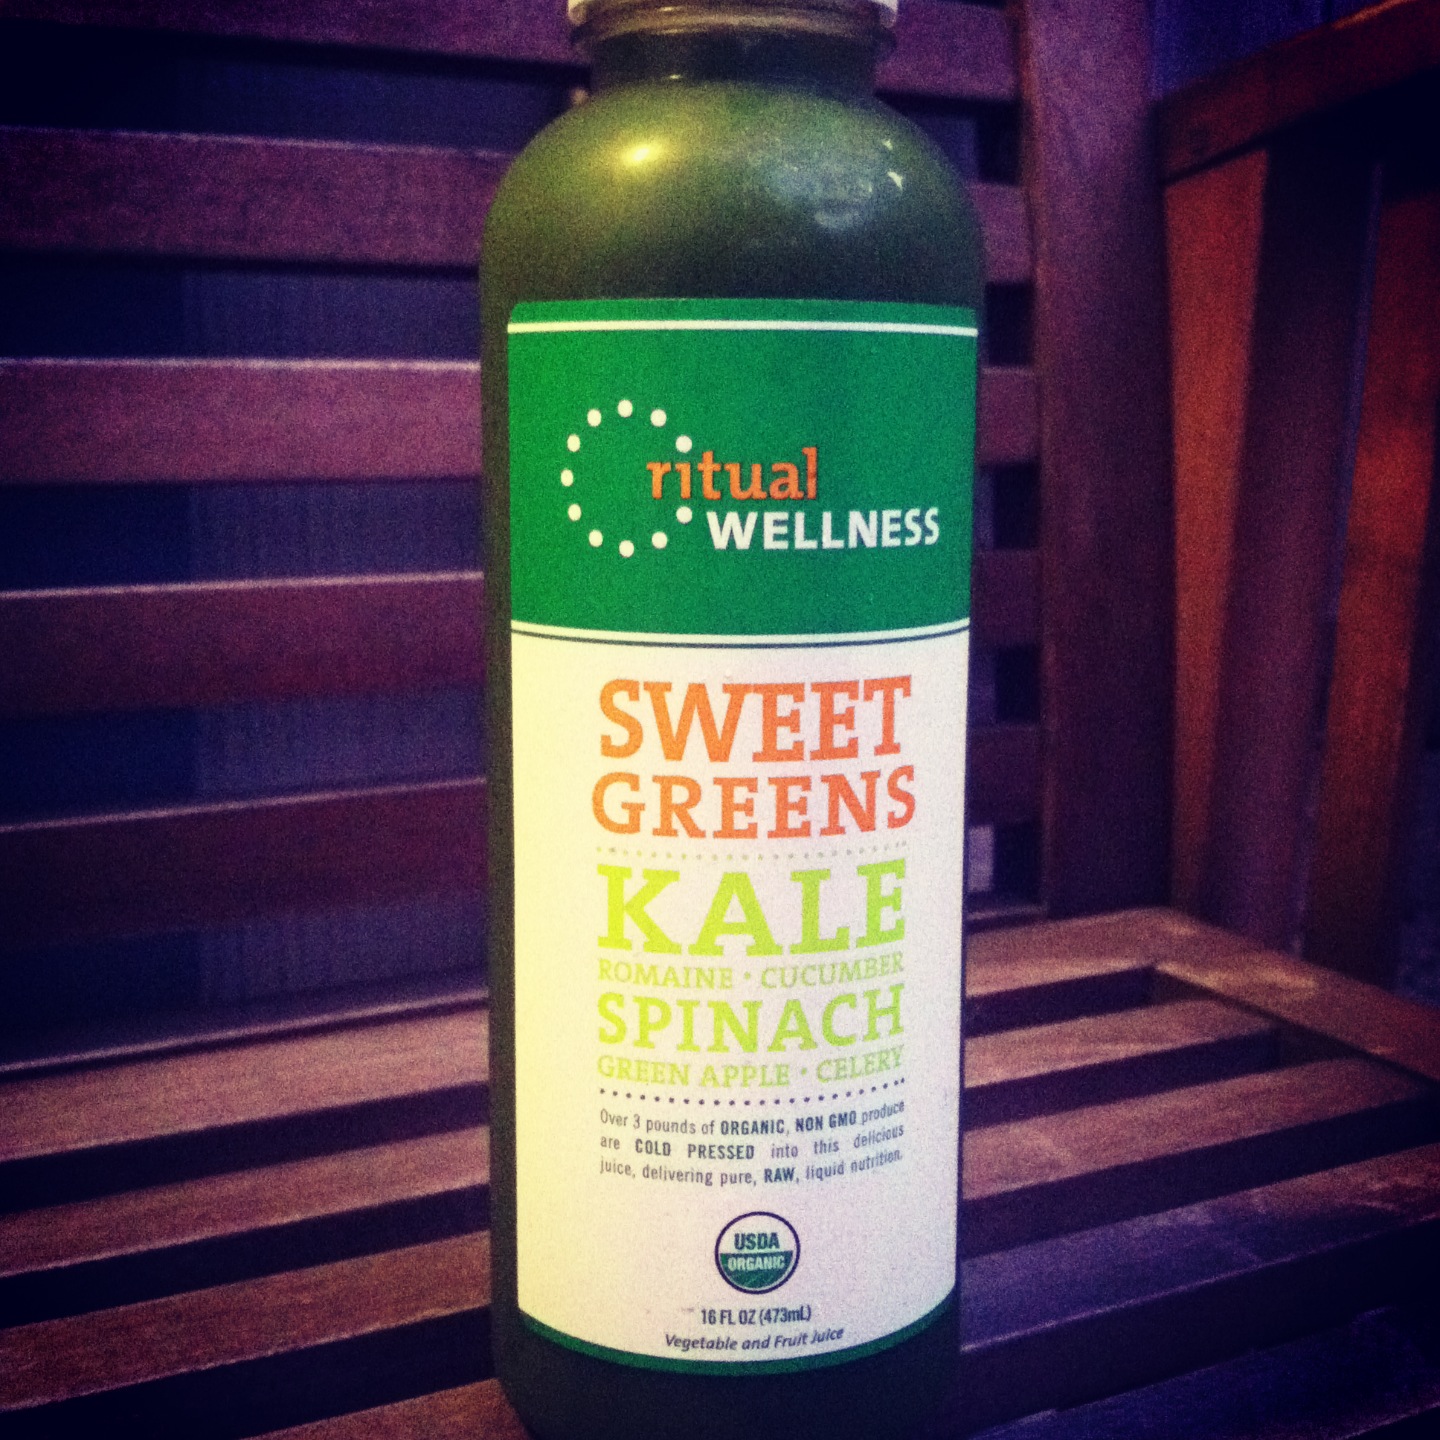
5:30pm: Juice #5: Sweet Greens: Kale, Romaine, Cucumber, Spinach, Celery, Green Apple

IMG_2097

I had this one a little bit after I got home.  I do this thing where I walk in the door and set the timer for 10-15 minutes.  In those 10-15 minutes I pick up or clean something.  Then after those things are done, I can relax.

The first sip I had of sweet greens was amazing.  I love that you can taste the apple (although you might not notice it at first).  I had been looking forward to sweet greens all day, because I know I like it.

7:30pm: Juice #6: Cashew Crunch: Cashews, Vanilla, Nutmeg, Cinnamon, Raw Agave

IMG_2098

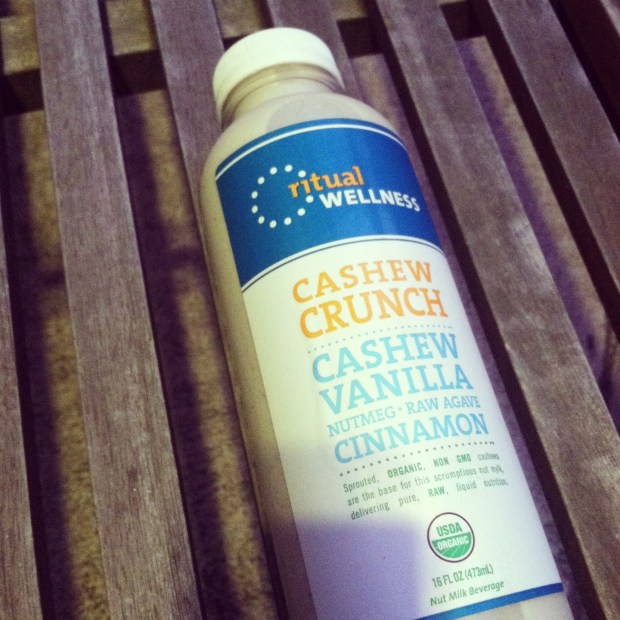
The last one of the day.  I was totally ready to have this and be set for the night.  Then Jesse came over and ate a burrito in front of me.  #FML

The smell made my stomach growl, but the cashew crunch was very satisfying so I resisted the burrito.  I’ve had Cashew Crunch a lot for breakfast.  It usually does a good job of keeping me satisfied through lunch.  So as the last juice on the cleanse it was great to have something so satisfying.

I slept well and the next morning I woke up feeling like I could do another day.  For me the decision to only do a 1-day cleanse was largely a cost factor.  I’m currently in money-saving mode, but otherwise I would have liked to try another day or two.  If we’re being honest, yes the juices are expensive, but what do you expect with 3lb of organic produce in each bottle?

I’m sure to get the full benefits of a reset palate and more detoxing, 3-5 days is more the ideal cleanse length, but I still think I benefitted from a 1 day cleanse.  I got the feeling of reseting my body (as cheesy as that sounds) and de-stress for a day.  I think the fact that I didn’t have to think about meals or anything was great, the juices were packed and ready to consume.

I was surprised that I wasn’t hungrier throughout the day (and I didn’t crave anything).  But I suppose that makes sense, you’re consuming something every few hours.

Overall, I’d love to try this again.  And maybe I’ll decided to do a longer cleanse in the future, but right now my budget is keeping me at a 1-day cleanse.

What about you? Have you ever tried a juice cleanse or wanted to try one? 

First Birthday Cake

Today is my nephew’s first birthday! I can’t believe it’s been a whole year since he was born.  The kid just keeps getting cuter.

1404789_10153514358980462_1038614502_o

This past week I’ve been agonizing over the fact that I was going to make him a birthday cake.  I started feeling extremely guilty that I was going to make a 1 year old a mini birthday cake full of sugar and fat, because at this point he’s too little to actually know he wants it. Earlier this week, my guilt got the best of me and I decided I was going to make a (refined) sugar-free cake.

I tried out a recipe, and it was a flop.  The next day I discussed it with the baby-daddy (aka my brother-in-law) and he made a good point: It’s his birthday.  He’s NEVER eaten cake. He probably won’t again until his next birthday.  It’s ok for him to have cake on his birthday.

That’s when I decided to make a regular cake.  Despite the fact that I felt like I was killing his little insides and firing up a sugar addiction, the reality is, that’s probably not true.

Graham is getting this cake.

firstbdaycake

It’s the Little Banana Cake with some whipped cream as filling and icing.  I made this a few months ago, but this time even littler.  I think it’s kinda cute and I can’t wait to see him dig into it.

What do you think? Should we give One-Year-Olds a regular cake or a lower sugar version?

P.S. Obviously I don’t have kids and am not an expert. I’m just a loving aunt who doesn’t want her nephew to develop a sugar addiction.  So feel free to comment regardless of whether or not you have kids.

P.P.S. HAPPY BIRTHDAY GRAHAM!

Cauliflower Pizza Crust

I’m thinking of changing my blog subtitle to:  A blog about balancing health with a constant desire to eat cake.

Because that’s really what it’s about.  I love baking and making deliciously fatty food, but I spend the better portion of my life trying to figure out how to be healthy and fit.  It seems like the two just don’t go together, but I think I’m making it work and this is a prime example.

cauliflower pizza1

It’s not “skinny” anything.  It’s Cauliflower Pizza.

I’ve been seeing Cauliflower Pizza crusts all over the internet for a while.  Cauliflower is slowly becoming the new Kale.   You know, the healthy thing that we all need to be eating all the time.  I still eat kale all the time, but I’m seriously enjoying finding new ways to cook with cauliflower.  Let’s let this food trend continue!

cauliflower pizza4

Cauliflower Pizza

12 oz cauliflower (1 bag from Trader Joe’s), grated
1/2 cup percorino romano cheese, finely grated
2 eggs
salt and pepper to taste1/3-1/2 cup pizza/pasta sauce
1 cup Monterrey Jack Cheese, grated
Toppings: Caramelized Onions, Sausage, Any other toppings

Pre-heat oven to 425F.

In a bowl, mix together grated cauliflower, percorino romano, eggs salt and pepper.  Press onto a parchment paper-lined baking sheet.  Try to get it as thin as you can so the pizza turns out nice and crisp.  Bake about 15-20 minutes or until lightly golden.

cauliflower pizza

Remove from oven, spread with pasta sauce, then sprinkle with cheese and desired toppings.  I used pre-cooked sausage, caramelized onions, and artichokes.  Put back in the oven for another 10-15 minutes or until your pizza is nice and crispy and golden!

cauliflower pizza3

Allow to cool a few minutes.  Then serve and enjoy! This recipe makes one large pizza.

I was a fan of this.  But let’s be clear.  Just like the two-ingredient paleo pancake DOESN’T actually taste like a pancake, this isn’t REALLY like pizza.  That said, it’s still super tasty!

Jesse and I agreed it really does taste like cauliflower and egg, which we were pleased with.  I think if I had pressed it more thinly throughout, it would have tasted better because the crispy edges were awesome!

So be sure to press it really thin when you try this!

cauliflower pizza2

I definitely want to try making this again.  Next time I think I’ll do caramelized onions, goat cheese with prosciutto and arugula.  Sounds awesome right?  This is a good template recipe that you can adapt to fit basically any flavor profile, while staying a little bit healthier.

What would you put on your cauliflower pizza?

Soft Pretzels

I’m more sore than I can possibly explain.  Like so sore I can’t sleep.

Don’t worry, I’m not going crazy with resolutions.  I’ve been going to crossfit 3-4 times per week for the past few months.  This week I’ve gone twice, and my shoulders and back are killing me.  But enough about soreness, because aside from my aching shoulders something else is bothering me this time of year: diet-palooza.

I love all the salad recipes floating around, and I’m all for people getting healthy.  I wish it would happen year round, not just the first 3 weeks of January.

But can we call agree to stop calling lighter versions of fatty foods “skinny”?  You know what I’m talking about.

Skinny Vanilla Latte=  Latte with Low-Fat Milk and Sugar Free Syrup
Skinny Nacho Dip= Some sort of cheesy dip probably made with non-fat greek yogurt
Skinny Onion Rings= No, they’re not just cut thin. They’re probably FAT pieces of onion rolled in whole wheat bread crumbs and baked.

I absolutely hate the word “skinny” when it comes to people and food.  I’m going to avoid “skinny” and talk about something that will get you nowhere toward achieving the goal of “skinny”… Soft Pretzels

Carb-y. Delicious.  Thigh-gap’s worst nightmare.

softpretzels1

Soft Pretzel

from Chow

1 cup warm water (105°F to 115°F)    
1 (1/4-ounce) packet active dry yeast (2 1/4 teaspoons)    
Canola oil spray (like Pam or whatever)    
2 3/4 cups bread flour    
1 tablespoon sugar    
1 teaspoon sea salt, plus more for sprinkling    
6 cups water    
1/4 cup baking soda

Place warm water in the bowl of a stand mixer.  I don’t measure the temperature, I just turn the water on hot from the sink and that’s usually the right temperature.  Add yeast and allow to sit for 5 minutes, until foamy.  If your yeast/water combo isn’t bubbley, throw it out.  It’s no good!

In another bowl, whisk together bread flour, sugar and salt.  Attach the dough hook to your stand mixer.  Add flour to yeast mixture and turn your mixer on low.  Mix for 10 minutes.   Transfer dough to a greased bowl.  Cover with a towel and place in a warm spot to rise for half an hour.

Prep your baking sheets by lining two baking sheets with parchment paper and spraying with cooking spray.  Once your dough has risen, punch down and knead by hand for another minute.  Divide dough into 16 small balls.  Take each ball and roll into a long string, then twist into pretzel shape.  For photos on how to do this, check out Chow.

Place prepared pretzels on baking sheet and cover with plastic wrap.  Allow to rise for 10 minutes.  In the meantime, preheat your oven to 425F and boil 6 cups of water.  Once water has boiled, add baking soda.  Add pretzels (depending on the size of your pot, you might be able to fit 4-5 pretzels at a time).  Boil one minute per side.  Then transfer to baking sheet and sprinkle with sea salt.

Once you’ve boiled them all.  Bake for 10-12 minutes or until dark brown.  Allow to cool and serve!

softpretzels2

If you’re still feeling the resolutions, feel free to have this with some skinny cheese-beer dip.  I’m sure you can find that recipe somewhere on Pinterest.  Just kidding.

But for real.  These pretzels are awesome and surprisingly easier to make than I would have expected!

How are your New Year’s Resolutions coming along?

I’m slowly on my way to being able to do a pullup.  I did one with the thinnest red band this week! Woo!

Arugula Salad with Lentils and Spiced Butternut Squash

Hi everyone!  I hope you all had a very happy Christmas, ate lots delicious food and spent time with family.

With my family, our holidays revolve around food and this Christmas was no different. We ate tons of tamales

and the only times we weren’t eating were the short walks we took to hang out with the neighbor’s llamas, ponies and donkeys.

llama

No, I’m not back in Peru.  People in LA County have pet llamas.   But other than llama sighting.  We mostly ate.

I don’t know about you, but after Christmas eating, I need vegetables.  Well really, I just think I need to eat normal, so that’s what I’m trying to do, but adding a few extra vegetables in there for good measure.

This morning, I finally tried Kodiak Cakes.  If you follow me on Twitter, Instagram or Like Foodologie on Facebook, you’ll remember that I won a few boxes of Kodiak Cakes through their 12 days of giveaways.  I decided to make some this morning

kodiakcakes

Along with their red raspberry syrup.  Overall, they’re super tasty! What I especially love is that they use all natural ingredients (and not to mention easy! You just add water!).

Then for lunch, I had this amazing salad.

Arugula Salad with Lentils and Spiced Butternut Squash1

It might not look that magical, but I promise it is.  It’s light but hearty enough to be a meal on its own. The mint makes it taste fresh and clean.  I’ve been making this salad for years so to be perfectly honestly, I can’t remember where I discovered it.  Someone deserves credit, I just can’t remember who.

Arugula Salad with Lentils and Spiced Butternut Squash

adapted from somewhere I can’t remember…

1/2 butternut squash, diced
2 tsp paprika
2 tsp cumin
1 tbsp olive oil
3/4 to 1 cup lentils, dry
6 cups arugula1/4 cup fresh chopped mint
2 tbsp olive oil
2 tbsp red wine vinegar
salt and pepper
4 oz (or more) goat cheese

Pre-heat oven to 375F.  Toss diced butternut squash with paprika, cumin, 1 tbsp olive oil, salt and pepper to taste. Place on a parchment paper lined baking sheet at bake for 15 minutes. Toss and bake for another 10-15 minutes or until crispy and cooked through. Please note: this cooking time may vary depending how how big you diced the butternut squash and how intense your oven is, so check it every so often and toss to make sure it doesn’t burn.

While the butternut squash roasts, cook the lentils.  Cover in water and boil about 20 minutes (or until tender).  Once cooked through, rinse and set aside.

Once the lentils and squash are ready, assemble the salad.  In a large bowl, toss together arugula, mint, 2 tbsp olive oil, vinegar, salt and pepper.  Scoop some of the salad on a plate, top with goat cheese, lentils and butternut squash. Serve and enjoy!

Feel free to made adjustments. I love mint so I’m a fan of tons of mint.  Don’t love mint? Omit it.  Out of goat cheese or hate its guts? Replace it with manchego! If you don’t like manchego, then we just can’t be friends.  But if you want to make it vegan and omit the cheese, I’m a-okay with that.

I have a feeling this is going to be salad week for me.  Be on the look out for some healthy eats and New Years resolutions in the days to come!

How was your Christmas?  What was the best thing you ate?

Salted Almond Joy Bark

With Christmas and the New Year on the horizon, I have two goals for today:

1. Clean out my closet/dresser of unwanted garments

I have too much stuff.  I have clothing I don’t wear and even more that doesn’t fit.  One of the fantastic things about lifting weights is that my body shrank.  It’s great! But it means that I don’t own any pants that fit me.  So I want to clear out the stuff that doesn’t fit me any more, because there’s no room in my shoebox of an apartment for clothing that is too big or old.
2. Bake Christmas Cookies for gifts

I love baking and Christmas is the perfect time to bake treats and give them away.  So today and tomorrow will consist of Christmas baking.  I had my recipes all planned out, but then yesterday when I arrived to Crossfit, Allison told me she had something for me.  She handed me a lovely tin filled with homemade salted chocolate coconut almond bark.

At this point it was nearly 6am and not an appropriate time to eat chocolate.  So I put it in my car, got my butt kicked during the WOD and went to work.  I have this rule during the holidays (since there are so many treats floating around) that I’m allowed to have a sweet treat AFTER lunch.

This means waiting til I have a nutritious (or semi-nutritious because yesterday my boss took us to Umami Burger for lunch and that’s clearly NOT nutritious) before enjoying goodies and also cutting down on how much I eat.  I have a hard time stopping once I start, so I found it’s better for me to just start later.  But anyway…

So I waited until after lunch and had a piece of Allison’s delicious bark.

OMG

OMG

OMG

It was awesome.  Let me just tell you, I gave some to co-workers and to Jesse, but the reality is I ate it mostly myself.  Today, as of 2pm… the bark is gone.  As in, I finished it all after lunch today.

Because this bark was so amazing I wanted to try to make it on my own and give it to my loved ones.  I’ve decided to rename it Salted Almond Joy Bark, because that’s sort of what it reminded me of.

saltedalmondjoybark5

Salted Almond Joy Bark

from Sweet Potato Bites

10 oz semi-sweet chocolate chips  (or chocolate chunks)
1/2 cup roasted, unsalted almonds
1/2 cup Roasted Coconut Chips*
Coarse Sea Salt

First, prepare your pan by lining a cookie sheet with parchment.  Set aside.

Next, pour chocolate into a microwave safe bowl.

chocolatechunks saltedalmondjoybark1

Microwave 30 seconds then stir.  Microwave another 30 seconds and stir, repeat until chocolate is melted and smooth. You can also do this in a pan or double boiler, but I’ll be honest, the microwave is a million times easier.  It’s also idiot-proof.  I can’t tell you how many times I’ve had my chocolate seize when using a double boiler, because water in chocolate (steam included!) might cause it to seize.

Because of this, I take the easy route and use the microwave.  Once your chocolate is melted and smooth, pour about 3/4 of the chocolate into the parchment paper-lined baking sheet.  Using a spatula, smooth until it’s a tiny bit thick (if you like your bark thicker, leave it thicker, if you want it thinner, spread it more).  It doesn’t have to be perfect because you’re going to cover it with stuff anyway…

chocolatespread

Sprinkle chocolate with coconut and almonds.  Take the remaining chocolate and drizzle it overs the coconut and almonds.

saltedalmondjoybark4

Sprinkle with sea salt (be generous! That’s seriously the best part!) and refrigerate or freeze until firm.

saltedalmondjoybark3

Once the chocolate is completely hardened (it took about an hour for me, if not it’ll start to melt when you touch it), break the bark into pieces.

saltedalmondjoybark2

Store in an air tight container in a cool spot for up to a week.

saltedalmondjoybark1

*I used Trader Joe’s Roasted Coconut Chips, but if there’s no Trader Joe’s near you, you can just use toasted coconut.

This stuff was seriously amazing.  The salt really takes this from normal tasty chocolate bark to something out of this world.  Everyone that tried it loved it.  I’m really excited to share this with others along with Orange-Pistachio Biscotti, Molasses Cookies, Chocolate Mint Cookies and maybe another cookie or two.  Any suggestions?

Are you giving Christmas Cookies this season?  If so, what are your top cookies or treats to gift?

Gingerbread Cookies

Let’s let the cookie obsession continue with Gingerbread Cookies!

Gingerbreadcookies
As a kid, Christmas cookies weren’t really a tradition during the holidays for us. I think I remember my sister setting out cookies for Santa with me once, but I might be making that up in my head. I know Christmas cookie decorating is a normal thing in most households, but it didn’t really happen in mine. That’s what happens when you have immigrant parents, I guess?

But this year, since cookies are all the rage in my world, I decided to go all out and make Gingerbread cookies.

Allison from Sweet Potato Bites had a cookie party at her house, so I thought that would be the perfect opportunity to make them for.

I baked them in advance and made royal icing at her house for decorating.

Gingerbreadmen2
I spent a long time researching Gingerbread recipes, but I found this one from All Recipes to be best.  As usual, I made a few changes to the recipe, so here’s my version:

Gingerbread Cookies

adapted from All Recipes

3 1/4 cup flour
1 tsp ground ginger
1/2 tsp cinnamon
1/4 tsp mace
1/2 tsp salt
1 tsp baking soda
1/2 cup butter, room temperature
1/2 cup brown sugar
1/2 cup molasses
1/4 cup maple syrup
1/4 cup almond milk (or water)

In a medium bowl, combine flour, spices, baking soda and salt.  In a large bowl (or in a stand mixer bowl), cream together butter and brown sugar until fluffy.  Beat in some of the dry ingredients and then some molasses, maple syrup and almond milk, alternating wet and dry ingredients until all combined.   Chill the dough for a few hours (I made this a day in advance and chilled the dough over night).

gingerbreaddough1

Once you’re ready to make cookies, pre-heat oven to 350F.  On a lightly floured surface roll out the dough to about 1/4 inch thick.  Using your cookie butters of choice, cut out desired shape and place on a parchment paper lined baking dish.  Place a few inches apart on the sheet as they cookies expand a tiny bit when they bake.

Bake 8-10 minutes (this will vary depending on the type of cookie cutter you use and the size.)  Once they’re golden on the edges, they’re ready.  Don’t overbake them or they’ll be hard.  Allow to cool completely, then decorate with royal icing.

Gingerbreadmen1I had never decorated cookies with Royal Icing before.  I’m going to try it a few more times, really perfect it then do a blog post on it.

That means I’ll be making these cookies again.  I really liked these cookies because they weren’t hard.  The ones in an air tight container stayed soft for over 5 days.  However, if you like crunch gingerbread cookies, just leave these out a little longer to harden and you’ll get crunch cookies!

I have some ideas for the next Christmas cookies to make, but if you have a great recipe to share, please share it in the comments!

Molasses Cranberry Cookies

Christmas season is in full swing!  Normally, I’m not that into holidays. But I’m not sure what’s wrong with me this year, all I want is a living room with a Christmas tree.   If you remember back when I told you about where Foodologie happens, you’ll remember that I live in a studio that is teeny-tiny.  That means I have zero room for a Christmas tree.   So because I can’t be festive in my living space, I have to find other ways to make the most of the holiday season.

First, I bought a Christmas dress. A new dress for Christmas is a tradition in my family for as long as I can remember.     Anyone else do that?

I’m thoroughly excited about it.  I also bought myself another dress, because… well…

dress

Christmas present to myself?  (P.S. When will I get over sending my friends pics of outfits I’m thinking of buying?)

In addition to my Christmas dress, I’ve also been thoroughly excited about cookies.  So cookie making has been happening, starting with these:

Molasses Cranberry Cookies4

I don’t know about you, but I love chewy molasses cookies with lots of ginger.  They’re pretty much the best, as are these cookies.

Molasses Cranberry Cookies2

Molasses Cranberry Cookies

adapted from Blue Ribbon Cookies

1 stick of butter + 2 tbsp (10 tbsp total)1 cup sugar (plus extra for rolling)
1 egg
1/4 cup molasses
2 1/4 cup flour
2 tsp baking soda
1/2 tsp salt
1 tbsp ground ginger
1/2 tsp cinnamon
1/4 tsp mace
1 cup dried cranberries

Cream together butter and sugar until fluffy.  Beat in molasses and egg until fluffy.  In a bowl, combine flour, baking soda, salt and spices.  Add dry ingredients to wet ingredients.  Just before ingredients are combine, fold in cranberries.

Chill dough for a few hours.

Once you’re ready to bake, preheat your oven to 350F.

Form dough into 1 inch balls and roll in granulated sugar.  Place on a parchment paper lined baking sheet.  Bake 8-10 minutes.  Allow to cool  and serve!  Makes about 4 dozen cookies.

Molasses Cranberry Cookies1

I took these to work, shared with friends and a boyfriend. They were gone pretty quickly.  I’ll definitely be including these in my Christmas Cookie Gift Tins.   I have a few other awesome cookie recipes coming up, because seriously… I’m obsessed with cookies right now.

What about you?  How are you preparing for Christmas?  Do you have a Christmas dress yet?

Persimmon Crumb Cake

Hi Everyone! I’m in Peru probably avoiding altitude sickness is Cusco and on my way to Machu Picchu, but before I left, I made something to share with you.

I have some pretty awesome co-workers.  Once brought me a bag with 15 persimmons.  Isn’t that amazing? I love persimmons but $$$ and let’s be honest… the rent is too damn high to be eating persimmons all the time.

First, I used the persimmons for pancake topping.

Pancakes with Persimmon4

But sadly, he gave me persimmons just before I left for Peru so I figured a great way to give back (and use up the persimmons) was to make a delicious treat with them. If you’re looking for a wonderful afternoon tea fall crumb cake… this is the one.

Persimmon Crumb Cake1

Simple and delicious.  And I have to confess, that I ate two pieces of this when I brought it to work.  It was great with a cup of coffee in the afternoon.

Persimmon Crumb Cake3

Persimmon Crumb Cake

adapted from Real Simple Sandi Rose’s Blackberry Crumb Cake

Crumb Topping:

1/2 cup oats
1/4 cup flour
1 tbsp molasses
1/4 cup (heaping) sugar
2 tbsp butter

For Cake:

1/2 cup vegetable oil
1 cup sugar
2 eggs
1 tsp vanilla extract
2 cups cake flour
2 tsp baking powder
1 tsp cinnamon
1 tsp ground ginger
1/2 tsp salt
1 cup milk
4-5 persimmons, chopped

Pre-heat oven to 350F.

Make crumble topping by combining all ingredients.  Use your fingers to work it together til it becomes the texture of coarse crumbs.  Set aside.

Next make the cake batter.  Beat together oil and sugar.  Continue to beat and add eggs one at a time, beating 1 minute after each egg.  Add dry ingredients as you’re beating in the dry ingredients, stir in the milk.

Pour batter into a 9inch square pan (I actually used a 9inch deep pie dish, because that’s all I had).   Sprinkle with chopped persimmons then the crumble topping. Note: some of the persimmons might sink because the batter is pretty watery, but that’s ok!

Bake 50-60 minutes or until golden brown and cooked through.  Allow to cool completely, dust with powdered sugar (optional). Slice and serve!

Persimmon Crumb Cake4
Definitely a winner. Perfect for afternoon tea or when you have guests.  And the best part, if you don’t have persimmons you can pretty much sub out any fruit: apples, pears, peaches, berries, even probably bananas?

Either way, make this and have it with a large cup of coffee or tea.  I did.  It was amazing. Do it.

Persimmon Crumb Cake2

So while I’m in Peru, I don’t have time to share all this goodness with the social media world.  Do me a favor.  Tweet it. Pin it. Facebook it. Tell the world about the magic of persimmon cake!  In the meantime, I’m going to hike a mountain and eat some guinea pig (well… we’ll see)…

Also don’t forget The Refugee Auction is ending soon! Don’t miss out on your chance to bid on some Foodologie treats just for you!  Check it out here!