Chicken and waffles are one of those food combinations that have a cult following. In Los Angeles, Roscoe’s House of Chicken and Waffles is an institution, and I’m pretty sure Lay’s makes a Chicken and Waffles flavored chips.
I remember having Roscoe’s once in high school, but I don’t remember if I tried the chicken and the waffles together. I’m pretty sure I ate them separately. That’s clearly not the “right” way to eat them.
Like most things I find intriguing, I wanted to try making my own chicken and waffles. But let’s be honest, frying chicken is not something I’m going to take lightly. I wasn’t going to just make 2 pieces of chicken, 2 waffles and call it a day. No no. This was my first time frying chicken. It was going to be an event. And thus the Chicken and Waffles party was born.
The first thing you need for an event is guests, so I recruited this crew to be my chicken and waffles testers.

So if you’re like me, and you feel the need to make chicken and waffles an event, here’s a how.
What You’ll Need:
- Chicken: I used drumsticks and thighs
- Peanut Oil for frying
- Buttermilk for the chicken (and the waffles)
- Flour, paprika, salt and pepper for dredging the chicken
- Yeast, Milk, Eggs, Flour, Sugar, Salt and Butter for the Waffles
- Maple Syrup or just pancake syrup
- Plate, forks, knives, napkins
- Beer. Lots of beer. And ice to keep it cold.
First things first. You have to convince people that you are an awesome cook and that your chicken and waffles will be amazing. I suggest creating invites to get people excited (don’t see how they wouldn’t be, also don’t tell them you’ve never tried frying chicken before). I used Evite, because I’m a nerd. But you can also e-mail, text or call your friends to invite them. Make sure they RSVP so you know how much to make.
I estimated 3 pieces of chicken per person and at least 3 waffles per person. My worst fear is someone leaving my house hungry.
A day or two before your event buy all the things you need (see list above).
The night before the event, start your waffles.
I used Smitten Kitchen’s Essential Raised Overnight Waffles.
They were amazing. I absolutely recommend them!
But because I’m a fiend for feeding people, I figured one waffle recipe for 8 people wasn’t enough (I was right). So instead of doubling the recipe, I used a recipe a friend shared with me (made day of). It was oh so buttery and tasty.
Day of…
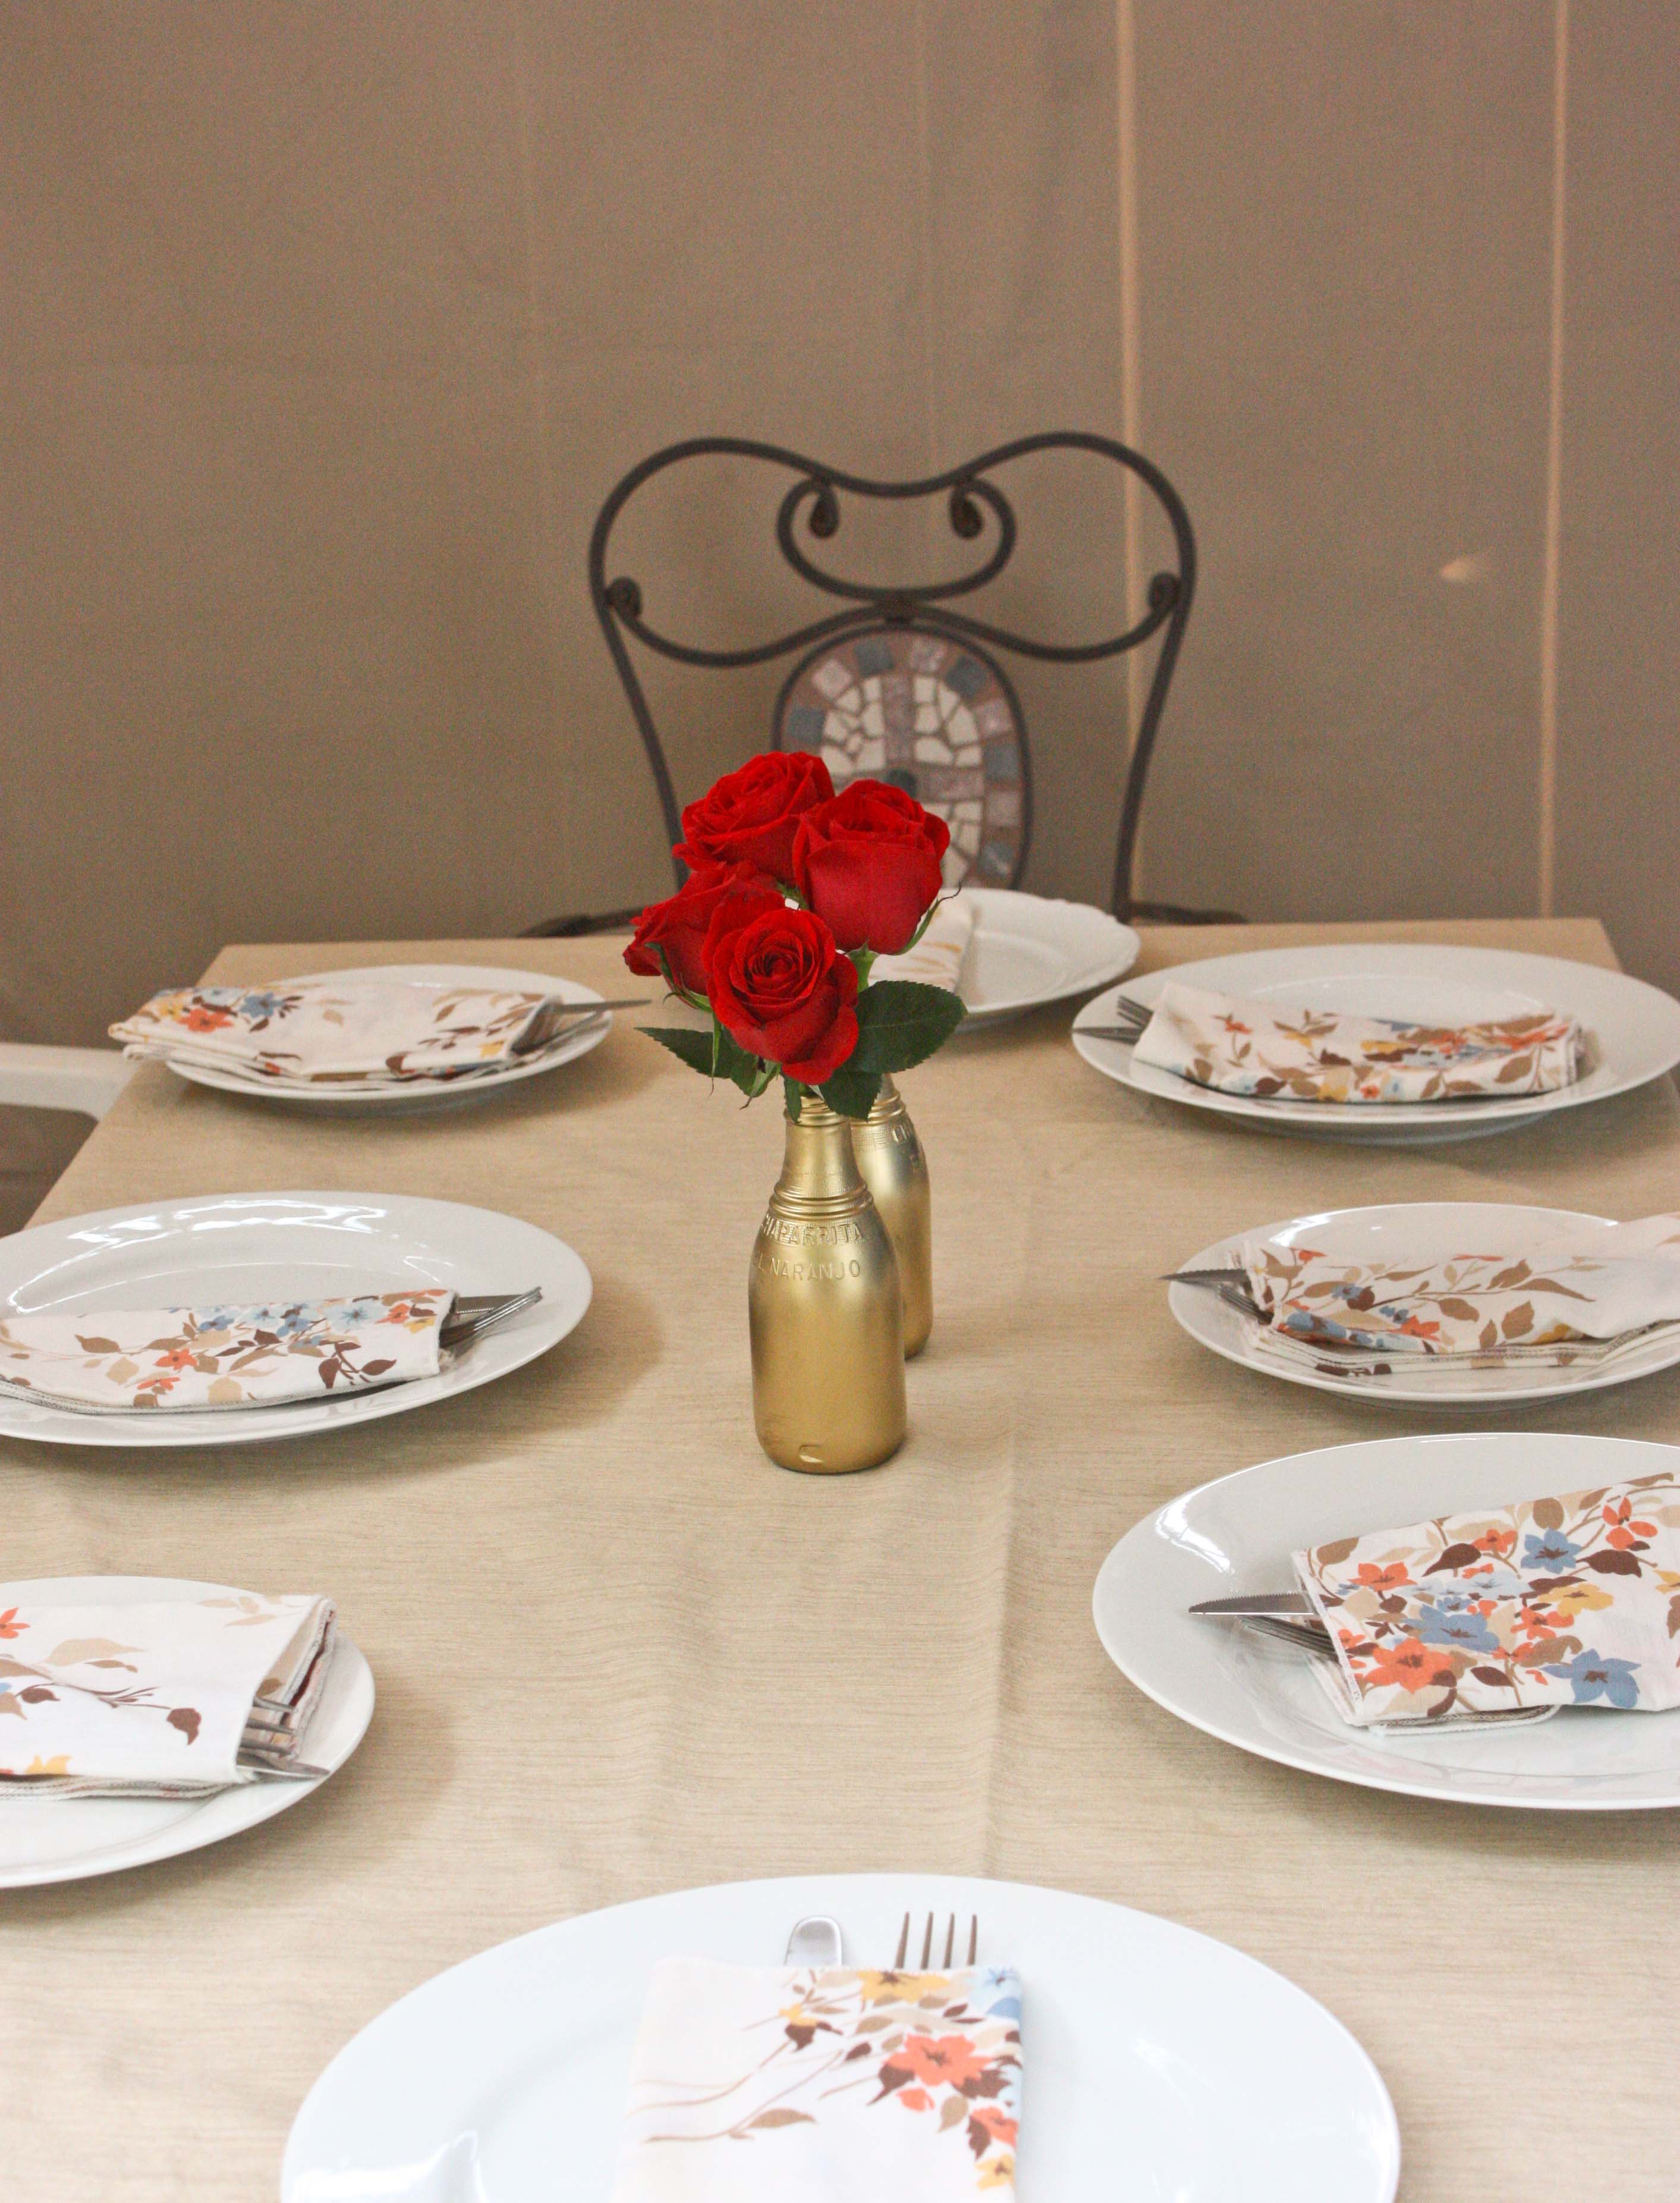
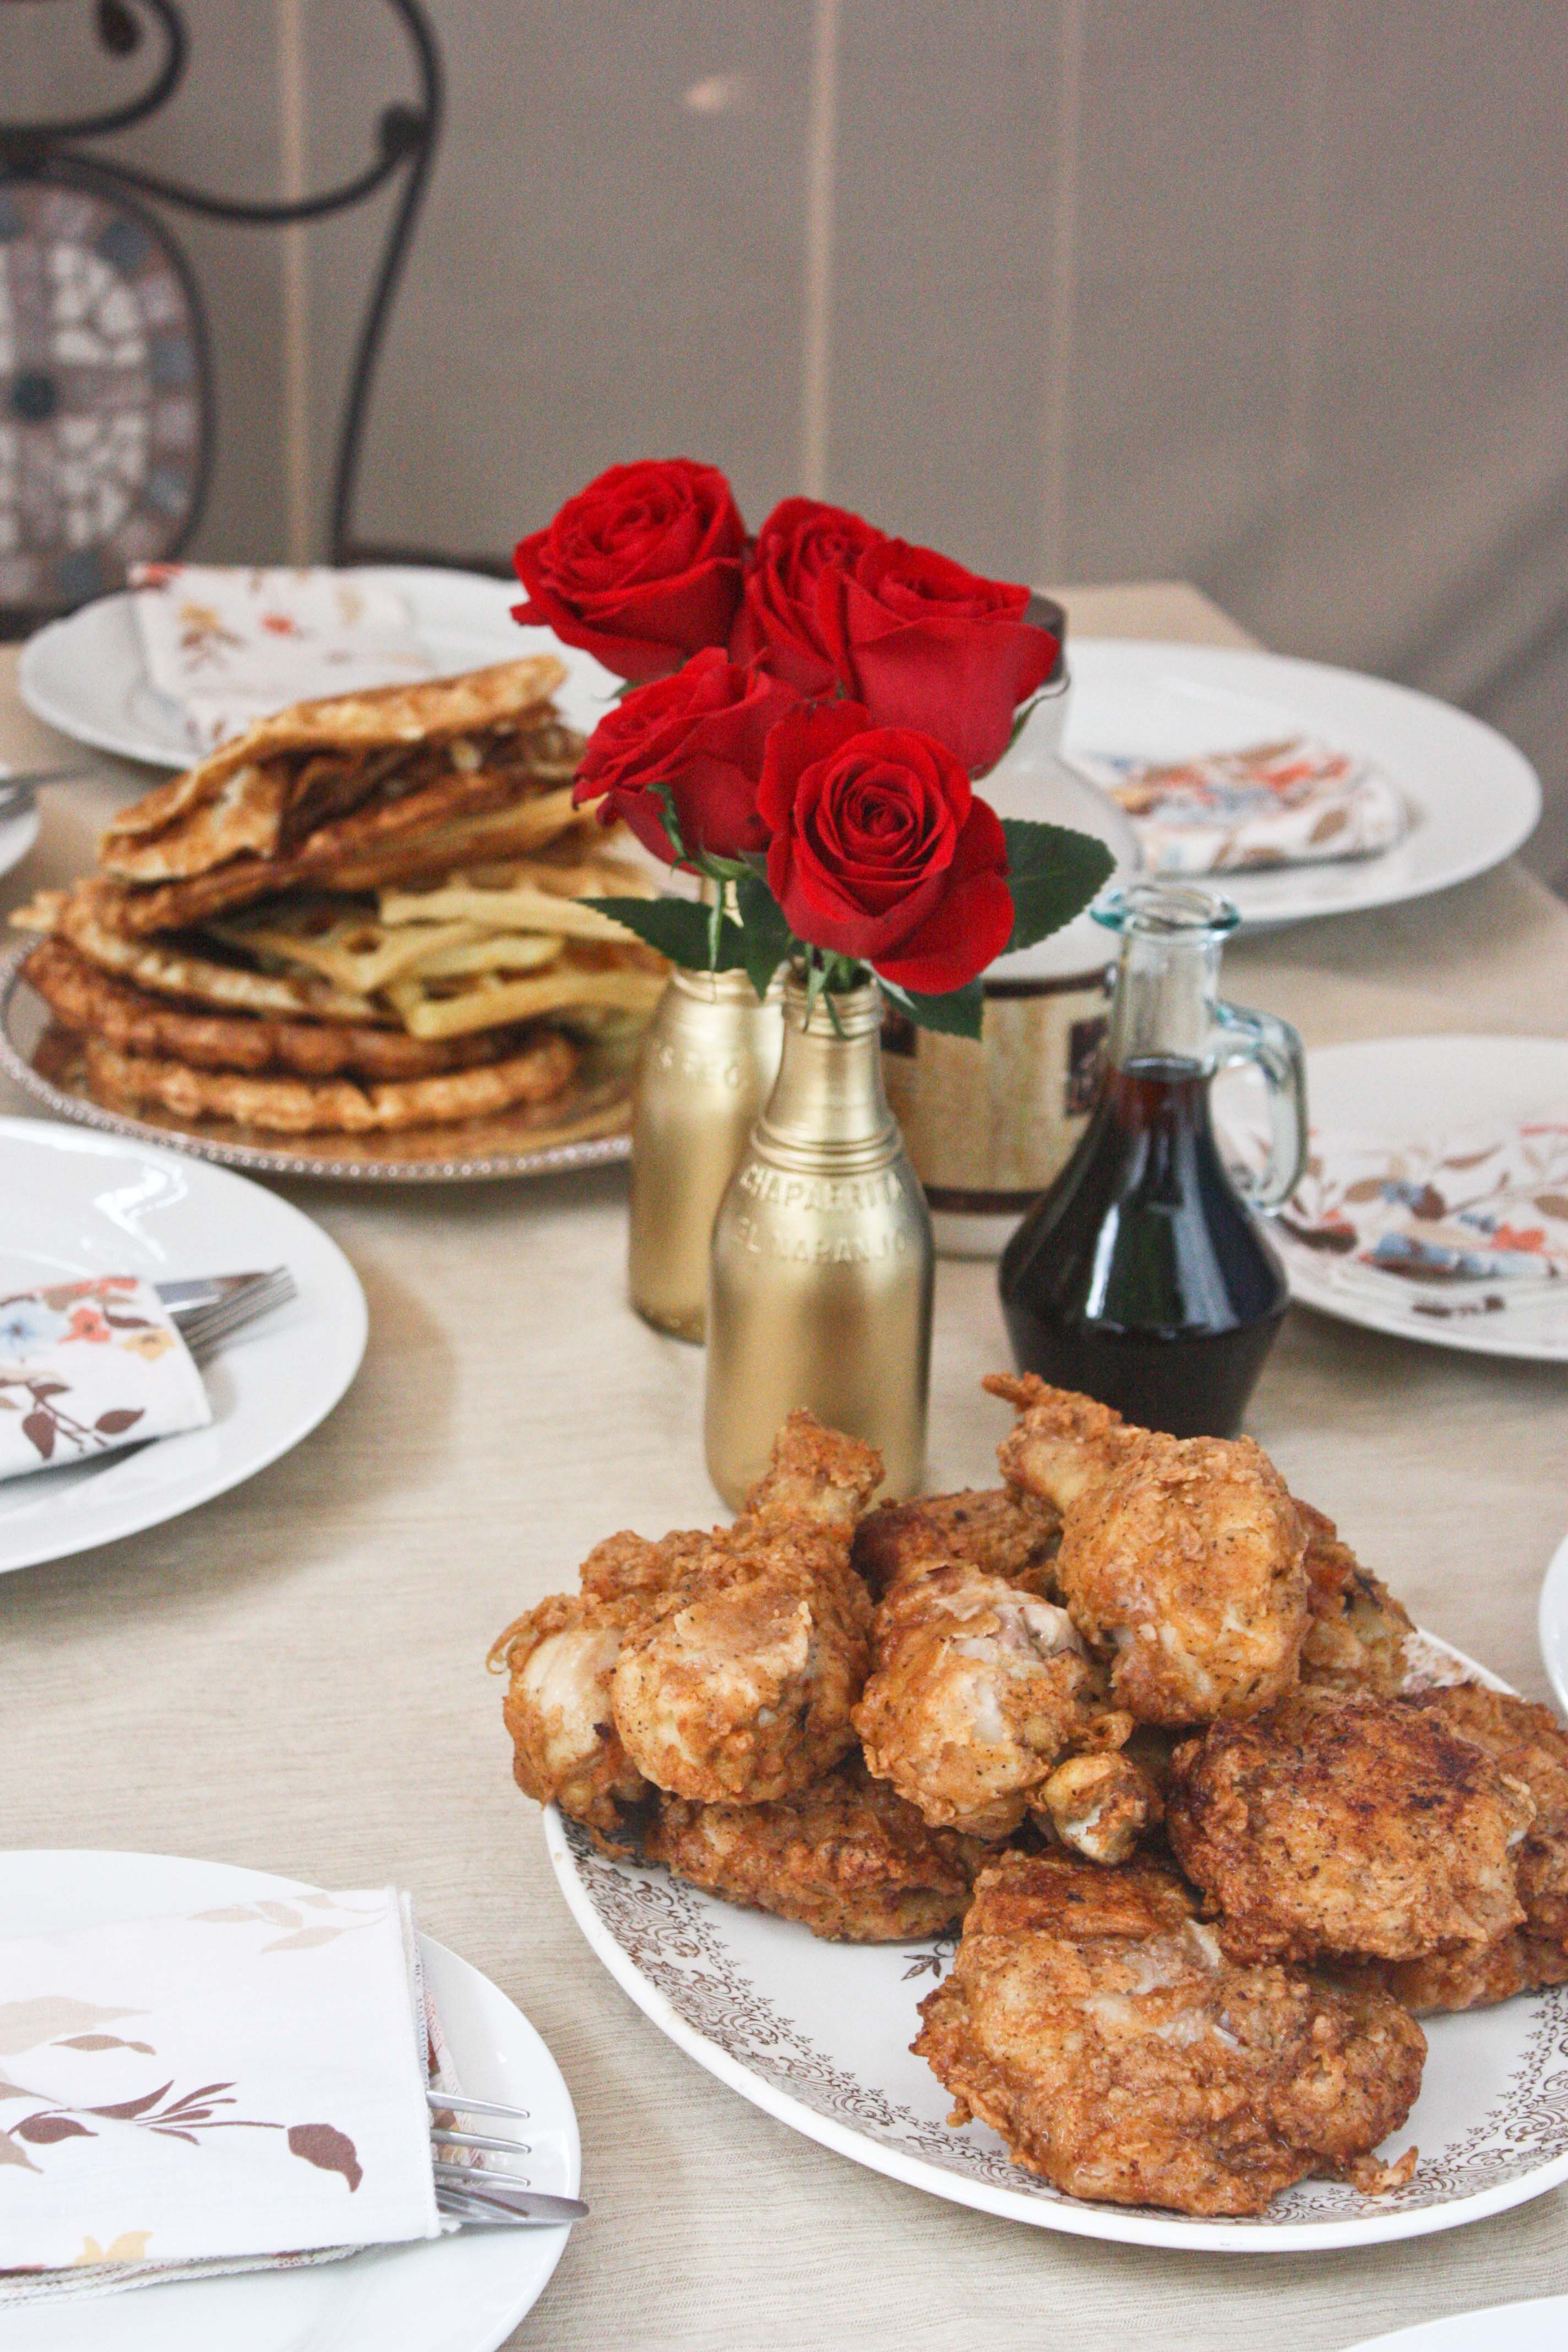
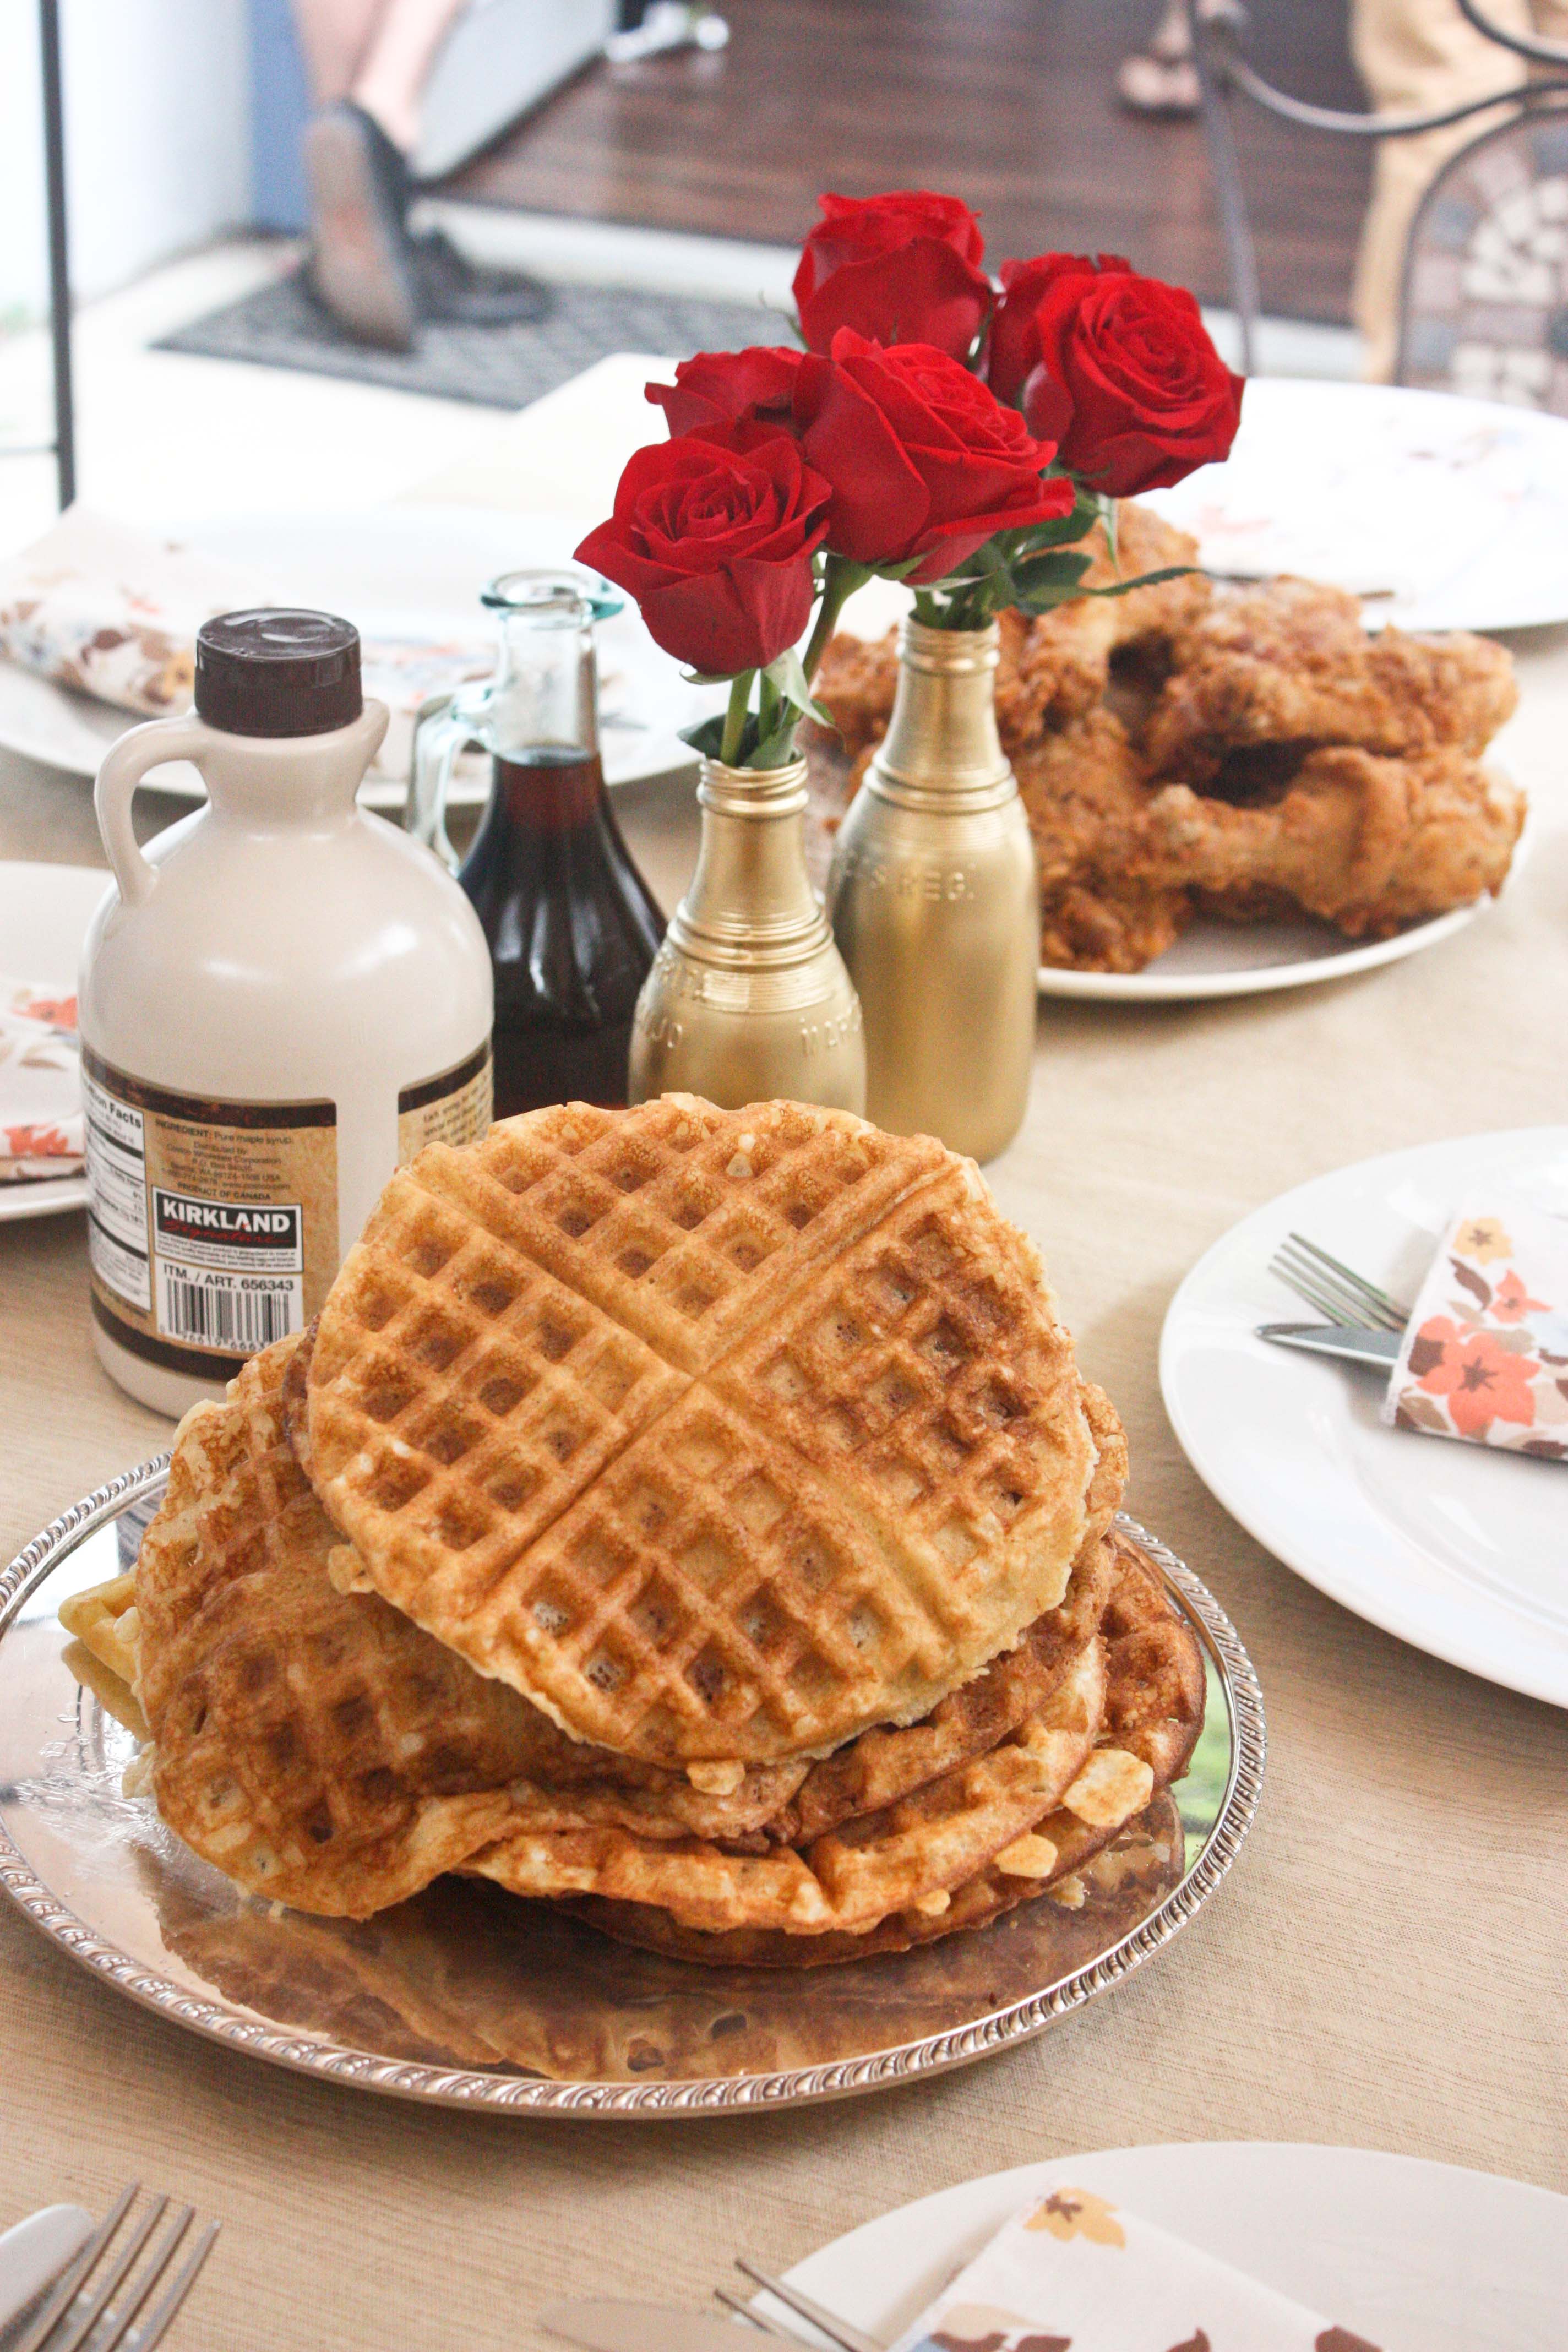
Set up your table. Dress it up, dress it down. Always include fresh flowers.


Start making the chicken. Let me preface this by saying this was my first time making fried chicken. I did A LOT of research. After reading the million ways to make the “perfect” fried chicken, I decided to keep it simple. I pretty much used this recipe from AllRecipes but didn’t use their method. My method was to make sure the oil wasn’t too hot and I kept turning it for even golden-goodness all around.
Frying the chicken is the most time consuming part, so start early (depending on the size of your skillet and how much chicken you make it’ll determine how long it will take).
First drown your chicken in buttermilk and let it sit there for a few minutes. Then put about 3 cups of flour in a bag with 1 tbsp each of paprika, salt and pepper (more salt if you’d like, mine wasn’t salty).
Transfer a piece of buttermilk soaked chicken into the flour bag, toss around. Place chicken on a parchment paper lined baking sheet. Repeat until all the pieces of chicken are covered in the flour/buttermilk mixture. Note: the amount of chicken you make will determine how much flour you need. If you need to make more, just remember the ratios above (1 cup flour = 1 tsp spice, feel free to increase the spice).
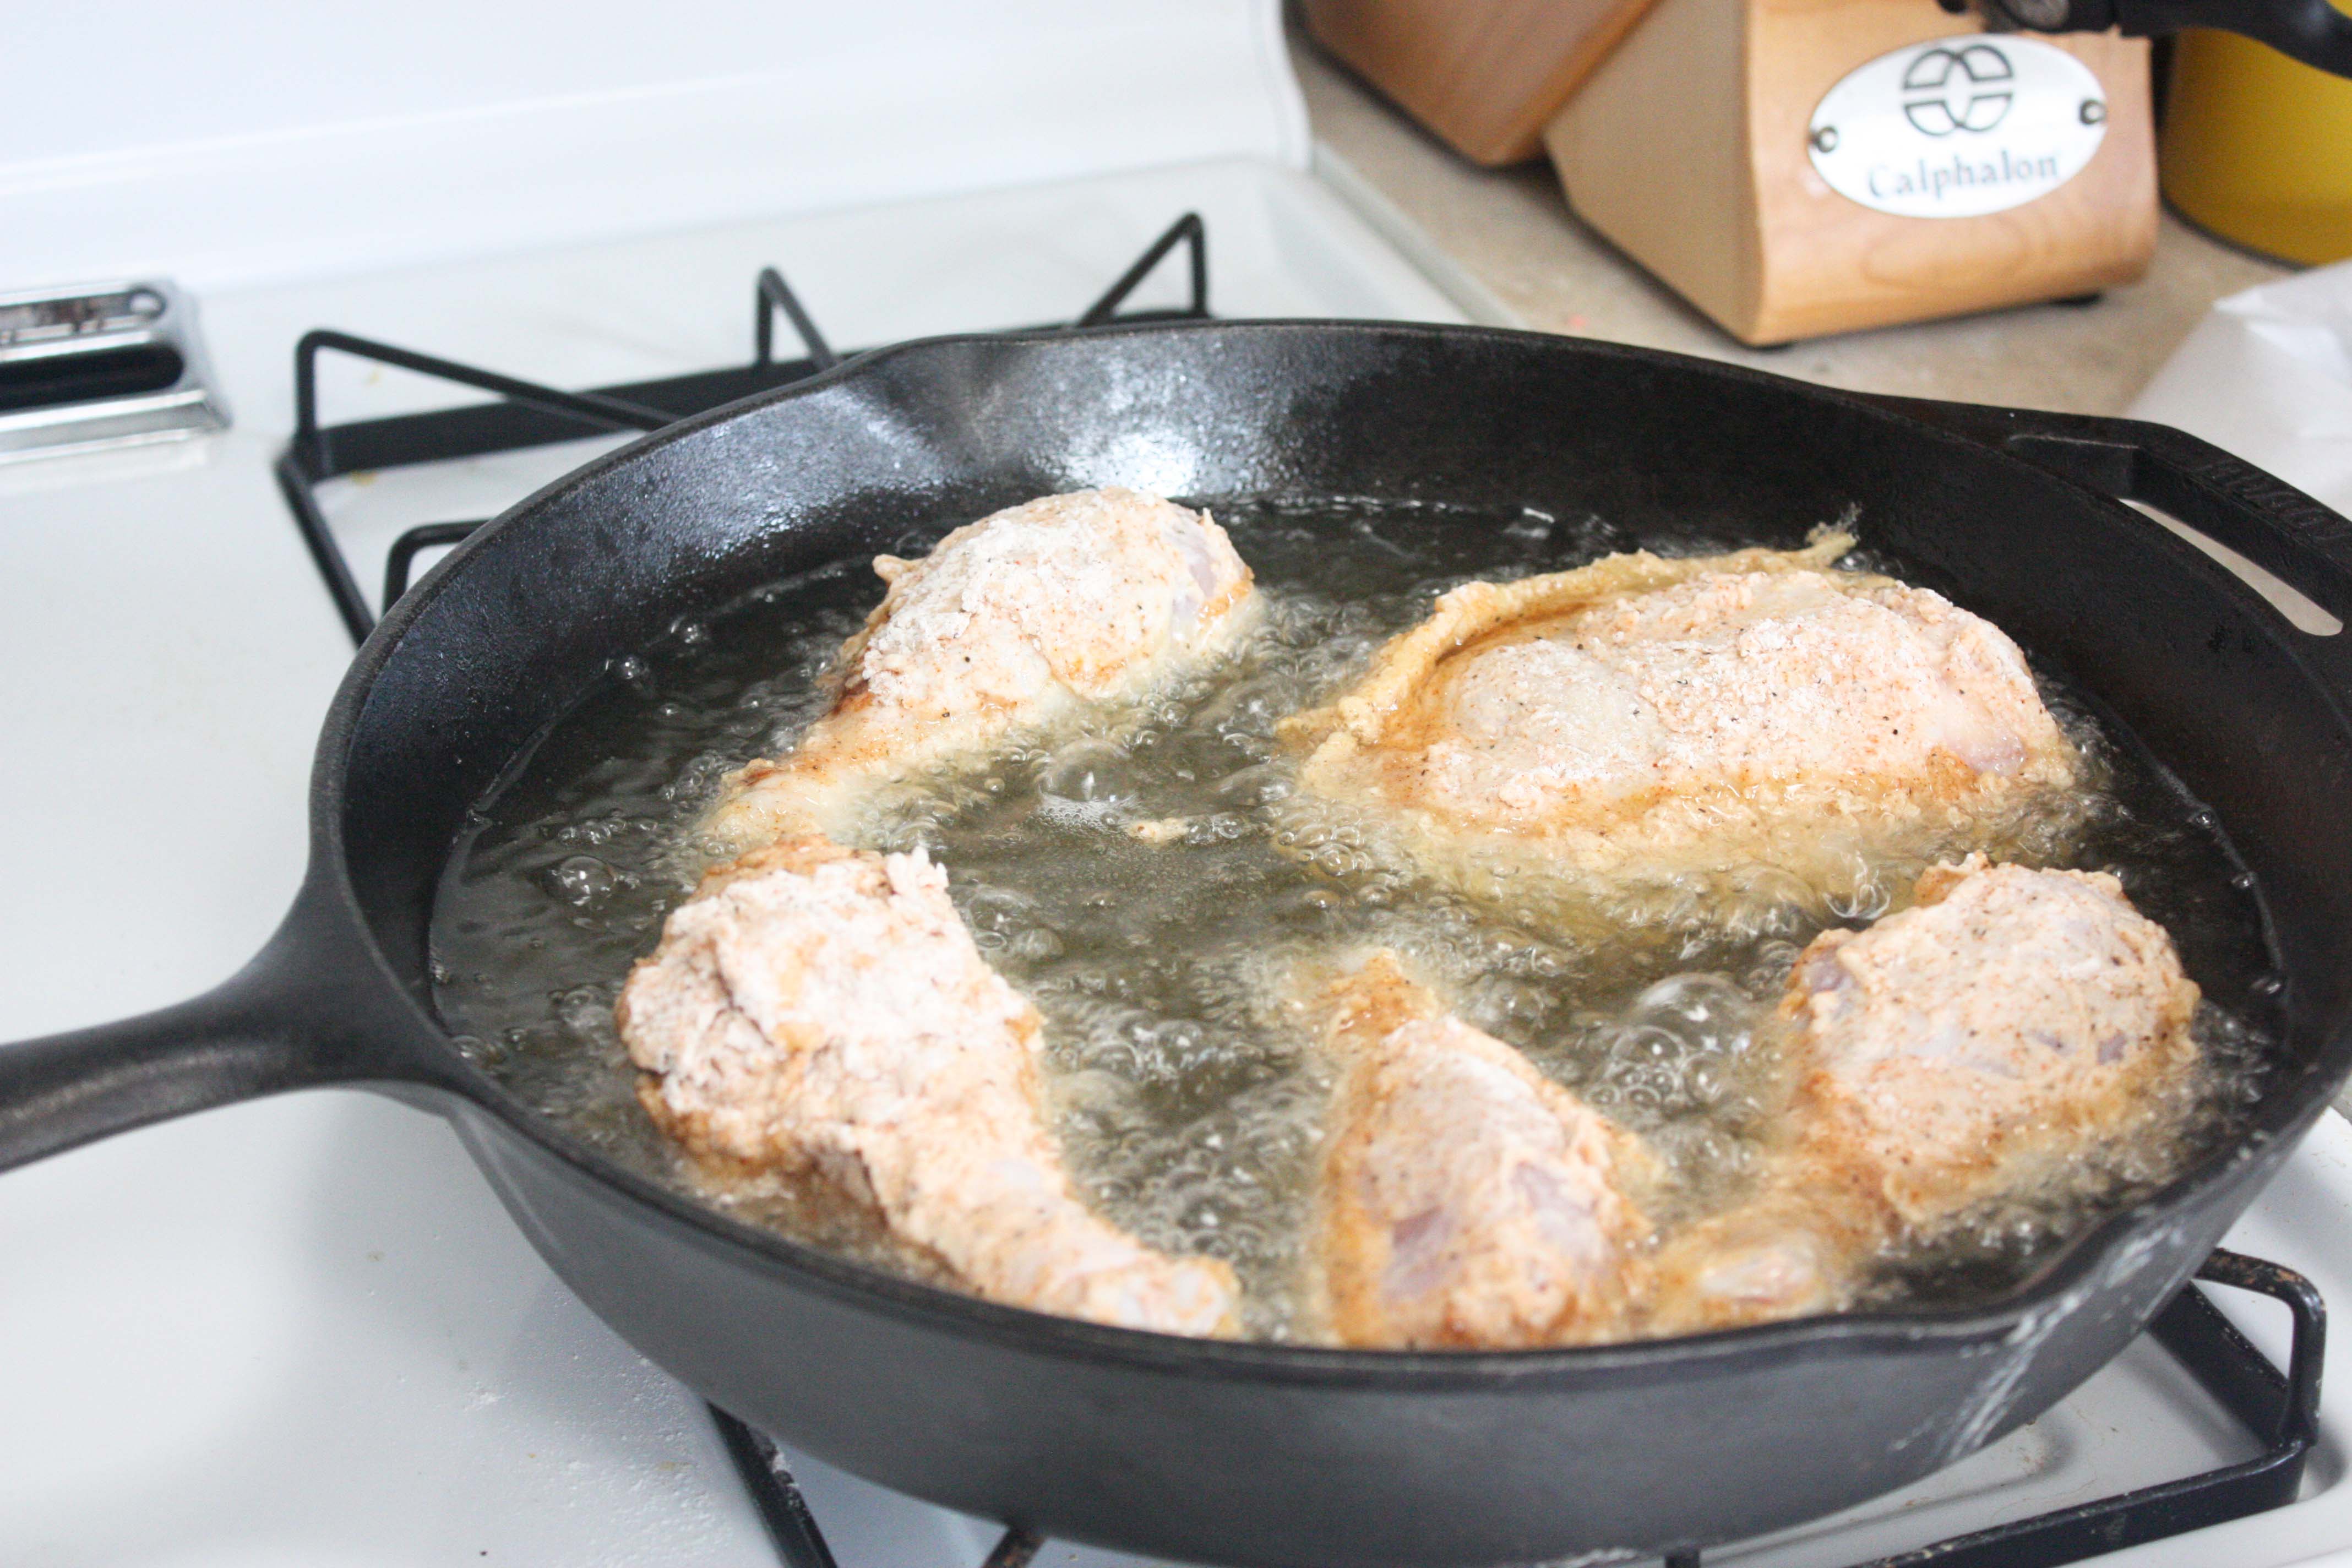
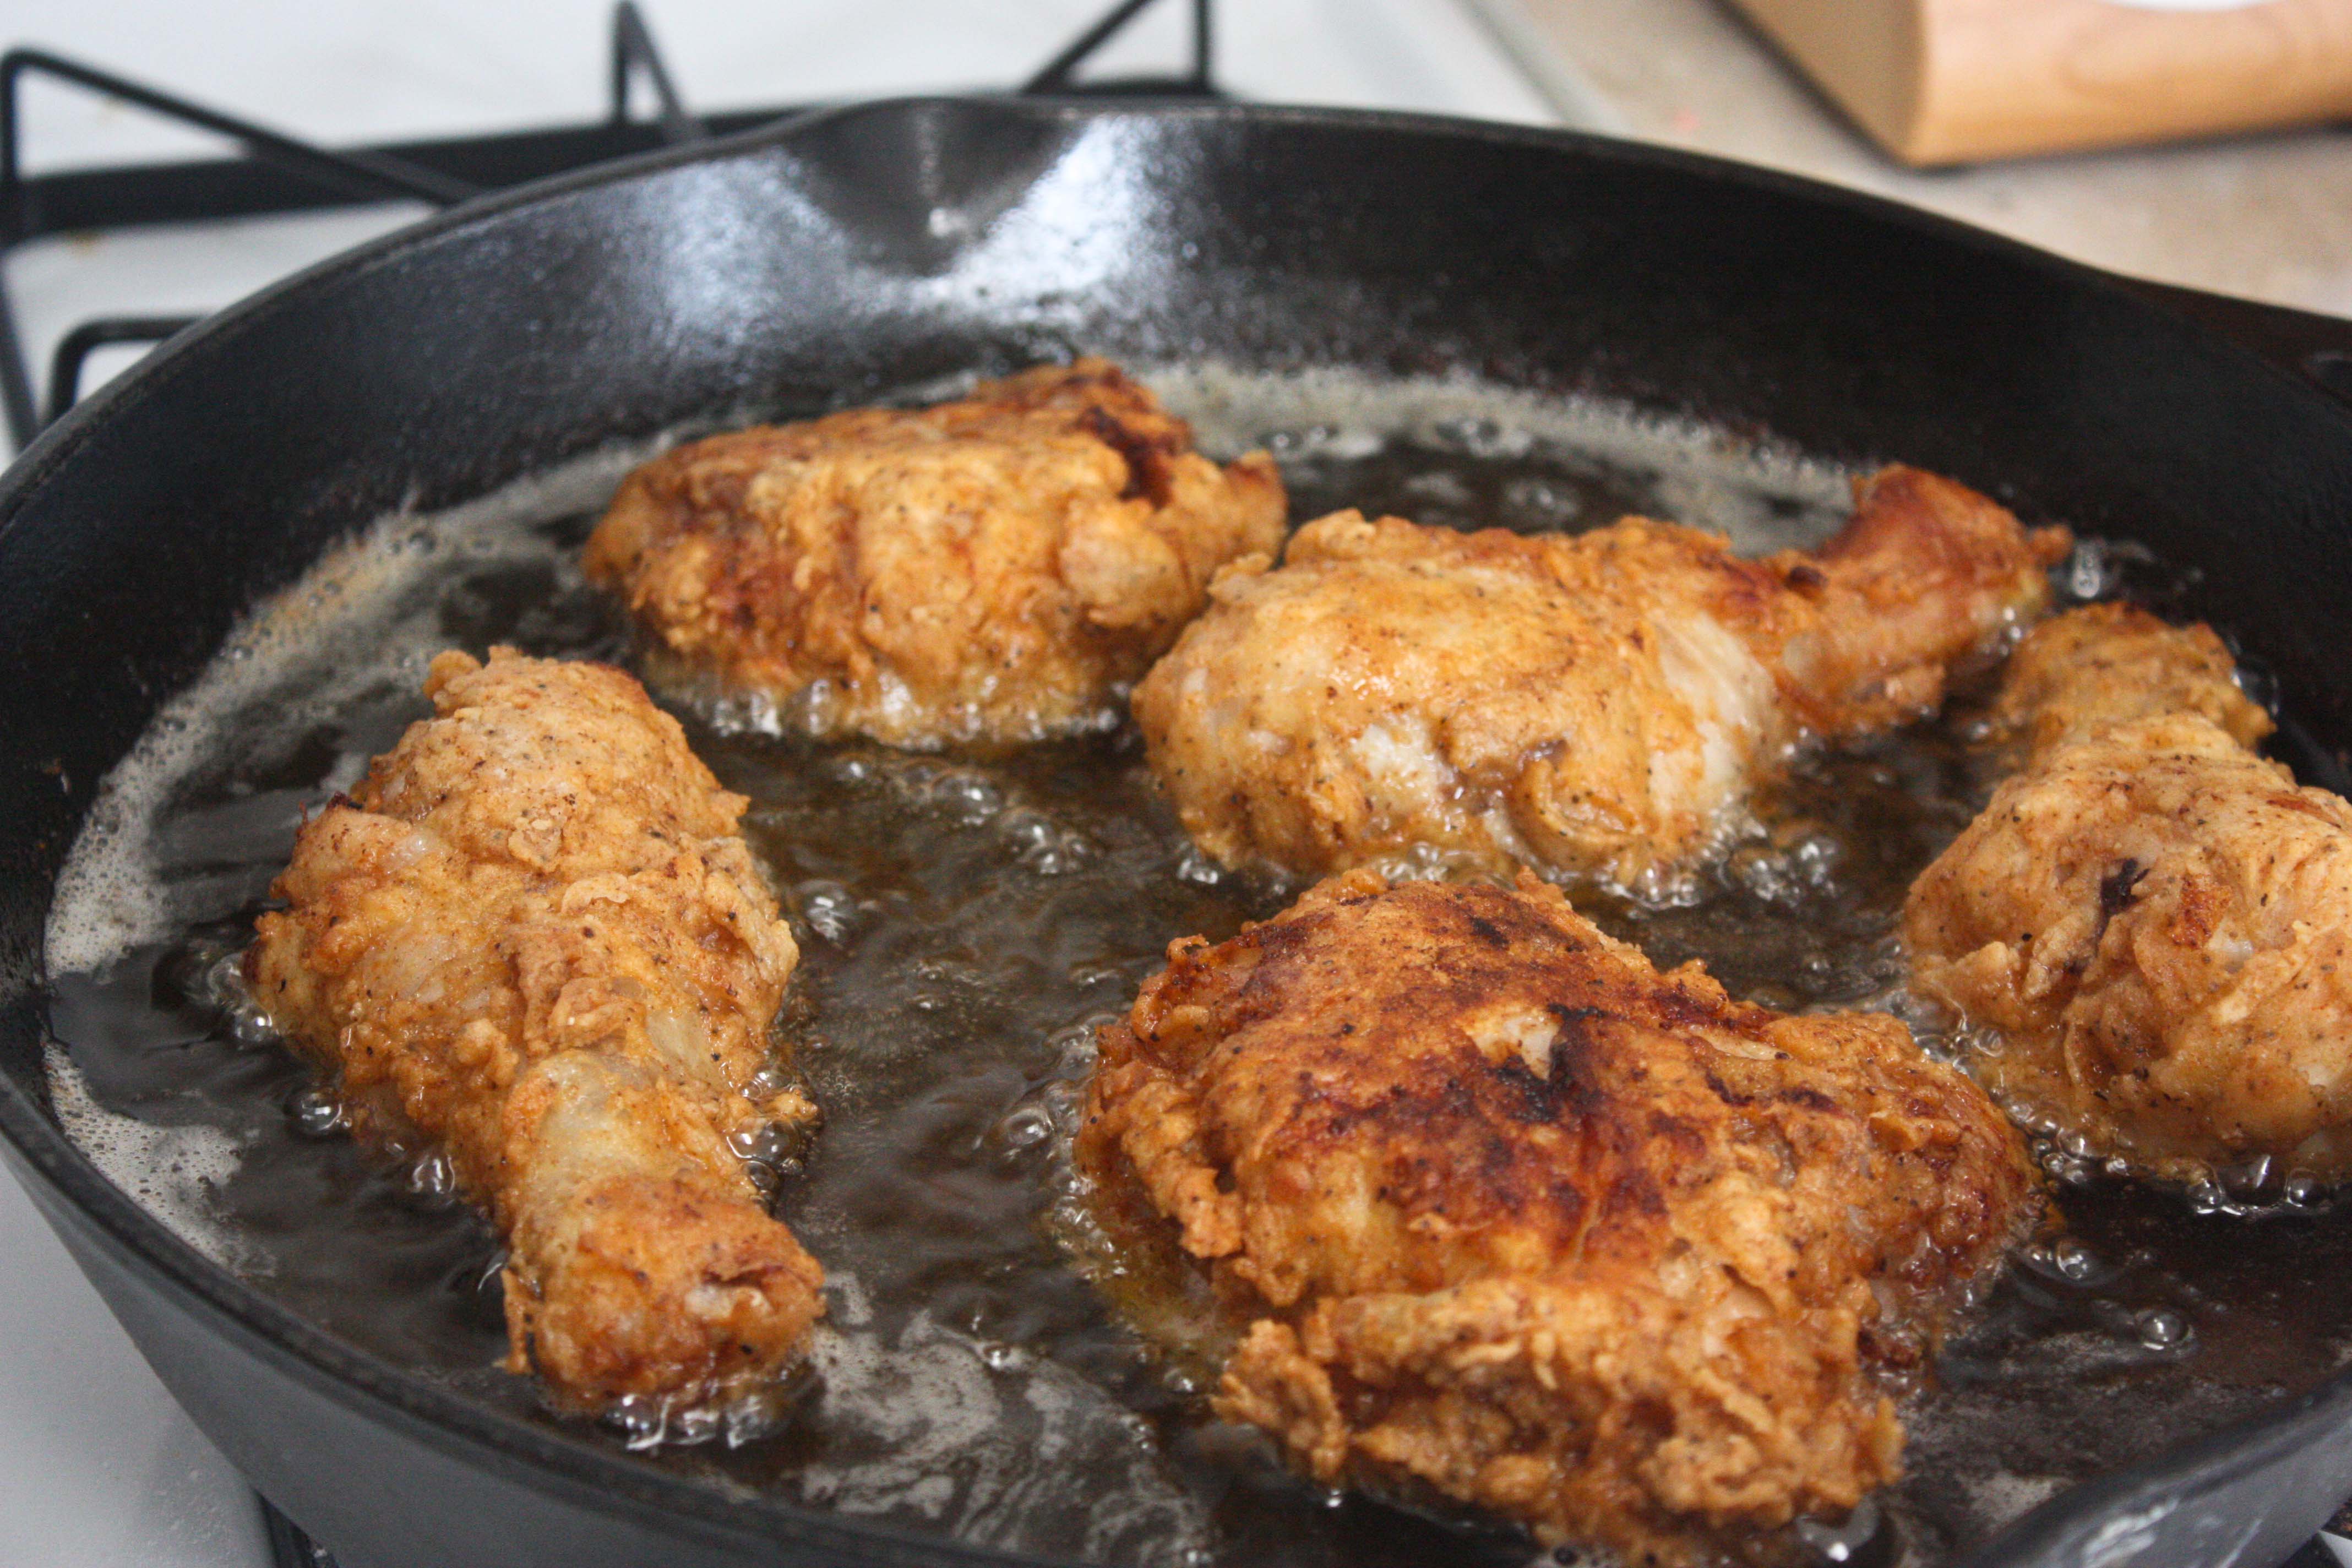
Let the chicken sit and the coating get paste-like as you heat the oil. Fill a large (I used 12″) cast iron skillet about half way full of oil. Turn on heat to medium and let the oil get hot.

I didn’t use a thermometer. I used the flour trick. What’s the flour trick? Sprinkle some flour into the oil. If it starts to bubble your ready to fry. Keep the flame at about medium. Once the oil is hot, add a few pieces of chicken to the skillet. You don’t want to crowd the pan but you should be able to fit about 4-5 pieces in there. Fry chicken, turning every 3 minutes about 14 minutes for drumsticks and 18 minutes for large thighs.

Cut through one to make sure it’s cooked through so you know your estimated cooking time from now on. Place chicken on a paper towel lined baking sheet and put in a 200 degree oven to keep warm and crisp.
Repeat until you’re done making your chicken.
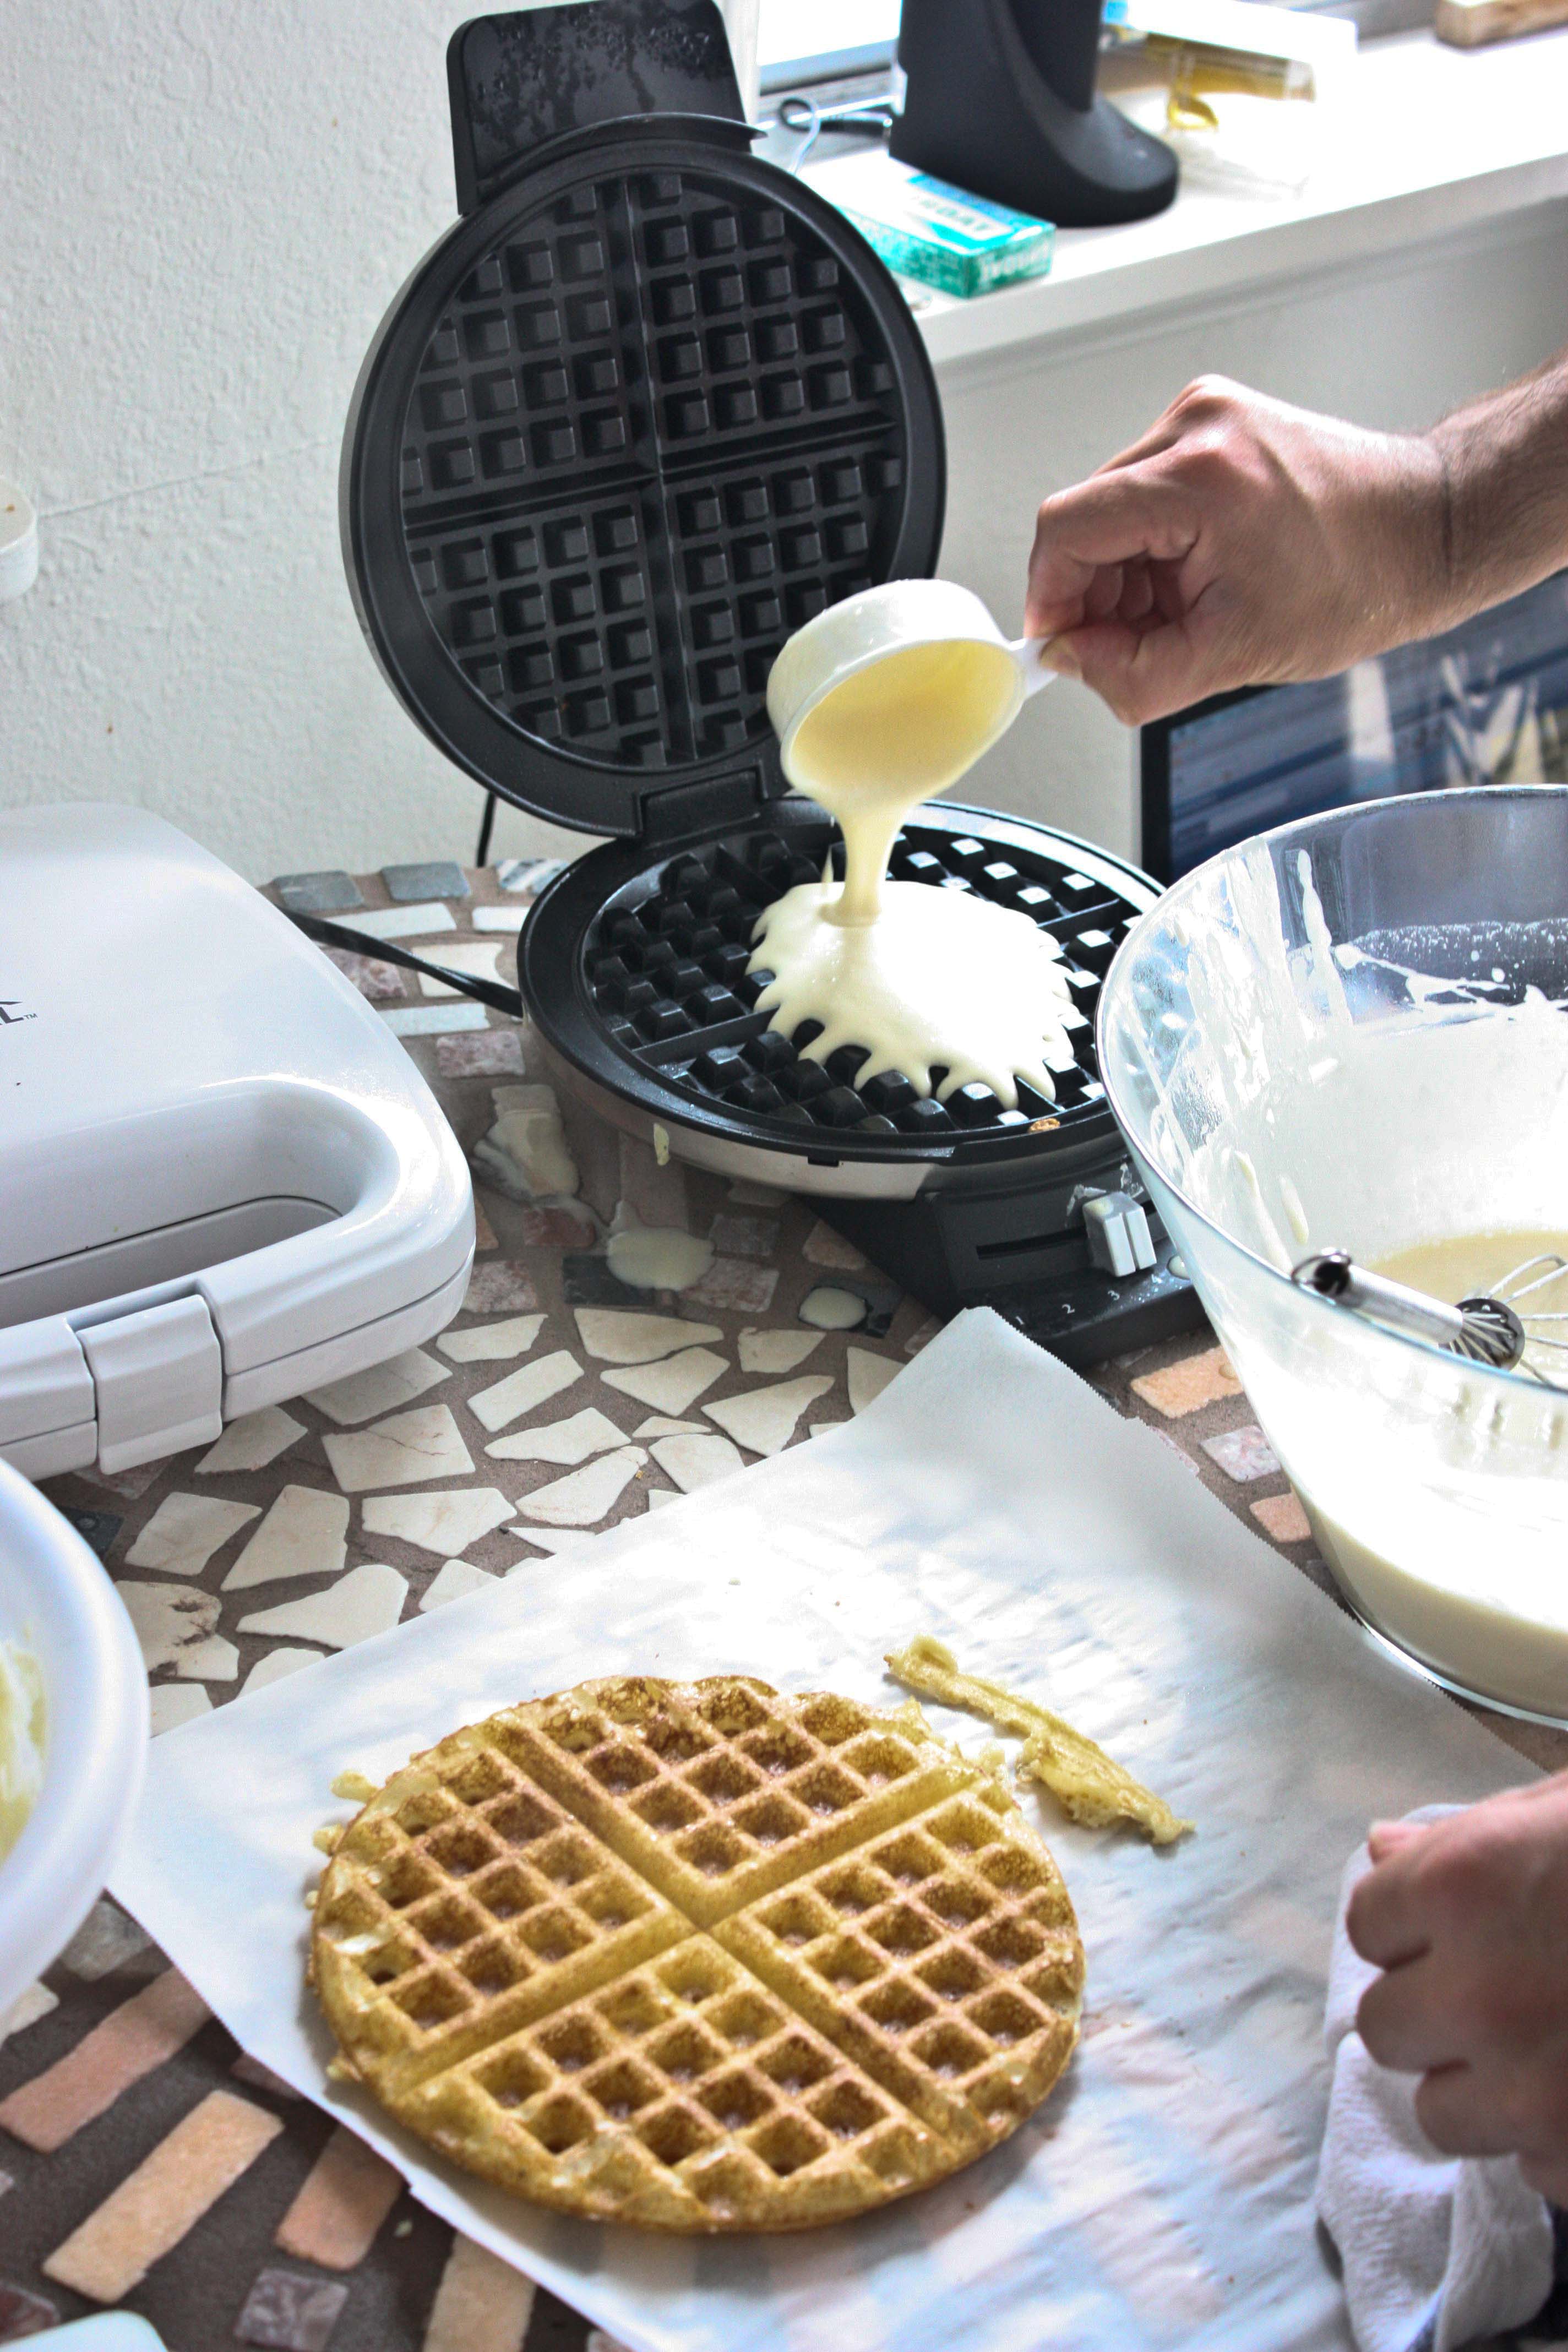
Next make your waffles. If you’re using Smitten Kitchen’s recipe, now is the time to mix in the 2 eggs and baking soda. Or mix together your waffle recipe of choice! Cook your waffles in your waffle iron.

I borrowed my sister’s waffle iron so that I had two going at the same time. It made the process faster. If you’re making waffles for a crowd, keep them warm and crisp in the 200 Degree oven by putting them on a baking sheet IN A SINGLE LAYER (I didn’t do that and totally got soggy waffles. Sad face.).
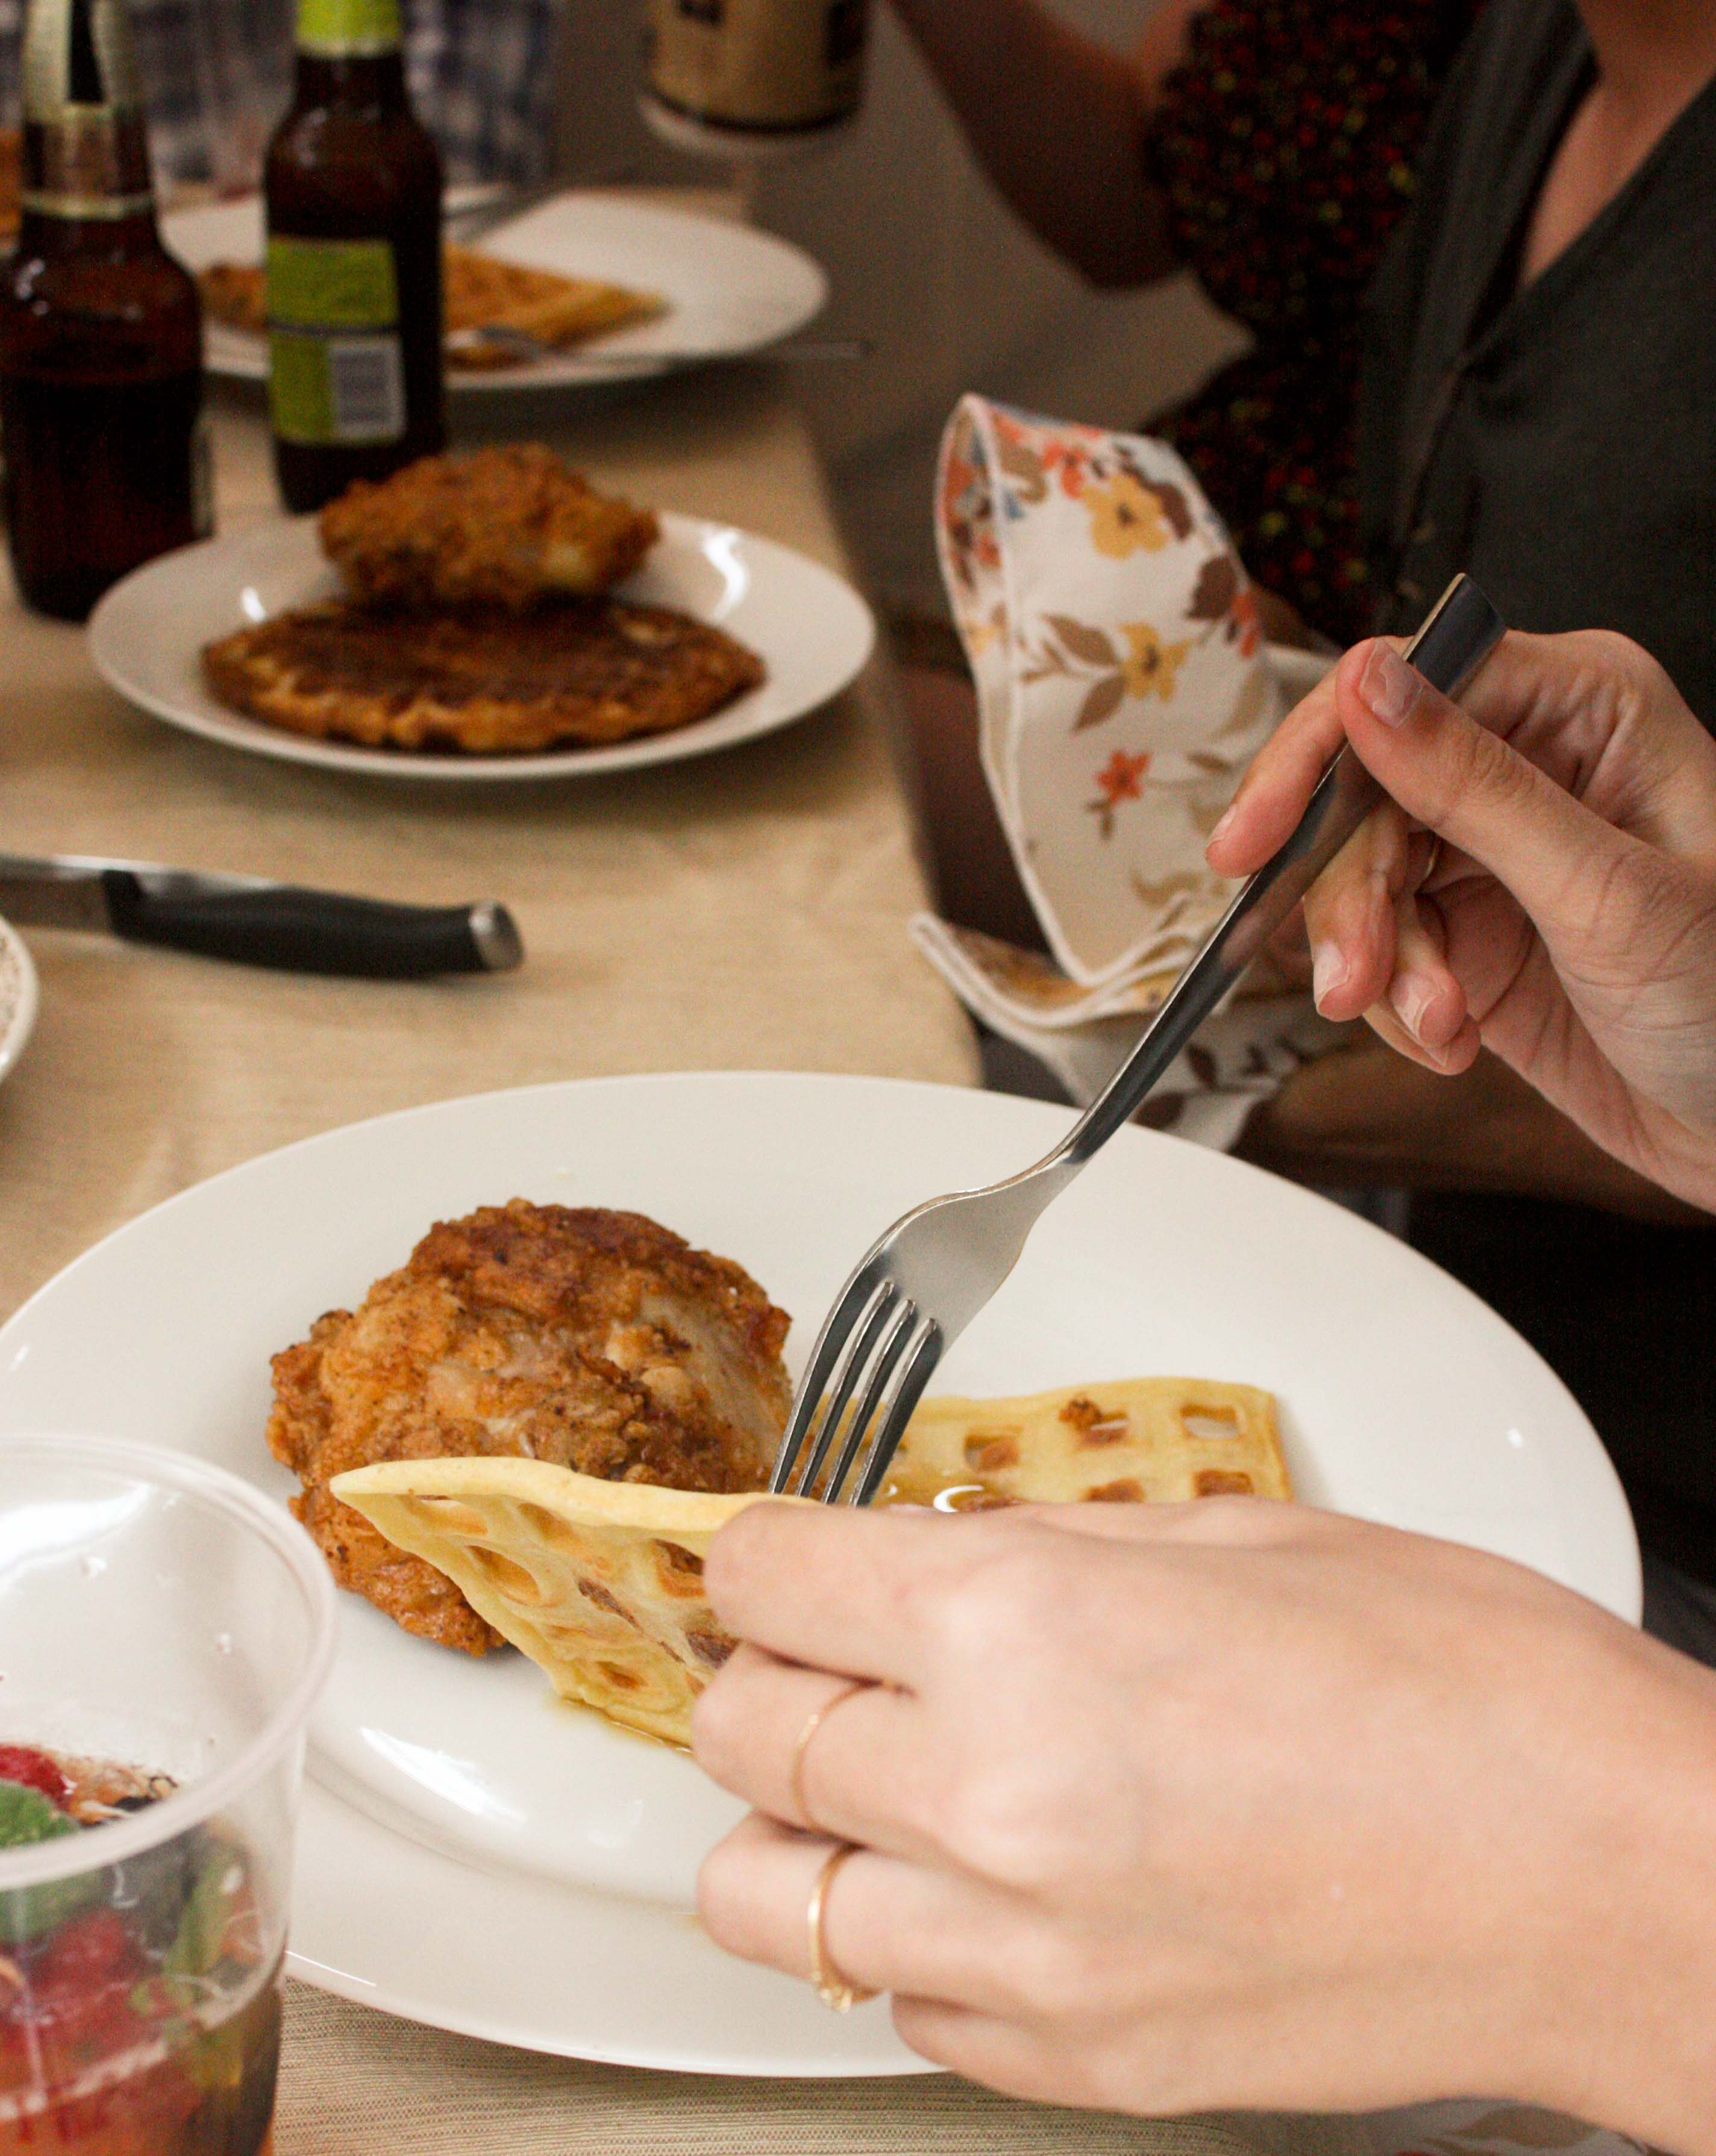
Now that your chicken and waffles are made. You’re ready to eat. Pile a platter high of chicken

and another of waffles, and don’t forget the syrup!
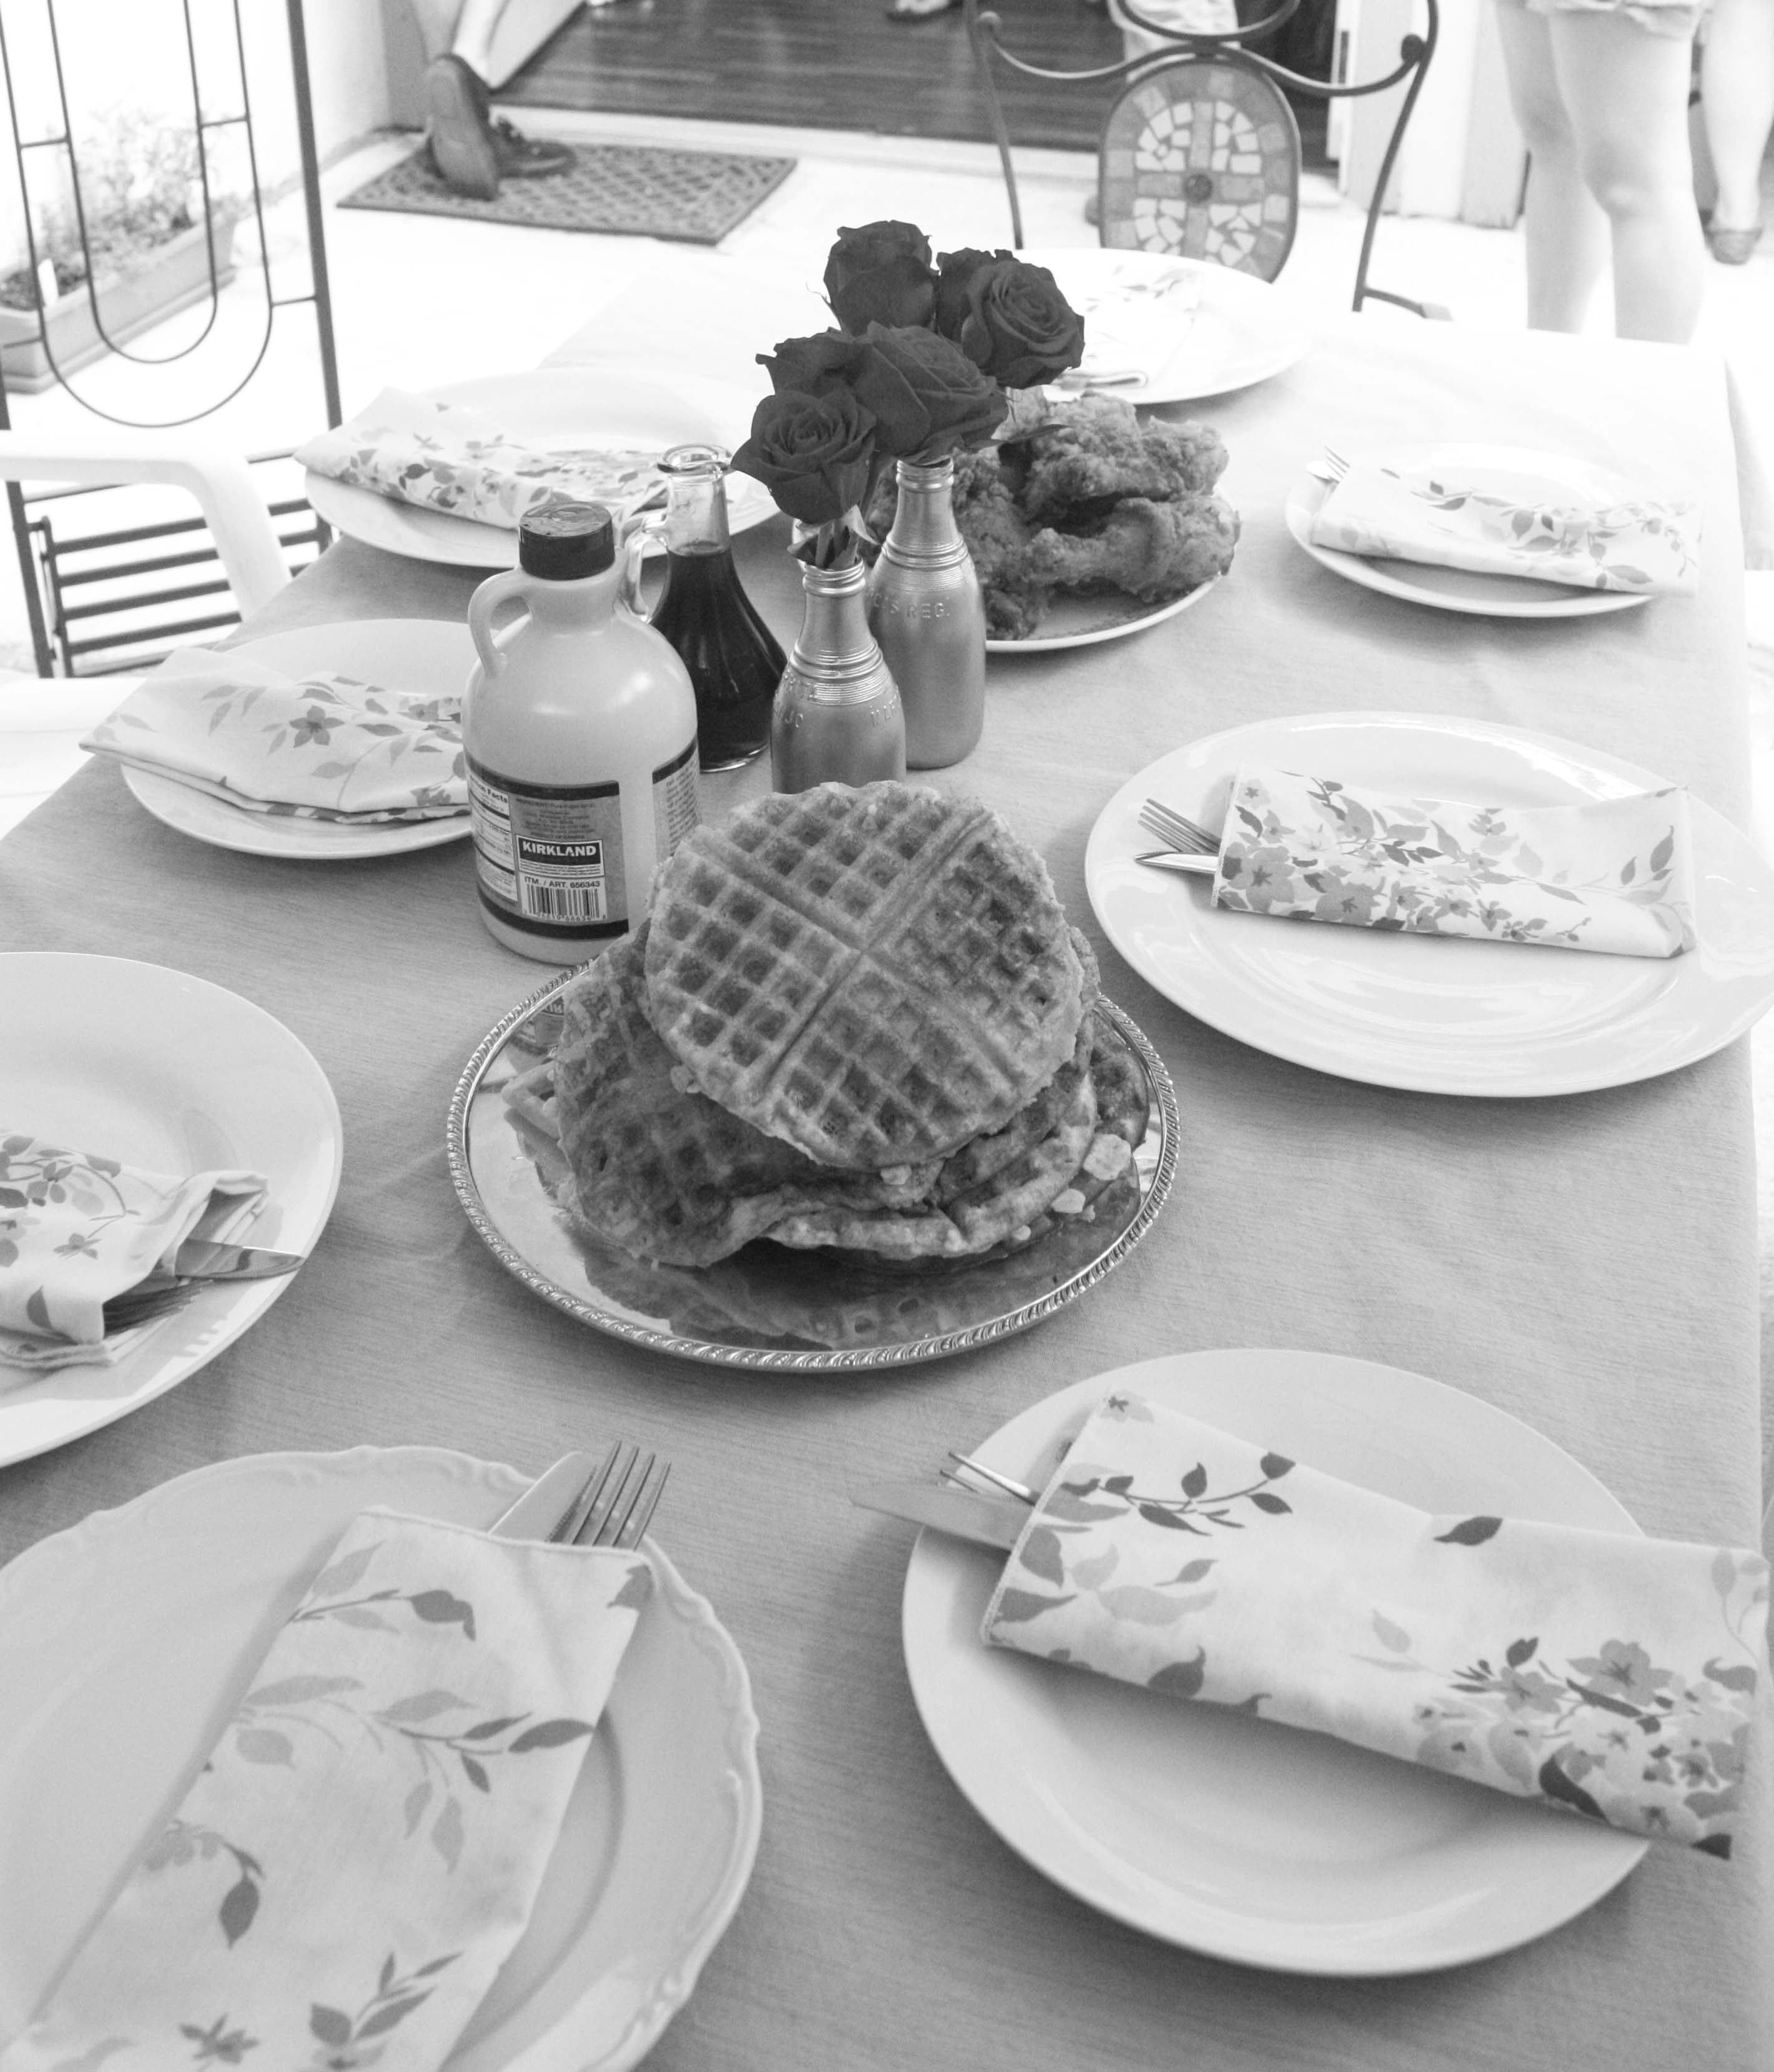
 And your table will be ready for a crowd to dig in!
 (Obviously they all had to wait while you took pictures of the table setting)
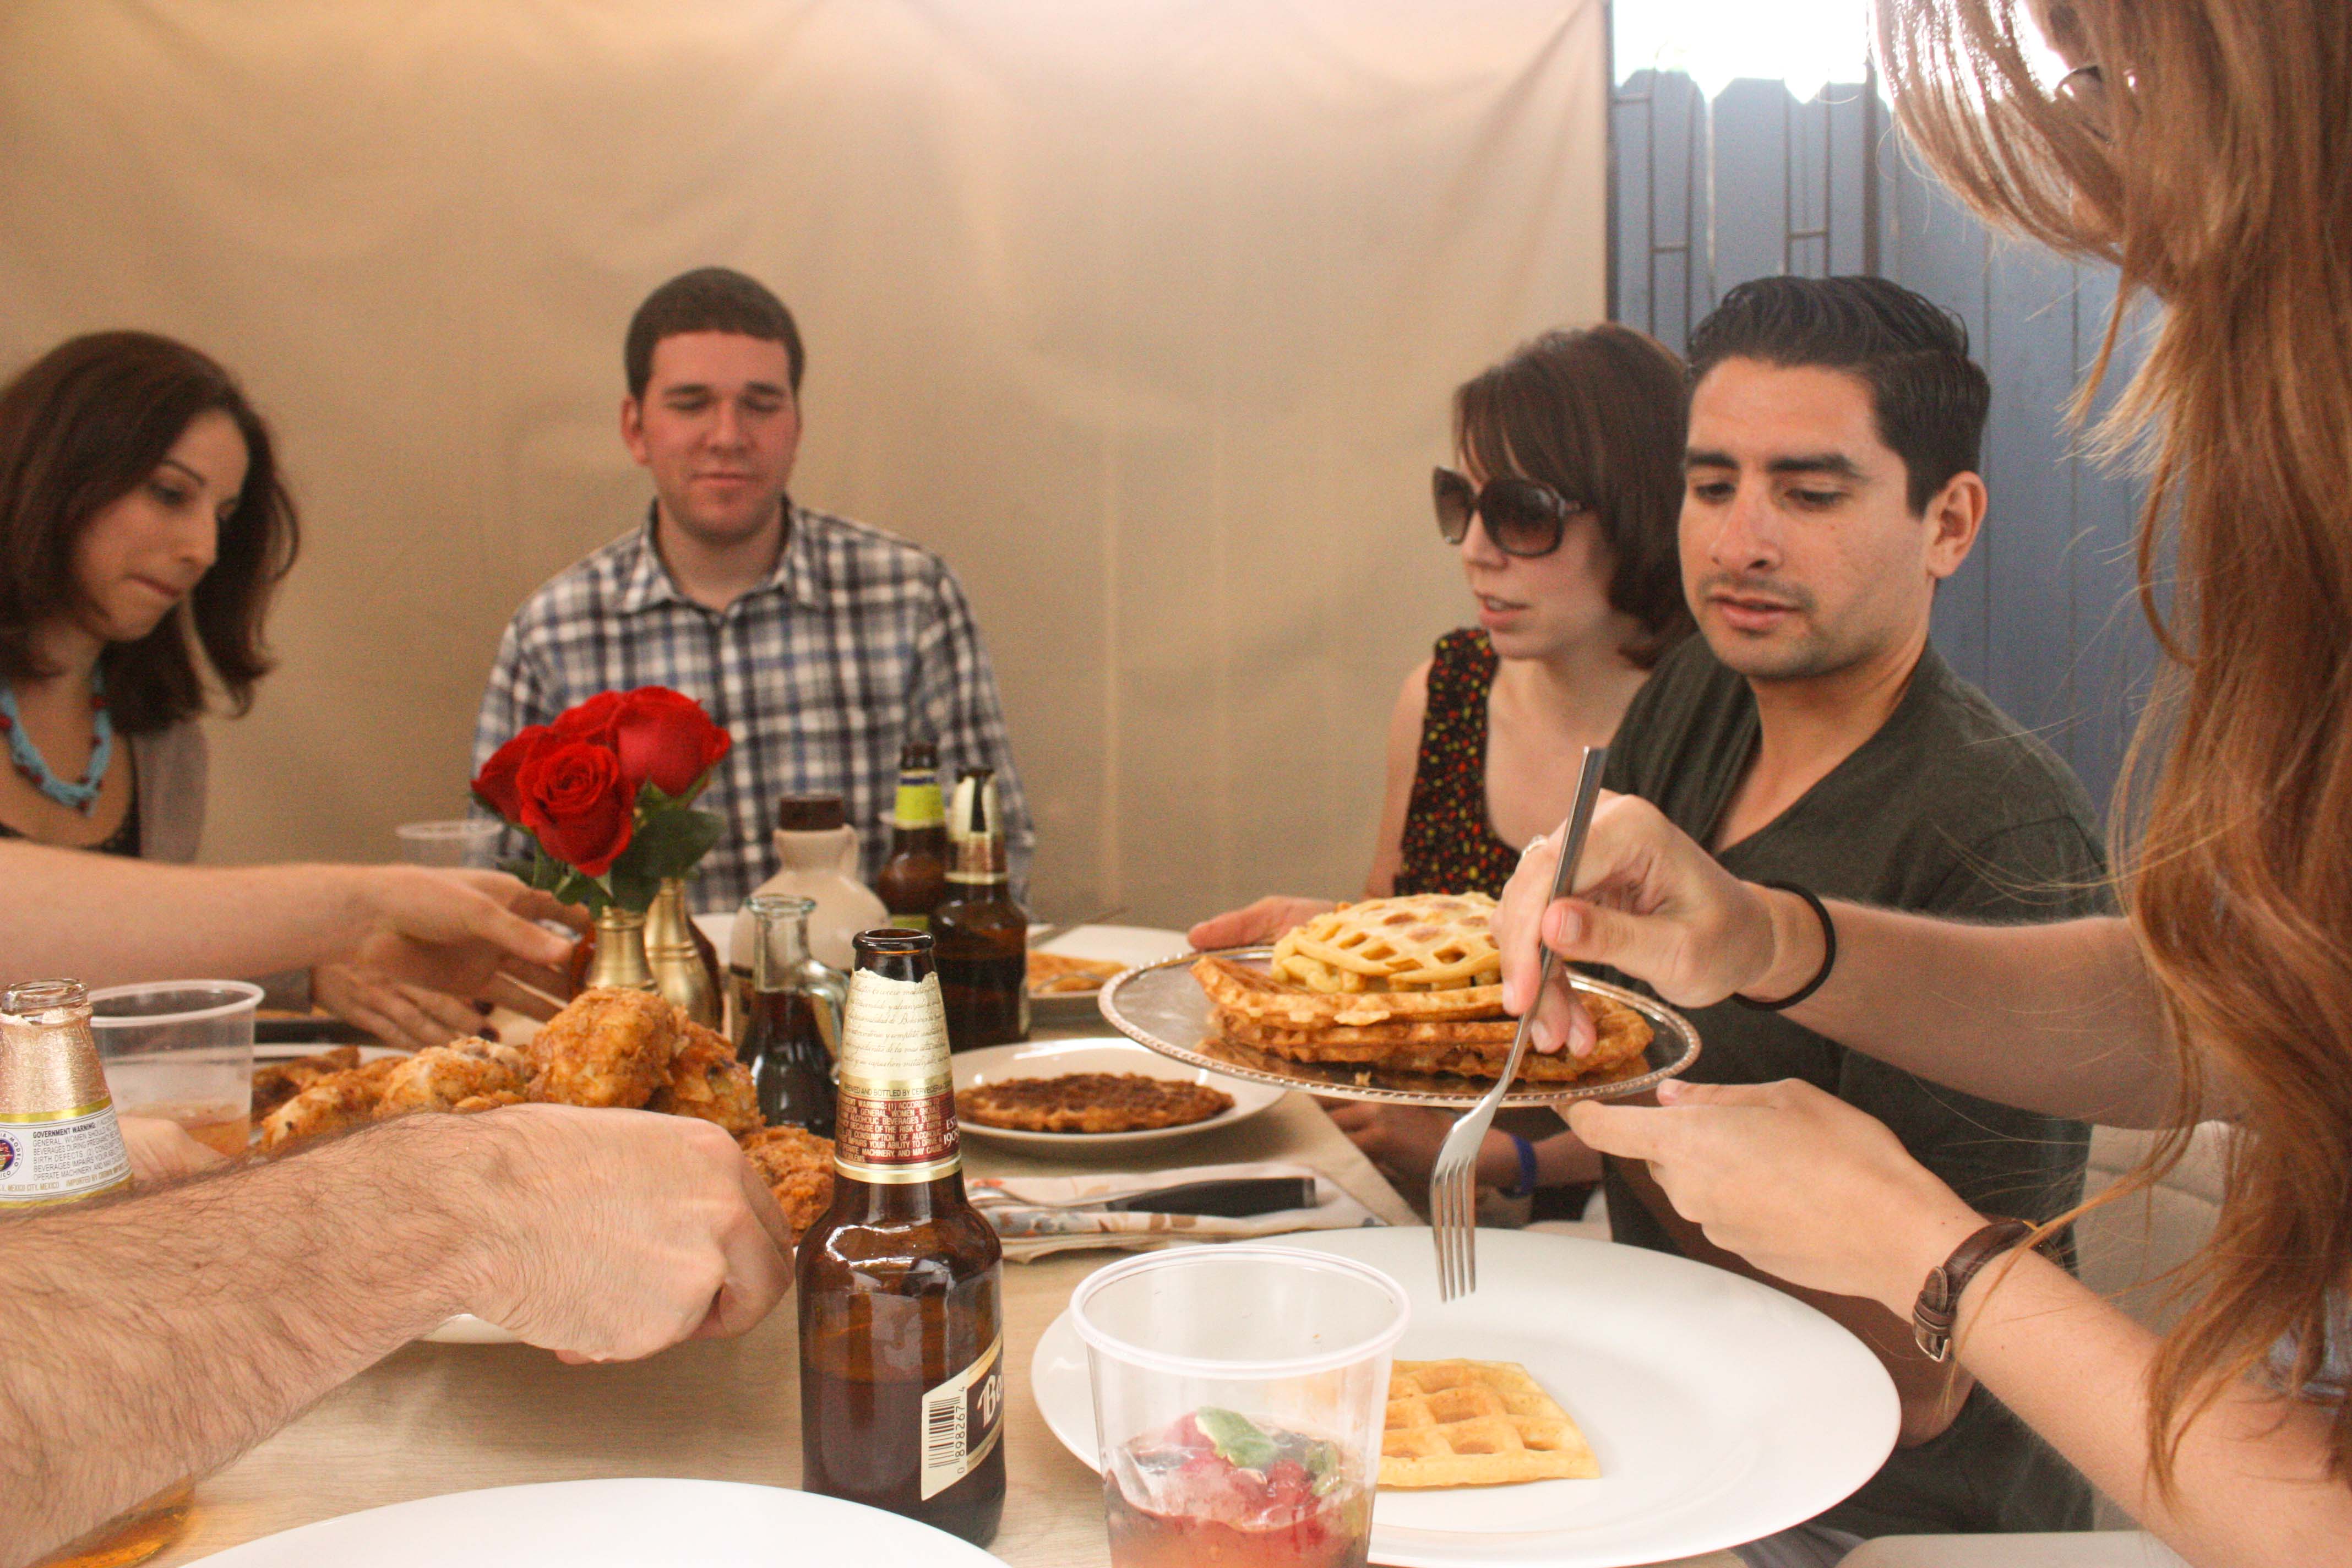
Now sit around, pass the waffles
 and the chicken
 And eat them how you like best, don’t be scared to use your fingers or smother everything in maple syrup.


If you have left overs, don’t worry. Reheat it all in the oven in a single layer and it’ll taste delicious the next day too!

Thanks to David, Talia, Rachel, Marco, Allison, Joe and Jesse (especially Jesse for being my co-chef) for having chicken and waffles with me! You guys are the best! Thanks for testing out my food and being all around pleasant company!
Ok so have I convinced you? When are you throwing a chicken and waffles party?
I would totally do it again!
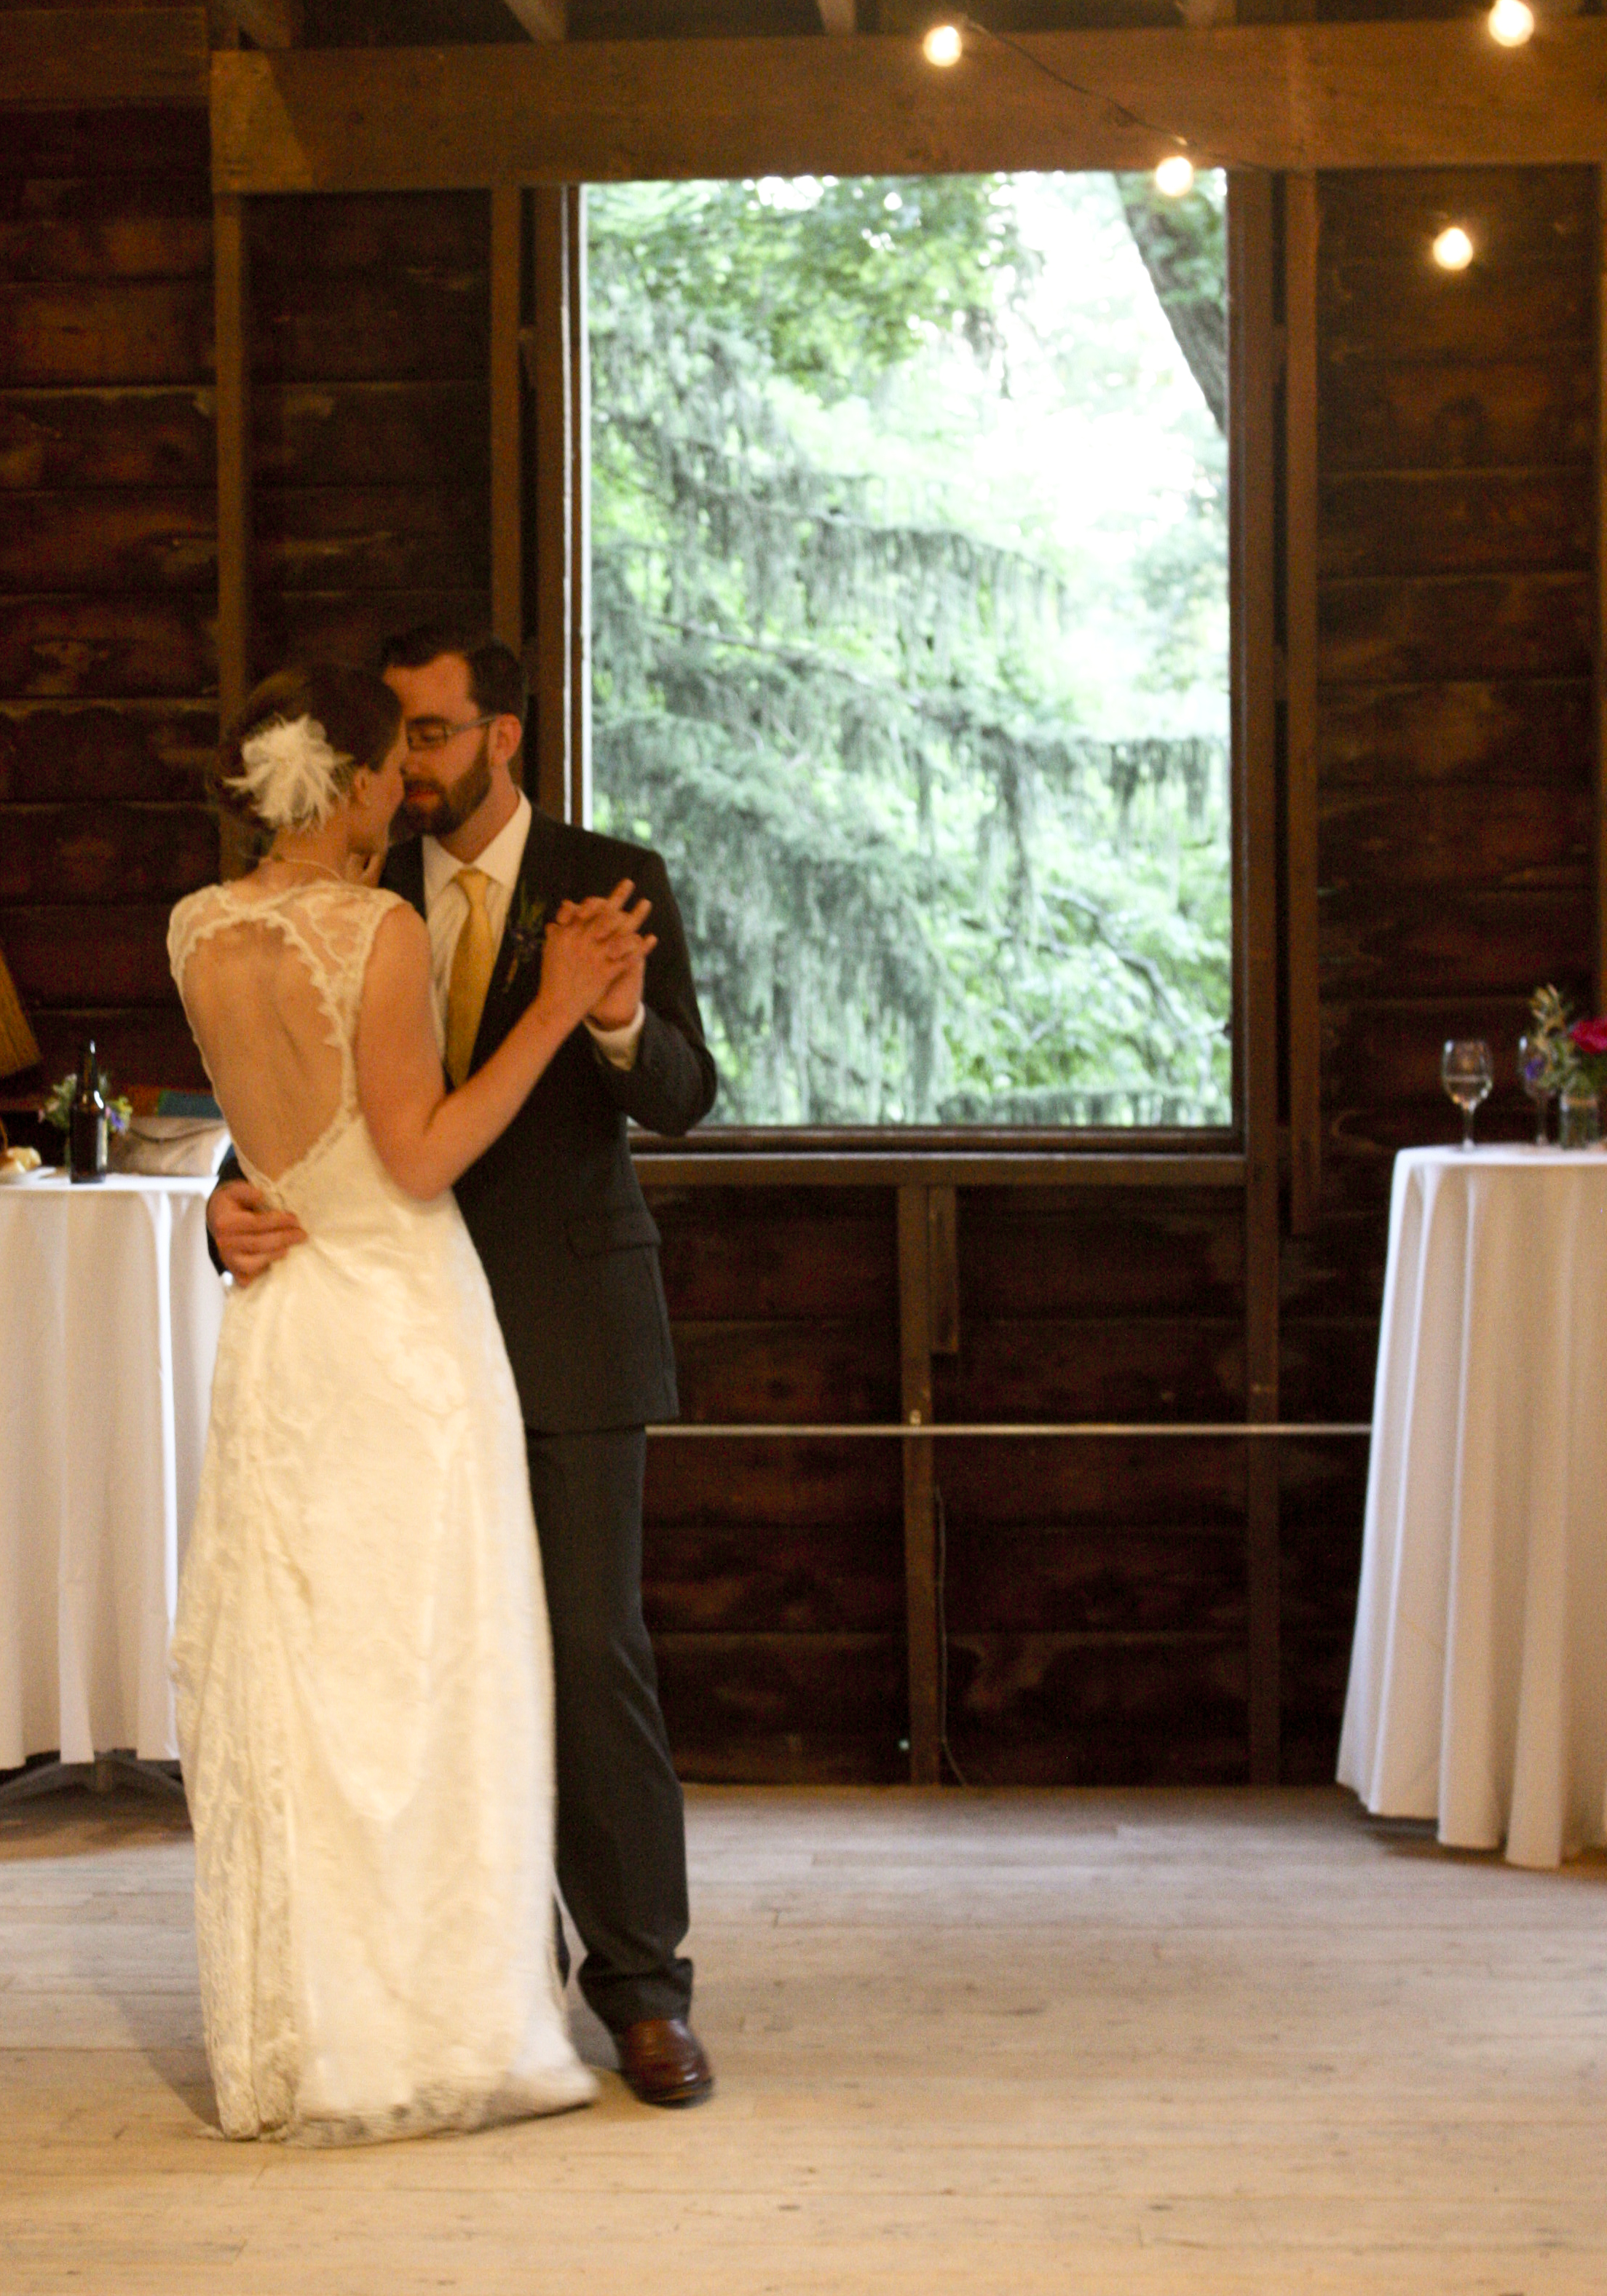
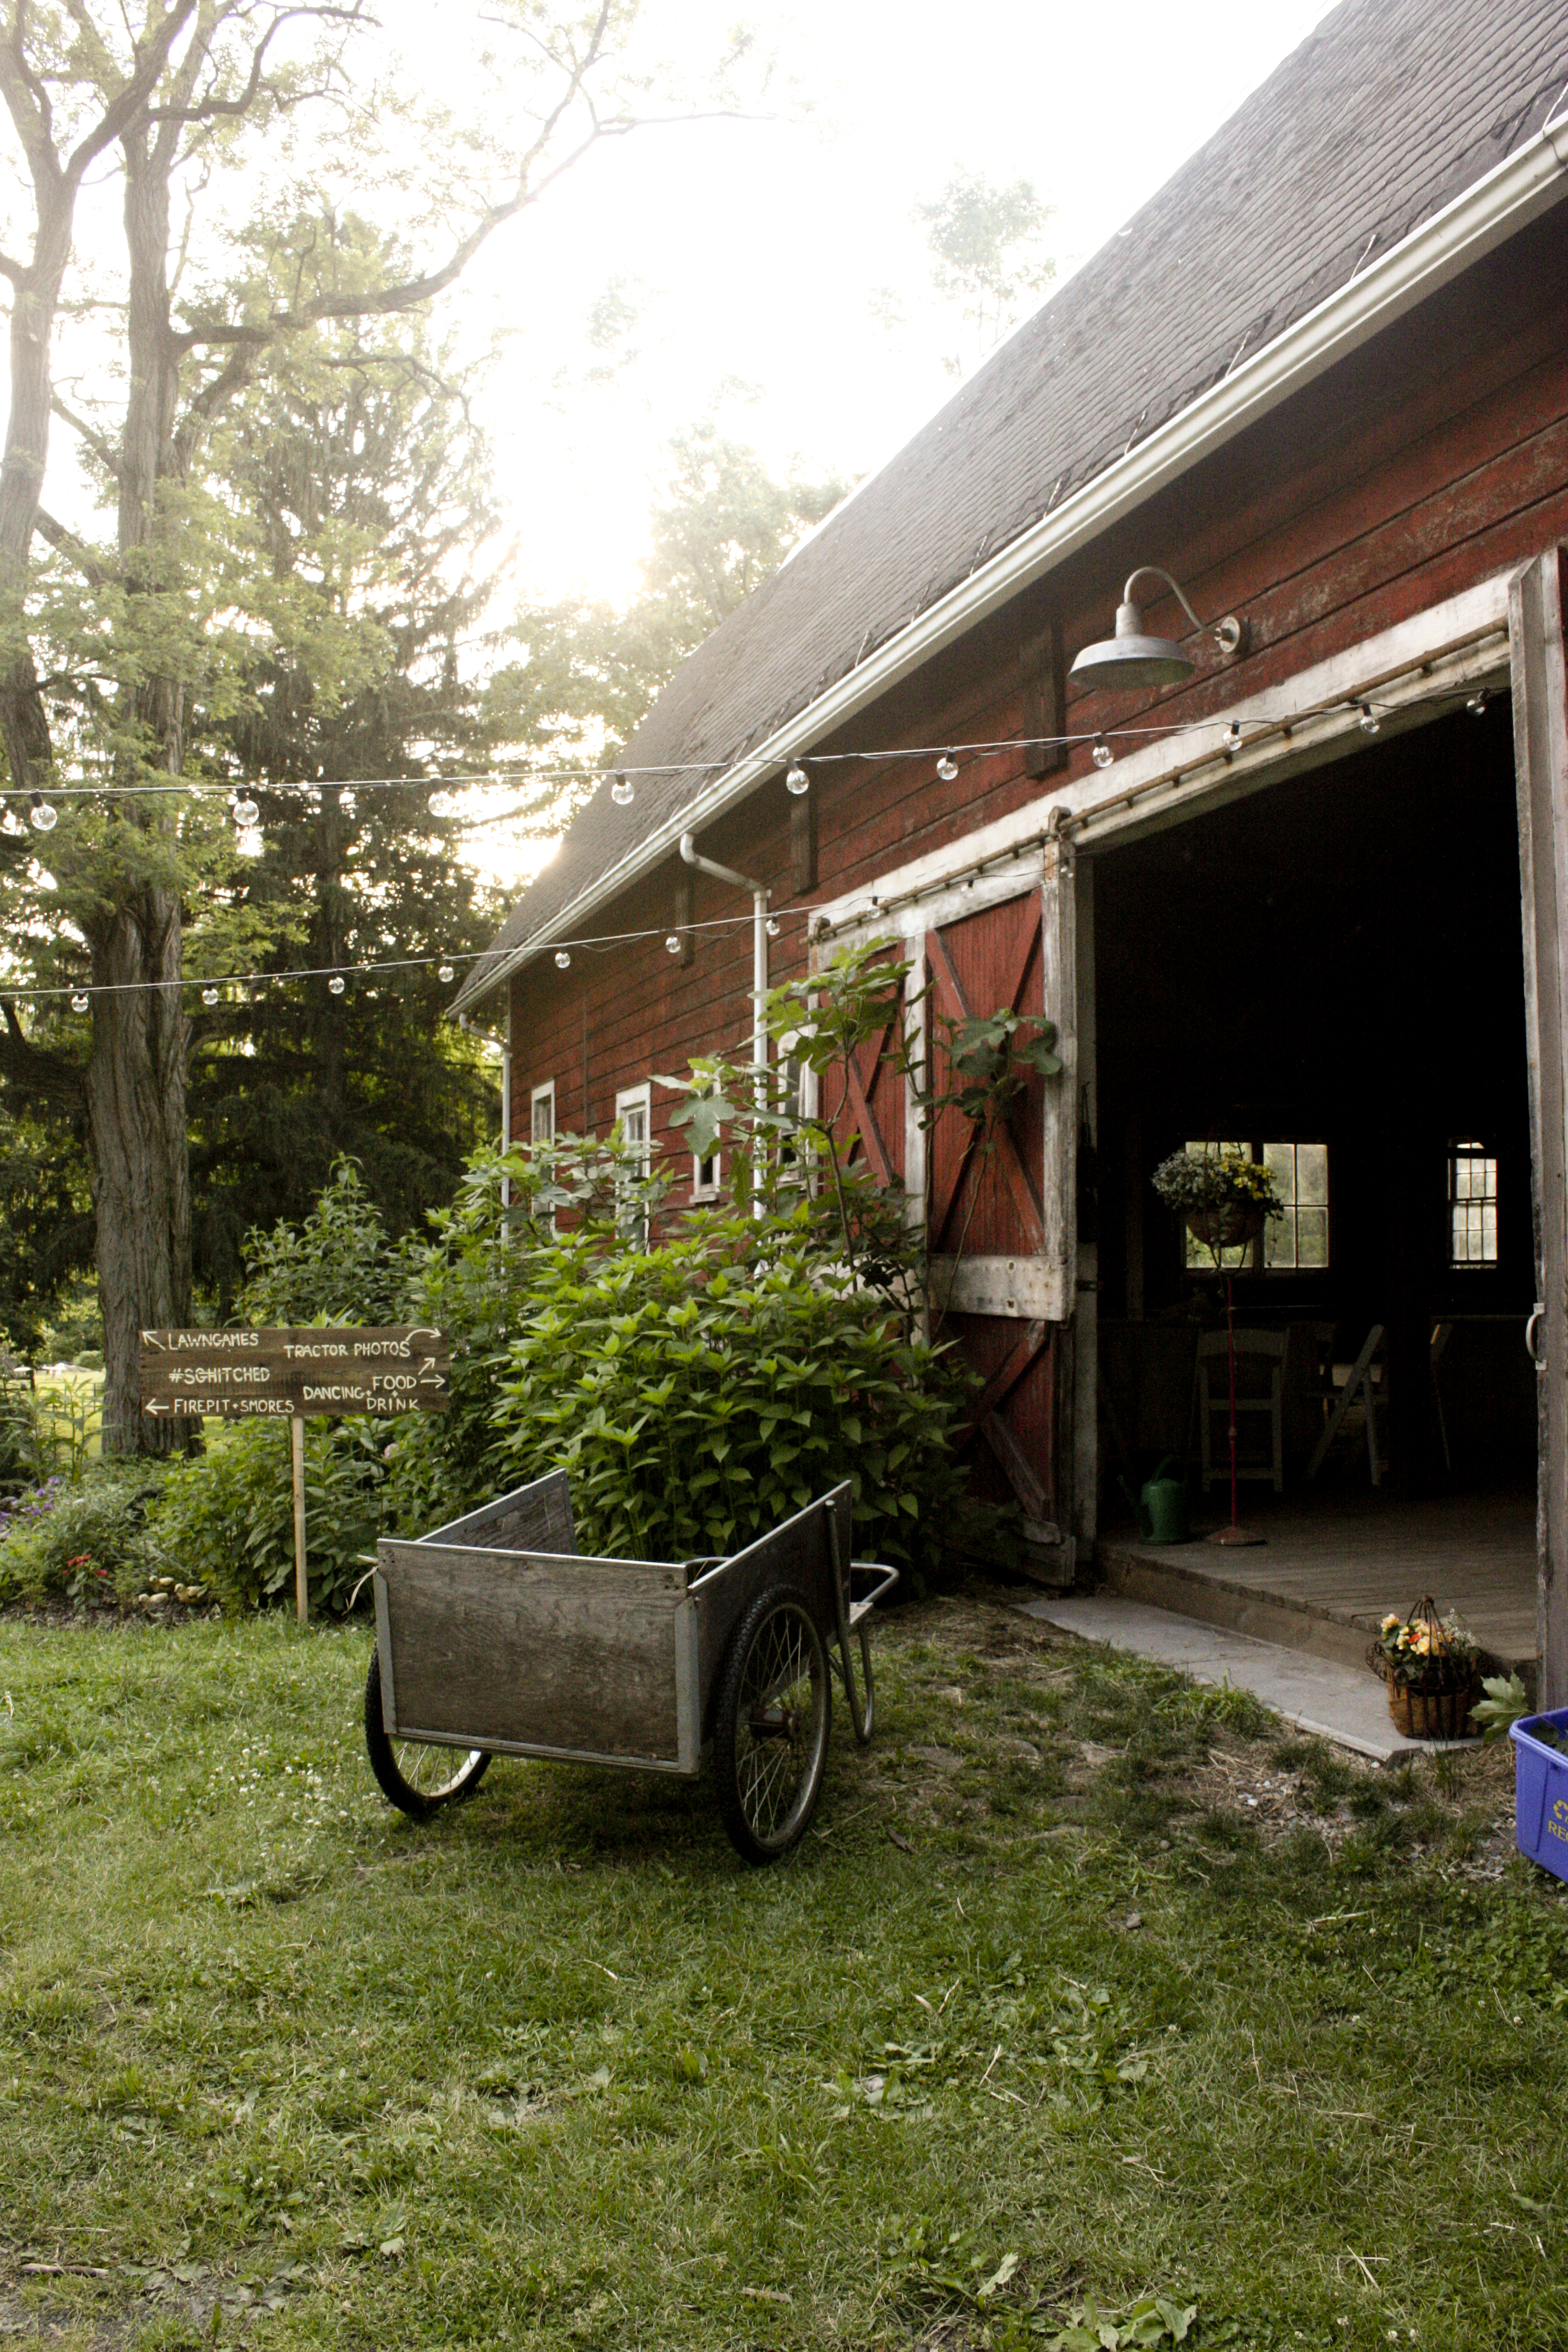 The wedding and the rehearsal were in this barn… on a flower farm. Isn’t that the cutest?! Ok back to food…
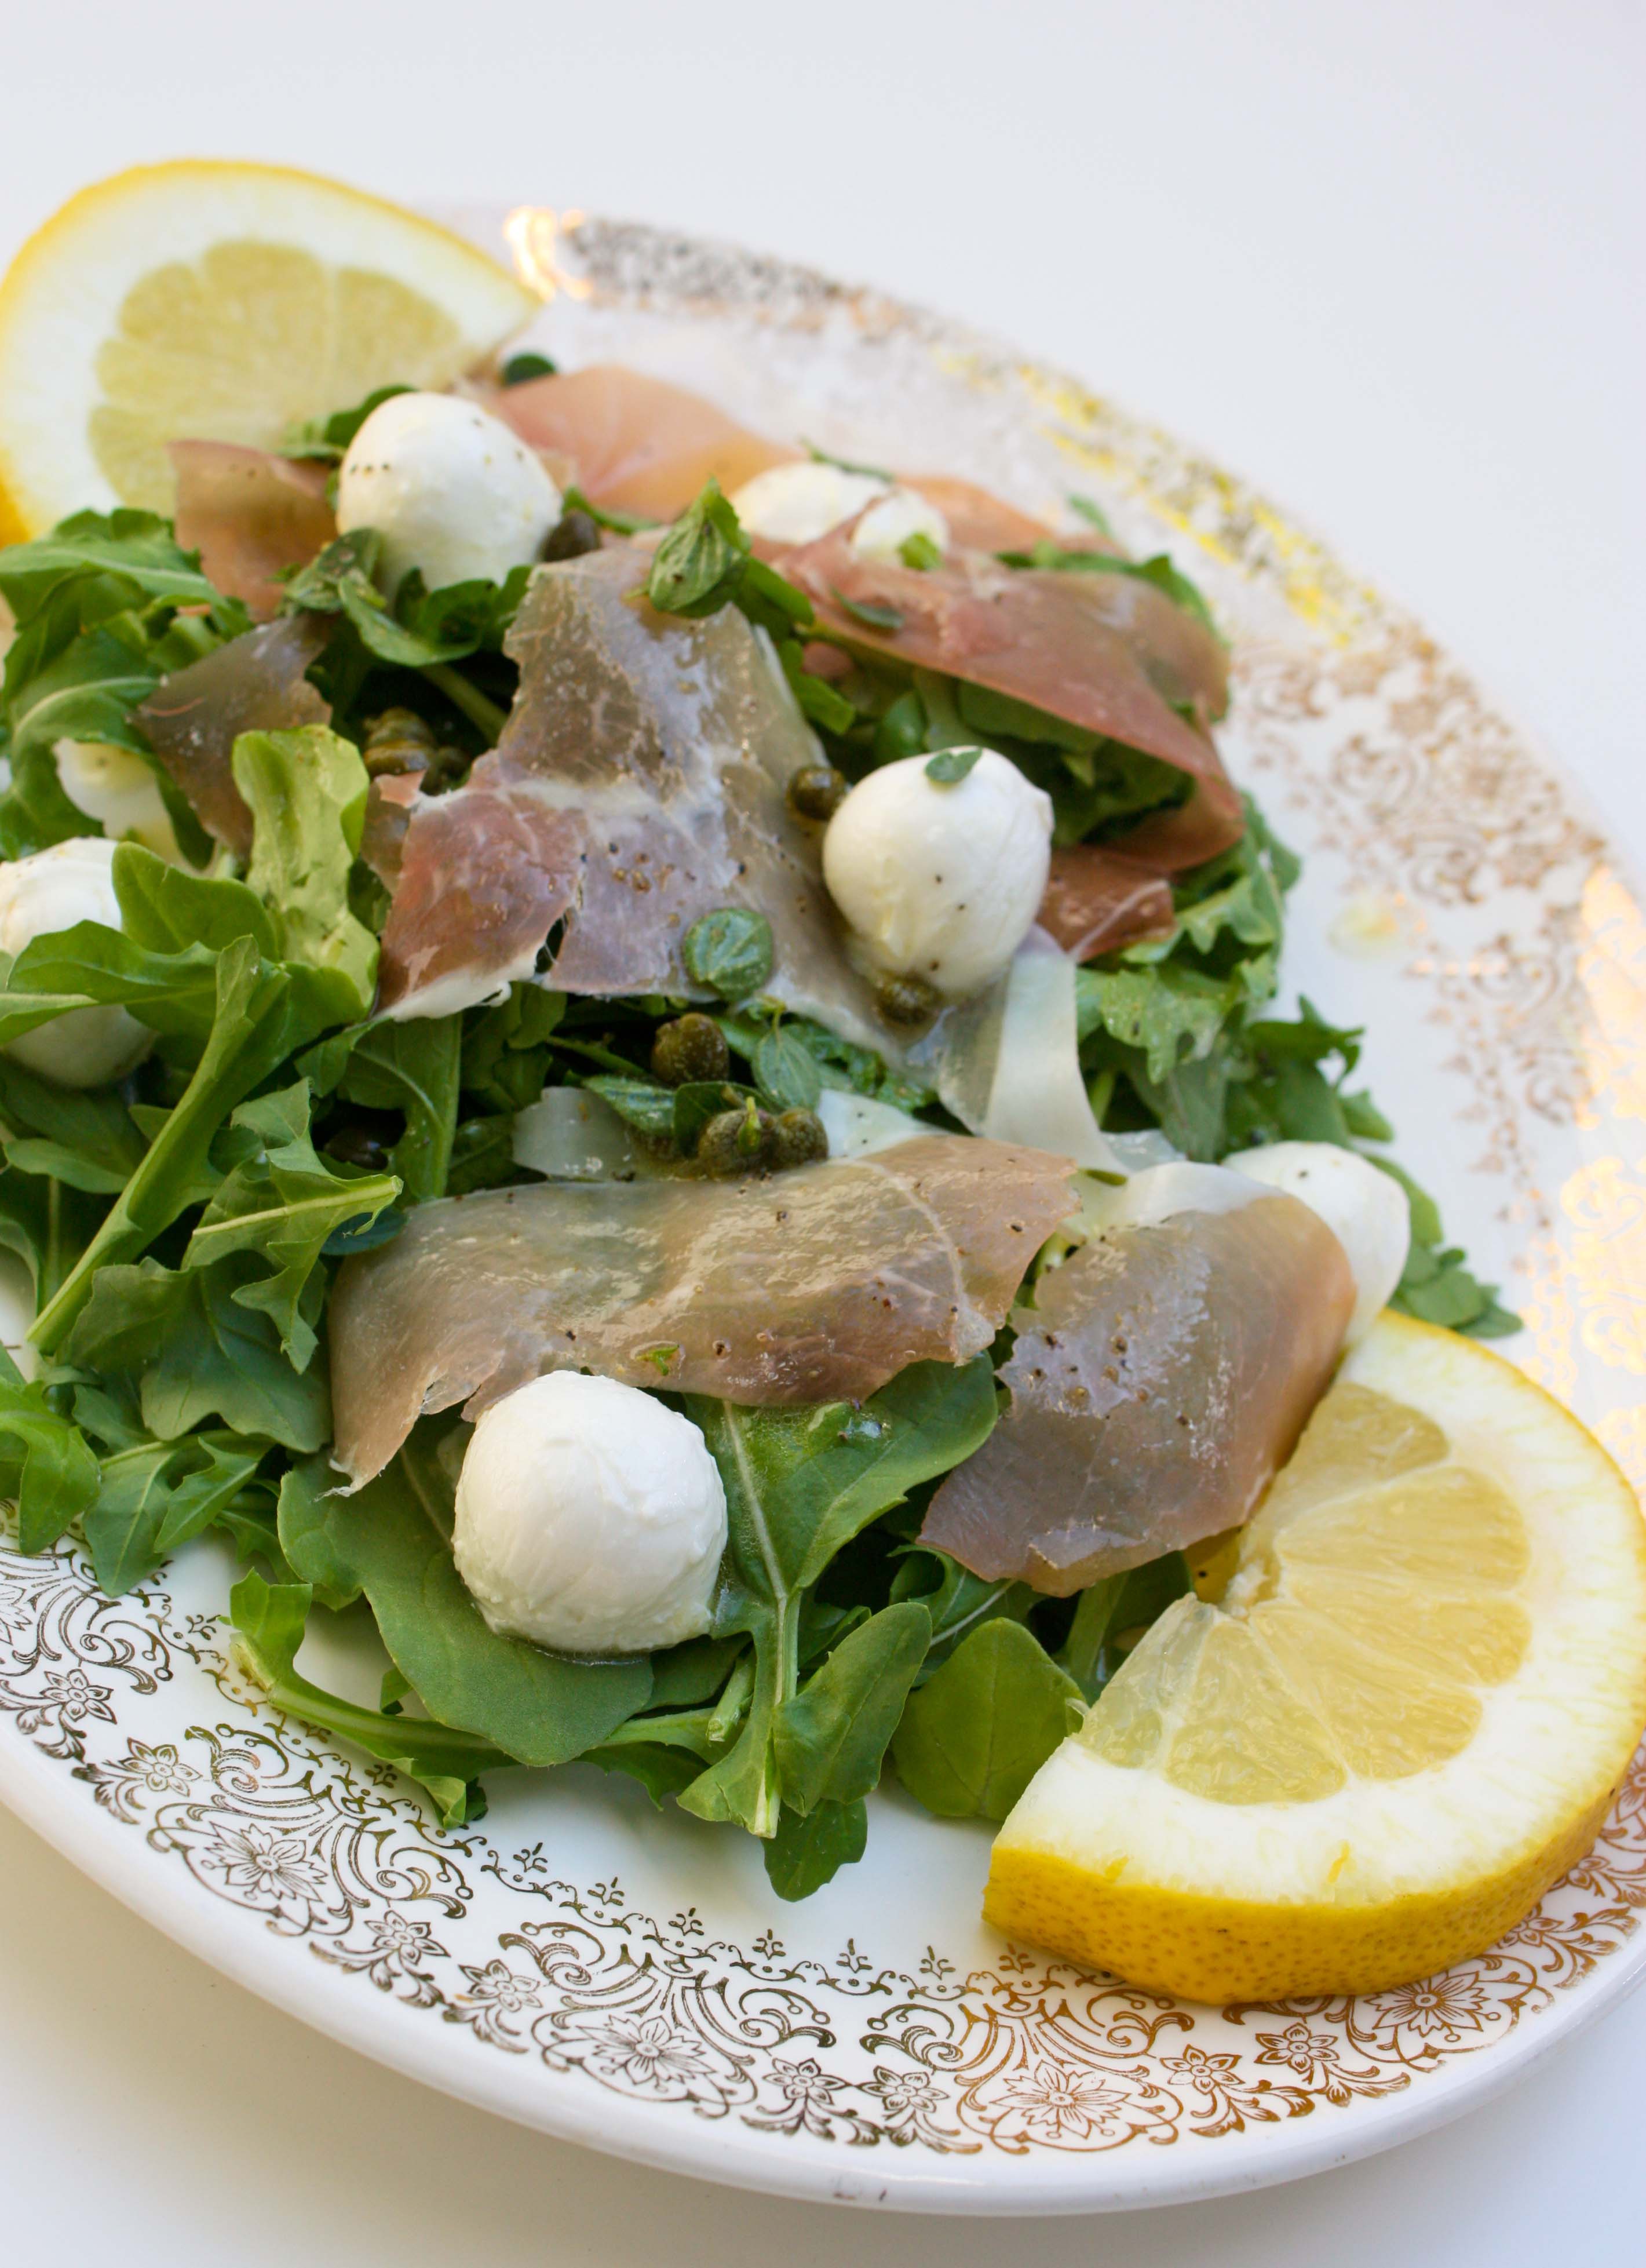

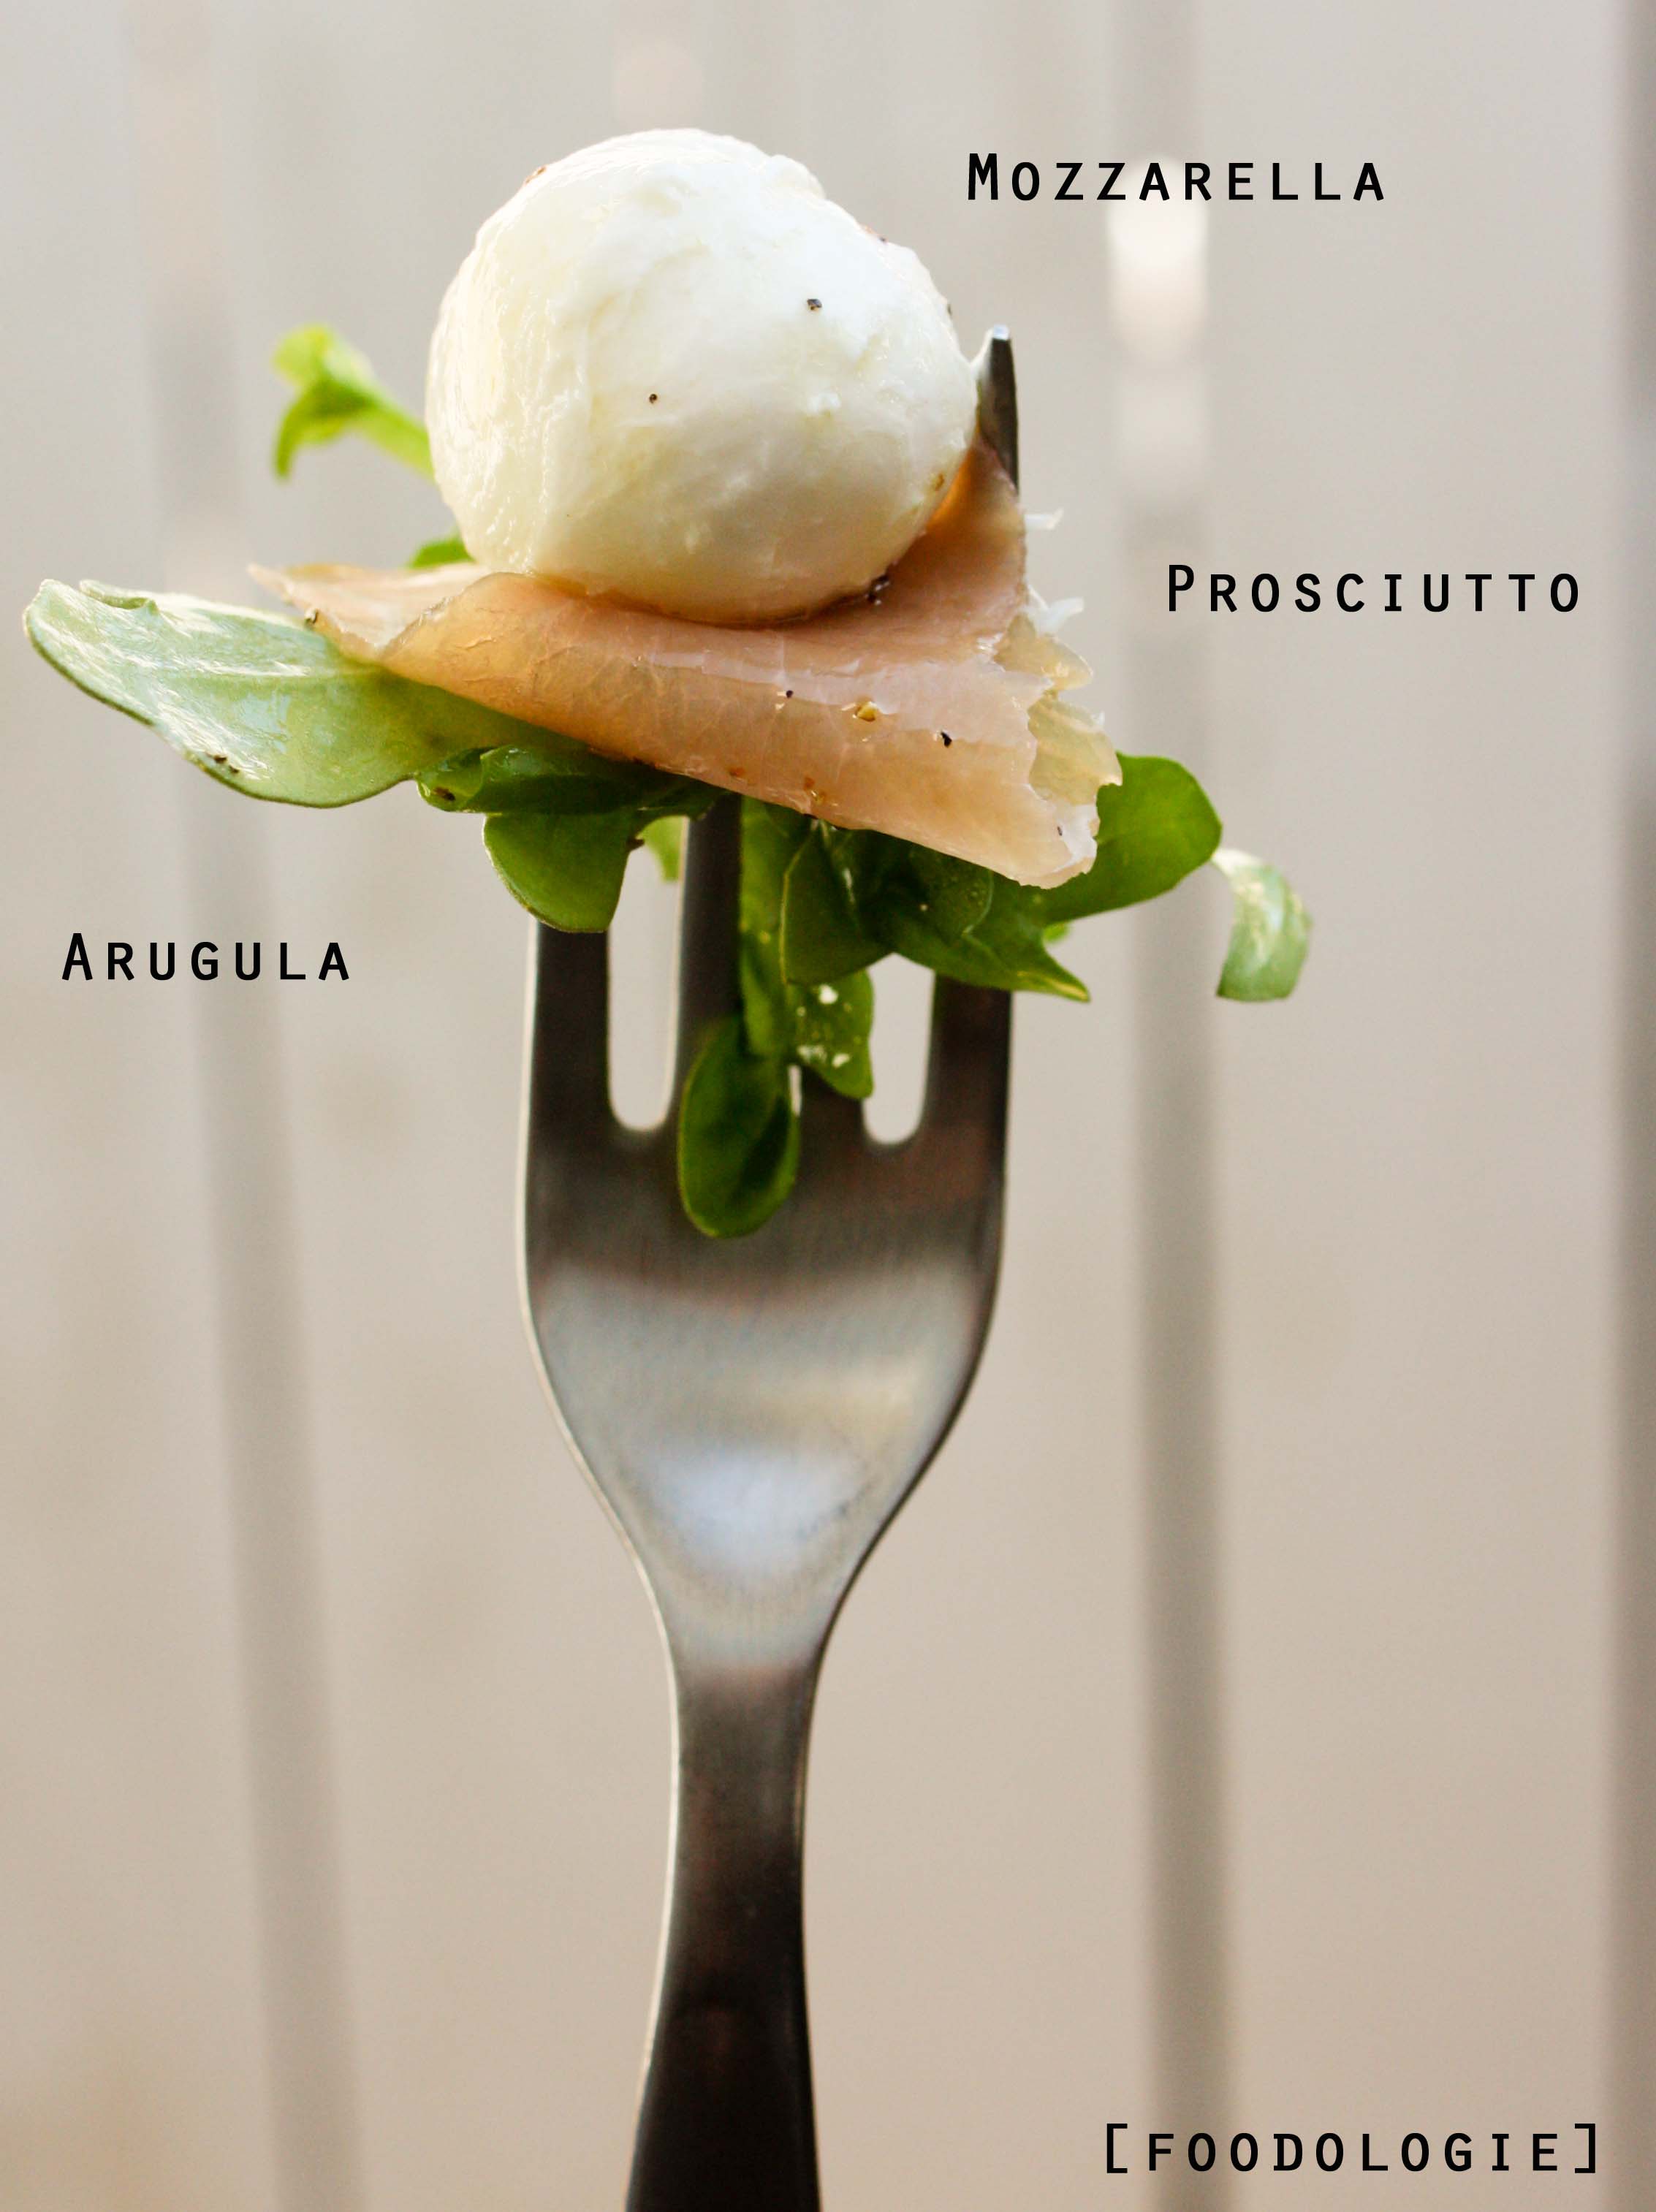
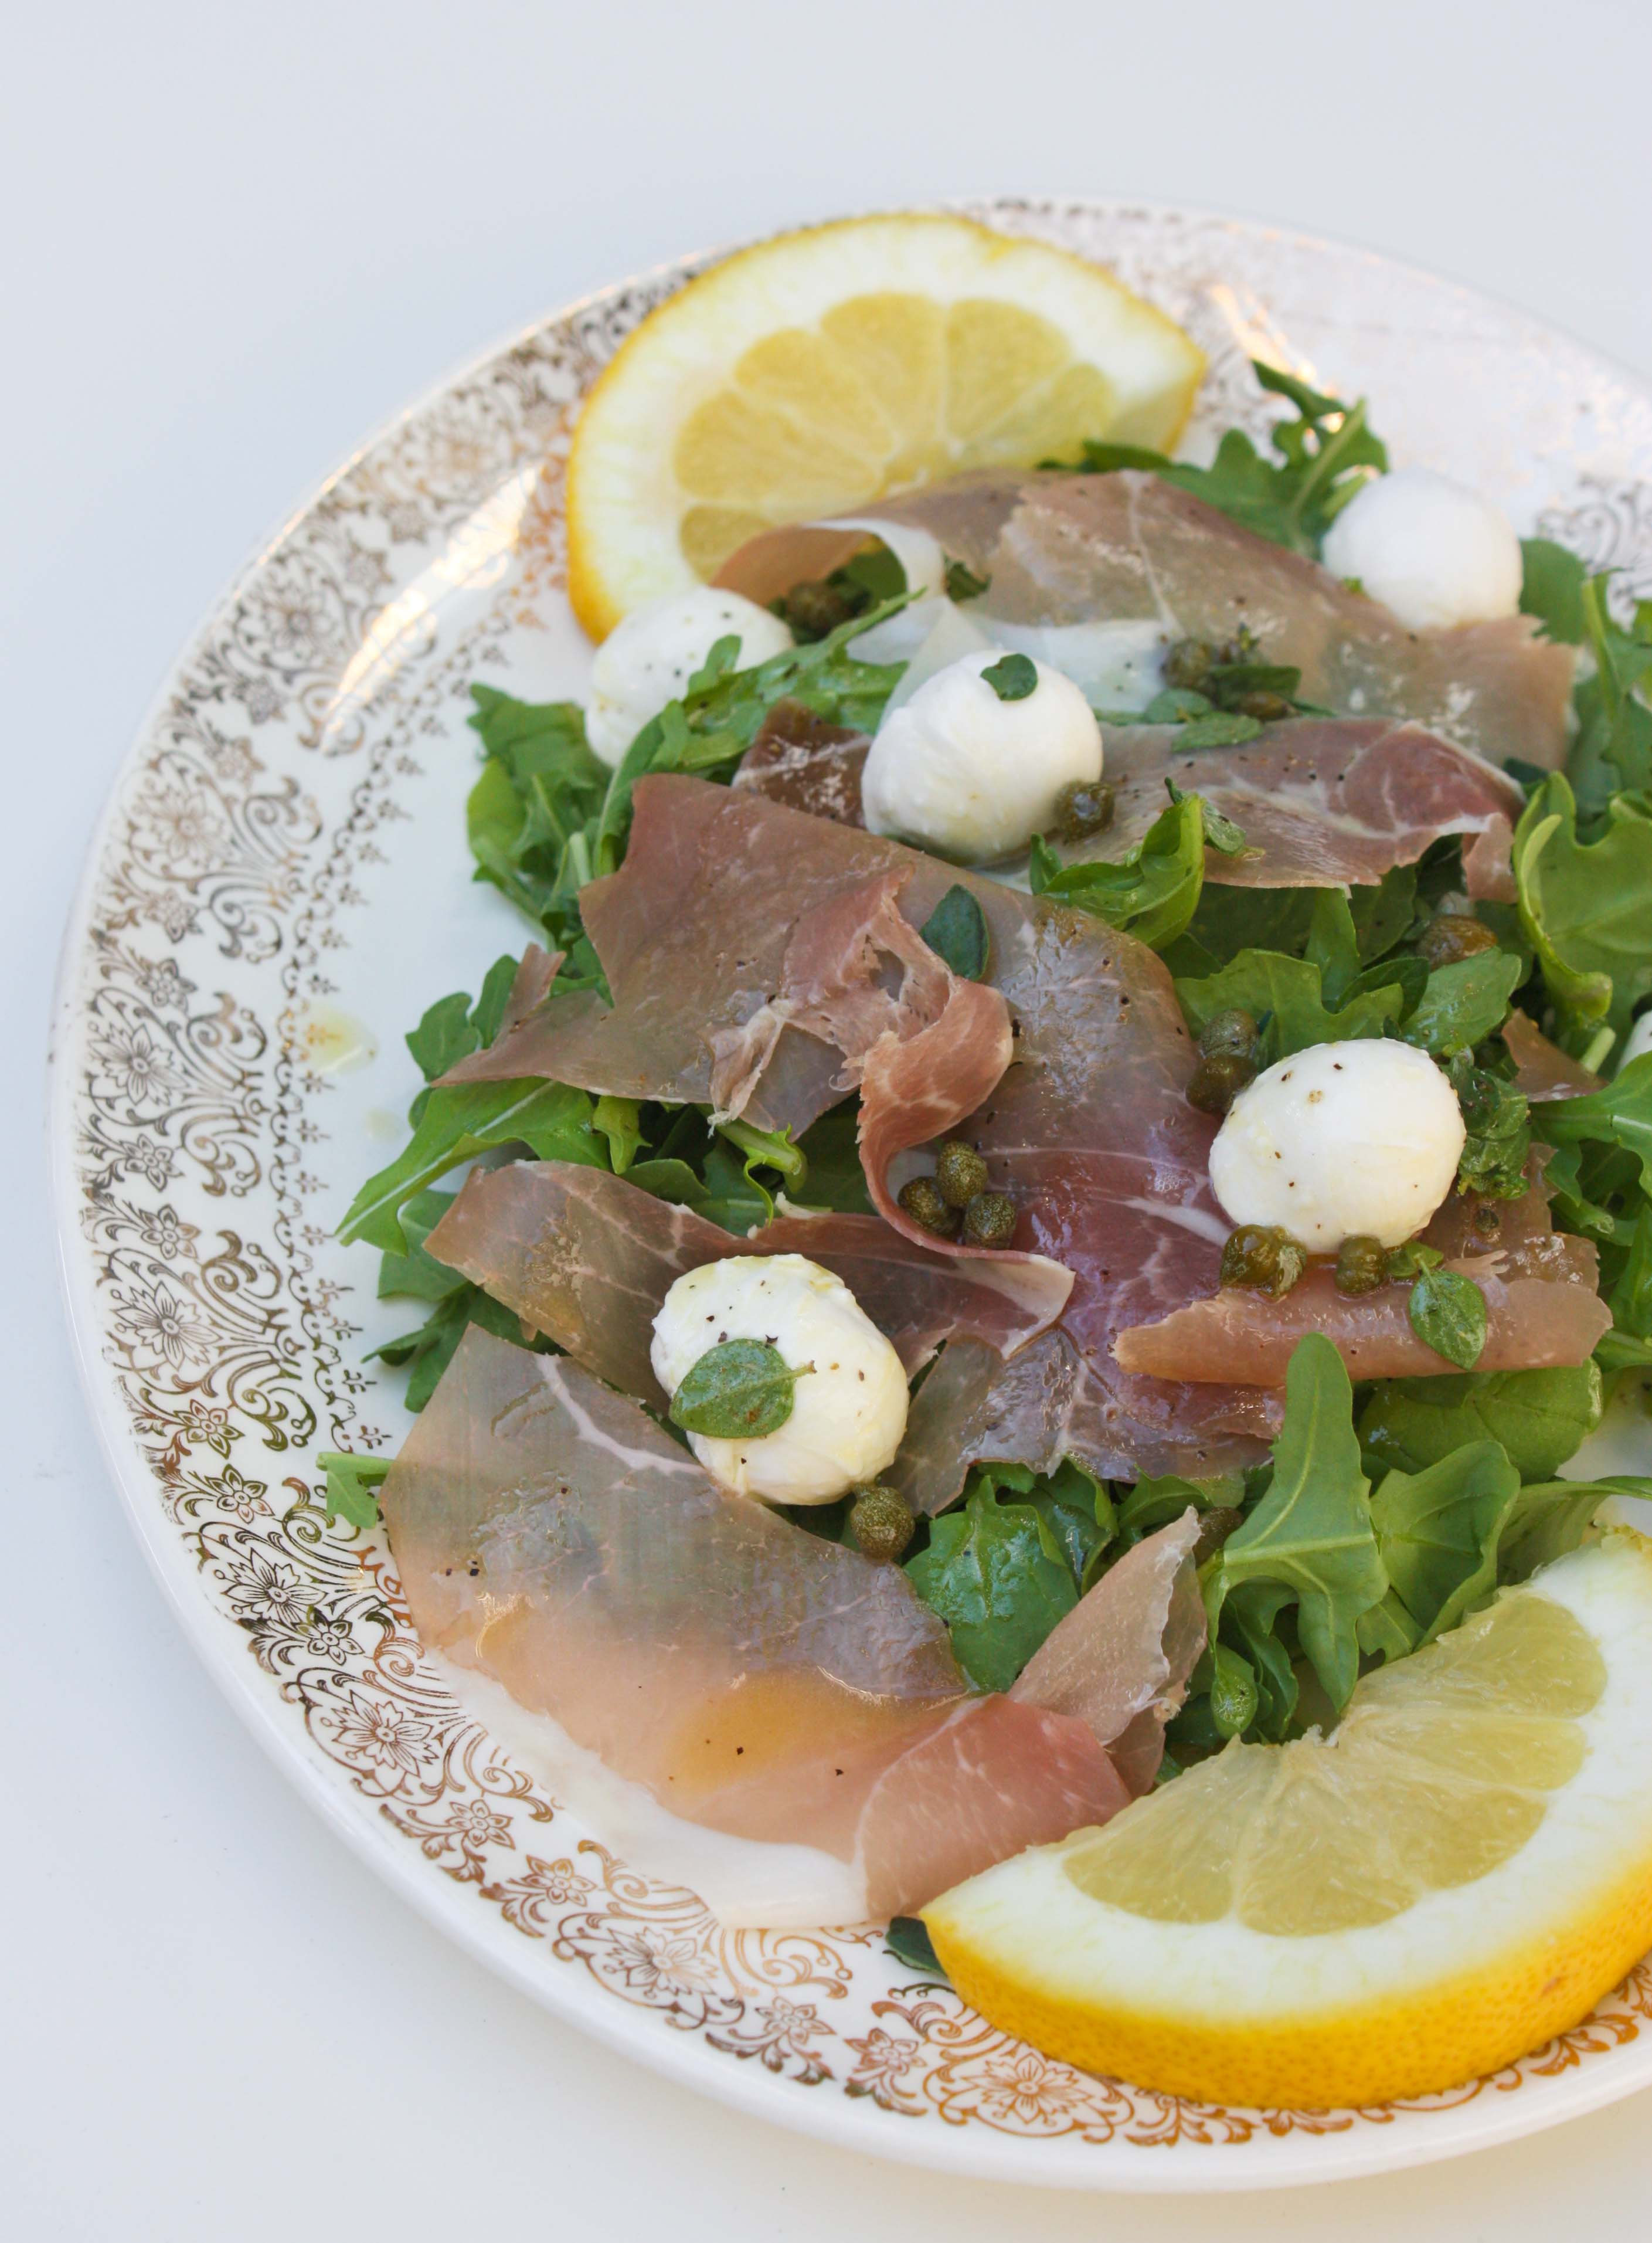
 I am completely in love with this salad. It’s pretty much perfect for one person or two. I’ve made it at least 4 times (probably because I bought a 4 oz pack of prosciutto), shared it twice and it’s delicious. You know what else I’m in love with? Showing you pictures of this wedding.