The Best Chocolate Peanut Butter Cake

I pretty much always wish I had a reason to make a cake.  The more I think about it, it’s one of the reasons I love weddings, because I think wedding cakes are amazing.  Tonight I had a conversation with some ladies about wedding media.  Wedding sites, blogs, shows magazines are all geared at woman.  The wedding is portrayed as entirely about the woman, which to me seems a little unfair, given that the woman is only one half of the equation.

But in the conversation, one of the things I pointed out is that part of my fascination with wedding media is the aesthetic.  I think weddings are beautiful.  I think cakes are beautiful.  That’s probably why I love food blogs too, because I think the photography is pretty.

Most of the time when I see a beautiful cake my first thought is I want to make that, then second, I want to eat that.  For me, making cakes is fun.  I love making them look beautiful, but I also love making them taste good.

ChocolatePBCake1

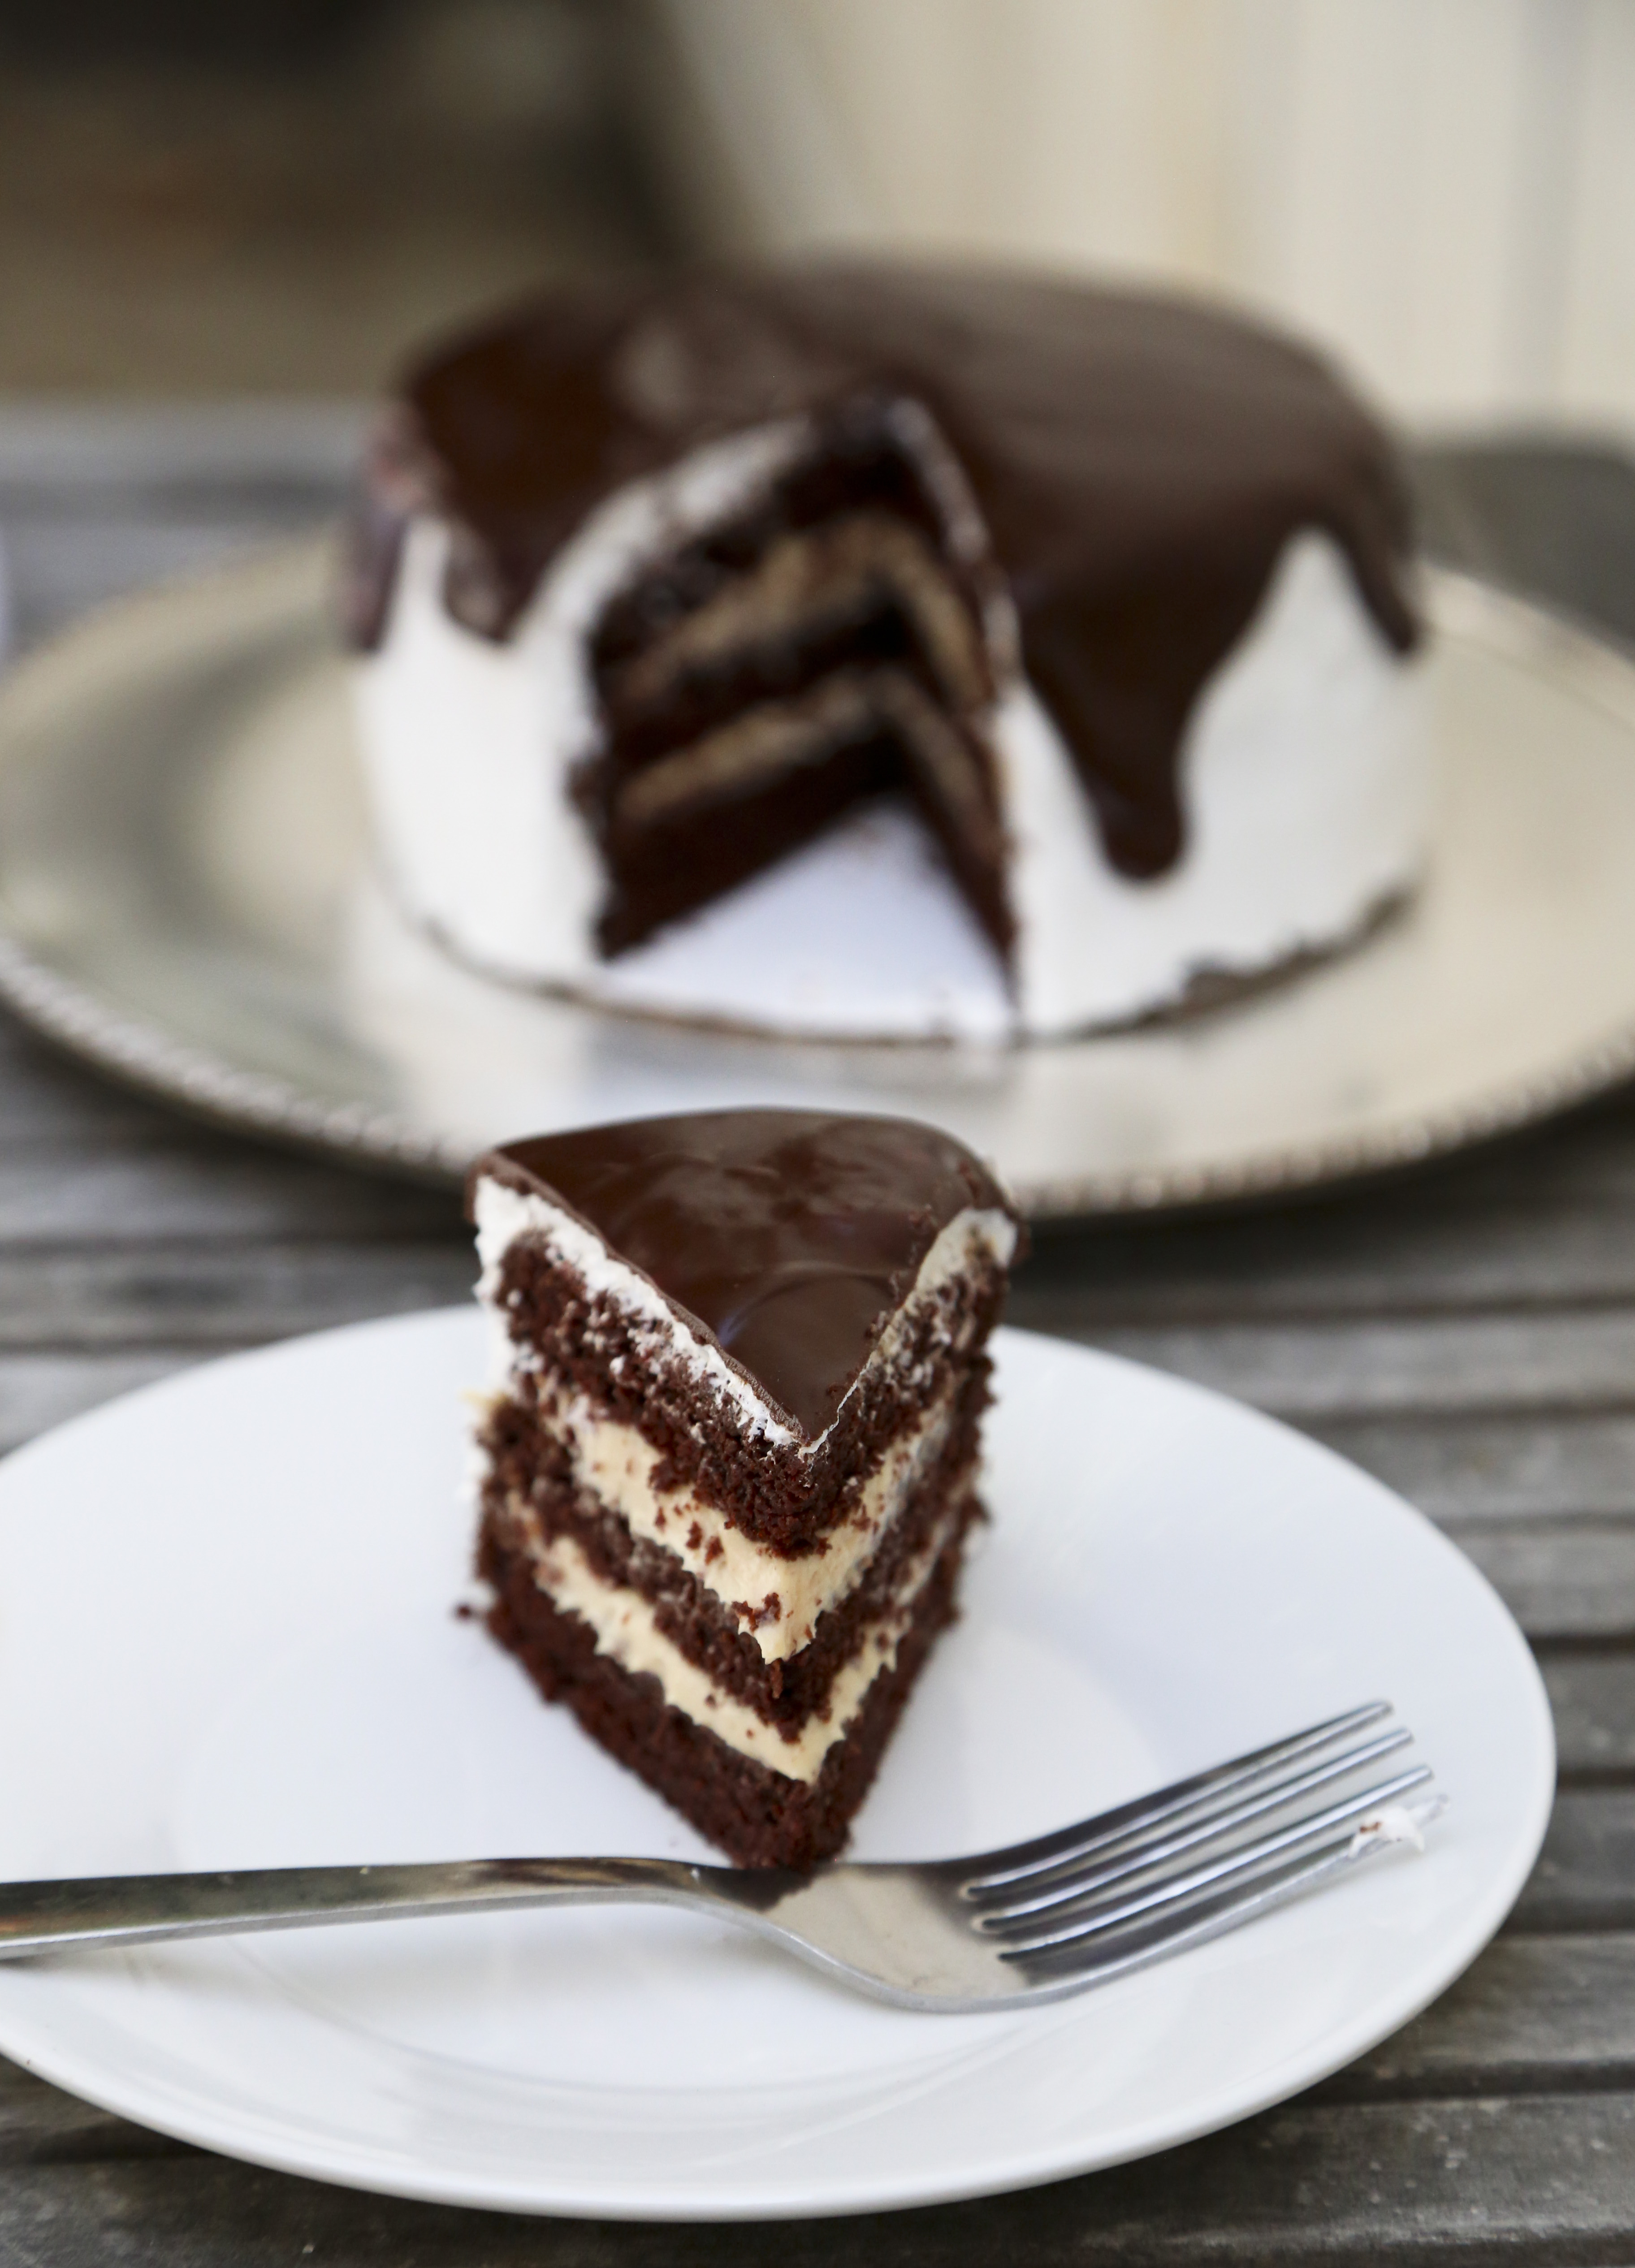
Because really, isn’t a layer cake just one of the prettiest things out there?

While I always want to make cakes, there isn’t always an occasion to make a cake.  I originally made this cake for a birthday/going away party for friends.  But it was so popular and pretty that I wanted to make it again and photograph it.  

I don’t think there’s anything wrong with that.  I think it just means I appreciate aesthetics. So if you want to make a cake for a special ocassion or no reason at all other than to please yourself… please do! ChocolatePBCake3

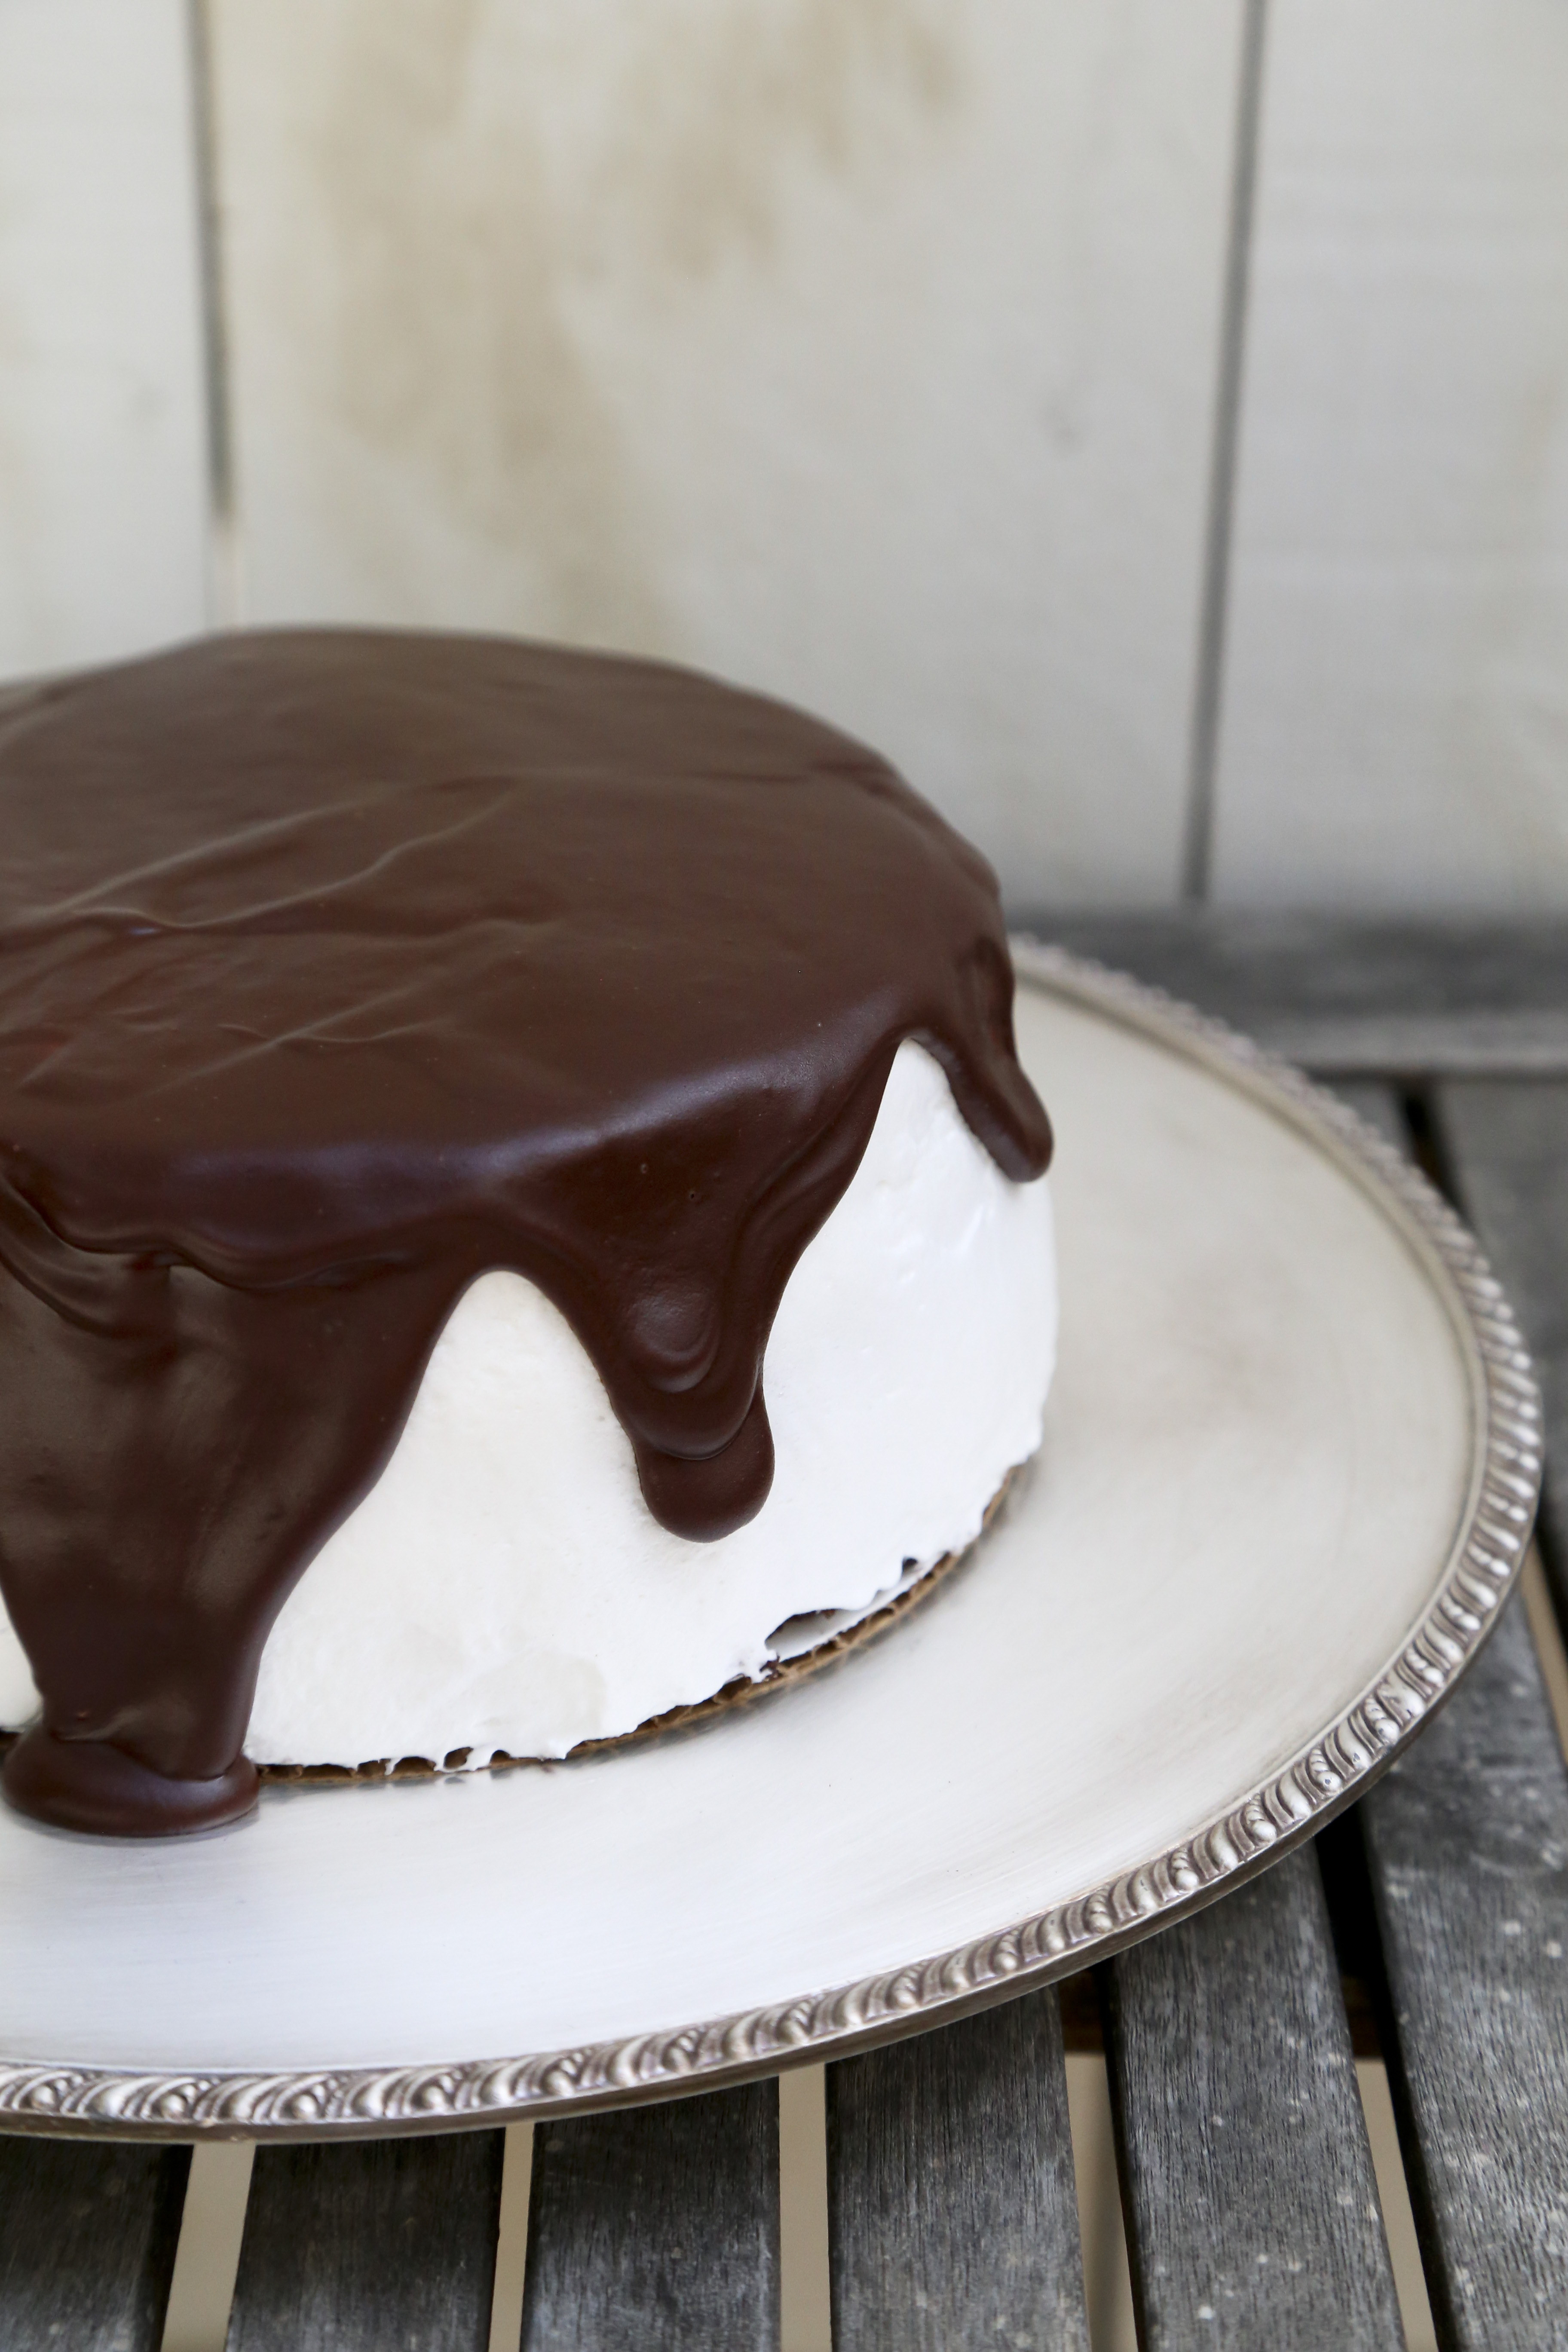
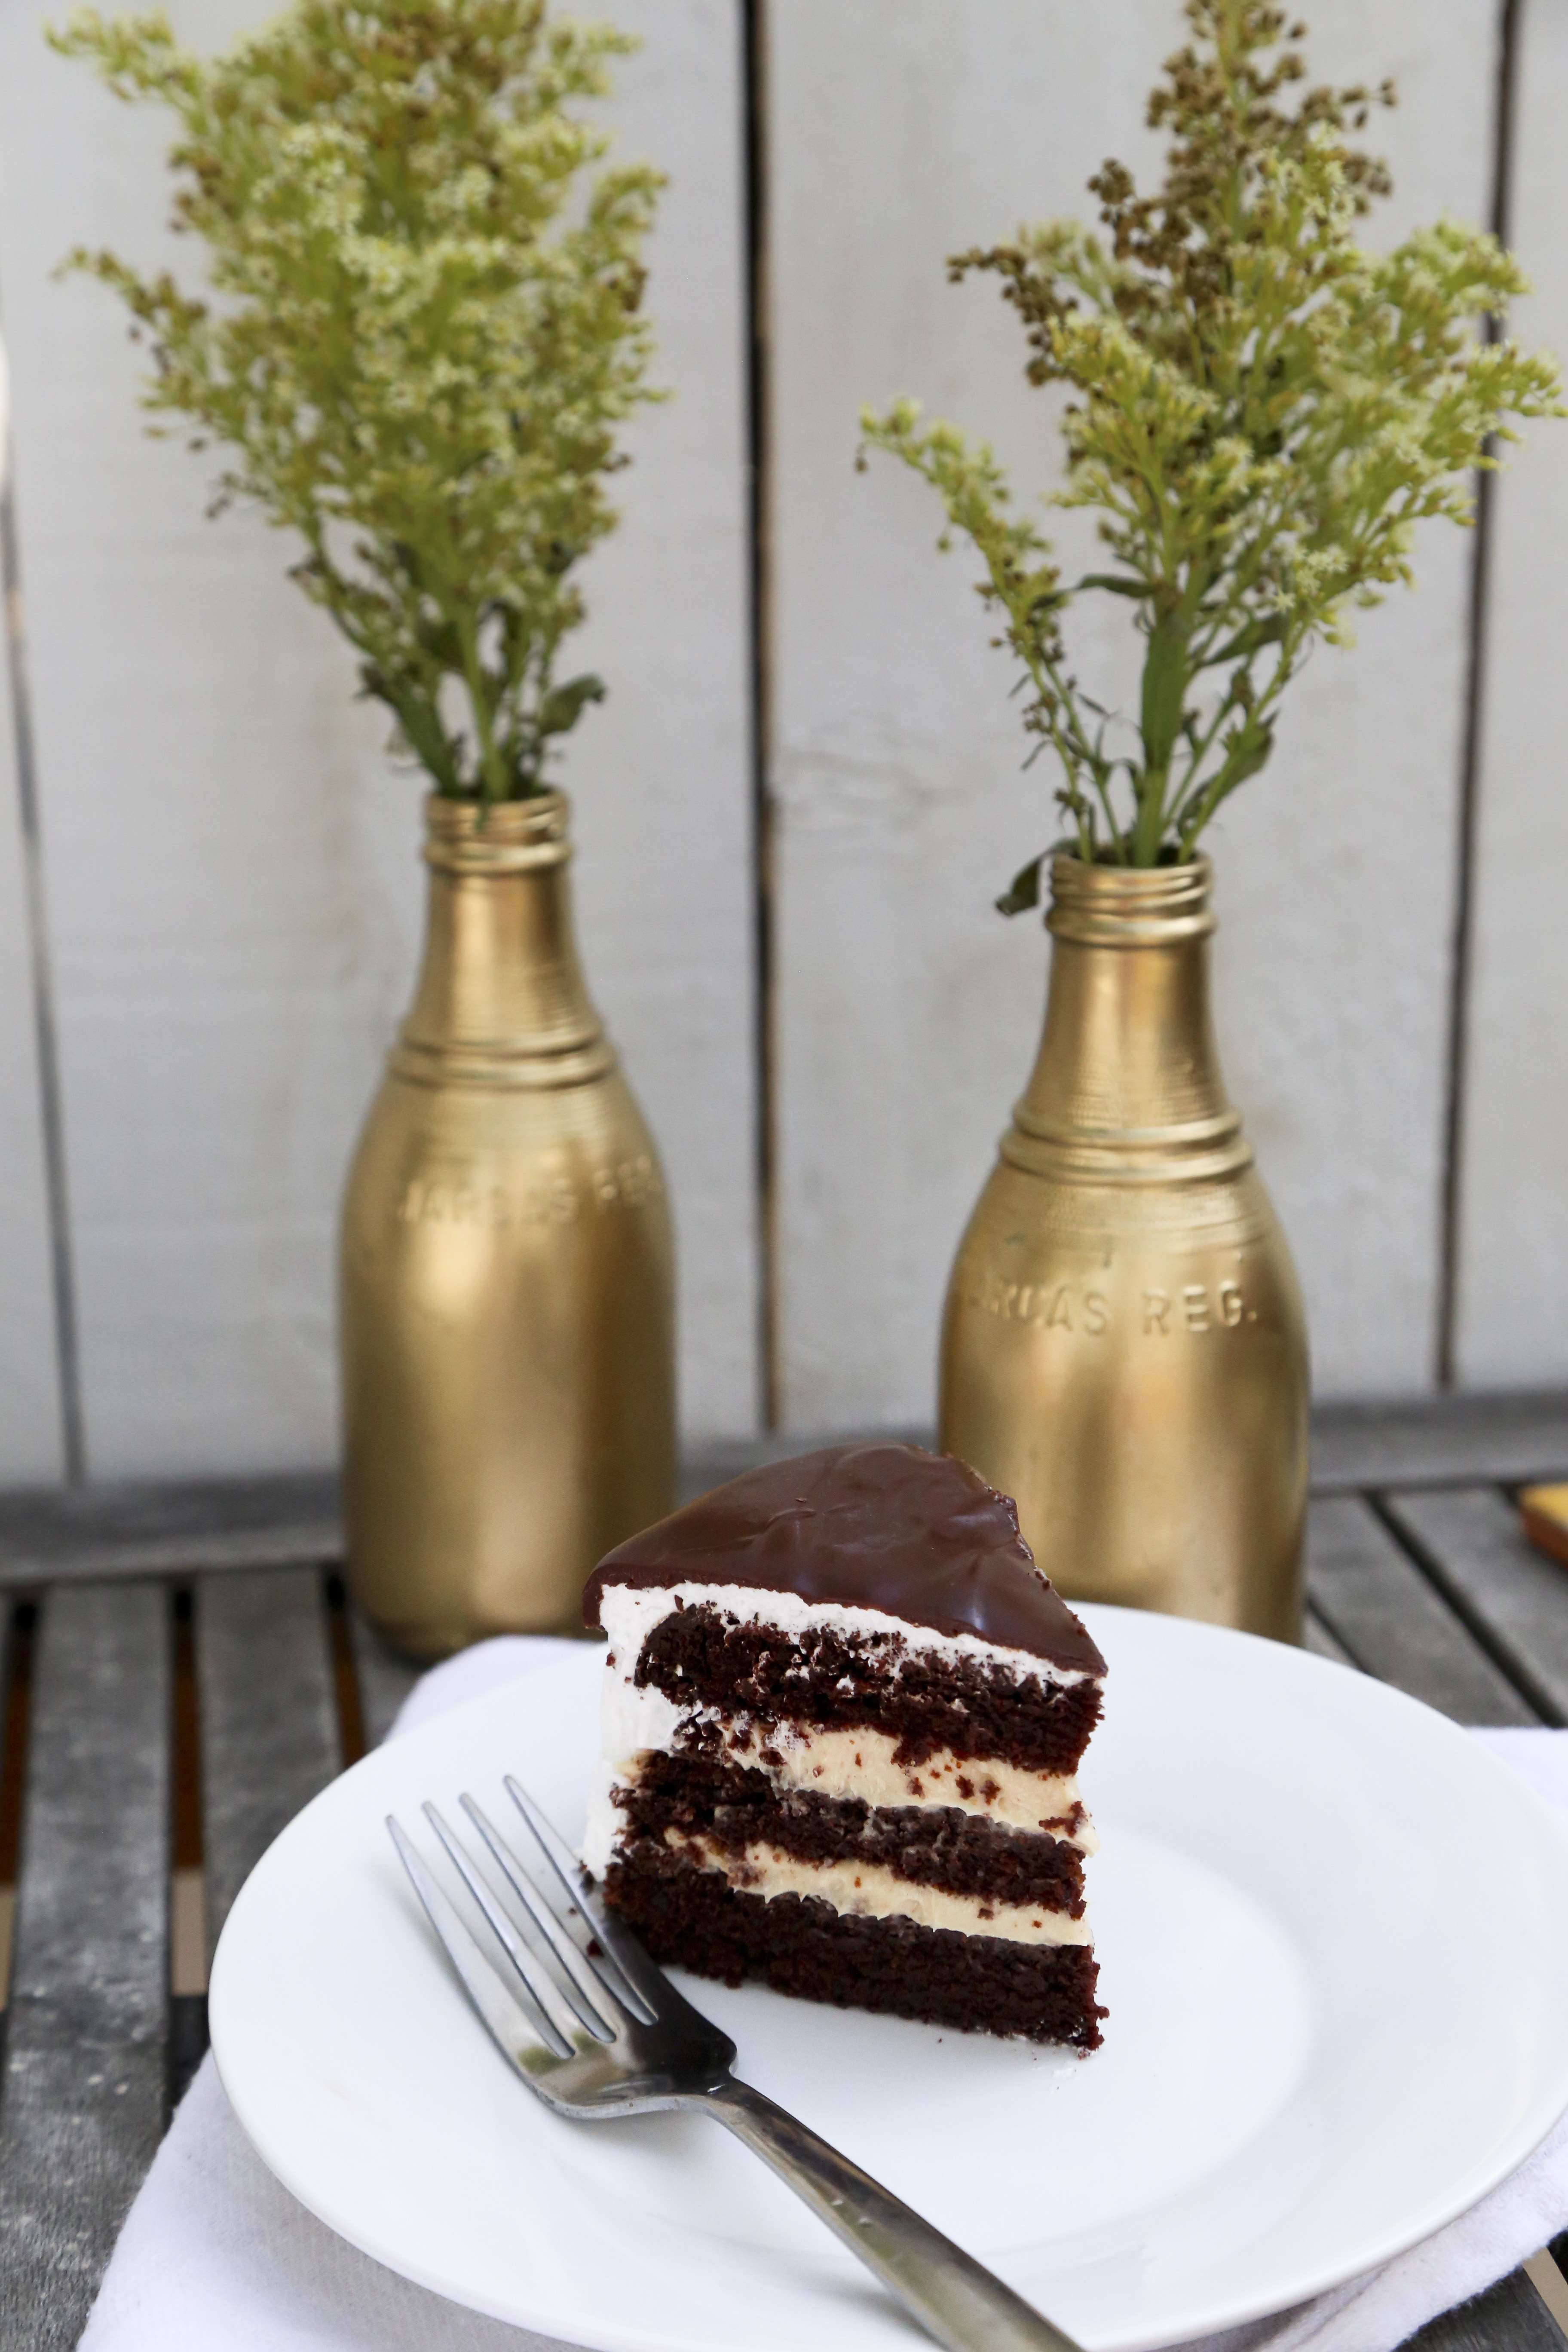
And as a bonus, it’s amazingly delicious and the perfect 6-inch cake.

Chocolate Peanut Butter Cake

For Cake (adapted from Hershey’s Chocolate Cake):

1 cup sugar
3/4 cup + 2 tbsp flour
1/4 cup + 2 tbsp unsweetened cocoa powder
3/4 tsp baking soda
3/4 tsp baking powder
1/2 tsp salt
1 egg
1/2 cup milk (I used almond milk)
1/4 cup vegetable oil
1 tsp vanilla extract
1/2 cup boiling water

For Filling:

2 oz cream cheese, softened
1/2 cup peanut butter
7 oz sweetened condensed milk
1/2 cup whipping cream

For Frosting:

2 egg whites
1/4 cup sugar
1/4 tsp vanilla extract
1 big pinch of cream of tartar*
1 pinch of salt

For Chocolate Ganache:

3 oz bitter sweet chocolate chips
1/4 heavy cream
1/4 tsp vanilla extract

Make Cake.

Preheat oven to 350F.  Grease and line with parchment paper 2 (6-inch) cake pans, set aside.  In a stand mixer bowl, combine all dry ingredients.  Add eggs, oil, milk and vanilla.  Beat together.   Add boiling water and beat until combined.  Pour batter evenly between both 6-inch cake pans.  Bake 25-30 minutes (this might vary based on your oven so start checking for readiness after 20 minutes, especially if using a convection oven) or until cooked through (i.e. do the toothpick test: insert toothpick, once it comes out clean, it’s ready).

Allow to cool completely.

In the meantime, make the filling.  Beat together cream cheese, condensed milk and peanut butter.  In a separate bowl, whip heavy cream into firm peaks.  Fold whipped cream into peanut butter mixture, refrigerate until ready to use.

Next make your frosting.

Place a glass bowl over a sauce pan that has about 1 inch of water in it, make sure the water is not touching the bottom of the bowl (aka build a double boiler).  Add egg whites, sugar, vanilla extract, cream of tartar and salt.  Mix together.  Heat, stirring constantly until the sugar dissolves and the egg whites are warm when you touch them.

Transfer egg white mixture to a stand mixer and attach whisk attachment.  Stir on low and turn up the speed every 15 seconds or so until it’s on high speed.  Beat 5-7 minutes or until glossy, stiff peaks form.

Now assemble the cake.  Level your layers and slice in half, so you have 4 layers (you’ll notice in my photo I only had 3 layers, you can accidentally drop one on the floor and have 3 layers as well… that’s allowed, but not advised).  Place your first layer on your cake circle or cake dish of choice. Lay some filling on top of the first layer and spread evenly, press on second layer, it’s ok if it overflows a bit.  Repeat until all layers are complete.

Next, frost with a generous layer of frosting.

Place in the fridge while you make your ganache.  Place chocolate chips in a bowl and set aside.  In a small sauce pan, heat heavy cream and vanilla stirring constantly until it comes to a light boil.  Pour cream over chocolate chips.  Let sit for a minute, then stir until smooth.  Pour over cake and smooth the top with an offset spatula.  Allow to cool completely, then slice and serve.

ChocolatePBCake2

I had hopes and dreams of making a beautiful vide to go along with this blog post, but I’m still working on perfect my video making skills… but in case you’re curious… here’s my first attempt:


Not the prettiest video, but I’ll take it for a first try!  We can’t expect to make gorgeous creations the first time around, and I’m cool with that.


So tell me, are you a fan of layer cakes, weddings and pretty things?  Are you overloaded with wedding stuff? Don’t even see it?  Is a cake just a cake for you?  


Molasses Ginger Apricot Cookies and The Coast-to-Coast Cookie Swap

One of the best things about having a blog is making new friends.  There are the kind you meet in real life, that also happen to live down the road from you.  But then there are the online ones.  You have crazy obsession with cookies, doughnuts and the best combination of flavors for that new sandwich you want to try.

I mean who else is going to understand that it’s REALLY important that you try adding herbs to your lemon cookies?  Or how you absolutely NEED to recreate that recipe you tried at some restaurant you went to last weekend?

These things are important. And other food blogger friends can truly appreciate that.  Because sometimes I need to send cookies to people, I teamed up with some bloggers for our very first The Coast-to-Coast Cookie Swap.

Since I was sending cookies to bloggers, I knew they had to be good.  Because of that, I tried to recreate my favorite cookie

MolassesGingerApricotCookiestext


We made cookies and sent them to each other.  It was pretty great!

Who Participated:

Allison from Sweet Potato Bites (aka my crossfit/running buddy) with her Loaded Oatmeal Cookies

Natalie from In Natalie’s Shoes with her Amazing Chocolate Chunk Cookies

Coco from Urban Chick’s Foodie Ventures with her Peach Cobbler Cookies <— LOVED

Jazzy with her Lemon Blueberry Cookies (Link to come!)


My contribution to the bunch:

MolassesGingerApricotCookies2

Molasses-Ginger Apricot Cookies

1 stick of butter + 2 tbsp (10 tbsp total)
1 cup sugar (plus extra for rolling)
1 egg
1/4 cup molasses
2 1/4 cup flour
2 tsp baking soda
1/2 tsp salt
1 tbsp ground ginger
1/2 tsp cinnamon
1/4 tsp mace
1 cup dried apricots, chopped
1/2 cup turbinado sugar (for rolling)

Preheat oven to 350F.

Cream together butter and 1 cup sugar using a stand or hand mixer.  Beat in molasses and egg until fluffy.  In a bowl, combine flour, baking soda, salt and spices.  Add dry ingredients to wet ingredients.  Just before ingredients are combine, fold in apricot pieces.

Form dough into 1 inch balls and roll in turbinado sugar (note: you can use any sugar, but turbinado sugar is thicker so it looks pretty!).  Place on a parchment paper lined baking sheet.  Bake 8-10 minutes.  Allow to cool  and serve!  Makes about 3 dozen cookies.

Clearly, I’m a big fan of ginger and molasses year round, not just for Fall/Winter.

MolassesGingerApricotCookies3

All the cookies were delicious!  It was cool to see what the other ladies chose to make, and also to make new friends.  And let’s be honest, who doesn’t love getting packages?

Thanks to Jazzy, Natalie, Coco and Allison for participating in the Coast to Coast Cookie Swap!  I can’t wait to do it again!


If you were making cookies for your favorite bloggers, what kind would you make?

Vegan Fusion Tacos

I don’t know about you, but I love fusion food.  My favorite is some sort of Asian cuisine combined with Latin. Food trucks are particularly good at this.   Kogi is the perfect example.  Their short rib taco is nothing short of amazing.  There’s another food truck around Orange County that has a banh mi taco.  Amazing.

I’m also a big fan of Taco Tuesday.  I wish I took advantage of it more often.  I really wanted to hit up my favorite taco spot today, but then I remembered I should probably save money (and calories).  Instead I made tacos at home with ingredients I already had, and thus this italian-mexican fusion vegan creation was born:

VeganFusionTacos1

Vegan Fusion Tacos

1 corn or flour tortilla
2 tbsp avocado pesto hummus
2 artichoke hearts, halved
a few sliced thinly sliced zucchini
1 tsp nutritional yeast (optional)

Heat tortilla.  Spread tortilla with Avocado Pesto Hummus.  Top with artichoke hearts, zucchini slices, then sprinkle with nutritional yeast.  If you want to go crazy, squeeze some extra lemon on top.  You won’t be sorry.  Then devour.

VeganFusionTacos2

Note: If you make a full avocado pesto hummus recipe, you should be able to make about 6-8 tacos.

Do you see the fusion in here?  Italian ingredients: Garbanzo beans, Artichoke Hearts, Zucchini, Basil.  Latin/Mexican: Lemon, Avocado, Tortilla.

I think that’s pretty good.

So there you have it.  Tasty vegan dinner, ready in about 10 minutes.  Get your Taco Tuesday on.

Spicy Black Bean and Kale Grilled Cheese

So a few weeks ago I told you about how Green Mountain Mustard sent me some of their mustard for me to try.  I originally proposed to make a grilled cheese sandwich and then stumbled upon the epic idea that became my German Nachos(ish).  But ever since, I’ve been thinking about how delicious their mustard is, because really it is, and how I NEED to make a grilled cheese with it.  But not just any grilled cheese, an amazing one and so I finally did.

Yesterday, all I could think about was grilled cheese, and since it was Meatless Monday, why not make something epically delicious to show the world how wonderful meatless can be.

blackbeancheddargrilledcheesetext

I mean. Can we take a minute and observe the cheesy goodness?


blackbeancheddargrilledcheese2

Now I’m going to have to come clean with you.  I probably ate this in about 3 minutes.  I didn’t have a stop watch, but before I knew it, it was gone.  I think that’s a good sign.  Then my mouth was a little bit on fire, because this mustard is straight up PICANTE.  If you’re a fan of spice, you’re going to love this.  If spicy isn’t your thing, it’s cool.  We can still be friends, use regular mustard, or skip it.

blackbeancheddargrilledcheese3

Spicy Black Bean and Kale Grilled Cheese

1 tbsp onion, finely chopped
1 tbsp red bell pepper, finely chopped
1/2 tbsp cilantro finely chopped
1 kale leaf, veined and chopped
1/3 cup black beans, cooked

1/4 tsp cumin
salt and pepper to taste
1/2 tbsp butter, softened
2 slices of whole wheat bread*
1 tbsp Barn Burner, Red Habanero Mustard

2 slices sharp white cheddar

Grease small skillet and turn on to medium heat.  Add onion, bell pepper, and kale.  Sautee a few minutes until soft.  Add black beans, cilantro, cumin and salt and pepper.  Cook a few minutes then transfer to plate.  Using a fork, mash beans lighly and set aside.


blackbeans


(Note: I didn’t fit all of this in the sandwich so I just ate it on it’s own and it’s delicious. The end.)

Spread bread with butter and turn over then spread with mustard.  Lay 1 slice of cheese on each side (on the mustard side, since you’ll be grilling the buttered side).  Spread one side with black bean mixture and put the sandwich together.

Place sandwich on griddle heated to low.  Cook a few minutes until golden, flip and cook a few more minutes until golden and cheese is melted.  Remember when it comes to grilled cheese, slow and steady wins the race.  In case you forgot here are my tips for fabulous grilled cheese.


blackbeancheddargrilledcheese4

Serve immediately and slice if desired.

*Note: I got my bread at Black Market Bakery. If you’re in OC, try it! Amazingly delicious, fluffy and fresh! Also free of preservatives!

This combo was amazingly delicious.  Obviously I’m biased, because I LOOOOOVE black beans, but you should definitely give this a shot.  I think this would be even more amazing dipped into sour cream, because who doesn’t love dipping sandwiches in sauces?

Please also note that if you decided to add bacon and avocado to this, I wouldn’t judge you.

If I could, I would invite you all over for this spicy black bean grilled cheese, but since we’re far away, make it and tell me if you love it.  How does that sound?

What’s your favorite grilled cheese combo?

Avocado Pesto Hummus

I’m loving the fact that it’s now light out until about 7pm.  What I’m NOT loving is that it’s still dark out when I go to the gym.  There’s nothing less motivating than waking up when it’s still dark out.

So while it’s still light out, I had all these hopes and dreams for magical creations I was going to make after work, photograph, enjoy and blog about.  Then I remembered that more cooking means more washing dishes and that suddenly sounded unappealing.  As much as I wanted to hit up Trader Joe’s for a box of Puffins for dinner, I decided to make something quick and easy.

Avocado Pesto Hummus 2

And seriously guys, this was all sorts of amazing.  You really need to make this, spread it on toast and stuff your face off.  That’s what I did.  Why should you?

Top 5 Reasons You Need to Make This:

    1. It’s healthy!  Lots of good fats from avocado
    2. It’s vegan! Let’s love the Earth a little bit more and eat less meat (especially if you’re in California.  There’s a drought folks!).  This spread still packs in the protein.  This whole recipe (which serves 4) has about 29g of protein!
    3. It’s crazy delicious.  Seriously.  So good.
    4. Avocado. Enough said.
    5. It’s ready in about 3 minutes, and you’re hungry so what are you waiting for?

BONUS REASON: It’s a great excuse to eat bread, not that you need one. Avocado Pesto Hummus 3

Avocado Pesto Hummus

1 can (15oz) garbanzo beans, drained and rinsed
1 avocado, pitted and peeled
1 clove of garlic
1 tbsp nutritional yeast, heaping
1 small handful of fresh basil leaves (I used about 7 large leaves)
juice of 1 lemon
salt and pepper to taste

Combine all ingredients in a food processor or Vitamix (which is what I used).  Pulse until combined.  I wanted mine a little bit chunky so I didn’t pulse it too long, but if you want it smooth you can do that too.

Avocado Pesto Hummus 1

Spread on your favorite bread or serve with pita chips or raw veggies and enjoy!

Do you need any more convincing?  I’m not sure how else to tell you this is basically delicious and awesome for you.  Eat it up!

Are you an avocado lover? Please tell me you are!

Banana Cupcakes with Chocolate Hazelnut Buttercream Frosting

I’ve been a little bit out of control with my sugar intake this week.  But that’s totally ok.  Monday will start a new week and we’ll be good to go with some more clean eating.  But before that, let’s talk cupcakes.

BananaCupcakeswchochazelnutfrosting2

A few weeks ago, Nocciolata sent me some samples of their tasty chocolate hazelnut spread to try. It’s seriously amazing and is certified organic, which cool! I really like that this has actual recognizable ingredients in it. Now, you might remember that I loooooove chocolate hazelnut spread (aka I went crazy with Nutella when I lived in Rome and gained 15lbs, no joke) and my favorite combo by far is chocolate/hazelnut + banana.

So with these samples sitting in my house, I tested out a few recipes for chocolate hazelnut frosting.  I failed 3 times and finally went back to the basics: buttercream.  Buttercream is delicious and always pleasing.  And I knew that the frosting I created would go perfectly with banana cupcakes.  So that brings us to these guys:

BananaCupcakeswchochazelnutfrosting1

Lately, the world has gotten ridiculous on the cupcake frosting front (myself included), but sometimes you just want to have a cupcake that looks homemade.  You know, like spread with a knife.  No fancy piping bags necessary.

Something familiar, comforting and tasty (like chocolate hazelnut spread).  Let’s concentrate on flavor, not on looks, because that’s really what this spread is all about: Great Taste.

BananaCupcakeswchochazelnutfrosting4

Banana Cupcakes with Chocolate Hazelnut Buttercream Frosting

For Cupcakes:
1 cup + 1 tbsp flour
1 tbsp corn starch
1/2 tsp baking soda
1/2 tsp baking powder
Pinch of salt
1 stick (1/2 cup) butter
1/2 cup sugar, heaping
1 egg
2 ripe bananas, mashed
1/4 cup + 2 tbsp whole milk
1/2 tsp vinegar
1 tsp vanilla

Frosting:
1/4 cup butter, softened
1/4 cup chocolate hazelnut spread
3-4 cups powdered sugar

Make cupcakes.  Pre-heat oven to 350F.  In a bowl combine flour, corn starch, baking soda, baking powder and salt.  Set aside.  Using a mixer, cream together butter and sugar until light and fluffy (about 2-3 minutes).  Add egg and beat for another minute. Add mashed bananas and beat for another minute.  Add remaining wet ingredients then start to add dry ingredients.  Beat until combined.

Fill lined cupcake pan with 1/4 cup of batter each (or until each cupcake slot is about 3/4 the way full).  Bake 15-18 minutes or until golden and cooked through.  Remove from oven and set aside to cool completely. This recipe will yield about 13-14 cupcakes.

Next make the frosting.  Beat together butter and chocolate hazelnut spread.  Gradually add powered sugar until it gets a thick spreadable consistency.  If it’s too thick, thin out with a bit of milk.  Spread frosting on cupcakes.  Top with sprinkles if you like, then serve!  (P.S. You can totally add more Chocolate Hazelnut spread to this frosting have it be even more flavorful, you just might have to adjust the powdered sugar amount.  I would have added more but I ran out of samples with my many fails).

BananaCupcakeswchochazelnutfrosting3

I’m definitely a fan of the chocolate-hazelnut + banana combo!  What’s your favorite thing to combine with chocolate-hazelnut spread? 

Thanks to Nocciolata for the samples!  Be sure to check them out.

Fancy Pants Rice Crispy Squares

I got into a Facebook fight today, and I’m only mildly ashamed.

With whom? Another blogger.  She posted something about how the Ban Bossy campaign was ridiculous.

If you haven’t heard of Ban Bossy, it’s a campaign by Sheryl Sandberg’s Lean In organization and the Girl Scouts.  The whole idea is to stop using the word ‘Bossy’ to describe an assertive girl.   An assertive little boy is a ‘leader,’ but an assertive little girl is ‘bossy,’ and this affects the way girls develop in leadership roles.  The campaign really aims at developing leadership among girls and young women.

fancypantsricecrispies1

I don’t think this campaign is ridiculous.  I actually think it’s a great idea.

That said, sure, the choice of marketing for this campaign is a bit silly (I love Beyonce, but she sort of sucks in the video).  The word bossy is just dumb, but I recognize its power.  Because of that, I was bothered by this bloggers comment and the subsequent comments to her post.  Mostly, they were people saying that being called bossy is a good thing, or examples of when their little boys are bossier than their daughters and how the word doesn’t mean anything.  Sure, I get all that.  To an adult, being called bossy is fine, but when you’re little things are different.  By the time we’re grown ass women, we know we’re more awesome than what some jerk says.  But let’s not forget that words have power.

So, Facebook “fight” ensued.  I argued that words are important and empowering girls is essential.  She argued that the campaigns message was clouded by bad marketing.

The feminist in me took over (p.s. I hate that to so many the word feminist is negative).  But then I just let it go, because if there’s one thing I hate more than people putting down people’s efforts to empower women, it’s women hating on other women.  Can we get a little female solidarity?

Overall, I get it.  Criticizing is easier than making a positive change, and as I emphasized  in my comments: everyone is entitled to their own opinion.  If you hate the Ban Bossy campaign, that’s fine.  But can you give me another way that we can start empowering girls to be leaders?

Regardless of how you feel about the Ban Bossy campaign, I genuinely hope we can all agree that empowering girls to be leaders is a cause worth talking about.  If only our Facebook interactions could be dialogues instead of arguments, we’d all be a tiny bit better off.

But in the meantime, before society progresses to that point, when someone tells you what you support is ridiculous, it’s my belief that you should kill them with kindness… the marshmallowy kind.  So ladies keep your bossy pants on and make yourself some fancy pants rice crispy squares.

fancypantsricecrispies4

Fancy Pants Rice Crispy Squares

1/4 cup butter
4 cups mini marshmallows
3 cups puffed rice cereal
2 cups puffed millet
2 cups puffed quinoa
3/4 cup unsweetened shredded coconut
1/2 cup dark chocolate chips
1-2 tsp canola oil

Grease a 9×13 baking dish and set aside. In a large pot, met together butter and mini marshmallows.  Stir until well combined.  Add rice cereal, millet, quinoa and coconut.  Stir to combine.  Press mixture into 9×13 dish and allow to cool for an hour or two (you can put it in the fridge to speed up the process).  Once cooled, cut into squares using a large chef knife.

fancypantsricecrispies2

Place chocolate chips in a bowl. Microwave for 30 seconds.  Stir and microwave another 30 seconds.  Repeat until chocolate is melted.  Stir in 1-2 tsp of oil or enough for the chocolate to be runny.  Drizzle chocolate over squares and allow to harden.  Once chocolate is firm, serve and enjoy!

fancypantsricecrispies3

Why are they fancy pants?  Millet is fancy.  Quinoa is like the black diamond of grains.  Coconut makes everything a little more exotic.  Also because I said so.

What are your thoughts on #BanBossy?  Feel free to give your actual opinion (even if you disagree with me, that’s cool!).

Delicious Snickerdoodles

A few weeks ago, I realized I eat salads pretty much every day for lunch and for a minute that depressed me.  When you work in an office full of people who buy delicious smelling take-out everyday, eating a salad with some sort of protein, olive oil and lemon daily gets a bit depressing.  Really it’s all a question of comparison.

But then I remember all the reasons I eat salads: health, tastiness, cost-effectiveness and of course, vanity– salads keep me in shape.

But that got me thinking: if I were a “naturally thin” person would I eat out all the time? Would I still go to crossfit?

I posed this question to my friend and her response was “But you love salads! You ate them every single day in school.”

Umm yeah, no.  I’ve deluded myself (and led others) to believe that I love salad.  I like salads just fine, but I don’t love salad.  I love cookies. And pie.

But I make myself eat salad.  Because being an adult means doing things you don’t love in the name of health.  I don’t think that’s a bad thing.  So I eat a ton of vegetables and I go to crossfit.  I genuinely enjoy crossfit but I also genuinely enjoy my bed at 5:20am when my alarm goes off.

Vegetables and exercise are important.  But let’s also remember that women cannot live on vegetables alone (although I know many try).  Sometimes we just need a dang cookie.  So I have one for you today.

This isn’t my recipe, but it’s a recipe that is awesome so I have to share it with you. If you’re looking for an awesome snickerdoodle recipe, look no further.  I’ve got you covered.

delicioussnickerdoodles1

Delicious Snickerdoodles

adapted from All Recipes

1/4 cup butter, softened
1/4 cup vegetable shortening, softened
3/4 cup sugar
1 egg
1 tsp vanilla extract
1 1/3 cup all purpose flour
1 tsp cream of tartar
1/2 tsp baking soda
1/4 tsp salt
2 tbsp sugar
2 tsp cinnamon

Pre-heat oven to 400F. Cream together butter, shortening and 3/4 cup sugar.  Beat until fluffy.   Add egg and vanilla and beat another minute.  Add flour, cream of tartar, baking soda, salt and beat until just combined.  

On a plate, combine 2 tbsp sugar with cinnamon.  Roll dough into walnut sized balls and roll into cinnamon/sugar mixture. Repeat until you get 24 dough balls delicioussnickerdoodles2

Lay dough balls on a parchment paper lined baking sheet a few inches apart.  Bake 8-10 minutes.  Remove from baking sheets and allow to cool.  Serve and enjoy!  This will make about 2 dozen cookies.

delicioussnickerdoodles3

Remember that vegetables are healthy eats are super important in life, but there’s also room for cookies.  So don’t forget to have one of those occasionally too.

What’s your favorite kind of cookie?  I recently discovered this Molasses cookie with Apricot Chunks from Blackmarket Bakery that I’m in looooove with. I must try to recreate it soon.

Moroccan Spice Blend

As we’ve previously discussed, dinner is a struggle for me.  Waking up at 5:15am to workout, then going to work all day leaves me little motivation to make a meal when 5:30pm rolls around, especially if it’s just for me.  I’m one of those people that prefers to cook for others.  Cooking for myself is extremely unappealing.

When Jesse has dinner with me, it’s awesome.  I tend to make an actual meal, but most days, on my own, I tend to snack.  So I’m trying to come up with better solutions.  My number one solution right now is to keep it simple.

So in my quest to keep things simple, yet flavorful, I discovered a Moroccan Spice Blend that is so versatile you can basically kick up any plain dish without adding fat.  The best part is you can control how much salt goes in it.

moroccan spice blend

Moroccan Spice Blend

Adapted from Epicurious

1 tsp  cumin
1 tsp ground ginger
1/2 tsp salt (or less if you’d like)*
1/2 tsp black pepper
1/2 tsp  cinnamon
1/2 tsp  coriander
1/2 tsp cayenne
1/2 tsp mace

moroccan spice blend2

Combine all ingredients until well blended.  Store in an air tight container until ready to use.

*Feel free to adjust the amount of salt.  You can completely omit it, if you’re trying to go low sodium.  You can also add more if you like things salty (the original recipe calls for 1 tsp of salt, but I tried that and thought it was too much.  1/2 tsp was more to my liking).

I mixed up a bunch to keep on hand for easy meals.  So far using this blend I’ve made: Moroccan Spiced Chicken Thighs and Moroccan Spice Tilapia.

Super easy! In both cases, I sprinkled the chicken (bone-in thighs, skin and excess fat removed) or fish generously with the spice blend and baked.  Both times it turned out awesome! I can’t wait to keep making this. If you’re interested, I can do a full recipe post on either of these.  Let me know if you’re interested.

Tonight, the ultimate quick dinner for 1:  I took a piece of tilapia, covered it in moroccan spice blend, then roasted it along side some asparagus for 17 minutes at 400F.  Done in less than 20 minutes, and easy clean up.  I like it.

Give this Moroccan Spice Blend a try! It’s a great way to add a ton of flavor while still keeping things healthy.

What’s your favorite quick and easy weeknight meal?

Healthy Baked Turkey Meatballs

This past weekend was a very Italian weekend for me.  I went to the Getty Villa.

gettyvilla1

If you’re in Southern California and haven’t been to the Getty Villa, you should go.  I grew up here and had never been.  It’s a beautiful museum built to look like a villa you would around Pompeii or Herculanum around 30 AD.  It’s seriously beautiful, not to mention the exhibits are awesome.

To add to the Southern Italian-ness of the weekend, Jesse and I also saw Pompeii.  While I question the historical accuracy, I must say I thoroughly enjoyed it.  It’s as if Titanic and Gladiator came together to make one ridiculous film.

If there’s one thing Pompeii taught me, it’s that Jon Snow is hot in a skirt.  After leaving the theatre, the one thing both Jesse and I had to comment on was Jon Snow‘s abs (because Kit Harington will forever be known as Jon Snow to me).

Image source: Torontosun.com

First we thought, those have to be digitally enhanced or airbrushed.  No one can have abs like that.  Of course then the conversation transitioned to: how does one get those abs?

I did some research.  Basically, if you want abs you have to lose fat and build muscle (no surprises here). Vanity Fair confirmed with an interview by the actors of the movie:

The four-hour workout: two hours of fight training with weapons, an hour of weight lifting, an hour of cardio, and an 1,800-calorie diet “designed specifically for our bodies to be attuned to lose fat and pop out muscles,” Akinnuoye-Agbaje told us.

Great.

So for the rest of us that aren’t working out for four hours a day or consuming a diet “designed specifically for our bodies to be attuned to lose fat and pop out muscles,” we should probably just stick to eating clean and maybe increasing our protein.

I’m not really in the market for Jon Snow abs (yep, that’s what I’m calling them now), but getting fit is always a good idea.  So to help you in that direction, I made you dinner:

healthyturkeymeatballs1

Healthy Baked Turkey Meatballs

1 lb lean ground turkey (from 1 package in the meat section)
1/2 red bell pepper, diced
1/2 cup red onion, diced
1 tbsp fresh chopped mint
1 tbsp fresh chopped rosemary
1 tbsp fresh chopped cilantro
2 cloves of garlic, minced
1 egg
salt and pepper to taste

Preheat oven to 400F.

Combine all ingredients in a bowl.  Using your hands work together all ingredients and form into golf-ball sized meat balls.  Place on a parchment paper lined baking sheet and bake for 25-30 minutes, or until cooked through (note: this might vary depending of the size of your meatballs and your oven). healthyturkeymeatballs2

Serve over cauliflower puree, on spaghetti squash or with your vegetable of choice and enjoy!  This recipe will make about 20 meatballs.

This low carb (paleo, gluten-free) meal will get you in the right direction to getting those Jon Snow abs.  Or if you’re like me and you just want to be a little bit healthy, to balance out an enormous piece of cake, this meal is great for that too.

Anyone else see Jon Snow’s abs in Pompeii and have their jaw drop?